
Likes
Comments
Share


@Growingistherapy
Follow
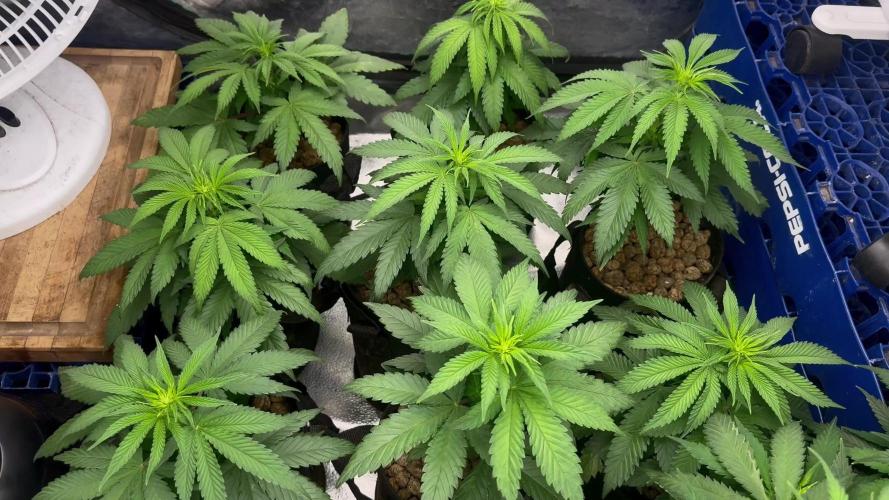
Only Compost tea mix
Worm,cow,fish, rabbit, chicken,
two pieces deployed late

Likes
19
Share


@emeraldlabs
Follow
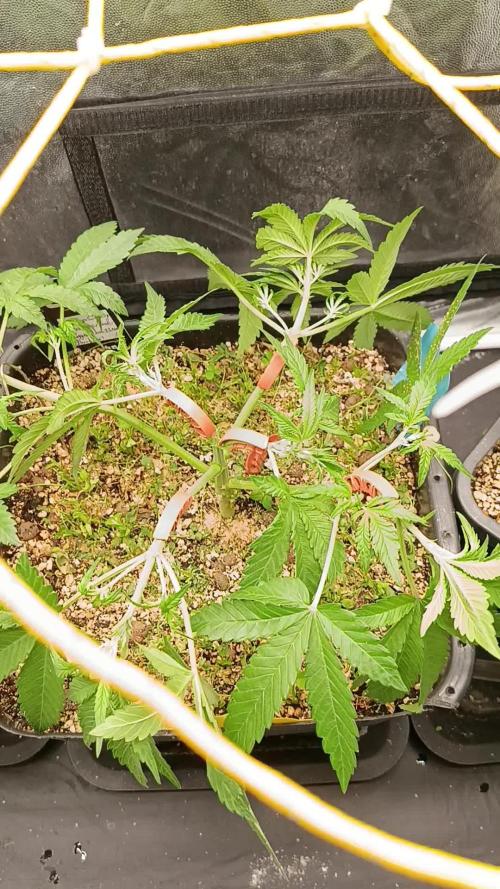
Third and final topping on day 35! Four additional branches on plant; will be removed shortly for a cloning attempt.
Photos/video taken 35 days after breaking soil.

Processing
Likes
17
Share


@Bushbanker4
Follow
Thanks for all of your replies to my questions.
I will be slowly upping the bloombastic 0.1ml every other feed until we get to 1ml.
3rd July. I done a light defoliate around the base of the plant, a few small bud sites removed that were tiny and 6/7 leaves that were dieing from the bottom to free up space around the soil.
Day 44, lowered nutrition to nearly half.


Likes
37
Share


@XperencdGmanXG
Follow
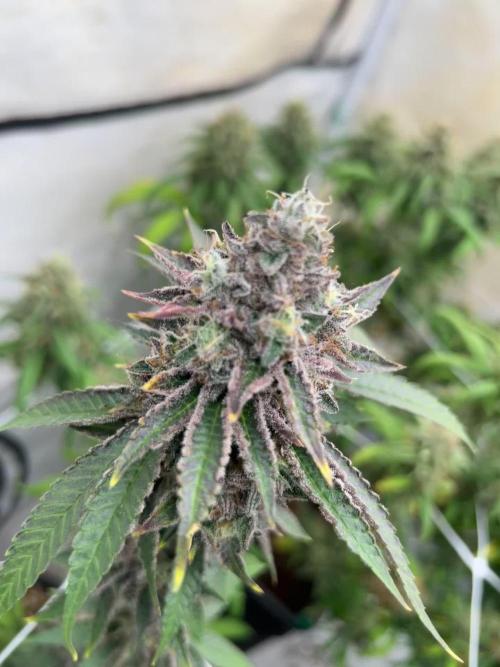
week 5 of flower and she has started to show some frosty, frosty, diameter of buds is growing nicely. under canopy seems to be developing nicely as well. Light is penetrating into the lower canopy thanks to the intensity and far red capabilities of this awesome light from Meijiu.


Likes
4
Share


@Wilstang
Follow
Her grow was not particularly easy but with a little care and attention she will be a masterpiece, not a very strong eater, less is better when she's a baby and deffently as a clone, but once flower hit it was smooth sailing. 100% recommend an amazing overall plant 💯 and was such a pleasure to grow and smoke🌱🌳💨

Likes
47
Share


@Natrona
Follow
Divine Seeds Auto Candy Outside Grow Contest
👉Sponsored👈
W5F1 July 6-12
We had a break in the temperatures and humidity this week. It’s been in the 80s and Iow 90’s.
It’s still hot but the heat index remained below 100.
Auto Candy had a growth spurt this week doubling her size from all the rain and heat. She is 12.5 inches tall and so far, doesn’t mind the heat and humidity. My little candy girl is becoming a lady. Little white pistils appeared at the nodes. Bring on the flowers.
I give water only from the well and I do not ph. , Fingers crossed she will be strong and take the heat like a champ.
As aways, thank you all for stopping by, for the likes and most of al growers’ love and support.
Stay green, growers love 💚🌿
💫Natrona💫

Likes
8
Share


@Solarcradle
Follow
I'm in southern Ontario. Spring is in the air! Humidity levels have risen with rainfall, and temperatures are rising outside and inside my tent. I have been leaving my tent door open during the day and semi-closed at night. Plants in tent do not yet smell and I have my air intake/carbon filter, by VIVOSUN, turned off. During the day my small clip-on fan circulates. At night I let her rest in the cooler air and turn the fan off.
May 2: Watered with a PH of 6.5, always using a bit of vinegar to PH down. Water included a pinky finger tip amount of crushed and stirred eggshells. Shells had been sitting in the water for 1.5 days. Shells did not enter the medium. Just the water they sat in.


Likes
517
Share


@Legendaryseedthumb
Follow
Hello guys I’m sorry that I missed one week, the last week when she turned pink!
Day 101 - harvest day, I had to wet trim my plant because i have problems with the humidity, it’s 98% rh outside and raining like hell.
I haven’t invested in a dehumidifier yet didn’t think I had to use one🤦♂️🏽
Day 103 - day 3 drying
Day 104: today I hade to cut the buds from the branches because my rh is to high hahaha!
😃
Day 105: I put my buds to jars today. I had a total of 124g trimmed buds!
Day 106: had to put my buds outside the jars for 12hr for now to start with, had them over night and rh was 70% in the jars… having them now for drying again in 55%-60% rh

Likes
2
Share

@BjomaBudz
Follow
Heute gab es zusätzlich BioBizz zu den Biotabs – aber nach meinem eigenen Schema.
Je 2 ml von:
Bio Grow, Top Max, Bio Bloom
Je 3 ml von:
Fish Mix, ActiVera, Bio Heaven
Außerdem:
0,6 ml CalMag.
Da die zwei Autos gerade anfangen, sich zu strecken und ich das Biotabs-Starterkit verwende (bei dem ich etwa 15 % unter den Vorgaben dosiere), passe ich auch die BioBizz-Düngung entsprechend nach unten an. Da alles organisch ist und es immer etwa 2–4 Tage dauert, bis der Dünger wirkt, beginne ich minimal mit dem Blütenschema und nutze gleichzeitig noch das Veggie-Schema. Sobald die Blüte richtig losgeht, werde ich mein BioBizz-Schema entsprechend anpassen.


Likes
21
Share


@BigBudWolf
Follow
BLUEBERRY AUTOFLOWER (QUEBEC CANNABIS SEEDS)
28 Days from sprout. (started from seed)
This week started light Grow nutrients (Advanced Nutrients Iguana Grow Organic + Ancient Earth & Calmag)

Likes
37
Share


@kakanero
Follow
I am very satisfied with the course and I hope it will continue to be successful!! :) Do you have any comments?
Likes
Comments
Share


Likes
35
Share


@Laviejaescuela93
Follow
Ultima semana de crecimiento para estas 5 nenas de royalqueen amnesia amg
Likes
22
Share


@Slobasian
Follow
You walk into the back yard and it’s a straight face punch of smells. Looking like some indoor rn moved all plants to safer place in case storm hits so now I atleast have a wind break


Processing
Likes
12
Share


@Piablo
Follow
Lessons learned from week 1 of my first grow so far:
the best watering solution I found so far is a mix of distilled water from the store and filtered tap water. with a final ph of 6 and ppm of 20-40.
a little ph buffer goes a bloody long way. Use with caution.
performing tasks like mixing solution and potting a germinated seed are best performed without a phone (camera) in one hand.
the seed germinated within 24 hours using paper towels. I planted after 36 hours.
After 24 hours of potting, the stem was already shooting up, and I turned on the lights, set to an 18 hour schedule. I wasn't quite ready for this, so it took me some time to research and get the desired humidity and temperature.
At this point I added more nutrient in even quantities of FloraGro, FloraMicro, and FloraBloom, according to instructions. Perhaps a little early though, although after just one 18 hour light cycle this plant is shooting up like a rocket and showing leaves.
I bought a fan for the inside of the tent and propped it up on a box, and a humidifier to bring the humidity from 40-50% to around 70%.
Since it's a winter grow, I have to periodically increase the temperature to keep it at 25 °C. The intake fan, humidifier, and inside fan are significantly lowering the temperature. I'm also experimenting with finding the right humidifier settings since the humidity seems to increase a lot when the lights go out, and the machine is still new.

Likes
2
Share

@MARCTAKAHASHI
Follow
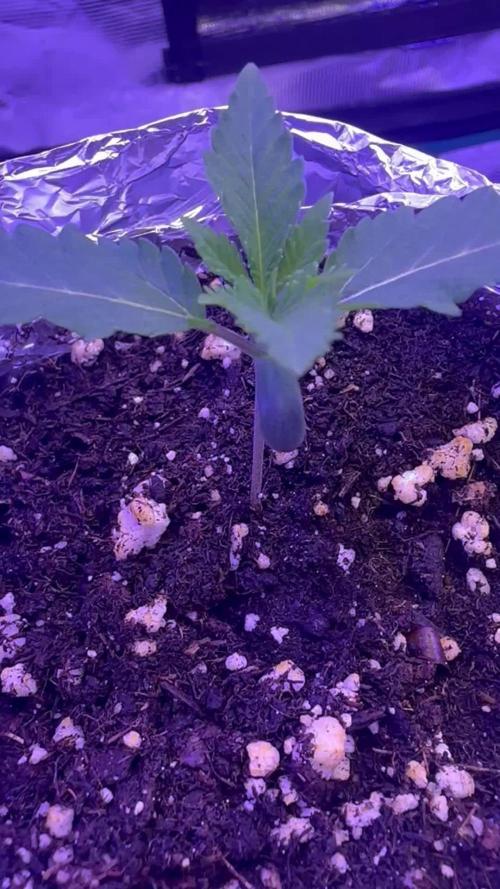
11/07/2026 — Día 1 de vegetativo.
La Super Boof ha completado la fase inicial de plántula y comienza el crecimiento vegetativo. Presenta el primer y segundo par de hojas reales bien desarrollados, nuevo crecimiento activo en el centro, color verde uniforme y estructura compacta.
Se mantiene en sustrato Janeco Light Mix, en recipiente intermedio de aproximadamente 2 L con buen drenaje y laterales protegidos de la luz.
Parámetros actuales:
* Mars Hydro FC-3000 + Adlite Blue
* PPFD aproximado: 200–220
* Fotoperiodo: 18/6
* Temperatura: 27–28 °C
* Humedad: 55–65%
Riego controlado, dejando secar parcialmente el sustrato antes de volver a regar. Se utiliza ATA Rootfast a 0,6 ml/L en dosis moderada para favorecer el desarrollo radicular. Todavía no se aplica fertilizante base de crecimiento.
Objetivo de la semana: reforzar el sistema radicular, desarrollar nuevos nudos, mantener una estructura compacta y preparar la planta para el futuro trasplante a 7 L.


