Likes
Comments
Share
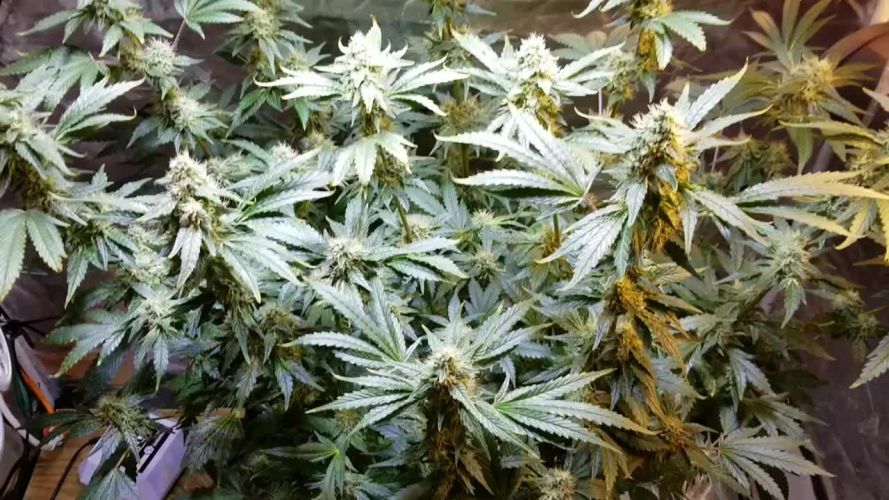
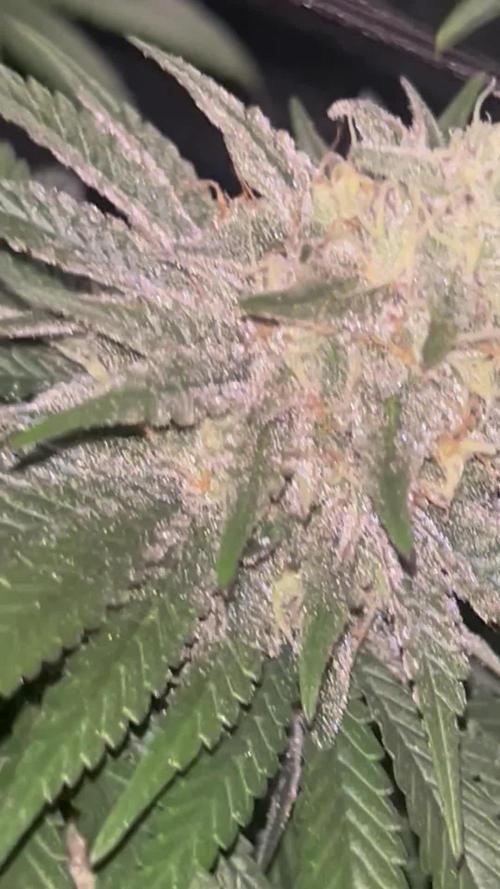
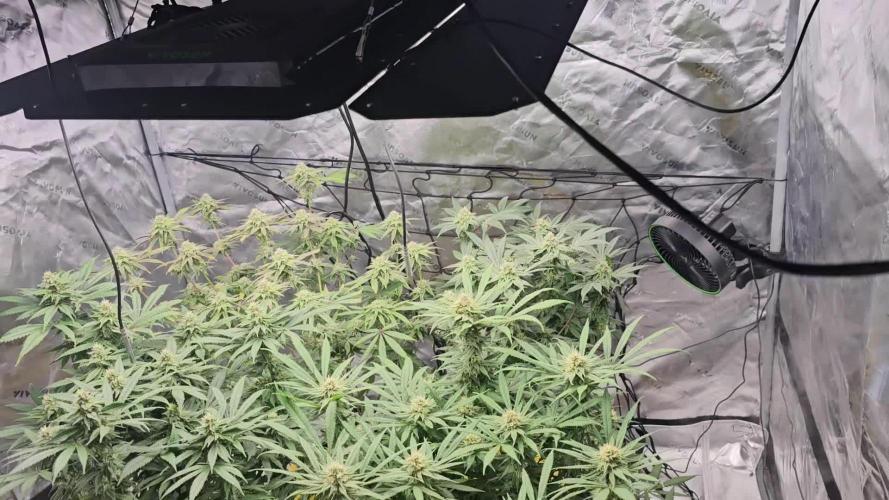
Well today is week five day 44 of flower this girl is fattening up very nicely some nice big colas coming not so much as a cheese smell to her got that musky sweet gorilla glue smell about her
Likes
13
Share
Pues esta es la Ășltima semana el sĂĄbado 12 corte las red mandarine y hoy martes le toca a la 8 ball
Likes
10
Share
Added a bit more Foliage-Pro to the mix as the LSDs have been a bit yellow, normal flowering? Buds are filling out, not as strong smelling as expected but I can tell they are in the house.
Likes
56
Share
Bonjour Ă  tous les padawans et les maĂźtres jedis Pour cette semaine 3 au jour 19 ma plante fais 21 centimĂštres et son septiĂšme noeud apparaĂźt je dĂ©cide donc de pratiquer un LST sur ma plante. Pour ce j'utilise du fil de fer galvanisĂ© que je plante directement dans le substrat en faisant attention de ne pas endommagĂ© les racines car n'oublions pas que ce qui pousse dessus pousse aussi dessous. Jour 17 je pulvĂ©rise du une solution composĂ© d'une cuillĂšre Ă  cafĂ© de savon noir mou (marque briochin) diluĂ© dans un demi litre d'eau en prĂ©vention d'Ă©ventuels nuisibles. Pourquoi le savon noir mou ? Savon noir : quelle utilisation pour le jardin ? Le savon noir est un produit naturel dont les propriĂ©tĂ©s nettoyantes sont connues depuis l'AntiquitĂ©. UtilisĂ© pour l'entretien de la maison et pour les soins corporels, ses vertus antibactĂ©riennes et insecticides en font un alliĂ© prĂ©cieux pour le jardinier bio. Le savon noir est fabriquĂ© Ă  partir de potasse et d'un corps gras de type huils vĂ©gĂ©tale comme l'huile d'olive, de lin ou de maĂŻs. Produit naturel et biodĂ©gradable (s'il ne contient pas d'additifs, comme cela peut-ĂȘtre parfois le cas), c'est un trĂšs bon produit nettoyant, pour les sols, la cuisine, la vaisselle, le linge, etc... TrĂšs polyvalent, il est Ă©galement Ă©conomique, comparĂ© aux multiples dĂ©tergents classiques du commerce. Le savon noir se trouve sous forme de pĂąte molle et brune ou sous forme liquide, diluĂ© avec de l'eau. C'est du savon noir liquide dont on se sert gĂ©nĂ©ralement au jardin, car son utilisation est plus simple. Il s'achĂšte dans les magasins bio ainsi qu'en grandes surfaces ou jardineries. Attention : la recette du savon noir de mĂ©nage et celle du savon noir utilisĂ© en cosmĂ©tique ne sont pas forcĂ©ment les mĂȘmes ; les savons noir de mĂ©nage (multi-usages) peuvent contenir davantage de potasse afin d'amĂ©liorer le pouvoir dĂ©graissant (irritant ou dessĂ©chant pour la peau), voire mĂȘme certains additifs chimiques. Au jardin, ce sont en prioritĂ© les propriĂ©tĂ©s antiseptiques et insecticides du savon noir qui sont utilisĂ©es. Le savon noir liquide est utilisĂ© pour lutter contre les pucerons, les cochenilles, les araignĂ©es rouges, les aleurodes, les psylles et autres thrips. C'est un insecticide de contact ; il tue les larves et nettoie le miellat qui englue les feuilles. La recette de l'insecticide Ă  base de savon noir (mou pour ma par marque briochin) est simple Ă  rĂ©aliser : une ou deux cuillĂšres Ă  cafĂ© de savon noir mou (briochin) diluĂ©es dans 1 demi litre d'eau tiĂšde (dilution Ă  5 %) ; une fois la prĂ©paration refroidie, pulvĂ©risez-la sur les plantes atteintes, en prenant soin de ne pas oublier l'envers des feuilles. À renouveler 1 Ă  2 fois si nĂ©cessaire, pour ĂȘtre totalement dĂ©barrassĂ© des indĂ©sirables. Comme il est de mise pour la plupart des traitements, ne pulvĂ©risez pas la solution Ă  base de savon noir en pleine journĂ©e, sous le soleil (ni sous la pluie !) ; procĂ©dez le matin de bonne heure ou patientez jusqu'Ă  la fin de journĂ©e, lorsque les tempĂ©ratures sont en dessous de 20°C. Jour 18 Je corrige mon LST suivant la pousse de ma plante ... Pour ma par c'est la maniĂšre dont je procĂšde mais petit rappel de la technique du LST Quand commencer Ă  appliquer la technique LST ? De nombreux cultivateurs commencent la manipulation dĂ©s que les plantes possĂšdent entre 3 et 6 nƓuds ou une paire de feuilles. Durant cette premiĂšre Ă©tape de la croissance, le tronc encore flexible est pliable sans risque qu’il ne se casse, mĂȘme si au fur et Ă  mesure du dĂ©veloppement de la plante il sera de plus en plus difficile de le plier. Nous pouvons continuer Ă  guider la croissance des branches durant toute la culture, mĂȘme durant la floraison, ce qui pour cette Ă©tape reprĂ©sente un grand avantage face Ă  la taille, qui n’est pas du tout recommandĂ© une fois que la formation des tĂȘtes commence, cela stressera en effet la plante, ce qui aura pour effet de retarder la rĂ©colte. Comment appliquer la technique de guidage LST Si nous sommes prudents, la flexibilitĂ© naturelle des fibres du cannabis permet de plier leur tronc et branches avec une relative facilitĂ©e, mĂȘme durant la floraison des plantes. En utilisant une corde fine, nous pouvons accrocher la pointe de la plante Ă  la base du pot par exemple ou Ă  un tuteur que nous aurons plantĂ© dans le substrat. Nous plierons le tronc avec prĂ©caution et nous le fixerons avec la corde, Ă  partir de lĂ , nous pouvons augmenter progressivement la tension de la corde, chaque jour un peu plus, jusqu’à obtenir la position souhaitĂ©e. Soyez attentif Ă  la rĂ©action de la plante, essayez de ne pas appliquer trop de pression sur la corde et rappelez-vous que la flexibilitĂ© des branches peut varier d’une plante Ă  l’autre. Pour obtenir de meilleurs rĂ©sultats, il suffit de suivre quelques rĂšgles simples. Pour commencer, nous devons choisir une corde fine mais pas trop pour ne pas blesser les troncs au fur et Ă  mesure qu’ils grandissent et qu’ils deviennent plus gros. Nous pouvons utiliser des crochets en plastique souple ou de n’importe quelle autre matiĂšre flexible pour Ă©viter d’endommager les plantes. SpĂ©cialement en intĂ©rieur, utiliser des cordons en plastique de couleur (voir les diaries de @Silky) est trĂšs pratique pour voir facilement les accroches et faciliter le travail au milieu du rĂ©seau formĂ©s par les cordes, les tuteurs, les mailles ou les supports que nous aurons dans la culture. Bien entendu, en culture extĂ©rieure et surtout en guerilla nous ferons juste le contraire et nous utiliserons des matĂ©riaux de couleur qui n’attirent pas l’attention pour que notre jardin reste discret. Pour stresser les plantes au minimum, la mieux est de rĂ©aliser ces manipulations le soir ou juste aprĂšs que les lampes en intĂ©rieur s’éteignent, ce qui leur permettra de se remettre durant la nuit. Normalement, le jour suivant nous pourrons observer comme les pointes des branches que nous avons pliĂ©es se dressent de nouveau vers le haut Ă  la recherche d’une source de lumiĂšre. Que la force soit avec vousđŸ’Ș
Processing
Likes
4
Share
Got a TDS meter at the end of this week. This lady is also in full on flower!!! I just love seeing the pistols, I am also catching a small bit of smell during a small period when the lights come on! She is starting to spread out and even out well. I dont think she is to great for LST, or at least she should be started a bit towards the end middle of week 3 or the end even. She grows short and bushy.
Likes
15
Share
Day 36 Done nothing just let them grow and trimmed a few leaves Day 37 - watered them with feeding. Decreased the amount by 25% except the base nutes. Added 12ml CalMag on 4L water by request of the community. If leaves curl down more, I will consider a flush. Day 38 No feed. Color changed from the middleone overnight, I think that’s a good sign. Maybe someone can comment on that đŸ’ȘđŸœ. For me it looks very good, I know a few leaves show signs of nutrient burn but I decreased already and no new signs appeared Day 39 No feed until tomorrow. Day 40 Fed them with very low amount of fertilizer. I aimed for a ppm of 1000 but I went a bit higher until I have osmosis water . Runoff ppm was 2000, but I have to say I am measuring ppm since this week and will fix this problem Day 42 No feed
Processing
Likes
26
Share
@GrowGuy97
Follow
First auto run! Fastbuds , Seedsman & Victory seeds! Never done autos before so excited to see how this goes! Day 5 and 2 of the NHL’s from Victory seeds still hasn’t poppedđŸ˜«đŸ˜Ź
Likes
9
Share
How's it growing farmers? She finally came through this week, showing me some of her potential. we finally have stinky flowers and resin. if you grow this strain in DWC and know what you are doing, top it at the fifth node, you will thank me. There's just too much foliage, I tried very hard with lollipopping and daily defoliations, yet there's still so much growth. if your aim is phat colas, this strain can deliver for sure, but you gotta top it. That said, im sure im still going to get very pretty and very sticky flowers, I predict to harvest around day 90, this is day 63. We have a whole month to go, plenty of time for her to get even frostier and fatter. I also added another trellis late this week, in futile attempt to expose more flower sites and reduce the chance of mold. doing this also reduces the overall rh in the tent, which im having some issues with right now. I started feeding green sensation this week, and kept my EC close to 1.6, this turned out to be a mistake, overnight she brought that 1.6 down to 1 and made the Ph skyrocket, She clearly needed more so I increased the dose to 2 EC later in the week, this is on the high end for me personally, especially for autoflowers, lets see how she responds to it next week. I stopped my Hypochloric acid too, Green sensation has enzymes in it, and i'm not sure how chlorine acts with it, it seemed to make my water cloudy, if anyone knows why, let me know, for now its cold enough to run sterile without chlorine... My Flower lights: https://marshydro.eu/products/mars-hydro-ts-1000-led-grow-light/?ref=BelgianBudtender My Veg lights: https://marshydro.eu/products/mars-hydro-ts-600-led-grow-light/?ref=BelgianBudtender Coupon code BelgianBudtender for 3% off
Likes
62
Share
Hello guys and welcome to week 9! Today my dehumidifier broke so I have to keep the tend open during the day. But for now everything is going smothely. The EC is pretty high at roughly 2.4. I will bring it down to 1.3 until the end of the week. I‘m ipressed how big the buds are getting even tho they aren‘t maturing yet. But I’m not familiar with this strain so we’ll see whats going to halpen. I hope I don‘t get mold issues later on so I‘ll keep a close eye on the humidity. Thanks for coming by and have nice rest of the day đŸ€đŸ€ŸđŸŒ
Likes
Comments
Share
Just changed nutrient solution & rotated the plants💧🌿đŸŒș
Likes
11
Share
@phelice
Follow
Week 8 and growth continues to be muted. Due to the poor soil, I'm only slightly scratching the strain's potential. I've attached a video of the insects that were in the soil, along with the fungus gnats. Today, the ladies were trimmed a bit at the bottom. ----------------------------------------------------------------------------------------------------------------------------------------------- woche 8 und weiterhin verhaltener wuchs. aufgrund der schlechten erde kratze ich natĂŒrlich nur leicht am potential des strains. ich habe mal ein video der insekten beigefĂŒgt die neben trauermĂŒcken in der erde inklusive waren. heute wurden die damen untenrum etwas freigeschnitten.
Likes
4
Share
Mar 31st Week 16 Mar 30th changed nutrients First 2 days will be straight Dense Bud Compactor @ 900-1000 ppm I use 1 gram / litre On April 1st I will add all other nutrients to the existing solution and check ppm level is not to strong April 1st Changed nutrients from straight Dense Bud Compactor to a full nutrient mix I used 8 litres of fresh water + 6 litres of the Dense Bud solution to make a mixer that is @ 1100 ppm
Likes
3
Share
Pablito, Pablito... What is wrong with you my Man?? I mean... Ph is at 6,3. EC is at 1,5. You get all Nutrients what you need. The Light is at 50% (720w) and 50cm above you... So why tf do you do this with you/me and your Leafs???
Likes
53
Share
10 September Harvest - see pictures. While some growers leave the plant whole when they cut, I do not. It is a personal preference and situational convenience if your a home grower. I chose to cut large, long branches, and remove any whole water leaves, as long as it doesn’t interfere with the bud formation. I don’t trim yet. This is done for a few of reasons: 1) It’s my last good close-up look at her until another 5 days or more, 2) I don’t want wet leaves drying on my buds if I can help it, and 3) I occasionally like being able to shine a small LED flashlight on the flowers while its drying. Mold is our greatest problem as growers, it can destroy a beautiful grow right up until the end process. Then I hang it in a dark closet, provide circulation and ventilation. Light and heat, anything above 80 degrees F, will start a break down in cannabinoids during the dry, it is ideal to stay away from both. I’m fortunate that a humidity level of 50- 55% and temperature of 65-70 degrees F is fairly consistent and easy to maintain. Anything below 60 degree F will prevent the adequate drying out of chlorophyll. Almost all my flower routinely take 5-7 days, some a little longer, to properly dry out. 15 September Trim - see pictures. First you’ll notice the buds have shrunk up to half their original size. This is just a fact that we growers have to deal with. Due to evaporation without uptake of water, it takes about 3 days for the chlorophyll to dry up, then slowly go through a chemical change. Along with the leaves, cannabinoids also begin a chemical change after 3 days called decarboxylation. A slow process where the THC level increases while curing. You want the leaf to be dry so they can be hand trimmed easily, but you do not want that bud so dry that it starts to fall apart in your hand. Try to handle carefully by the main stem to avoid touching the bud all together. A lot of these cut leaves will be covered with trichomes, good for making oils, or other products, it’s an option worth looking into keeping it. After trimming, I do separate a few premium flowers for my first smoq. Then loosely fill wide mouth quart mason jars with about 1 oz/28 gr of product per jar. I seal the lids for a few hours to determine what relative humidity they are at, see hygrometer pic, before making a decision to put in a 62% humidity control pack of my choice or to wait, then place in secure in a cool dark place with stable humidity and temperature. It is very important to then observe/burp or exchange the air as needed, up to several times a day, until 62% rh is achieved. Once your close to to your mark, put in your desired RH level control terpene shield. If you have a problem getting there: 1) it has dried out too much, no real solution, try to put several large cut stems left over from harvest into the jars with the buds to try and increase humidty, 2) it has not dried out enough, in this case no problem, just remove and dry out a little more. This is also a personal choice, some people like it drier in the 50% plus range. Whatever you do, research and preserve. At that time burping is no longer required. Cannabis will reach its peak potency potential at about 40 or so days into the cure. The finished product should be a perfect grind when cured correctly without clogging up your grinder, this could take a month. Now that I’ve said that, I’m sure someone has grown something that they have not been able to grind. It can remain in this state for an easy 6 months with little change, locking in all the terpenes and potencies. All you need to do is occasionally check the product to ensure there are no molds. If your grow/harvest/cure techniques are good this should not be an issue. It would not be uncommon to find many cannabis strains will last, with small degradable change, for up to one year after being stored this way. Using an airtight glass container, controlled relative humidity, maintained low temperature, and kept in darkness will equal maximum shelf life. Always avoid direct sunlight and temperatures above 80 degrees F. The reasons I’ve ultimately chosen Deep Water Culture as a grow medium. Each has their own pros and cons indeed. I found the most efficient, less maintenance and ideal solution for my situation was DWC. Burdens to overcome depend on size up set-up; initial equipment cost, size of containers, ph monitors, air pumps, type of water to use-reverse osmosis, RO cost/set-up/maintenance, ways to transfer/change water and nutrients, what nutrients to use and schedules, takes several grows to learn and understand, a 1 year learning curv, easy to nutrient burn. The Benefits of growing in water; no dirt, no bugs, no diseases, rare nutrient deficiencies/toxicities, steady and rapid growth that enables the plant to reach its genetic potential. After harvest, there is about a 1 hour equipment cleanup, sterilization and turn around process before replanting. Cannabis will perform in so many different ways and mediums, no one way is the best and the best way is the one you are using, right. Chose what works for you in the long run. There will always be an initial cost in set-up. My advice if one were in need to cut corners, I would not recommend cheap lights. This single factor is the most critical, afford for the best. The notion that organic and water has a different taste, flavor and potency effect is absolutely debatable. The more we learn the better we grow and experience is always the best teacher. This is what works for me and my methods of growing in general from beginning to end. A BIG “Thank You” to everyone who stopped by to take a look. My next diary will start at the beginning of October 2023 with a Forbidden Runtz Auto. There will be minor differences during the grow. I enjoy Auto strains simply by what can be achieved in a short time. No matter the strain they will unveil one thing in common, the demand for attention. Many times over it is the anecdotal gardener that surmount plant scientist. Last should I mention, do not forget to stop and enjoy the fruits of your labour...
Likes
16
Share
Day 5 since time change to 12/12. Hey everyone â˜ș. Finally the time has come :-) The lady moved into the flower tent on January 6th, 2021 😁. The day before, of course, a cutting was taken 👍. In the flowering tent, the distance between the plant and the lamp is 40 cm so that she can get used to the strength of the lamp. After 3-5 days I go down to 30 cm. This week it was watered twice with 1 l per plant. GHSC enhancers were added to one wash :-). Flower fertilizer will only be added in 12-16 days as soon as the first blossoms are there :-). Otherwise the tent was completely cleaned and the humidifier refilled. For the next few days I have filled fresh osmosis water in canisters again :-). Next week I will remove the bottom shoots so that the energy doesn't end up going into small popcorn buds 😉. There is nothing more to report this week and I wish you all a lot of fun with the update 😀. Stay healthy and let it grow đŸ™đŸ»đŸ€ You can buy this Strain at https://www.barneysfarm.com/blue-cheese-34 Type: Blue Cheese â˜ïžđŸŒ Genetics: Blueberry X Original Cheese 👍 Vega lamp: 2 x Todogrow Led Quantum Board 100 W 💡 Bloom Lamp : 2 x Todogrow Led Cxb 3590 COB 3500 K 205W đŸ’ĄđŸ’Ąâ˜ïžđŸŒ Soil : Canna Coco Professional + â˜ïžđŸŒ Fertilizer: Green House Powder Feeding â˜ïžđŸŒđŸŒ± Water: Osmosis water mixed with normal water (24 hours stale that the chlorine evaporates) to 0.2 EC. Add Cal / Mag to 0.4 Ec Ph with Organic Ph - to 5.5 - 5.8
Likes
10
Share
BlĂŒten werden kompakter, ab jetzt etwas weniger DĂŒnger ... Trichome werden langsam milchig .... Bei den kleineren PhĂ€notyp Ernte vielleicht in 2 Wochen ?
Processing
Likes
1
Share
@Lifted
Follow
Even though it has only been 4 days since my last update, I want to upload whenever I do more then just water my plant. Something that being said since my last upload I did put more of a bend in the main stalk and defoliated alot of the up higher and down low branches trying to keep it all the same height.
Likes
30
Share
June 13th - Day 22; fed 1L yesterday 16th - fed a full meal; 1L - extended another section of LST. It can now grow as it wants 17th - taking some urgent action because of an ailment that had fallen on Californian Snow, that now seems to be affecting Zamaldelica. After being fed yesterday, Cali Snow had all of her Fan Leaves wilt and dissolve sort of, within 4 hours. She was flushed and it seems a Low pH was the final element to clear from the run-off. This morning Zamaldelica fan leaves are sporting Orange Spots. I’m throwing 6 gallons of pH’d water (6.5) through the substrate right now thanks
 ! - looking to put some of the blame on me, for allowing these plastic pots, with limited holes, to be the final resting place for these gems
 should have AT LEAST been into Fabric or Smart Pots DoH. When I picked them up yesterday, that container was physically Hot. Not dry, but man the soil portion was warm. - glad I flushed, did not see this one coming. Sure, it was a Heat Warning, weather system, but things did not dry-out. - also moving Zamaldelica into a 5 gal fabric pot. Last soil in the house, kinda worked perfectly. Sorry Californian Snow, maybe too far gone. Something became acidic in the substrate after the volume of that meal, reached the lower levels, and an accumulation of Nutes/additives. It reacted - I knocked off any loose soil from the original Pot/rootball and put 60% of the plants core into a DynoMyco laced 6gal bag. - caption for the video; been one of those days

Likes
18
Share
@Canna96
Follow
Hey now, hope everyone is having a great weekend and staying safe. Another great week for the ladies, as they are now about 2 weeks into flower, and the stretch is winding down. I am still feeding them silica, cal mag, and flower nutrients maxi bloom by GHE. I will start to add a PK booster this week. I also will be switching to light from V1 to F1 sometime this week, and also integrating the UV/IR bar into the light cycle later this week. I will run the UV/IR bar for approximately 30 minutes prior to lights off to get started. The 5X5 is really starting to fill up nicely, I am running two dehumidifiers outside of the tent and I am able to maintain around 50% RH in the tent during lights on, and around 55% RH with lights off. Still very happy with the Spectrum X from Medic Grow. I am running her at 90% in the V1 cycle and will be transitioning to the F1 cycle later this week. Overall, the plants seem very happy and healthy. The temperature and humidity is significantly dropping so that helps keeping the tent cool and not overly humid. This is by far the best time of year to be flowering plants in my region. I hope everyone has a great weekend, Thanks for stopping by, Stay Safe and Blaze On!!! đŸ’Ș Website: https://medicgrow.com/ https://growdiaries.com/grower/medicgrowled