
Likes
Comments
Share


@Barcelona_Farmers710
Follow
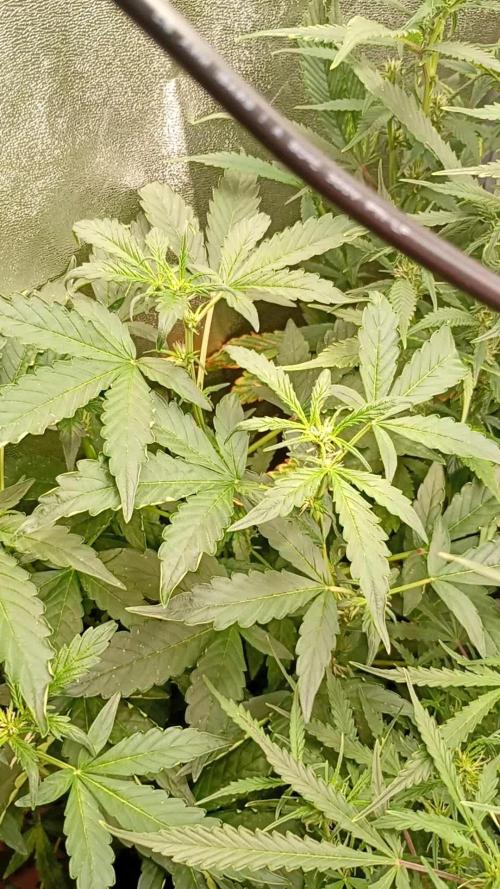
Se nos fue un poco de altura pero intentaremos arreglar el error farmers... al final quedo simplemente en podas apicales y de momento ramas muy finas. Iremos comentando el proceso Farmers!🍁

Likes
5
Share


@JohnnyBarrel
Follow
Week 17
Last week before harvest. Just let the plants ending the maturation process. Good synchronization between the different strains, selected with an approximate identical flowering period. I want harvesting all the plants at the same time.
Flowers are dense, hard and thick, pretty resinous. 4 strains = 4 different smells, 4 different colors….🤩
I flushed consciously and stopped watering 4 days before the harvest day. I turned off the light during 48h, with ventilation on.
All is ready for the cut. Date is programmed to the full moon period….why not…🤔
I will trim a little bit the plants before cutting and hanging them in the tent with the same ventilation cycle, no light of course…


Likes
2
Share


@Aleks555
Follow
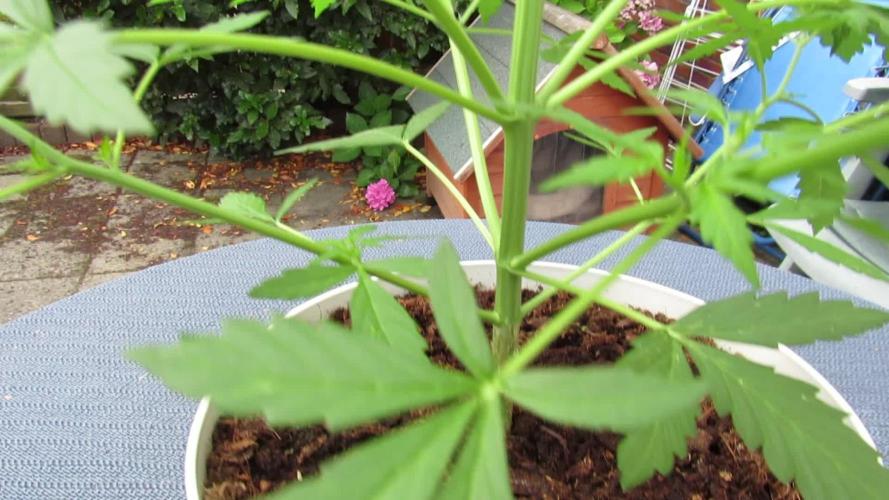
Our beauty is now 1 week old, and she’s already nearly 10 cm tall. Growing steadily, showing great potential. We’ve decided to experiment and switched the light schedule to 12/12 to see how she responds to these conditions.
The daytime temperature is steady at 28°C, and nighttime at 21°C, with humidity maintained at 65%. At this stage, we’re starting to feed the plant with fertilizers from Xpert Nutrients to ensure it gets all the essential nutrients for active growth.
A huge thank you to Xpert Nutrients for their quality products, helping our plants reach their full potential!
Likes
11
Share


@Lahuertade_Bototo
Follow
🌱🌱🌱Continuamos este cultivo, con esta hermosa cepa de FastBuds, Girl Scout Cookies Auto, entrando en el periodo de crecimiento mas exuberante vegetativo.🌱🌱🌱
👨🍳👨🌾🏻 Nutrición y Bitácora 👨🌾🏻👨🍳
Día 15 se riega con una solución nutritiva NPK de 1 Litro con Plagron Power Roots (0.3 ml), Plagron Pure Zym (0.5 ml), Plagron Alga Grow (0.7 ml) y Plagron Sugar Royal (0.3).
Día 16, se mantiene saludable creciendo 👨🌾🏻, asimilando de muy buena manera el riego nutritivo del día 15
Día 17, sigue creciendo y creciendo y cada vez mas hermosa esta bella planta 😍
Día 18. Se ajusta el LST para bajar el apical. Se riega con una solución nutritiva NPK de 1 Litro con Plagron Power Roots (0.3 ml), Plagron Pure Zym (0.5 ml), Plagron Alga Grow (0.7 ml) y Plagron Sugar Royal (0.3). También se ve la producción de mas ramas bajas que comienzan a tomar fuerza como posibles colas principales y también se ve la aparición de los primeros pistilos, así que estamos prontos a comenzar la Pre Floración, pero aun le queda un buen tiempo en su etapa vegetativa de máximo crecimiento.
Día 19 sin novedades.
Día 20 se instala la malla para direccionar las ramas. Se realiza defoliación para mejorar la penetracion lumínica y se riega con 1 litro de solución NPK + Trichodermas.
Día 21 la malla mejora el uso del espacio, mejora considerablemente la penetracion lumínica y el crecimiento sigue de manera constante. La planta ya esta pidiendo mas alimentación y riegos, en 24 horas el sustrato se encuentra casi seco. Va de maravilla entrando a la cuarta semana 💪
🚀Equipamiento🚀
Indoor de 60x60x159 cm y una iluminación BlackCob F320, se activa solamente 1 modulo (160w) a 70cm para estimular su crecimiento, pero evitar estrés lumínico (en el día 21 se ajusta la iluminación a 55cm del canopy), se agrega un humidificador HUMIPRO para mantener estable entre 55 y 65 % la Humedad, intractor de 100mm, extractor de 100mm, filtro de carbon, ventilador "oscilofan", ventilador "clip fan", 2 termohigrometros y se agrega el día 20 una malla SCROG de kanovi
Acompáñenme para ver los resultados de este hermoso desafío, un saludo cultivadores 🔥🔥🔥

Likes
37
Share


@StickyFingah420
Follow
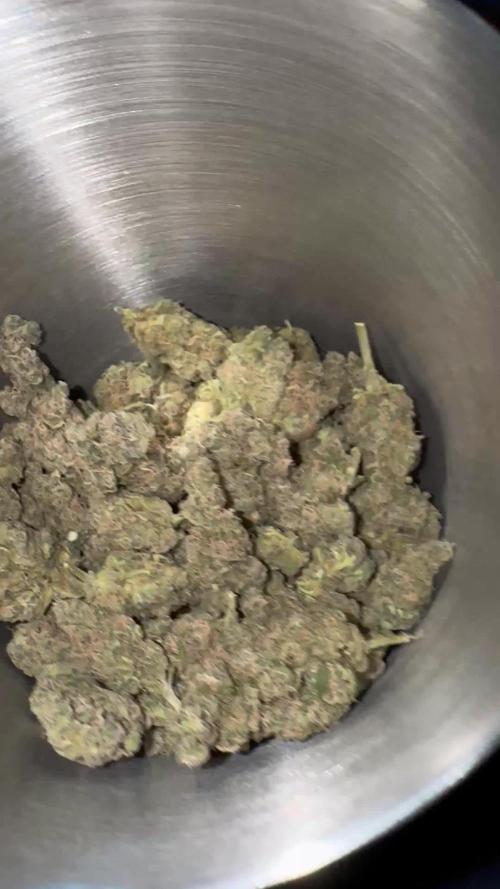
Última semana y esta planta ya se ve que dió todo de si.
De estatura baja y estructura ratificada, con flores densas y con un color hermoso y profundo.
Se ha cubierto de tricomas blanquecinos y ámbar que desprenden un olor a fruta ácida y dulce como las fresas y un frescor muy característico.
Ya en dos días se viene el corte así que les estaré informando.
Buenos humos! 👽
Processing
Likes
4
Share


@inxxx
Follow
Week 4 of flower just started,
Everything is under control, I gradually remove bigger fan leaves as I want as much light on buds as possible, I’ve added small led at the pot level shining upwards on all the popcorn buds, just testing this idea. Any one tried that before ?
I’ve decided to transplant all the plants in veg into final 11l pots, 2 smartpots and 3 airpots (no point for bigger pots since they are clones and don’t develop big roots),
Another 4 weeks on veg, flip on cfl and then I’ll be moving them straight under 12/12 cmh
In a week I’ll be sprouting new seeds from RQS
- Kush
- Medical mass
- AK47
- Cheese
Hopping for baby gorilla to spread her wings quicker, she is very shy ☺️
Have a nice weekend folks
Likes
8
Share

@PhinolaGreen
Follow
9. Woche
Sweet ZZ Auto Royal Queen Seeds ist mitten im Stretch, mal sehen, wie Groß die Dame wird. Sonst bin ich soweit zufrieden, in ner Woche werde ich wohl einen Lollipopp bei ihr machen müssen. Trotz das sie 2 Wochen hinterher hinkt im Vergleich zu Big Bud, sieht sie doch schon ganz gut aus 😃


Likes
21
Share


@Esoteric_growing
Follow
Flushing nicely, leaves fading to purple and yellow. Will be flushed for a total of 12-14 days and then hung.

Likes
4
Share


@Littledaan
Follow
Now with more water haha
Follow me on: https://supergreenlab.com/public/plant?id=718890da-822b-4656-b0bd-cc186a2bdd8f

Likes
120
Share

@Hologram
Follow
OK, im doing an update now becouse my breakup cake is going tranny!!(hermie)
I already have noiticed she was not growing as strong .. but u can blame that on anything , especially when growing outdoor..
but this morning i saw that she was g(r)oing 'bananas'!😢
I have put her aside from the rest (in the back of garden) but think gonna have to terminate her asap!..(and i will, right after this post👍)
The weed she will give will be filled with seeds and those seeds will be hermies too, so wothless..
and if i dont throw her away quick she can infect the rest.
So goodbye breakup cake..😢
who wants to eat a cake when they are breaking up anyway..😒 (just hiding my pain with lame humour 😳)
happy growing for all ✊

Likes
24
Share


@nanaboham
Follow
Reduced ph to 6.8. Increased humidity to around 50%. Lights set at 50% pwr. Currently 18hrs on.


Likes
33
Share


@GrowmieDeLaStreet
Follow
All is said in the video.
The recommended flowering time was 60-66 days and I had to chop on 58. I wish it went to 66 but I couldn't control the environment and air flow so mold developed on a bud.
Some trichomes are still clear but most of them are cloudy and some even amber.
The harvest was impressive considering all the mistakes I made. Big and dense colas, I'm expecting ≈ 100g per plants.
They are now drying and waiting to be delicately unseeded.
Likes
8
Share


Likes
64
Share


@MadeInGermany
Follow
Hey everyone 😎.
This week she was completely defoliated around the bottom 😃.
Everything turned out exactly as hoped 🤗.
She looks great and is just beginning to develop her buds.
I am very curious how it goes this week 😃.
I wish you all a lot of fun with the update, stay healthy 🙏🏻 and let it grow 🌱
You can buy this Strain at :
https://www.barneysfarm.com
Strain :
Blue gelato 41 clone from mother (Barney's Farm)
☝️
Genetics:
Blueberry x Thin Mint Girl Scout Cookies x Sunset Sherbert
👍
Vega lamp:
2 x
Todogrow LED HLG Quantum Board 100 W ( 200 W )
💡
Flower lamp:
2x Todogrow LED CXB3590 205 W = ( 410 W )
💡 ☝️
Soil : Canna Terra Professional +
☝️
Fertilizer:
Canna Terra Vega , Canna Terra Flores , Rizotonic, Cannazym, CANNA Boost, Pk 13/14, Canna Cal / Mag, Canna Ph - Grow, Canna Ph-Bloom
☝️🌱
Water:
Osmosis water mixed with normal water (24 hours stale that the chlorine evaporates) to 0.2 EG. Add Cal / Mag to 0.4 Ec Ph with Ph - to 6.0 - 6.3
💦 💧

Likes
91
Share


@Greenwolvesfarmer
Follow
Hicimos transplantes , y la verdad me retrasé en subir el seguimiento . Se ven preciosas , esperemos que el stress dels transplante y luces , sea favorable para que exploten de felicidad !
Ahora innovando y agradecidos con los kings de las luces ! mKleds apostando por un : 480w Samsung 3500k + epistar UV 660 IR ...
#greenwolvesfarmer #seguimientoMkled #loboXcultivo

Likes
175
Share


@love_2_grow
Follow
Day 43 Flower (Day 85)
Today is the first day of week seven of flower, and this is supposed to be the last week of flower for this fast strain, but I doubt that either of the girls will be done this week.
That being said, it's pretty much a waiting game at this point since we're on the home stretch. The right girl should be done soon-ish, but the left girl will probably take a few more weeks.
I just got my second Corona vaccine shot a couple of days ago, and as soon as it is entirely up and running, I'm off on vacation. After 1.5 years of this pandemic crap, I'm SO ready to go traveling again.
To prepare for my travels, I installed a drip irrigation system in the left girl's tent. It's a simple system with a 10-liter water bag, some hose, and a few drip emitters, but once dialed in, it should be enough to provide the left girl with water for around a week.
The system was a piece of cake to install, and I wrapped the water bag with some white mylar to avoid the water getting heated and also to reflect the light better. It's a bit ghetto still, but I'll make it prettier once I see that the system works as intended. I installed the system now already to give me time to dial it in.
I'm hoping that the right girl will be done before I travel, but if she isn't, then I'll hook her up to the automated drip irrigation system that I use for our tomatoes.
Come hell or high water. I'm going on that vacation, dammit!
Lastly, I gave the right girl 3 liters of pH 6.5 water.
Day 44 Flower (Day 86)
I think those extra photons from the new light are starting to work their magic in the left tent, and the left girl is slowly starting to fatten up.
In the right tent, everything is just cruising along and I gave the right girl 3 liters of pH 6.6 water today.
Day 45 Flower (Day 87)
The drip irrigation system in the left tent is working out great so far. Only been a couple of days though but yeah, so far so good.
The right girl is packing on some weight into her buds and some of the thinner branches are starting to fall over. I've ordered some plant yoyos for support but they won't arrive until next week so I'll make do until then.
Lastly, I gave the right girl 3 liters of pH 6.3 water.
Day 46 Flower (Day 88)
Not much is happening on a day-by-day basis this late in flower.
I hope those plant yoyos get here asap as the right girl is struggling to keep some of her branches up under the weight of the buds. I want to go in and tuck some fan leaves in her canopy to allow better light penetration. Still, I can only tuck a couple without starting to knock over branches as other branches precariously support them.
(Note to self: use a second scrog next photo grow to give support after the stretch.)
I gave the right girl 3 liters of pH 6.5 water, and that was all for today.
Day 47 Flower (Day 89)
Woooo! The yoyos arrived today even though they weren't due until next week. It was a breeze to put up; attach the yoyo at the roof of the tent with a zip tie, pull down the hook and attach it to the branch, done.
I ended up using only three since the other branches are standing quite well once those three worst offenders are supported. A fourth branch could also use support, but the branch is way in the back, and I can't get to it without getting my arms and hands all covered in resin as just about everything in the tent is super sticky now.
The buds on the right girl are very resinous and have a strong smell. I should bring out the microscope soon and start to check the trichomes to see where she's at.
I also gave the right girl 3 liters of pH 6.6 water.
The left girl is just hanging out in her tent, doing her thing, and slowly fattening up.
The drip system is working great so far. After four days, the water bag is about half empty, so it looks promising that it will last a week. I've been monitoring the soil humidity, and it has slowly been dropping these four days, but the drop is so slow that it is next to negligible.
Day 48 Flower (Day 90)
Today, the left girl's soil humidity did a small drop, but it is still in a great range. I guess it is because as the water in the bag gets less, the water pressure is reduced, resulting in the water flowing more slowly out of the drip emitters. Not a huge deal, though, as it is now five days since the last time I hand-watered the left girl, so this irrigation system will work just fine when I go on vacation for a few days.
I filled up another 3 liters of pH 6.1 water in the bag, and I'll keep an eye on it to see if the soil humidity increases.
Speaking of watering, I treated myself today to a new, better pH pen. As a living soil grower, I don't use any nutes, so I thought I might as well make sure I have a quality pH pen to make sure the water is on point.
My old Dr. Meter pen has served me just fine, but this bluelab pen is a lot faster, and it has a backlit display which makes it easier to use in low light situations. A friend of mine recently started growing, so I'll gift my old pen to him as well as my old tiny, drying tent, and the ViparSpectra P600 light as I don't need that now when I have a much more powerful light for the small tent.
The right girl got 3 liters of pH 6.1 water as I haven't hooked up the automated drip irrigation system to her yet but will do that in the next few days as I suspect that she won't be finished either before vacation.
Lastly, I started to brew some compost tea to give the girls one final boost of microbes and nutrients. I used a similar recipe as previously: worm castings, rock dust, biochar, lime, bentonite, neem meal, kelp meal, and molasses. I upped the castings and neem, though and I'll leave this tea brewing for 24 hours and feed it to the girls tomorrow.
Day 49 Flower (Day 91)
The last day of the seventh week of flower, and all is well in the tents. According to the breeder, this week is supposed to be the final week of flower, but none of my girls are near ready. I took out the microscope today and checked the trichomes on the right girl, and I would guess she has at least another week, if not two, to go as her trichomes are still clear. I might even end up running her longer as I'm looking for a decent amount of amber this harvest. This strain is supposed to be a heavy, almost narcotic Indica, and I'm aiming to make her as potent as possible. A "last-smoke-of-the-night" kind of smoke.
Lately, there has been a noticeable cannabis smell in my lung room, and last night I tracked down the cause. It turned out that there was a leak between the carbon filter and the fan, so the fan blew out partly unfiltered air. Nothing that some duct tape couldn't fix, and this morning the smell was gone.
The right girl is sticky af and has a strong smell. Initially, there's a strong citrus fragrance with hints of lime and grapefruit, but once those terps have started to evaporate, there's an underlying fragrance of pine.
The left girl has even longer to go, and it wouldn't surprise me if she takes another month.
We made some guacamole last night, but a couple of the avocados had gone bad, so I put them on my pots. My loss is my worms' gain.
All I did today was to feed the compost tea I started yesterday to the girls. Each one got 3 liters of unfiltered tea at pH 6.7.
