


Processing
Likes
Comments
Share


@sercultiveta
Follow
35 dias de actividad en el indoor, foto periodo de 20 horas de luz y 4 de oscuridad



Likes
33
Share


@DrDuhboto
Follow
The plants have had a great week.
I cleaned up under the canopy and re-arranged the scrog a bit for the last time.
The plants are just now beginning to smell.
The 1 Maui Clone has gone quite pale green so I added 1/4 cup of Bat guano to the top of the soil and worked it in. Then I added about 4 cups of worm castings on top before watering this week.
I also started a FFJ juice mix using a recipe from Cho Korean Natural Farming.
I started some Drosera from seed in January and they are now showing there first true leaves and carnivorous trichomes. I added photos of the bright red trichrome stalks.
Other than that the plants are flowering well and the HLG light is sure a beast, I am really liking the super even coverage I am getting.

Likes
3
Share


@mquintero7
Follow
Missed 7th week. The growth advancement has been incredible. She has several strong stems that are going to create big buds. Smell is strong. She has a bush like shape now, which is better. The 20L container was to small to her so she was moved. I believe this is the last Veg week, pre-flower signs appearing now.

Likes
20
Share


@Justa_Retard
Follow
Day 15 update;
Morning;
Was definitely a mistake to cut the leaves already.. I let the leaves stay on one of the 3 plants I have, and after it got repotted yesterday, growth have taken off completely.. It's 3 days younger than this one, and almost twice the size, having set the second set of leaves on the sidestems already. I'll add some fertilizer today, to the 2nd one I cut leaves on, and see how it goes, and then decide tomorrow if the other two will get some then or if waiting a few extra days is best.
- It's looking incredibly healthy tho, for a plant that lost a bunch of it's roots yesterday.. It's hugging the light from the lamp with the rest of its leaves, even more than before. So hoping I didn't set growth back too much.
- Added a video of the setup. It's nothing fancy, but should work nicely.
Night;
Still really healthy looking, and still hugging the light with pretty much every leaf, even the ones sprouting on the side have begun to do so.. Seems like it's starting to grow a little again as well, not much, but definitely a start to getting back on track.
Day 16 update;
She's definitely begun to grow again. Hopefully she'll catch up to the other two pretty fast.
Day 17 update;
There reqlly ian't much to say today. I think she's picking up the pace for growth, bit can't be too sure..
Day 18 update;
There's no doubt that she's back to growing nicely again. She might even have a healthier green colour than before.
Day 19 update;
Morning;
Pretty sure she's showing signs of the beginning of sexing this morning. A little earlier than I'd hoped, especially with the setbacks she's had. But she still got time to grow before flowering, so hopefully not a problem now that she's back on track.
Evening;
She popped a few hairs during the day.. I tried taking some better pictures, but damn phone camera just won't focus when getting closer than what I've uploaded, so I underlined the hairs slightly.. They hard to aee in the pic tho, but they're there.
Night;
She's set another couple of hairs at the top, they're very tiny tho and I still can't get a good picture.
Growth is definitely progressing faster.
Day 20 update;
She's had a productive day. Definitely preparing to flower within the next week or so. Hairs should be pretty noticable on the top-down pic this time around, the way it looks close up, it could be suspected that she was already flowering.
Day 21 update;
Not quite flowering yet, but definitely very close from the looks of her top.. another couple of days, and she'll be there.

Likes
1
Share


@kauilmayel1996
Follow
Aplicando tierra de diatomeas
Y creo que va bien...
Me encanta cultivar en exterior pero nunca puedes ir muy alto y los bichos son lo peor....
Vamos avanzando y espero que está nena le siga gustando el exterior
Likes
28
Share


@Tremojem
Follow
June 20, 2022
Watered with 3 gallons RO water with no nutrients or supplements.
This may be the last watering. I checked each cola for amber and cloudy trichomes. There are about 5% of thr trichomes that are amber. There are about 50% that are cloudy. She is getting close.
Watering Numbers
In
PH 6.65
TDS 37.1
EX 52.5
Out
PH 6.78
TDS 351
EX 496
June 22, 2022
Watered with 3 gallons RO water with no nutrients or supplements.
She is close.
Watering Numbers
In
PH 6.54
TDS 70.1
EX 98.8
Out
PH 6.69
TDS 328
EX 463
June 24, 2022
Watered with 7 gallons RO water with no nutrients or supplements.
This completes the flush, as the runoff numbers are great.
She will get her 12 hours of sun today and then immediately followed by darkness for 36 hours, then hang whole.
Still reading up on finishing techniques so I have time to decide whether or not 36 hours of darkness are beneficial.
Watering Numbers
In
PH 6.57
TDS 54.8
EX 77.2
Out
PH 6.94
TDS 108
EX 152.7


Likes
11
Share

@Stacy_smokez
Follow
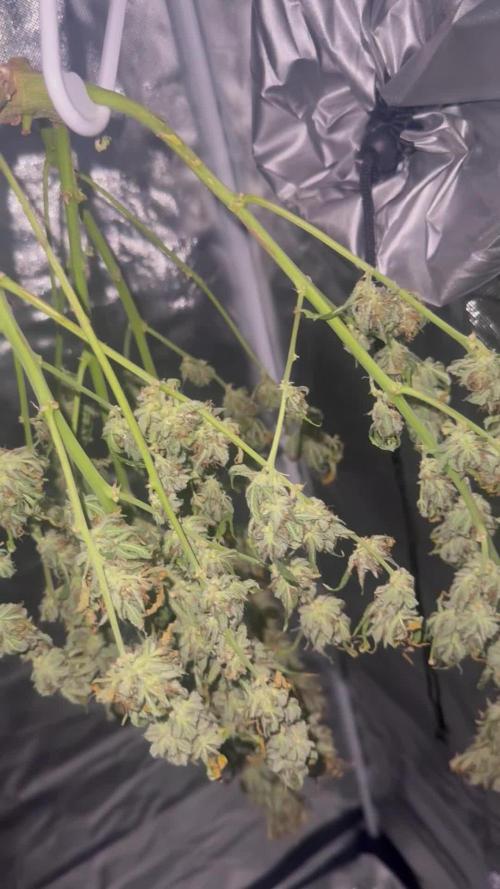
WDrying waiting weight it . This was a good grow to get back into a rhythm overall great I will like to rerun using different soil and nutrients as well as switch up my training as well . I will update my journal once it’s completely dry trim and everything like that with better numbers and better information. The genetics were pretty good and solid overall I’m happy with my girl.


Processing
Likes
6
Share


@VovaFarms
Follow
Late vegetative phase over and the plants are preparing for flowering. I gave the plants grow nutrients for last time and i switched the LEDs to bloom mode. I slightly decrease the RH and i've boost the ventilation so more air could move within the tent.


Likes
Comments
Share


@The_Lonely_Farmer
Follow
Monday 29th!!!
So this diary is again late and only allowed too add a few images which are mix match,
How upsetting 👎 annoying at the least...
I've been trying since repotting these girls on monday too upload yet constantly saying resizing photo no matter which folder I upload from so I appolagize.
I will try too upload and update this week but if continues will create a new diary and try that way 🤷♂️
So as if it were monday 29th I transplanted all the fastbuds testers into their final pots and I have 2 of each whichever I'm very happy with and the other 3 seems slightly slower but still here 🌱
They are now being fed shogun nutrients and hopefully this week they settle in and get comfy ready too begin their vegative journey 👌
I will feed lightly and all girls will start some form of lst next week
Hopefully I can update this week properly soon as I like too recap myself as it helps keeping log of what I've been doing 🙄
Shouts too aptus Holland nutrients I gained great roots ready for transplant using their startbooster & regulator which I'll be continuing too use too start of all my seeds/seedlings in future 💪 thank you aptus! 💚
Growers love, stay blessed 💚
Likes
45
Share


@Bluesbreeder
Follow
yesterday did some defoliation !
damn this cinderella jack is some bushy plan! so many leaves and i maybe cut of like 200 leaves from the 4 plant and they still it's looks so bushy.
also pinched the tops of all my buds for the Budswelling but i forgot to make a video of it.
but i will post the video from my last diary again just to show you what i did with the bud's for this budswelling if you look close to the pictures and zoom in you can see that all my buds have a little brown spot in the middle. that's where i pinched the buds yesterday and is the wound of doing this.
but don't be afraid she will recover soon and produce some big fat compact buds with lot's of trichomes !
it worked on my last grow the auto ultimate to get some fat buds so i will be doing this all the time.

Likes
2
Share


@High_Grade_Dadli
Follow
Girls are doing well....seed looking like she earning her name..have some cutting off her n am please with the first week of flower....one got super stress n she dont even look like it jus watchin to see how things look later

Likes
11
Share


@hannabis420
Follow
fast growing auto, overloaded on nutes with this one but she still produced beautiful buds
Likes
128
Share


@Tropicannibis_Todd
Follow
💩Holy Crap We Are Back At It And Loving It💩
👉SHES READY TO BE CHOPPED IN THE NEXT DAY OR TWO👈
Growing in a 11 ounce pot 👈 👀 👀 👈
Growmies we are at DAY 63 and she's just killing💀it👌 TALK ABOUT FROSTY 👈 Amazing results thus far for the Tiny Pot 😀
👉Added straws within the Tiny pot to help watering in week 4 👈
So I'm starting to see she needs watering every single day and now need nutrients 🙃
Lights being readjusted and chart updated .........👍rain water to be used entire growth👈
WATERING SINGLE TO TWICE DAILY 😋
👉I used NutriNPK for nutrients for my grows and welcome anyone to give them a try .👈
👉 www.nutrinpk.com 👈
NutriNPK Cal MAG 14-0-14
NutriNPK Grow 28-14-14
NutriNPK Bloom 8-20-30
NutriNPK Bloom Booster 0-52-34
I GOT MULTIPLE DIARIES ON THE GO 😱 please check them out 😎
👉THANKS FOR TAKING THE TIME TO GO OVER MY DIARIES 👈
JUST KNOW EVERY COMMENT AND OR LIKES IS MUCH APPRECIATED
Likes
23
Share


@SonomaSungrown
Follow
Skipped a week in my journal due to travels.
Had my neighbor water my plants.
Having some minor early deficiencies with my photoperiod plants (particularly the chem brulee)... so I decided to go ahead and give everything a solid feeding of Foop Bloom 1, 2 and Sweetener. This is their first ever bottled feeding. Have been running on supersoil and a prayer.
Also top dressed everything and mulched with rice straw to help with the soil drying out a bit too quickly.
Leaves have been yellowing on all three. Mostly relegated to the interior of the plants.
Chem Brulee is looking a bit too yellow overall, as well.
French Macaron is a 66in. Chem Brulee is 56in. Pineapple Meatball is 45in.
I have a sneaking suspicion that my neighbor didn't water them quite enough while I was gone.
Will probably continue with the Foop feedings... probably at least once per week. Don't want to overdo it.
Also top dressed with my flowering top dress mix and mulched all plants with a thin layer of rice straw.
8/4 Sprayed with Neem Oil and Castile Soap
8/5 Sprayed with Gravenstein Apple FFJ and OHN
8/6 Sprayed with Neem Oil and Castile Soap (this will likely be the last time I spray with Neem Oil, as I don't want residual oils as buds start swelling. Also fed 1/4 strength FOOP to ensure we head off any deficiencies.


Processing
Likes
1
Share


@IMILYSETPOSR
Follow
1st week
2nd day - Gelato popped through, removed water bottle. Swapped intake and exhaust fans about to get new fresh air from outside. Used diffuser to raise humidity and ice cubes to lower temp. Intake running on full, exhaust at 70%.
Cookies popped through. Removed water bottle. Misted tent and lightly top watered. Intake at 70, exhaust at 50 for overnight. Diffuser to hold humidity.
Day 5 - First watering - 1l ph water each. Misting tent throughout day.
Day 6 - Added 180mm cyclone fan for air movement. Removed runoff. Both seedlings doing well. Slightly further development on cookies.
