


Likes
Comments
Share


@Jakobyzone420
Follow
Questa è l’ultima settimana. Faccio fino alla 10 con il flush e dopo taglio

Likes
10
Share


@Froggman
Follow
Getting close! Buds are nice and thick. No amber on either but plenty of milky.

Processing
Likes
13
Share


@DrewbieDoobieNoobie
Follow
Weeks 3 Think different is in need of some NPK in Higher amounts due to the offset in planting it is ahead by 3 weeks from the blue dream that is now in the tent. I have some bottom leaf die off so i will have to feed them differently the other 4 will get a 200 ppm feeding until the catch up in the veg stage Think Different got a 460ppm feeding today at a PH of 5.8 1 gallon of harvested rain water. I am gonna let them dry out for a few days let the roots dig to the bottom and keep an eye on the color they have got plenty of food and water. I might have over done it. I think looking at your Garden every day routinely will help you catch things before they get to far out of whack.


Likes
15
Share


@Messypies
Follow
Auto cinderella jack - Amazing week of growth. There are new nodes exploding from everywhere and its not showing signs of slowing down. They are currently loving the organic nutes and have started showing signs of flowering.
Auto critical cheese - this plant has shot up recently. It was planted a week later that the ACJ but is growing some seriously fat fan leaves. Should be a nice yeilder.
Peanut butter cookies - this girl is looking pretty sorry for herself. I am intentionally trying to keep her as small as possible so that I can get the autos out before flipping into flower but she is gonna be a beast. Will transplant into a final pot in the next day or so.


Likes
5
Share


@grazi2706
Follow
Another good week, just waiting for them to ripen. I'm planning on another week. That will put us at 9.5 weeks and they should be good to go.


Processing
Likes
14
Share


@CommanderCannabis
Follow
Eventful yet easy week. After putting eVE into flower mode she began to grow again very fast. I have tried to keep humidity in the high 40's and have done random CO2 enrichment. The roots have been doing well so far after the pruning two weeks ago. Would like to see the branches get thicker. The first pistil showed up today and made me happy that it came up so fast.
Likes
8
Share


@pzwags420
Follow
Started off week 6 off by adding 5ml of Flying Skull Z7 to reservoir and adjusted reservoir PH to 6.0. I've got the blumats nearly dialed in and keep making small adjustments every 24 hours. I am holding off a few days on the nutrients to see what the plant tells me. The clawing seems to have improved(combo of over watering and not getting runoff on hand watered nutrients I believe). When I apply nutrients going forward I will make sure there is plenty of runoff so I don't repeat the same mistakes. 😬 on day 2 I applied 1 gal of nutrients and watered until runoff. On day 3 I defoliated the bottom of my plants to improve the air flow. On day 6 I added 5ml of flying skull Z7 to the reservoir. I noticed a possible calcium deficiency on one plant so on day 7 I applied my 1 gal of nutrients with the addition of calmag and silica. Ive only used calmag once growing in coco and it burned my plants...so I assumed there was enough from my tap water and nutrients. I know this goes against all advice.. I think it finally caught up with me LOL.LIve and learn to buffer your coco. Next grow I will buy buffered coco and use a calmag product 😅 I defoliated the center of my plants to increase airflow and expose light deeper into the canopy.

Likes
78
Share


@Hou_Stone
Follow
👌It’s progressing, slowly but surely for my 4 young banana krumble 👶🍌
For this grow, I plan to let each plant grow with a large main bud, without topping.
Next week I will cut the lower branches closest to the ground.
-----------------------------------------------------------
💧Watering:
1L on day 9 and 0.5L on day 12
I use tap water, adjust the ph to around 5.8 and water
------------------------------------------------------------
🤩Equipment of the week :
Light FC3000 Mars hydro. power 80% at 50cm
Extractor 6 inch Mars Hydro. power 1/10. ON 24/24h
2 fans to circulate the air inside the tent. Each on for 30 minutes then off for 1 hour. this rhythm repeats itself in a loop
Heating mat Romberg 95x95cm. ON 45 minutes. OFF 30minutes. In a loop
I am adding anti-midge bird stickers 🐦
------------------------------------------------------------
Thank you for your visit and your support with the likes, comments. It's always nice to see you!💚
------------------------------------------------------------
My Instagram 🌱❤️️ :
https://www.instagram.com/hou_stone420/

Likes
8
Share


@valiotoro
Follow
Pour la petite histoire j avais eu des graines d auto Mokum’s Tulip de Dutch Passion en cadeaux 🎁 sans ca je n aurai peut etre jamais commander cette variété et c est devenu une de mes préférés 🤩 un grand merci a Dutch Passion ❤️🔥
De la germination a la recolte vraiment trop facile c est ma premiere fois en indoor et je suis super satisfait du résultat !!
679gr avant séchage je ne sais pas trop a quoi m attendre en sec mais ca va etre lourd 🤩☄️
Pour l odeur je dirai un melange de fruits sucré de la fleur d oranger et de jus tropical 🌴 🍹j en ai l eau a la bouche !
A noter aussi que c est une plante tres robuste les branche ont supporter d enormes tetes sans aucun tuteur et soutiens,résistante a la moisissure et aux parasites
Elle est dans mon top 10 des meilleurs variétées autofloraison ❤️🔥
Likes
14
Share


@KannaKullektiv
Follow
Aloha Freunde der Sonne 😊
Die Tage vergehen und die Damen wachsen prächtig vor sich hin.
Immer noch die Höhe der Mädels angleichen auch wenn mal was abbricht 😅
Viel Spaß

Likes
15
Share


@Rebola
Follow
05/07/2021
Big bud is recovering, she is now more green with buds starting to grow.
My goal was to harvest all at the same time but Big Bud will need extra weeks 😐
Now i have problems with #2, very yellow with brown spots, i raised the nutes, but nute burn started to show up, gave her a bit calmag and cut the nutes to half.
I think she needs more 2/3 weeks to harvest, just like #1 and #3..
#1 and #3 have no big problems, only big buds 😄

Likes
13
Share

@Suemchen
Follow
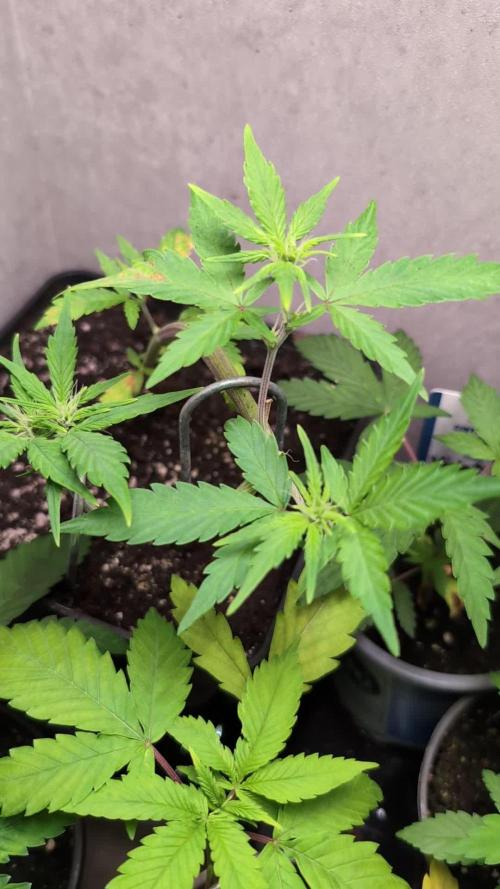
Outside during the day INSIDE during the night
Day 30: Looks good 👍🏻 watered with supplements: rain water and 1ml/l Root Juice + 1 ml/l Powerzyme 👌🏻
Day 32: looking good 👍🏻 watered with supplements: rain water and 1ml/l Root Juice + 1 ml/l Powerzyme 👌🏻
Day 34: watered today with out supplements 👌🏻 Just rain water 👍🏻
Day 35: looking good 👍🏻 she's developing pistils.
Likes
25
Share


@Kakui
Follow
Veg36, están creciendo bastante bien, a esperar unos días para un próximo riego.
Veg38, ya hay que revisar amarras y ver si hay hojas abanico tapando algún brazo, siguiente riego era en 1 o 2 días más.
Veg40, se regó con EC 2.5 y pH 6.0, se cortaron un par de hojas, hay que seguir haciendo LST para lograr una altura uniforme.
Veg41, algunas hojas están mostrando quemadura en la puntas por exceso de nutrientes, los siguientes riegos tendrán que ser más suaves.

Likes
8
Share


@Skully
Follow
🇩🇪
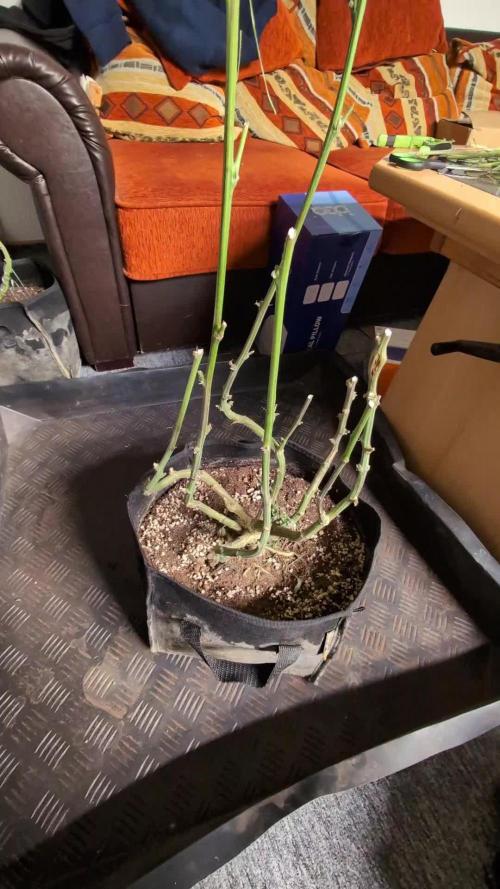
Zum trocknen habe ich die Pflanze in drei Teile geteilt und sie leicht vorgetrimmt (Fanleafs ab) an Kleiderbügeln im Zelt aufgehangen. 13 Tage bei 62% Luftfeuchtigkeit und 23 Grad
🇺🇸
To dry, I divided the plant into three parts and lightly pre-trimmed it (removing fan leaves), then hung it on hangers in the tent. It dried for 13 days at 62% humidity and 23°C.
🇪🇸
Para secar, dividí la planta en tres partes y la pre-podé ligeramente (eliminando las hojas grandes), luego la colgué en perchas en la tienda. Se secó durante 13 días a 62% de humedad y 23°C.
Likes
76
Share

@yan402
Follow
🌸🍊✨🍭🌸🍊✨🍭🌸🍊✨🍭🌸
Back at it with Kannabia — huge thanks for the NEW EXCLUSIVE Upcoming Kannabia's seed Launch 🙏🍨🍊
Grateful for the trust and for everyone following along, I’ll run her clean and showcase what she can do.
Dessert-party goals: berry–citrus sherbet terps, creamy finish, tight stacks, easy trim, zero drama.
Veg 24/0, clean manifold + LST, flip on a happy, even canopy.
Coco’s fresh, seed goes in now. 🚀
🌸🍊✨🍭🌸🍊✨🍭🌸🍊✨🍭🌸
💭❗💭❗💭❗💭❗💭❗💭❗💭
❗Events & thoughts worth noting❗
💭❗💭❗💭❗💭❗💭❗💭❗💭
10.08.25 GW1 Sowed seed, soaked starter pot with #1
12.08.25 GW1 Seed popped hip hip hurray
28.08.25 VW2 Stopped using GreenBuzzBloom, took it out of the schedule.
01.09.25 VW3 TriPartMicro 10→30ml, TriPart bloom 10→30ml
🌱💦🌱💦🌱💦🌱💦🌱💦🌱
🌿 Day to day tasks & actions 🌿
🌱💦🌱💦🌱💦🌱💦🌱💦🌱
28.08.25 VW2 – Fed 0.1l of #1 → no runoff
29.08.25 VW3 – no water → no runoff
30.08.25 VW3 – no water → no runoff
31.08.25 VW3 – Fed 2l of #1 → 0.1l runoff
01.09.25 VW3 – Fed 3l of #1 → 1.5l runoff
02.09.25 VW3 – Fed 5l of #1 → 2.5l runoff
03.09.25 VW3 – no water → no runoff
04.09.25 VW3 – Fed 0.1l of #1 → no runoff
(*RUNOFF reused for tomato plants)
🍶💧🍶💧🍶💧🍶💧🍶
💧 Nutrients in 30L #1
🍶💧🍶💧🍶💧🍶💧🍶
💧 TriPart Micro:
30ml
= 1.00ml/L
🍶 TriPart Grow:
0ml
= 0.00ml/L
💧 TriPart Bloom:
30ml
= 1.00ml/L
💧 Cal-Mag:
60ml
= 2.00ml/L
🍶 Home-made FFJ/FPJ (new batch):
30ml
= 1.00ml/L
💧 pH Down:
Citric acid (BuxXtrade) — adjust to ~pH 6.0
📦 TOTAL:
150ml per 30L
🔬 4.00ml/L
🍶💧🍶💧🍶💧🍶💧🍶
⚙️✂️⚙️✂️⚙️✂️⚙️✂️⚙️
✂️ Tools & equipment ✂️
⚙️✂️⚙️✂️⚙️✂️⚙️✂️⚙️
✂️ 2× MarsHydro SP3000
⚙️ MarsHydro 150mm ACF Ventilator
✂️ Trotec dehumidifier (big unit)
⚙️ Mini no-name dehumidifier
✂️ Kebab skewers (LST – stainless)
⚙️ Wire + roast skewers (LST assist)
✂️ Scissors (HST)
⚙️ Vacuum (for spills & cleanup)
✂️⚙️✂️⚙️✂️⚙️⚙️✂️⚙️✂️⚙️✂️⚙️
---
🍊🍧🌬️🍬🍊🍧🌬️🍬🍊🍧🌬️🍬 Mystery seed (Kannabia Seeds) — NEW EXCLUSIVE
🍊🍧🌬️🍬🍊🍧🌬️🍬🍊🍧🌬️🍬
Species: Hybrid (GF / swift-flowering line)
Genetics: TBA (breeder sheet pending)
THC: TBA
Effect: Euphoric, relaxed, creative (target profile)
Flavor: Berry–citrus sherbet, sweet candy, creamy finish
Flowering (indoors): ~6–7 weeks target (GF)
Resistance: High (aim: no drama)
Indoor yield: TBA
Outdoor yield: TBA
Structure: TBA
Notes: Brand-new exclusive from Kannabia’s GF line — I’ll update specs when the breeder card drops. Goal is rich sherbet terps (berry–citrus + cream), low leaf-to-calyx, easy trim. Stage harvest stays on the table if tops finish early.
Processing
Likes
13
Share


Likes
3
Share


@dracslav
Follow
Had some recent troubles. Overwatered once, then it dried out a little much. Also found out I got nutrient burn, so defoliated what I had to. Used half recommended dose and still had burn. Won’t be feeding for another week.
Likes
15
Share


@Professor_Daank
Follow
Cruise control baby!
Nothing wrong. No issues. All growing extremely well. Keeping to my EC and my pH and all is well. Let's see what the next week is going to give us.
Likes
14
Share


@Jays_Not_Here_Man
Follow
Overall, this plant was a producer! Easy to grow, no surprises and stayed healthy throughout. 11 weeks from seed to harvest. It was squat, but stacked, so airflow and humidity control were key to preventing powdery mildew or bud rot. Took the nutrients like a champ, didn’t show too many demands. I’d like to run this again to see if I can get them taller, to potentially produce more. Otherwise, a very good, potent strain choice for someone who is short on space, and would do well with a sea of green style…Happy Gardening 🇨🇦👊❤️

Likes
8
Share


@Dmon013
Follow
I use it as a supplement that nourishes the soil and helps maintain the condition of beneficial microorganisms.I try to push her to bring out her potential as much as possible.
#Notill
#Livivgsoil
If you like it 🙏💚🥦💚🙏
Taste:🍬🍒🥛🧀🧀
