


Processing
Likes
Comments
Share


@BigBaby420
Follow
Started with 2 Sour Chelumbians and 2 Lemon Haze Autos. Neither of the LH autos wanted to live so I started a bubba kush and a white widow to be in the same tent. They will be about a week apart in life

Likes
9
Share


@XanHalenTGI
Follow
All done all done there we go bam
First ever successful grow I’m psyched, can’t wait to do four more of this strain under a way better light and see how dense I can get those nugs
Recommend any new grower looking to try out some auto flowers.

Likes
16
Share


Processing
Likes
32
Share


@Platinouuu
Follow
Saludos mis amigos! Muchas felicidades en estos días navideños y salud por el buen tiempo que pasamos a los nuestros. Por aca les dejo el proceso, sigo nutriendo solo con agua, pero en estos días usare solo RECHARGE para así darle un toquecito adicional. Me gusta ese producto, me ha hido muy bien con el. Siguen creciendo los masos de moñas, se tornan cada vez mas color vino, rojizo. contentas, olorosas, frutoso... les comento que es como cuando te pasan una barra de STARBURST POR LA NARIZ... JAJAJA! 😇 disculpen la analogía, pero literal es como les comunico. MUUUy contento ésta navidad con los resultados. Seguimos creciendo, deseando que les valla mejor, un abrazo... BUENOS HUMOS!

Likes
9
Share


@High_Grade_Dadli
Follow
She ready to harvest ...the focus is the other two now.. the same stain look very promising now she getting into flowering branches are turning a bit purple.....just have to watch the purple paralysis n see wat she becomes
Likes
20
Share


Processing
Likes
3
Share


@Grownewgenetics
Follow
These amazing genetics are after 12 hours on the ground, comming out these strain's cream caramel auto is the second faster after the dark devil auto.

Likes
6
Share

@Northern_Ent
Follow
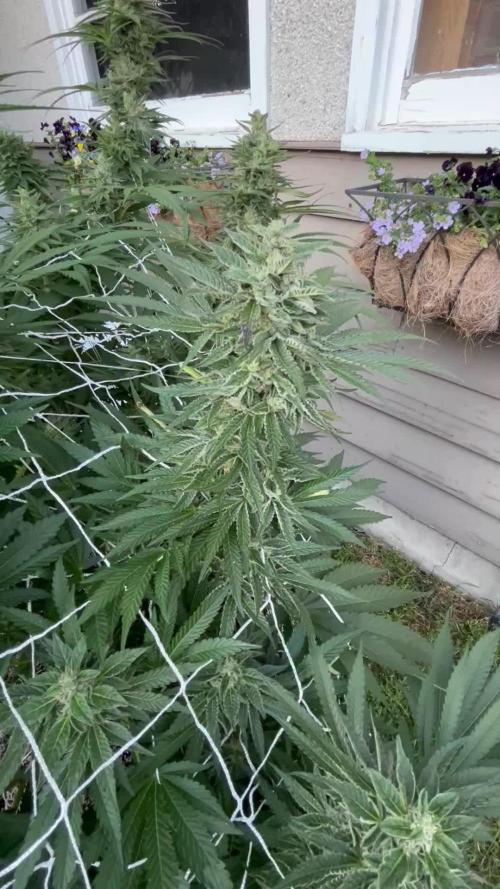
Sep 12: Amnesia Haze is almost ready. Two more weeks at most I think.
Doing Final Flush using 9L in the 27 L of soil.
Sep 13: did another 18 L flush as I decided one pore volume (30% porosity in 27 L) yesterday wasn’t enough. Defoliated leaves to expose buds to sunlight.

Processing
Likes
12
Share


@GrowGuy97
Follow
I have to say, overall out of all 5 purple Lemonade seeds I’m not very happy with the results so far considering they was a little more pricey & the fact that I know how good these plants can turn out! Not sure if I just got some bad genetics or what’s up but pretty bummed about this run so far😅😅 hopefully things will start to look up! Thanks for following & happy growing friends!✌️🏼🌱
Day 24 - Decided to pull the smallest purple lemonade that wasn’t doing anything so I can go ahead and get something else going in it’s place! Watered the other ladies today.
Day 25 - Ladies are still stretching like crazy!

Likes
45
Share


@masterofsmeagol
Follow
7/18 I'll make this week a six day week to get back on track since i didn't last week. Rhis has been INCREDIBLY challenging for me to be away from my plants for this long. It will be six days. I'm leaving early to come home and water. We are supposed to get thunderstorms. Not sure if we did but it's only 11am. All pics so far are ones sent to me this morning. It rained a little bit yesterday. I have a lot to do in the garden. I need to assess Amy damage. Probably water (depending on weather), defoliate and hunt pillars. I may decide to spray and I may not. Depends what I see. Plants are getting big though. I'll need to add the second set of supports. I'm hoping I come back and find inch long buds like I did last time with those mendo breath that flowered super early two years ago. I just want to see my girls and take a big deep breath of their smelly goodness. I need to check for deficiencies as well as i usually started nutes by now. Tomorrow morning I'll do a video when I get back.
UPDATE: AROUND 7 O'CLOCK MY INTUITION OR AS I CALL IT "MY SPIDY SENSE" STARTED TINGLING. IT HAD BEEN EARLIER BIT I IGNORED IT. I PLANNED FOR TWO THUNDERSTORMS WE GOT HERE AND WERE SUPPISED TO GET AT MY GROW BIT DIDN'T GET. I FIGURED THE GIRLS WOULD BE OKAY BUT I COULD FEEL THEIR PAIN. I COULDNT REALLY TELL THROUGH THE CAMERA IF IF THEY WERE DROOPING BAD SO I HAD DAD GO LOOK. HE DIDNT RESPOND WHICH PISSED ME OFF. I TOLD HIM THIS MORNING TO KEEP A VERY CLOSE EYE ON THEM AND IF NEEDED TO WATER THEM. NOT WANTING TO ASK TO MUCH OR I WOULDVE JUST SAID DO IT. HE WATERED EACH PLANT A HALF GALLON AND SPLIT A GALLON WITH THE 10 GAL AND THE 5 AND 50 GALLON SEEDLING CONTAINERS. I'M GLAD I CAUGHT THIS. I NEED TO INCREASE THE AMOUNT OF WATER. AT LEAST I HOPFULLY WONT COME HOME TO DROOPING PLANTS. THAT WOULD BE A KICK IN THE NUTS. I'M NOT GOING ON VACATION DURING GROWING SEASON AGAIN. I CANT WAIT TO SEE MY GARDEN.
7/19 Came home to the plants looking okay but very light and needing water. All expected storms missed us so what I planned for water wasn't enough. Plus they are much larger. DAD WATERED ALL CLONES WITH A HALF GALLON OF WATER AND THEN I GOT BACK AROUND 10ish AND GAVE THE PLANTS ANOTHER FULL HALF GALLON. THE GMOs ARE DEFINATELY WATER HOGS. I've noticed some interior leaves fading so I'll start nutes soon. Saw some pillar damage (and the pillar in a picture dad sent) and went hunting. I caught 11 caterpillars!!! Three different species. A big green one that rolled into a ball. Yellow and green normal moth larvae and an inch worm the color of an earth worm! I found no eggs though. I took a video, but I'll have to wait to upload it. Luckily, my intuition is on point, and I have family that will help me. All it takes is a day of this heat advisory over 100f weather and the wind to dry my bags right out! I don't want to over water, but 10% is 2 gallons in the 20s. I'm upping the water to a gallon a plant. The event horizons seem to be a little further in flower and don't seem to be using AS much water. I'll play it by ear. I was going to spray bt but having caught double digit pillars I think I'll hold off and do what I'm doing. I can always spray later if needed.
7/20 Checked my plants late and noticed they were light and starting to droop. I had one gallon mixed up so I gave to what was worse. They seemed like they would be OK until after my wife's doctor's appointment. I got back and EVERYTHING but one event horizon were starting to droop and light as a feather. This was after I gave them half a gallon yesterday afternoon and dad gave them a half gallon the late night before. The plants are just too big and with this heat they need more water. I mixed 8 more gallons amd gave each plant a full gallon. Used another gallon earlier in the morning so a total of 9 gallons was used on the garden today. I defoliated what I could. I noticed a hole in my cage as well. A lathe broke and it left a small hole for an animal to crawl through. I found a small lathe and got the drill and went around and repaired the cage. I have a lot more to do. Some serious defoliation. I need to start nutes and I need to add the second supports which is a trellis. That way I can LST. The cages kinda hold everything close together but once the supports are added things while be spread out much better. Much more room this year. I need to switch the plant in the 10 with the flowering event horizon to better utilize space. Dad says these are the best looking plants I've grown. I don't know if I agree but the are really thick. Could just be the strain. I'm certainly not complaining. Things look good. If I can hunt pests myself I'd rather do that than spray chemicals. Got a few more pillars and jpn beetles. Took a video but it won't upload until tomorrow.
7/21 It was definately a good idea to up the watering amounts. If not they'd probably be dead. They are growing at a significant rate. Some seem to be in early flower. I have damage from pillars but considering how many I've caught from hunting im still on the fence about spraying. I probably still should. I went through abd manually removed as many as possible. When I went over this morning I checked the weight of every plant. Every plant was noticeable lighter than after I had watered them yesterday. That kinda suprised me. My water hogs were actually significantly lighter. We haven't been getting rain either. I'm going to have to water every day. I think a gallon a plant should be enough. 10% is 2 gallons though. I'd rather understand water than over water but I'd like to get it so I'm not watering every day. Or every other day which I'm sure is what will happen. I'm planning on having to water tomorrow. I'm still going to mull over whether I should apply the BT tonight or not. I probably should. They aren't a problem now but further in flowering they wreck havoc on flowers. Eating and shitting and spreading mold every where they go. There's no way I got all of them. I keep saying it but never do it but I should get netting. That would basically solve this problem. Oh, didn't get a chance to upload the video I made. I'll do it tomm.
UPDATE: THAT "SPIDEY SENSE" STARTED TINGLING AGAIN SO I DROVE TO INSPECT MY PLANTS. ITS BEEN SUNNY AND HIGH 80S/90. ALMOST ALL PLANTS WERE DROOPING. SOME WERENT FEATHER LIGHT BUT THEY WERE LIGHT AND DROOPING. THE WIND WAS WHIPPING AND WHEN IT DOES THAT IT DRIES THOSE BAGS OUT QUICK. INTERESTING ENOUGH THE EVENT HORIZON THATS IN THECMIDDLE OF THE CAGE SURROUNDED ON ALL SIDES ABDCPROTECTED FROM THE WIND STILL HAS WEIGHT. IT LOOKED A LITTLE DROOPY BUT DOESNT GETCTHE WIND THE OTHERS DUE. IM WONDERING IF I COULD BE OVER WATERING THAT ONE PLANT WITH THE FREQUENCY OF WATERING. THE SOIL WAS DUSTY AND DRY BUT WHEN I STUCK MY FINGER IN SOME DIRT STUCK TO IT SO I DIDNT WATER THAT ONE PLANT. I MIXED UP EIGHT GALLONS OF WATER AND GAVECEVERYTHING A GALLON. I GAVE A HALF GALLON TO THE PLABT IN THE 10 AND BRIEFLY HIT THE CONTAINER PLANTS. THE REMAINING HALF GALLON WAS ADDED TO THE PLANTSCTHAT ARE USING THE MOST WATER. GMOS WERE USING MORE THAN ANYTHING BUT THAT SHERB PIE AND TOASTED TOFFY SEEM TO HAVE CAUGHT UP. LOOKED FIR PILLARS BUT COULDNT FIND ANY. ILL UPDATE TOMORROW. IM WONDERING IF I SHOULD GO FOR A GALLON AND A HALF EVERY TWO DAYS OR A GALLON A DAY DURING THIS HOT WEATHER. LUCKILY I CAN KEEP AN EYE OUT AND FIGURE IT OUT. I HAVEXA COUPLE PLANTS THAT ARE TRANSITIONING TO FLOWER. EXCITING TIMES! OH AND AFTER WATERING THE GIRLS PICKED THEMSELVES RIGHT BACK UP. I KNOW ITS NOT IDEAL BUT ITS BETTER TO UNDER WATER THAN OVER WATER. I STILL HAVE NIGHTMARES ABOUT FUSARIUM.
7/22 Much cooler day. It's 74 at 9:40 bit it was 60 earlier this morning. With the cooler weather I'm hoping I won't have to water as often. I think I hadn't been giving them enough water at a time for the conditions. I'm not going to water again until all bags are super light. That's what I had been doing but I don't want my plants getting to the drooping phase. Luckily I check on them multiple times a day and I've got the cams. I caught approx half a dozen inch worms this morning. I'm wondering if I should still spray. If I'm catching this many there has to be more. I'm not removing the damaged leaves if they aren't bad so it's hard to tell if it's new damage. It was extremely windy yesterday. I assume that is what helped dry the bags put so much. I already doubled the water intake so I don't want to do anything else until I see how this turns out. I figure I'll have to water tomorrow. We are getting some rain in the next few days but not much.
7/23 This will be the last entry for this week so I can get back on track. If you've been following along you'd see that I had pretty much doubled my watering amount due to it not lasting until next watering. I take the weather reports I to account. They have really been passing me off lately. On vacation we were supposed to get two large storms at my grow. We got ZERO rain amd it just followed me to my vacation (where the weather WAS supposed to be sunny) and poured some of the heaviest shert rain I've seen. Now after I over watered my plants (just a litttle) I found out the weather changed. Today, tomorrow and Wednesday we were supposed to get TINY amounts of rain. It totaled like .35in for the 3 days. I'm thinking cool. Instead it get changed last minute to supposably get an inch of rain JUST today. It was sheet rain earlier but it has totally stopped raining. The GMOs aren't really over-watered (too bad at least) and look normal. Nothing looks BAD. I can just tell by the weight that some of these girls are overwatered. That's OK though. If we get any wind (which we should) it will dry those bags out quick. With the gmos and that sherb pie it would be very hard to overwatercto the point where it hurts the plant. I just need to realize the GMO'S just use more water. They are asparagusing right up. Event horizon is in early flower. Everytime I go to my grow I'm able to kill multiple pests. I got at least 5 moth larvae, a couple moths, couple leafhoppers and I missed this giant grasshopper that had been going to town chomping leaves. I think it's time to start nutes. I also think I'm going to spray either BT or captain Jack's after this rain. I don't need pillars come flower. Since I can SEE multiple pests it might be best to use something broader like spinosad but we will see how it goes. I also need to switch a couple plants for better room, defoliate and add the trellis and second set of supports. The first support kinda keeps the branches together so I need to lst and tie down branches to open up the plant.

Likes
12
Share


@thonhash
Follow
Sorprendido gratamente del resultado final tanto de producción como de sabor/efecto.

Likes
38
Share


@RussianGrower
Follow
I have bad news friends. A grief happened. After I updated my diary a few days ago, there was a hurricane on the street and there was a strong ice hail. The size of the ice balls reached several centimeters. That is why I am forced to do diary updates ahead of time.
As you could already imagine after an ice hail that lasted 10-15 minutes. Because of this, the plants are very much affected. From the beginning, it became very dark on the street, as if night had begun during the day, after which there was thunder and thunderstorm and freezing rain began. I immediately began to worry about my plants, but I couldn’t get to them. Hurricane and hail began as suddenly as it ended.
When I came to the place today, firstly I saw that the whole reed fell to the ground, so my secret passage to the secret place became open, and my buckets became visible from far, through the fallen reed. Most likely I will be forced to move the plants even further into the depths of the swamp, but now I can’t do it, because it has flooded a little, but my plants are on an island. I know that the reed will recover and rise when the weather is sunny.
The second problem was when I saw the plants after the ice hail, it is that they were very badly damaged. Two plants managed to survive the ice hail with minimal losses, they lost only a few leaves. The third plant was interrupted by a central one on the crown. And the fourth plant suffered the most. His central stem was interrupted, and almost all lateral processes and leaves were broken, and only 3 branches remained on it. Broken parts of the plant lay below.
This is very sad, since I wanted to try these plants most of all. Unfortunately, I could not do anything against the weather and the sudden ice hail. You won’t argue against the Russian weather. With grief, I drank vodka. I am extremely sad because of this at heart. Where they grow, the sun is not too much for the plants to completely recover. Part of their potential will be lost forever. They will survive, but they will not be able to give a full crop in the areaBut despite this, I will continue to keep this diary, as part of the plants remained alive and safely survived the ice hail. From the very beginning, after the ice hail passed, I thought that the plants would be completely dead, since it was almost impossible to survive under such a hail, even people ran away from the street. The fact that several plants remained unscathed, and two though they suffered damage, but everything grows evenly, is a real miracle. The city was very strong and big. Therefore, with your support and my love, I hope that they will show what these plants are capable of under the given conditions.
If you are interested in following the adventures of weed in Russia, subscribe to my diaries and leave your comments.
------------------------------------------------------------------------------------------------------------------------------------------------------
У меня плохие новости друзья. Произошло горе. После того как я обновил несколько дней назад свой дневник на улице произошел ураган и был сильный ледяной град. Размеры ледяных шариков достигали нескольких сантиметров. Именно поэтому я вынужден сделать обновления дневника раньше времени.
Как вы уже могли себе представить после ледяного града который продолжался 10-15 минут. Из-за этого растения очень сильно пострадали. С начало на улице очень сильно стемнело, как будто днём началась ночь, после чего был гром и гроза и начался ледяной дождь. Я сразу начал переживать за свои растения, но никак не мог к ним попасть. Ураган и град начался так же внезапно, как и закончился.
Когда я пришёл сегодня на место, во первых я увидел что весь тростник повалило на землю, поэтому мой тайный проход в секретное место стал открытым, а мои ведра стало видно из далека, сквозь поваленный камыш. Вероятней всего я буду вынужден перенести растения ещё дальше в глубь болота, но сейчас я не могу это сделать, так как его немного затопило, но мои растения находиться на островке. Я знаю, что тростник восстановиться и поднимется когда будет солнечная погода.
Второй проблемой было когда я увидел растения после ледяного града, это то, что они очень сильно пострадали. Двум растениям удалось пережить ледяной град с минимальными потерями, они лишились всего лишь нескольких листиков. У третьего растения была перебит центральным на макушке. А четвёртое растение пострадало сильнее всех. У него был перебит центральный стебель, а так же сломаны практически все боковые отростки и листья, на нём осталось всего лишь 3 веточки. Отломанные части растения лежали внизу.
Это очень печально, так как именно эти растения я хотел попробовать больше всего. К сожалению, против погоды и внезапного ледяного града я не смог ничего сделать. Против Русской погоды спорить не станешь. С горя я напился водки. Мне крайне печально из-за этого на душе. Там где они растут, солнца не слишком много чтоб растения успели полностью восстановиться. Часть их потенциала будет потеряна безвозвратно. Они выживут, но уже не смогут дать полноценный урожай в данной местности.
Но несмотря на это, я буду продолжать вести данный дневник, так как часть растений осталась жива и благополучно пережила ледяной град. С самого начала, после того как прошёл ледяной град, я думал, что растения будут полностью мертва, так как выжить под таким градом было практически невозможно, даже люди убегали с улицы. То, что несколько растений остались невредимыми, а два хоть и понесли урон, но всё ровно растут - это реальное чудо. Град был очень сильны и большой. Поэтому с вашей поддержкой и моей любовью, я надеюсь что они покажут, то на что эти растения способны в данных условиях.
Если вам интересно следить на приключениями травки в России, подписывайтесь на мои дневники и оставляйте свои комментарии.


Likes
8
Share


@ButterfliesLittleFarm
Follow
Hello Diary,
The Milky Way F1 is ready to harvest soon, although the Titan F1 ripened first and is already ready, the Milky Way F1 and Apollo F1 will have to wait another week in my estimation.
The Milky Way F1, as seen in the photos, is truly a sight for the eyes.
The flowers started to get more and more brown pistils, but looking under the microscope, the trichomes are not all milky yet.
So I'll leave her for another day.
Otherwise, the flowers are full of trichomes, from which a strong fragrance spreads.
Here and there a yellowish leaf appears, which I immediately remove.
Watering is a little more frequent due to the high temperatures, but I stopped adding any nutrients.
Here's a quick recap of the week.
26/06/2023 - Day 58.
Watering.
Only two days later, the plants drank all the water, so I watered them with two liters for each individual plant.
29/06/2023 - Day 61.
Watering. I repeated the procedure as I did three days earlier.
01/07/2023. - Day 63.
Photographing plants.
That's all for this week, see you soon.
Processing
Likes
32
Share


@Vega0284
Follow
Hey Guys!
Super excited this week! I've really been wanting to try growing outdoors, so I built a cheap hoop house! Got most of this stuff for the frame from Lowes under 300$. All the soil products I got from GrowGreenMI. Some really cool people out there.
One thing I'm super worried about is drainage. Right now those holes are about 4 feet deep and they've got about 4 inches of water in them already. What's been cautioned is that, eventually, about 2 months in these plants roots will grow and reach the bottom and cause root rot to form. One of the biggest things I was trying to be wary of was causing root rot. This was also the biggest precautionary measure I took when mixing the soil. Adding the extra perlite, coco, and clay pebbles. Best advice right now is to build the soil up on the holes another 16 to 18 inches and possible stick a PVC pipe down to the lowest drainage point of the hole to allow some of that natural occurring water to evaporate.
Any advice anyone has on it is welcomed!
Making a compost tea for the soil outdoors, will probably put 2 cups in each RDWC bucket as well and let that do it's magic for a day or so before nutrient change. Raised the bed about 14 inches as well!
All the seeds sank! Off to a good start! Lol


Likes
42
Share


@iLoveGoodWeed
Follow
WEEK 5 - both ladies are stretching, no issue so far pleasure to grow
9L Pot I started notice pre flowering stage
12L Pot the is getting bigger but still in veg stage
Likes
8
Share


@Icedoutgreen
Follow
Diese Woche kam endlich mein Luftbefeuchter von AC Infintiy an, habe die Luftfeuchtigkeit gleich mal auf 75% hochgeschraubt, ich denke in der aktuellen Phase habe ich noch kein hohes Risiko mit Schimmer. Ich werde die gleiche Luftfeuchtigkeit noch in der vierten Woche halten und danach suggestiv um 5% pro Woche runter gehen. Außerdem habe ich diese Woche eine halbe BTI Tablette auf 10l Wasser eingesetzt um die Trauermücken ein bisschen unter Kontrolle zu bekommen. Außerdem habe ich Reismilch angesetzt, selbige werde ich morgen mit Milch mischen, dann einige Tage warten und dann die daraus resultierende Milchsäure als Zusatz für das Gießwasser zu geben.
