
Likes
Comments
Share


@Kingseeds
Follow
Such amzing strain bred by seed junky (animal cookies x kush mints 11 )


Likes
34
Share


@BOMbolenath
Follow
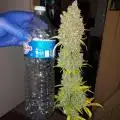
First week of flowering. The plant will stretch, so i adjusted the LED dimmer to 100%. Did a good defoliation too. Doing good, very healthy. Smell very good.


Likes
Comments
Share
@squalino
Follow
🛠️ De la Fleur au Hash : L'Art du Dry Sift "Old School"
Quand la fleur ne suffit plus, l'artisanat prend le relais. Voici le résultat d'une transformation patiente et entièrement manuelle, réalisée à partir des restes de têtes de Purple Haze.
Le Processus : La Méthode Traditionnelle
Dry Sift : Tout commence par une extraction à sec rigoureuse pour isoler les trichomes les plus purs, créant ce "sable" doré et volatile.
Pression Humaine : Pas de presse hydraulique ici. Tout a été fait à la chaleur des doigts et par pression manuelle. C'est cette chaleur corporelle qui permet de briser la membrane des glandes de résine et de lier le kief entre lui.
L'Affinage : Le résultat est une Temple Ball lisse, dense et brillante, témoignant d'une belle concentration en huiles essentielles.
Le Résultat : Un Concentré de Caractère
Aspect : Une bille d'un brun profond et huileux à l'extérieur, qui révèle toute sa complexité une fois travaillée.
Texture : Malléable et collante, typique d'un hash pressé à la main avec soin.
Puissance : En concentrant les trichomes, on atteint enfin ce niveau de force qui manquait à la fleur brute. Les effets sont ici beaucoup plus marqués, profonds et durables.
"Rien ne vaut le savoir-faire à l'ancienne pour transformer une petite déception en une grande pépite de collection."
Likes
24
Share


@m0use
Follow
***Sponsored Grow*** = Medic || https://medicgrow.com || Grow = ***Sponsored Grow***
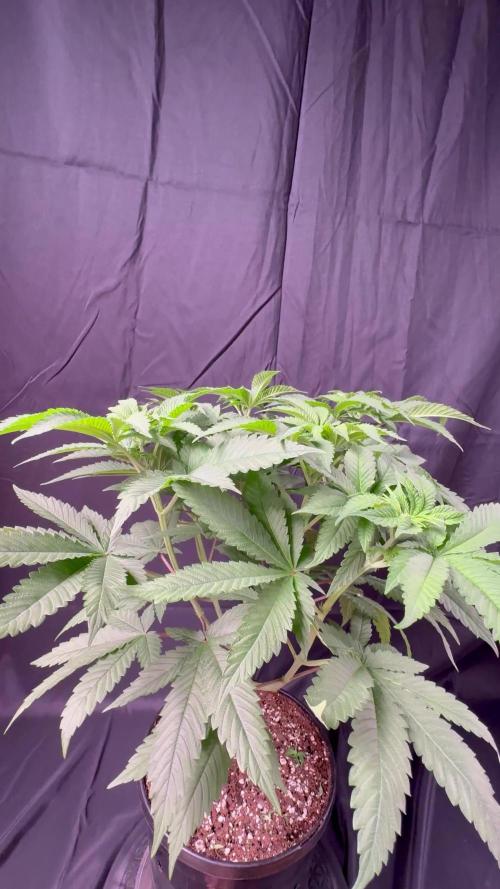
Ok, so first week of introducing the trip tonic line of feed into the medium and getting rid of the lotus crap, all of the newer growth is looking much better and some of the older growth is greening up but I don't expect a full fix for that. Gave some extra grow B in this week as it is higher in P and K and will act as a small PK boost for the stretch that is to come. Flipped my plants to flower as well so they are now on a 12/12 setting. Been using the medic grows mini sun 2's internal timer in the lights and they appear to be working just fine. They have pre-programmed setting of 12/16/18/20/22 "on" cycles, I thought it might have been hold the dial till the number you want came up but its not that fancy. As of now my photoperiod is from 1:30pm-1:30am but I might move this up to 12pm-12am so when I need to look at my plants I'm not waiting till the afternoon. Its really only an issue on the days I'm working. over all happy with the progress, Plants are drinking lots so I'm happy with that.
Lights still running at 80% with V1 spectrum, will increase to 100% after stretch, don't need to growing into them and burning up.
Till next week.
***Sponsored Grow***
Official Website:
https://medicgrow.com/
+
https://www.emeraldtriangleseeds.co.uk/
Facebook:
https://www.facebook.com/medicgrowled
+
https://www.facebook.com/OriginalETS/
Twitter:
https://twitter.com/medicgrow
+
https://twitter.com/emeraldseeds
Instagram:
https://www.instagram.com/medicgrow420/
+
https://www.instagram.com/emeraldtriangleseeds/
YouTube:
https://www.youtube.com/channel/UCNmiY4F9z94u-8eGj7R1CSQ
Growdiaries:
https://growdiaries.com/grower/medicgrowled
https://growdiaries.com/grow-lights/medic-grow
+
https://growdiaries.com/grower/emeraldtriangleseeds
https://growdiaries.com/seedbank/emerald-triangle-seeds

Likes
7
Share


@BushDoctor740
Follow
Things are moving along great.The buds are developing and smelling absolutely amazing.Cherry cola won’t be a big producer but wow is her scent potent.The Lemon cherry cookies having the biggest buds so far and will finish first but still needs some time.Ive increased light intensity to 80 percent which kinda fried the fan leaves but no longer needed at this point.
Likes
3
Share


@StewartBloom
Follow
Day 54 and I think we're on track to harvest some time next week. I've decided not keep any of these as a mom, the back left one has some potential but non really seem like good hash plants. I'll jar test each to make sure but all have really greasy trichromes.
Likes
150
Share


@RussianGrower
Follow
I welcome you from Russia my friends from different parts of the world. The end of 16 weeks has come. Plants already fully show their ripeness, and buds SAG from their weight. Soon I will be harvesting, as soon as I get the final dry product I will make the last update of this diary.


Likes
1
Share

@Ninjabuds
Follow
It’s the 1st week of flower I flipped the plants to 12/12 a few days ago. There is a lot going on and a lot of cool and amazing things coming in the near future. Make sure to check out my YouTube page. I bought me a DJI gimbal this week. Might be my new favorite toy. The temps are starting to break for the summer. I don’t see it being very long until winter is here and it’s time to use a heater and not an ac unit. All of the plants are healthy. The plants have all grown so well I turned down the light intensity a bit today the plants didn’t seem like they was starting to strech very much. Hopefully the lower light intensity will make them strech out just a bit
Likes
10
Share


@Gutismoke102
Follow
She has grown to be a beast. She’s been very easy to grow medium feeder ever other day I keep ppm 400-600 so I’m able to feed more frequently. She loves it stay tuned she just warming up


Likes
5
Share


@MrFriday
Follow
26.08.2024
1. RDWC: I run a DIY system made of 4 Buckets 17L+separated control/tank bucket (12L operational water per bucket used) fallponic plus underwater current. I don't know why I have made such system I just wanted to be sure that I have included every possible option. I'm not sure but maybe I'll upgrade it to rainponic it's not that hard of a job. I'm not using my 100L reservoir this run becose it needs replacement old one made a small flood in my garden.
2. TENT AC Infinity 5x5
3. Airpump Hailea ACO 388 D 70L/min.
4. Water chiller: hailea water chiller hc-150a.
5. LED GROW light Grand Master Level Tarantula voyager 1500W 2 chanel's plus controller (it will be my first run with this monster it just arrived).
6. INLINE FAN: AC Infinity cloudline S6 carbon filter.
7. CLIP FAN: AC infinity Cloudray S6 3 pcs. For low middle and over the LED air movement.
8. Humidifier AC INFINITY T3 (I don't need stronger one naturally the humidity here is around 65-70%)
9. TENT CONTROLLERS: controller 69 PROX2
10. Germination/humidity dom by AC infinity with germination lamps 40W Ionabeam S11 only for the first 2 weeks before VEG.
DAY 1
Closed in a box hiden in a dark boiler room.
Room temperature 25C
EC 850
RH 90%
Instruments used for measuring:
AC Infinity Hydroponic Meter PRO
AC infinity VPD thermometer
DAY 2 5/6 seeds have start to crack open I guess tomorrow or the day after they will be all ready for the cubes.
DAY 3
ROOM TEMPERATURE 26 C
Relative Humidity 83%
5/6 seeds are showing signs of life. The 6th one is a little bit slower it's cracked as it can be seen on the picture but it refuses to show it's tale. I believe tomorrow it will be ready. On day 4 I'll put them in the "Root Riot" cubes and after that I'll just monitor the RH and RT until I see the sprouts.
DAY4
ROOM TEMPERATURE 24.5
RH 94%
6/6 seeds have germinated so far. Today I'll move them in the Humidity dom where they will stay until they become seedlings and I'll keep them there until they are ready to be moved in the RDWC system and coco coir. In the video I have show my method of preparing the cubes for the seeds next update will be tomorrow probably only for temperature and humidity.
DAY 5
ROOM TEMPERATURE 25-27.
RH 89-95
I can't believe that I'm seeing first sprout today. Maybe this strain is one who can take a little push 🤣🤣🤣 I'll keep in mind and I'll se how much I can push it. Unfortunately I still don't have CO2 for veg and flower but I can try other different little tricks. I'm happy with this seeds obviously 42 Fast Buds are giving a really quality seeds. Let's see what kind of buds will come out of this seeds. I hope tomorrow everything will be sprout out and i will turn on the lamps.
DAY 6
PPFD 120
ROOM TEMPERATURE 24.5
RH 92.1
It's day six 4/5 seeds are successfully germinated. Maybe the next two will pop out but for one of them I'm not so sure. Anyway I have one spare seed that I can pop out for the coco project plus I have one Papaya Cookies Auto for the fifth bucket so that's no problem. The seeds ar under the light AC Infinity Ionabeam S11 on level 3 equal to 115 ppfd plus the DOM extension.
DAY 7
ROOM TEMPERATURE 25C
RH 82%
I have 4/6 successfully germinated seedlings. Tomorrow I'll open up the humidity dom a little bit. It's good to have spare seeds. Now I'll have to plant my spare peace of gorilla cookies and probably one Papaya Cookies Auto (gift) becose my plans were for 6 plants. Anyway this 4 soon will be transplanted in the RDWC flowering pot. Let's see what tomorrow have to say.
DAY 8
ROOM TEMPERATURE 25C
RH 82%
Amazing root development, I wasn't expecting this kind of speed but obviously tomorrow I'll transplant them in the RDWC even before the VEG state. Maybe I'll keep them a few more days when the first set of leaves is all out.
DAY9
ROOM TEMPERATURE 24.1
RH 58%
Today is the last day in the humidity Dom. I delayed the move becose i wanted to have a longer stems and becose my fertilizers got lost in the depo so ill receive them tomorrow. We have very healthy baby's with a lot of tiny roots so it will be perfect to start then from day 10.
DAY 10
ROOM TEMPERATURE 26-27C
RH 70%
EC 115
pH 7
This is the fastest seeds I ever see. I have never transferred seedlings in to RDWC so far, usually I make this procedure around day 17-20. While I was transferring them one of the seedlings accidently snapped a little bit but I hope it was not fatal enough and maybe it will survive, only the time will show, anyway I have another one in coco so I can always transfer it in to RDWC if needed. EC is only 115 for today becose of the little bit of ATHENA BALANCE I dropped in the water, so far the roots are not touching the water so i can add the fertilizers tomorrow while I'm fresh.
DAY 11
Water Temperature 18C
Room temperature 28C
EC 120
pH 7
PPFD 200
RH 70%
They look nice and healthy still not enough signs of roots for picture but so far the seedlings look fresh. One more day in the Formulex+tap water and they will go in the Athena by day 13.
DAY 12
Water temperature 18C
Room temperature 27C
pH 7
PPFD 220
RH 70
AC 240
Everything is going g quick and perfect. So far this run is going smooth as never. I never had root development that quick as this with this seeds. I'm almost in love with them. After a quick summary with my previous runs I decided to double the AC before tomorrow when I'll change the water and I'll replace it with 6.0 pH RO water and the full athena program for the RDWC. So far so good let's see what the Athena nutrients will show after one week.
DAY 13
RH 70
Room temperature 27-28
EC 290
pH 6.1
Water Temperature 20C
PPFD 300
Light cicle 20/4
I couldn't resist to flip the fertilizer to athena. After all as soon as I teach em what its better. Full water change of the tank and new suplements. Formulex is amazing suplement for the first two weeks maybe it can carry most people to whole VEG if it's in soil or coco, but I want the real food in RDWC. So far all the plants have amazing small roots so that means the system work well. Let's see the progress tomorrow, but I beleave in the middle of the week this plants will be already in official VEG period.
DAY 14
RH 70
Room temperature 26C
EC 290
pH 6.0
Water temperature 19.5-20C
PPFD 350-400
Light cicle 20/4
I needed a little bit more light. I don't know how to explain it but its a grower thing and now my seedlings are looking better than the morning. They were looking a little bit "dizzy" if I can use this terminology. So basically in perfect water temperature, perfect fertilizer level and good aeration, there was nothing left beside the light. As I'm saying you can't feed a lot if you don't have enough light. I added the spider farmer SF 1000 EVO over the water container, becose the big fixture is too far from them, but I can't put them under the Voyager, becose my previous grow is in the final week. So now they are on a separate light 🤣🤣 🤣 370-400 PPFD is a little bit much but I beleave they will manage it. After all the plan of this run is to reach 1000 PPFD in the final days.
DAY 15
RH 70
Room temperature 26C
EC 290
pH 6.0
Water temperature 19.5-20C
PPFD 350-400
Light cicle 20/4
So far the progress is mainly on roots and some new leafes are coming out. Probably next set of leafes is going to be the first that will mark the veg stage. I have added a little bit of ATHENA clense today and by far notging ha e changed since yesterday.
DAY 16
RH 70
Room temperature day 26C
Room temperature night 23C
EC 290
pH 6.1
Water temperature 19.5-20C
PPFD 350-400
Light cicle 20/4
As I was expecting most of the job is pre-veg, what I mean is that the results we can see are mostly in root development and ohh boy this is a crazy root spike in just 24 hours. I don't know is it becose of the Athena or just the genetics of the seedling but Im really amazed. In just 11 days from first seedling until today and I'm seeing some crazy root development. I truly beleave that the next set of leaves will be marking the vegetative stage and then we can start the game.
DAY 17
RH 55-60
Room temperature day 26C
Room temperature night 21-23C
EC 320
pH 6.18
Water temperature 19.5-20C
PPFD 350-400
Light cicle 20/4
I decided to add a little bit more Athena Ca-mag. It feels like that my little ladies are struggling for it. I'll see the results tomorrow.
DAY 17
RH 55-60
Room temperature day 26C
Room temperature night 21-23C
EC 320
pH 6.18
Water temperature 19.5-20C
PPFD 350-400
Light cicle 20/4
I decided to add a little bit more Athena Ca-mag. It feels like that my little ladies are struggling for it. I'll see the results tomorrow.
DAY 17
RH 55-60
Room temperature day 26C
Room temperature night 21-23C
EC 320
pH 6.18
Water temperature 19.5-20C
PPFD 350-400
Light cicle 20/4
I decided to add a little bit more Athena Ca-mag. It feels like that my little ladies are struggling for it. I'll see the results tomorrow.
DAY 18
RH 55-60
Room temperature day 26C
Room temperature night 21-23C
EC 320
pH 6.18
Water temperature 19.5-20C
PPFD 350-400
Light cicle 20/4
Okay two more days and we will be in veg. It's Not like we are not in veg today I just want to keep the update from Sunday to Sunday.
DAY 19
RH 55-60
Room temperature day 26C
Room temperature night 21-23C
EC 320
pH 6.18
Water temperature 19.5-20C
PPFD 350-400
Light cicle 20/4
We are in veg tomorrow so today we change nothing. Tomorrow will be great day.


Processing
Likes
1
Share


@ladyjane
Follow
9/1 - Start of week four and all four of my Purple Microdots are female! That means I got 100% feminine seeds from this round and they are looking strong. One of the ladies is split at the main cola as if she had been topped...even though she hasn't. Can't wait to see how she turns out. Watered all today with RO water and molasses.
9/4 - Just a light water and some LST today. Still no nutrients and they are looking fabulous. Moving them just about a quarter of the way around the pot. They are really starting to become bushy and branch out.. They are all very green and looking great.
9/6 - First signs of flower! Each of the four have little pistils coming in and they look beautiful. I come in each day and water and do a little LST on all the ladies and that's about it. Will feed at the end of the week.
Processing
Likes
5
Share


@dutchMASTAkilla
Follow
Added frame to keep tent from being sucked in by filter fan.
