


Likes
Comments
Share


@chapadux420r
Follow
Wazzuuuup guy’s?
So it’s week 7, the lady’s are officially on the flowering stage!! (Since 4/10)
It’s all going very well, they are happy and so am I, been watering every 3-4 days with 1.2l each (before flowering I’ve watered with approximately 2l) and they have good colour and you can see some stretch. Well, not much but they are trained after all 🤷♂️🏻
Just some yellow leafs below the canopy but guess that’s normal, they are really needing some defoliation but I’m going to wait 2-3 weeks because I don’t want to stress them on this early stage
I’m thinking about adding the scrog net but I don’t know if it’s too late for that, what do you guys think?


Likes
1
Share


@daythemn
Follow
There's a blank week, sorry about that. There are detailed pictures and explanations of the current situation. At this point, the older plant seems to be doing fine. However, the younger plant's growth has definitely slowed down. Suspecting potassium deficiency, that's why I increased the nutrient amount. But K deficiency might not be the only thing that's wrong. My pH levels should be fine, got a new meter and did calibrations regularly.
Likes
52
Share


@Ogchemst
Follow
Quick kush is called quick for a reason 👌, nice big indica leaves starting to grow and stretch pretty fast, i had to re pot one of the girls so one of them might look a bit sad but she will get better (its the salts)
Flushing and Buffering-
I am personally using Canna Coco Coir,mix with one brick of plagron coco coir(had one left).
1. Why you Should buffer your Coco. Lets get to reading! (Its Worth it for those that dont know about it)
There are cation exchange sites in coco that will interfere with nutrition until they are buffered. The cation exchange sites in coco naturally come loaded with sodium (Na) and potassium (K) cations. However, the Na and the K are only weakly held to the exchange sites. In the presence of calcium (Ca) or magnesium (Mg), the sites will release their Na or K cations and lock onto the Ca or Mg. These processes are known as “cation exchanges”.
Buffering coco is accomplished by soaking it in Ca and Mg. This allows the cation exchanges to take place prior to adding plants. Simply soak your coco in a solution of Cal/Mag water and the exchange sites will release their K and Na cations and lock onto the Ca and Mg. When the cation exchange sites bond with Ca and Mg rather than Na and K, it is “buffered”. The bonds that hold the Ca and Mg to the sites are very strong and cation exchange will largely stop. This means that all of the nutrients that you add to the water will be available to the plant at the ratios that you provide them.
2. Alot of growers Grow in Unbuffered coco coir and its a big mistake guys, I myself was a "victim"😬of unbuffered coco and it does cause alot of problems... now i am going to try and fix them!
-----GROWING IN UNBUFFERED COCO---
Many growers are unaware of the need to buffer the coco and they try to grow plants in unbuffered coco. In unbuffered coco, the cation exchange sites will strip the nutrient solution of the Ca and Mg and replace those cations with Na and K. This creates a sub-optimal Nutrient Element Ratio (NER) and renders Ca and Mg unavailable to the plant.
Failing to buffer the coco is why so many growers suffer calcium deficiencies in coco grows. Manufacturers of prepared coco products try to exploit these problems and convince growers that only their proprietary products are suitable for growing. However, it is actually very simple to properly buffer your coco yourself. This tutorial walks you through the process and provides all the information you need to turn even the cheapest brick of dehydrated coco into a superior growing medium.
I hope i Helped out someone who didnt know about this link on how to Buffer your Coco Coir is Here https://www.youtube.com/watch?v=OQi8AMMIyyA&t=18s
14/02/2019- I Decided tp raise up the amout of nutes and im giving them 1,5 ml per L so 15 ml's for 10 L / 2 Gallons of water



Likes
17
Share


@Naujas
Follow
She is much prettier than she was a week ago :) I remembered that I have my first grow light, which is more compact and it will give me more space, so I changed my light, now the girl's side branches get light too:) I add a lot of video memes, because I really want to win Iphone16 pro ;) and those who don't take risks don't drink champagne:) good luck to everyone.


Likes
22
Share


@Chumpkilla
Follow
7/14/23 - Day 32 - Switched to flower today. It will get its first dose of 12 hrs. of daylight, 12 hrs. of dark. This will tell the plant to start budding. I'm excited to see the bud's form. So far everything with the Leaf system is going great. I'm excited to show the next few weeks as they happen!
7/16/23 - Day 34 - The plant is bushing out big now. It's getting tall. I'm a little worried we waited for a little too long, but who knows? We shall see.
7/20/23 - Day 38 - She is a few days into flower, and she is sprouting up like crazy. I bought another Scrogg net. I'm going to try and double Scrogg? is that a thing? Lol I just know that I need to keep these buds from hitting the lights. I think I'll be able to get all of this to work well, but I am nervous about the height. I can see some pistils starting to poke out!
7/21/23 - Day 39 - The lights turn off at 2am and back on at 2pm, so right now I'm waiting to open the box up for the day. But I was looking back at the pictures and trying not to freak out about how big she is (I'm worried about the lights, they don't move, and Shes is MASSIVE already) One thing I noticed about the pictures is that I have not had a single leaf turn yellow, or get spots, or have curling leaves, or have any issues with the plant. I would expect some sort of dying leave somewhere, but no. Not one single leaf has been less than perfect, I mean PERFECT. It seems like this LEAF growing box is literally the perfect environment.
If you are looking for this experience, check out https://www.getleaf.co/

Likes
8
Share


@Chubbs
Follow
420Fastbuds
FBT2301 WEEK 9
What up Grow fam. Hope everyone's having a good one. Week 9 update for these two beautiful girls. Flower sites are developing bigger and bigger daily so that's awesome to see. Starting to see more fade in the leafs on the bigger of the two but over all both are growing great. The shorter one has more fat colas as the bigger one has more branches but smaller colas nut more flower sites. I'll probably stop feeding notes this week as I generally will give a week or two of just water while they finish the last couple weeks before harvest. All in all Happy Growing
Processing
Likes
7
Share


@Kushizlez
Follow
Days 35-42
(Day 36) Some minor problems starting to arise here. A few times this week it got up to 90+ degrees which I think may have caused a bit of heat stress in some of the plants. I’m seeing a bit of cupping/crinkles on some of the fan leaves and some of the new growth is looking pretty gnarled and twisted. I hear windburn can cause this too so I’m turning my fans down to low speed. This could also be a problem with humidity so I’m going to turn off my humidifier, dim the lights and raise them. During my last feeding I mulched in some worm castings but it seems like they’re keeping the soil/coco from drying out. Pots are still decently heavy and even the surface is still quite moist but they aren’t showing any major signs of overwatering. I figure it will only be a few weeks before the castings break down so I will just leave it.
A few of the plants are starting to show yellowing leaf tips which is probably some kind of micro nutrient lockout from my PH being slightly too high. It could also be from nute burn so I will water in 6.0 until I see some runoff. Although the most likely culprit is potassium excess. I’ve been feeding potassium almost as much as nitrogen so far. I know that can cause the yellowing of leaf tips by locking out trace minerals. It can also cause leaf problems like crinkling. Excess K can even cause water retention! Will water at 6.0 until run off next watering.
The lst is coming along nicely. It was a good idea to remove the first two sets of branches (not leaves). Now I have 4-6 perfectly even stems coming from each plant that I plan to top one more time each.
(Day 37) Today I’m going to vacuum, clean, wipe down and spray all my equipment in the tent. I’ve been letting the floor get quite dirty and I haven’t had the chance for a thorough clean since last round. I’m kind of surprised I haven’t seen any powdery mildew yet. I guess the prevention spray is working because the room has to be infected from my last crop.
(Day 40) I was reading that you can foliar spray whatever you are deficient in for an immediate uptake. I‘m going to try that with my current potassium excess since it locks out trace minerals. I’m going to foliar feed a bit of phytoplankton at 15ml/L and some MagnifiCal + VeloKelp from Remo nutrients both at 5ml/L. The cal mag is not organic but as long as it’s not going into the soil and doesn’t contain chlorine I’m fine with it. I’m also going to be changing the light cycle to 18/6 for the remainder of veg. This will be their first dark cycle so they can properly foliar feed. Edit: humidity shot up to 85% a few hours after foliar spray.
I went to top dress everything today and I mixed up the plants while doing so! So the ones I was unsure about I gave 1 extra tablespoon. I won’t top dress again for at least 10 days. Might give a light tea sometime next week. I also tilled the shit out of the top of each pot. It had a hard crusty layer on top that was keeping the medium from drying out properly. I’m not going to water again until everything is bone dry. Then I will water until slight runoff at 6.0 ph with some Dr. Marijane bacteria/root probiotic.
I’m starting too see a lot more of these abrasions on some of the bigger fan leaves. It almost looks like thrip damage but I’m 100% sure it’s not a pest above ground. It could be bulb mites, which I found in my worm castings but I can’t check until the roots are more established in their pots. The leaves themselves are cold and feel damp to the touch. I haven’t even seen a fungus gnat since I last fed. I’m hoping it’s related to the K excess and clears up with the troubleshooting.
(Day 41) Just ordered a wire cube rack to prop my plants up with and help evaporation/root warmth. Each cube is 11.8”x11.8”x11.8” and it comes with 16 cubes. So it will fit just perfectly in my 4x4. Depending on the size, I might order another one for the flower room where I would need 25 cubes.
Likes
5
Share

@Naujas
Follow
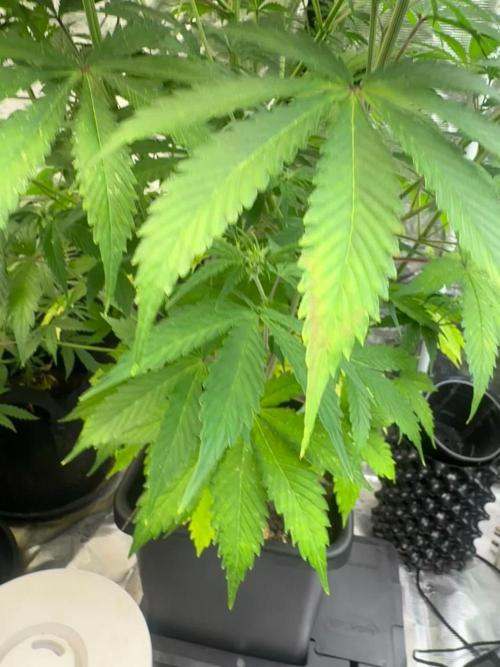
a lot of rain and little sun does not allow the girl to be happy, but it will stop soon:) the girl's leaves are already huge, the girl still has a lot of vegetation time left, so she will grow and I think she will be really big:).

Likes
3
Share

@ibbzy
Follow
Had to snap this bitches neck Jesus Christ....still growing...doesn't want to bud apart from stretch

Likes
19
Share


@WaffleTerps
Follow
This grow has been something truly special for me because it was my first one. Beyond the numbers or the final weight, it was a constant learning experience — mistakes, adjustments, moments of doubt, and a lot of satisfaction watching the plants develop day by day. Seeing them finish healthy, resinous, and looking the way they did is a feeling that’s hard to describe.
I genuinely want to thank everyone who supported, advised, and followed the process. Every message, every comment, and every piece of constructive feedback meant a lot and helped more than you probably realize.
This is just the beginning. In the next runs, we’re bringing things better executed, more refined, and more detailed in every aspect. More control, more experience, and higher quality. We grow step by step — and we’re only getting started.
Likes
101
Share


@morganfreeman420
Follow
El frio se ah anticipado bastante, el dia dura 12hs y la planta esta empezando a ponerse cada vez más morada cosa que me gusta mucho, ya que hace mucho que no cultivo una variedad morada

Likes
14
Share


@torgul2000
Follow
As my previous experience, I decided to use 10L pots, which is the best ratio I had last year regarding quantity/soil.
First week only with plain water, no Ph regulation

Likes
109
Share


@Wackytabacky_420
Follow
Hey fellow growers week 10 update of my critical purple and pineapple auto grow. As of today plants are 70 days old total plant age. This is my feed this week...
11/8/21
Critical purple #1-
2ml micro
3ml bloom
1/2ml ph down
Ph 6.41
420 Ppm
Solution temp 72.3°f
Critical purple #2-
5ml flora kleen
3/4 ml ph down
Ph 6.1
164 Ppm
Solution temp 74.5°f
Pineapple auto #1-
2ml micro
3ml bloom
3/4ml ph down
Ph 6.42
440 Ppm
Solution temp 72.1°f
Pineapple auto #2-
3ml cal-mag
3ml bloom
1/2ml ph down
Ph 6.36
410 Ppm
Solution temp 72.5°f
Use my discount link for savings on viparspectra merchandise!
https://www.viparspectra.com/?aff=Wackytabacky420&utm_source=affiliate
Critical purple #1- this lady has just been filling in this week she is starting to thicken up nicely!
Critical purple #2- so this lady was pulled tonight and put in darkness for 48hrs!! She will be cut sat night! So ready to smoke this lady!!! So she was put in darkness at exactly 7 weeks of 🌸
Pineapple auto #1- this will be my last lady to finish out in this tent as she started out SLOW in first week or two of 🌸 she's starting to fill in now but she is behind the rest, but she also is the biggest plant in the tent.
Pineapple auto #2- gave cal mag and made her worse again. So I'm just gonna stretch her until the end. She has about 2 weeks left so I'm praying for the best. Apparently I have a hard time Growing sativa!
Well guys I'm gonna bring this to an end for the week. I would like to thank all my fellow growers for the follows, likes, comments and just all around great support!! Till next week Best of luck and Happy Growing!😎🌱💚💪💪

Likes
11
Share


@Krissci
Follow
Day 5 -
MC1 need large amount not defoliation and LST
MC2 light defoliation and leave LST tilnext week
Likes
5
Share


Likes
2
Share


@Aleks555
Follow
Our beauty is now 6 weeks old and has officially entered the flowering stage! She has gained noticeable height and bushiness, showing off her healthy growth and vibrant energy. We've installed a net and gently guided her underneath to maximize the potential of each branch and ensure even light distribution.
The light schedule remains 12/12. Daytime temperature is a steady 28°C, nighttime drops to 21°C, and humidity stays at 65%. We continue feeding her with Xpert Nutrients, providing all the essential elements she needs during flowering. CO2 supplementation also continues, supporting her vigorous development.
A huge thank you to Xpert Nutrients for their top-quality fertilizers — it’s thanks to them our girl is entering the flowering phase with such strength and confidence!
Likes
12
Share


@SupremeJay
Follow
This is my second time growing this strain and i am much more please this time around. Came out with almost 3 times more than last time and the buds are a lot bigger. Have already ordered another seed because i think this may be my favorite strain!

Likes
1
Share


@Grow_miss
Follow
The effect was very Indica-heavy, but I also harvested it with a relatively high amount of amber trichomes.
W