


Likes
Comments
Share


@UKauto
Follow
Turning I out amazing this one 👌🏻
She's small but she's gonna pack it on.
So glad i never scrapped her haha
Smell is ridiculous already.
It's so pungent when you get up close burns ya nose honestly 😂
But has that beaut citrus when you touch the frosty leaves. Can't wait for these next few weeks

Likes
29
Share


@KingSalomonsWeed
Follow
Mango, i smell mango 😍
Sticky? It is.
Hard buds? Not yet.
Not bad for a little bit forgotten Orphan.
But Bad news... The strain is sold out for the moment.
21.10. Four days and even nights :) has passed. Lets see how the flower progresses...
Have a nice week.

Likes
7
Share

@NSABND
Follow
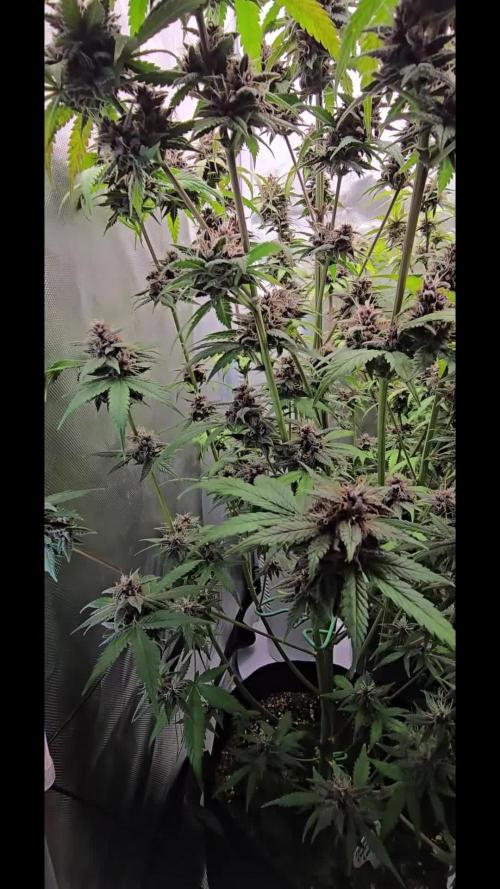
Day 64 the queens got some fertilizer 💪😃👍
Day 65 that massive smell and these juicy buds 😃👌




Likes
23
Share


@SonomaSungrown
Follow
Skipped a week in my journal due to travels.
Had my neighbor water my plants.
Having some minor early deficiencies with my photoperiod plants (particularly the chem brulee)... so I decided to go ahead and give everything a solid feeding of Foop Bloom 1, 2 and Sweetener. This is their first ever bottled feeding. Have been running on supersoil and a prayer.
Also top dressed everything and mulched with rice straw to help with the soil drying out a bit too quickly.
Leaves have been yellowing on all three. Mostly relegated to the interior of the plants.
Chem Brulee is looking a bit too yellow overall, as well.
French Macaron is a 66in. Chem Brulee is 56in. Pineapple Meatball is 45in.
I have a sneaking suspicion that my neighbor didn't water them quite enough while I was gone.
Will probably continue with the Foop feedings... probably at least once per week. Don't want to overdo it.
Also top dressed with my flowering top dress mix and mulched all plants with a thin layer of rice straw.
8/4 Sprayed with Neem Oil and Castile Soap
8/5 Sprayed with Gravenstein Apple FFJ and OHN
8/6 Sprayed with Neem Oil and Castile Soap (this will likely be the last time I spray with Neem Oil, as I don't want residual oils as buds start swelling. Also fed 1/4 strength FOOP to ensure we head off any deficiencies.


Likes
2
Share


@Dameon0803
Follow
Day 36 - In the picture, I demonstrated the efforts I put in for leaf tucking, the back half, so that light can get deeper in the canopy. A had also removed all of the flowering cover crop to prevent it from going to seed. It served its purpose and now serves as compost for my outdoor garden.
Day 37 - This plant does not slow down! It is maxed out, for my preference, horizontally. Stretch is slowing down. Bud growth will now be the focus.
Day 38 - She really needed a haircut, so she got one. Everytime I do this, I honestly scare myself. I know the potential these plants have, but a mistake that would cause additional stress to the defol can change everything.. cover crop is also cut down and breaking down in my outdoor garden. One last spray down before buds appear and a good feeding to push her through this heavy strip. Love to see worms hanging out on the surface of the soil, breaking down all my top dresses.
Day 39 - She's praying to the skies! This plant isn't skipping a beat with vigorous growth! You can see how all those lower sites are now getting adequate lighting!
Day 40 - Realized I had stopped adding picture to demonstrate her height. She's a great height! Honestly taller than I had imagined! Nodal spacing is super tight at the top. She's going to have some huge nugs! Really debating on getting another natural co2 generator to get higher levels during peek flower. Loving this plant!!
Day 41 -
Day 42 -
Likes
9
Share


@Serhiosaez
Follow
Día tan esperado de esta cosecha de crítical mas con cogollos muy duros y muy apretado y compactos y grandes con un aroma muy fuerte con un olor a diesel

Likes
1
Share


@Krautis_IndoorFarm
Follow
Der Grow ist Gestartet 01.03. mit der Keimung. Nach 20 Stunden bei 28 grad zeigte sie ihre Wurzel.
Heute ist der 4.3 und sie hat ihren Köpfchen gezeigt.


Likes
2
Share


@ZuriEn
Follow
Defoliated, some lst again and lollipop. Pre flowering and "scrog" full already

Likes
17
Share


@Sergio_721
Follow
the seedlings germinated on September 22 in the biobizz light mix soil after 13 days I administered 1ml / lt. advanced nutrients ph perfect grow 1ml / lt. ph perfect micro 1ml / lt. 2ml / lt. b-52 2ml / lt voodoo juice after 4 days I repeated the fertilization with 1.4ml / lt of the main nutrients and 2ml / lt of b-52 after a few days I noticed some burnt tip signs of overfertilization so from day 12 I started giving demineralized water until the outflow for 3-4 times until a few days ago that I noticed a yellowing of the upper part and spots that look like calcium or potassium deficiency I was also wondering if I can do without the cal-mag since the ph perfect micro contains a lot of calcium. tomorrow I give the third dose of nutrients hoping they will recover since nothing has changed with the first two fertilizations
Days 39
they do not seem mileage even after a week of fertilization even if at very low dosages the next time I increase the nutrients and let's see what happens
Days 41 it looks like it's going well they still look nutrient deficient the next time we increase the dosage.
Likes
21
Share


@ButterfliesLittleFarm
Follow
Hello Diary.
The second week of flowering is over, as seen in the photos, Mimosa # 2 flew into the sky. She has grown 45cm in a week which is twice her size since last week.
Both plants look good and healthy. The color of the leaves is dark green and they shine as if they were varnished. Both have stretched quite a bit, especially Mimosa # 2, to whom defoliation has obviously come in handy.
Also after I put the bending clips, I directed the branches away from the plant to get as much light as possible.
We’ll see how the flowers continue to form and fill in, but for now, all is well.
Watering is now every two days, I added CalMg preventively twice and added one Easy Bloom Booster tablet.
Conditions at the "Farm" are not ideal, the temperature is around 29 degrees which is expected given the summer months.
Here’s what it looked like last week.
14/06/2021 - Day 30.
Watering. I always prepare about 8 liters of water, I regulated p.H. at 6.5, added 1.5 ml / lit CalMg and one Easy Bloom Booster tablet. With that, I watered all three plants evenly.
Temp / Humidity on the farm - 27.6 degrees and 40% humidity.
16/06/2021 - Day 32.
Watering. I lowered the p.H to 6.2 and added 1.5 ml / lit CalMg.
Temp / Humidity on the farm - 29 degrees and 50% humidity.
18/06/2021 - Day 34.
Watering. This time I didn't add any extras, I just lowered the p.H to 6.4.
Temp / Humidity on the farm - 29 degrees and 50% humidity.
19/06/2021 - Day 35.
Photography and height measurement.
Mimosa # 1 - 104 cm
Mimosa # 2 - 90 cm
That’s all for this week, see you soon.

Likes
6
Share

Likes
16
Share


@Dunk_Junk
Follow
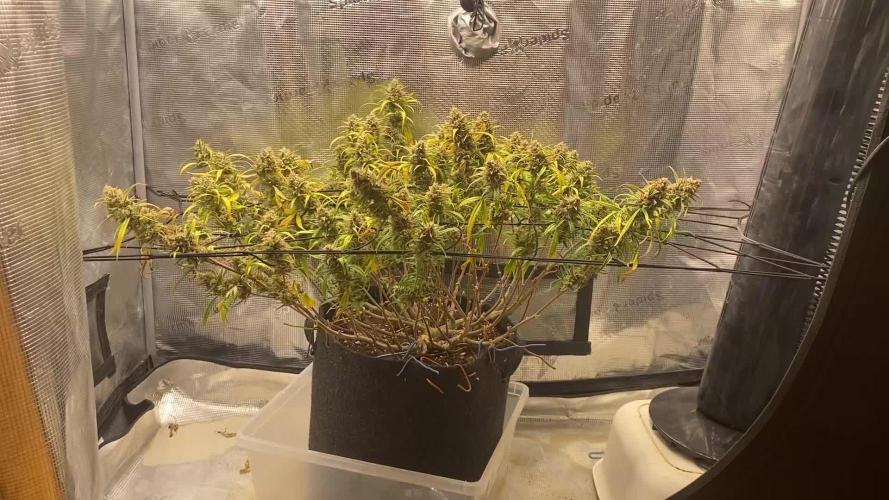
Not got a lot taller this week, but she's pushed out quite a few leaves!
Likes
48
Share


@Papablob
Follow
11/04 De retour sur le green. Elle a eu un peu soif. Mais elle murie bien 😊👍🤤
12/04 J'ai mesurer quelques sucettes. La plus longue fait dans les 32cm les autres tournent entre 20 et 25cm. 😊😋 J'en avais rêvé d'une comme ca..😍🤩
16/04 Elle termine sa semaine en beauté.👍😁


Likes
170
Share


@Master_weeda
Follow
Bonjour à tous les padawans et les maîtres jedis
Jour42 ma plante entre bien en floraison je pratique sur elle une defolliation pour permettre aux têtes de prendre la lumière
La floraison des plantes de cannabis
La plante de cannabis passe par différentes étapes de vie avant de parvenir à la récolte. Ces étapes sont : la germination, la pré-croissance, la croissance et la floraison.
Pour les autofloraisons il n'est pas nécessaire d'avoir de changer le cycle de lumière elle entre en floraison automatiquement voilà d'où elle tient son nom "d'autofloraison"
L'origine de l'auto-floraison vient de la sous-espèce "cannabis sativa ruderalis" , qui à l'origine produit de très faibles niveaux de THC. C'est en croisant cette variété de marijuana avec d'autres qui produisent des niveaux de THC plus élevés qu'à vu le jour ce magnifique compromis que sont les variétés auto-fleurissantes avec des taux de THC très satisfaisants. En parallèle, cela a permis d'améliorer la production de ces variétés, qui initialement étaient exceptionnellement basse.
Pour des résultats optimaux, en culture Outdoor (extérieur), je recommande que la germination des graines de marijuanaAuto-flo se fasse entre avril et août.
En culture Indoor(intérieur), la photopériode idéale que ce soit pour la croissance comme pour la floraison est de 20h de lumière. N'oubliez pas que ces graines ne sont pas tributaires de la photopériode pour passer en floraison.
Il est préférable d'utiliser des pots d'une capacité de 10 à 20L dès le début, étant donné que leur cycle de vie est réduit, les auto-flo n'ent pas besoin de plus de volume pour se développer. Vu sa petite taille (et la discrétion) elle fait l'objet d'un bon choix pour la culture de cannabis sur balcons.
La première variété de Lowryder auto-floraison a été créé à partir de cannabis indica sativa croisé avec des génétiques de cannabis sativa rudelaris par la banque de graines de marijuana "The Joint Doctor". Puis vinrent la White Dwarf de "Buddha Seeds", la Roadrunnerde "Dinafem", l' Auto Stoned d' "Autofem", la Speed Devil de "Sweet Seeds" , la Maxi Gom de "Grassomatic", la Flash, la Gnomo de Kannabiaet bien d'autres.
Jour42 defolliation (video)
Avant toute chose n'oublions pas de bien désinfecter ses outils et bien ce laver les mains.
Quesque la defolliation ?
LES CULTIVATEURS AMATEURS, PRENEZ GARDE, MAIS NE PRENEZ PAS PEUR
La défoliation consiste à retirer les feuilles des plants de cannabis en intérieur afin d'accroître le rendementfinal. Le cultivateur amateur doit faire preuve de vigilance lorsqu'il commence à appliquer cette technique de taille. Malgré le débat sans fin entre ceux qui prônent cette technique et ceux qui la dénigre, il n'y aucune raison pour qu'un amateur ne s'y essaie pas afin de voir si ça lui convient ou non.
COMMENT DÉFOLIER
Que vous tailliez les feuilles ou les branches des plants de cannabis, il vaut mieux utiliser un sécateur stérile qui est confortable en main. Arracher des feuilles à la main manque de finesse et engendre souvent par accident, l'arrachement des couches d'une tige en plus de la feuille. L'objectif principal de la défoliation est de permettre une meilleure pénétration de la lumière et de promouvoir la production de plus grosses têtes. Les feuilles éventails qui font de l'ombre doivent être retirées. Tailler la tige principale et/ou les pousses secondaires n'est pas de la défoliation.
La règle d'or lorsque vous donnez à vos plantes un rafraîchissement est de commencer avec les feuilles nourricières les plus grandes et les plus larges, en taillant du bas vers le haut. Il est important de retirer les feuilles stratégiquement et non pas au hasard. Pensez également qu'il vous faut limiter votre rafraîchissement à approximativement 10 à 20 % des feuilles totales de votre pied. Il est très facile de s'emporter durant la taille et de se retrouver avec des plantes chauves. Un excès de taille de feuilles empêchera la photosynthèse et paralysera vos plants.
QUAND FAUT-IL DÉFOLIER
Il est assez rare d'appliquer la défoliation comme seule technique pour obtenir un fort rendement. La taille des feuilles est généralement associée à d'autres méthodes de tailles et de palissage pour un meilleur rendement telles que le topping ou étêtage, le FIMming, le LST, le manifolding, le supercropping et le ScrOG. Les cultivateurs utilisant la méthode ScrOG auront besoin de retirer toutes les croissances inférieures ainsi que les feuilles et les tiges se trouvant sous le filet.
Les plants de cannabis peuvent être défoliés dès lors qu'ils sont passés de la phase de plantule vers la phase de croissance végétative. Cependant, il est recommandé aux cultivateurs amateurs de laisser aux plantes 1 à 2 semaines de croissance végétative avant de s'attaquer à la défoliation de celles-ci. De plus, certaines variétés sont plus sensibles à la taille que d'autres et de ce fait, seront plus stressées par la taille des feuilles. Surveillez minutieusement le comportement de vos plants après la taille. Une période de convalescence de minimum 3 à 7 jours avant de recommencer la défoliation est fortement recommandée pour éviter trop de stress aux plants. Les cultivateurs peuvent également défolier pendant la phase de floraison, ce qui permettra à l'énergie de la plante d'être concentrée vers la production de têtes tout en limitant l'ombre et l'excès d'humidité. Néanmoins, il est important de ne pas défolier trop tard sous peine de simplement blesser ses plants inutilement.
LES AVANTAGES DE LA DÉFOLIATION
Évidemment, l'avantage numéro un de la défoliation, c'est l'augmentation du potentiel de rendement de cette technique de taille pour tous types de cannabis allant de la photopériode aux variétés autofloraison. Ce n'est pas un secret que les fleurs qui reçoivent plus de lumières deviennent plus grandes et larges que celles dissimulées dans l'ombre des feuilles. De plus, retirer les feuilles intérieures des plants touffus aide à prévenir toutes menaces de moisissure. Les plants très feuillus avec un feuillage intérieur dense produiront une quantité importante de têtes pop-corn. Dans le pire des cas, les branches de têtes et les têtes qui sont denses succomberont au pourrissement.
Si vous observez des gouttes d'eau se former sur la surface des feuilles, il est grand temps de penser à faire de la défoliation. Libérer la zone inférieure et médiane des feuilles est un excellent moyen d'améliorer la circulation de l'air.
LES DÉSAVANTAGES DE LA DÉFOLIATION
Les plants de cannabis en intérieur bénéficient de la défoliation pour deux raisons. La première est parce qu'ils reçoivent la lumière d'une source stationnaire au-dessus d'eux, et la deuxième est parce que les conditions environnementales sont contrôlées par le cultivateur et non Mère Nature. Les plants d'extérieurs eux, n'y gagnent pas beaucoup, car les cas échéants se vérifient pour eux. Le soleil traverse le ciel, illuminant sur sa route, différentes portions de la plante de son lever à son coucher.
Les cultivateurs en extérieur n'ont pas besoin de manipuler les plantes afin qu'elles se développent en adoptant une structure plate puisque le soleil est infiniment plus puissant que n'importe quelle lampe de culture et qui plus est, il est toujours en mouvement. Tailler les feuilles des plants extérieurs les rend également plus vulnérables aux conditions humides et brise leurs barrières naturelles contres les nuisibles.
De nombreux cultivateurs d'intérieur peuvent, et malheureusement, c'est souvent le cas, réduire le rendement final à cause d'une défoliation faite au mauvais moment et/ou excessive. Tailler les plantules n'est pas conseillé et engendre souvent des plants nains. Scalper les plants matures est encore pire, et au lieu d'obtenir de longues branches de têtes, vous obtiendrez probablement encore moins de fleurs. De même, tailler des plants malades ou en mauvaise santé à n'importe quelle période de la croissance risque de paralyser la croissance plutôt que d'encourager la formation de fleurs denses.
Jour44 Arrosage une fois sur 2 topmax de biobizz
Jour46 arrosage avec de l'eau ph6.3 à laquelle j'ajoute 0.8g par litre d'eau de feeding enhancer greenhouse.
Jour47 léger arrosage.
Jour48 léger arrosage

Likes
9
Share


@pascal_dop
Follow
Das Umtopfen war erfolgreich und die Pflanzen wächst und wächst und wächst .... und das obwohl ich sie ein paar Tage nicht gießen konnte 👏

Likes
42
Share


@Gabarram
Follow
25/11 Day 73 already and starting another week (week 4 since I changed the photoperiod); budlets are not completely formed but still look like more of preflowers. She continues to stretch, she's growing 4-5 cm per day, a complete beast. I think she could be stretching more before the aspect of the preflowe/budlets cahnge much. Comparatively with the pictures of other Grinspoon's growers, the flowering stage is going on very slowly...well I thought the same when she was at vegetative stage, I saw everybody's Grinspoon specimen was much bigger and much sooner than the one of mine, but in the end her growth has been so big that I 'd have liked better she hadn't grown that much. She's entirely taken over the grow room! The light spectrum I use does not promote much stretching per se, as I've seen it on many other hybrid strains in the last two and a half years since I have this system. It's a 80cm*80cm*160 cm grow box (Darkbox) and so far I think the environment for the plant is, in general, let's say fine (except perhaps the hottest days of summer and the coldest days of winter). Humidity is a little high, becuase my place is humid and I don't specailly control it but I'd guess it is roughly 60% HR throughout the year. Being that said, I blame this stretching entirely to her genes and yes, my lack of caution to have prevented all this enormous growth from happening. Really I didn't want to regret later, of not having the size of the plant I wanted and also for not knowing how much she would stretch (I wouldn't have thought this much) I let her grow more than I should have. But one learns from his mistakes and by growing new strains, every strain has different phenos and one never knows which is destined to one's plant.
The fertigation solution is now 0.5 mL/L Pro-Silicate; 1,3 mL/L Cal-Max; 0,4 g/L Flower Power Bloom fertilizer at pH 6.1-6.2, EC is 1.35 mS/cm and I raised the fertigation volume to 6L keeping the frequency.
Day 74 (26(11) she keeps on stretching, I'm seeing another way to raise the lights the maximum I can, I see the budlets forming more definitely so I don't think she'll be stretching much longer, perhaps and luckily this week she stops doing it. Meantime all I can do is keeping the tallest shoots out of the line of the led lights to prevent bleaching of the leaves or the budlets being burnt. God help me with this. I'll post some pics tomorrow if I have more time. My plants do take more than 60% of my free time at home (but I <3 growing marijuana).
Day 75 (27/11) I used a few hooks from the bathtub's curtain to hold the growlights and managed to raise them a precious distance.
Day 76 (28/11/2019) i jumped off the bed to assess the sitaution and evertyhing was normal, a big blade burned it tip for proximity to a led light, but the bud tips seem no to be damaged -yet-because of the strong lights/heat. One fertigation (inflow EC 1.35 mS/cm. EC run off 1,5 mS/cm) "en dan ben ik klaar met haar".
Day 77 29-11-2019 she keeps growing tall and she's become something almost unmanageable. A couple of shoots have surpassed the lights. If only they won't be burned 🙏
Day 78 (30/11) She seems to be stopping growing. When I saw her I realised extraction fan was gone, fortunately being Saturday I could find a replacement soon. I find that run off pH is 5.3 (collected at the last portion the run-off, 2nd fertigation of the day. Isn't it a little too acidic to leave this issue untreated?
Day 79 (01/12) after a reply from @knut at cocoforcannabis.com I am advised not to take in consideration runoff pH but to take care of pH in and EC "in", as for the runoff, just checking EC, because pH varies for the interaction between nutrients and is of zero interest, so I was told.
The extractor is working fine and it is a lot more silent than the older one.
Last for today, I'd say I'm happy she seems to have completed the stretching phase, although there are a few shoots at scarce centimeters from the ceiling of the box as a consequence. The other shoots are fine, at a reasonably good position from the lights.
It was very hard times with these last weeks and the damned stretching. If I had to evaluate the growing difficulty of this strain, I'd say "quite hard" because she's pretty much unmanageable at the stretching phase, unless proper caution measures be taken before it's too late.
Day 80 (2/12/2019) To end week 12 (4th week flowering) I see it seems that stretching phase is over so I can breath again. She still may be growing one or two centimeters, that I dunno for sure, but judging from the accelerated rate of stretching I have seen since the last two weeks, it appears that she won't get taller. She's almost tocuhed the ceiling :/ I see a slight swelling of the baby buds, like the calixes that are starting to form.
Likes
13
Share


@cookingwithninja
Follow
Week 7 day 3. I stopped giving soluble nitrogen today. 1/2 reduction in soluble pk. Adding solubles in water drops my ph perfect so I don’t use ph down in flower. Now today I start adding a little ph down as the 1/2 strength soluble pk brings water to about 7.4, so reduction to 6.9
Likes
77
Share


@Ukfarmer420
Follow
Hi guys,
So week 4 now and all 5 should be in flower/preflower stage by next week, the gelatocake are doing brilliant im not so sure about the sherbert mimosa.
2 lights running now so bloomplus bp2500 for gelatocakes and marshydro tsl2000 for the mimosa
550watt actual in ghe room now
I Will update the the week and add pics.
I have popped 2 x dark phoenix inhouse genetics and 2 x blue cheese from big buddha all 4 photo fems and will be vegging them in the back of this little room lol.
Wish me luck and happy growing people. 💚💪
