
Processing
Likes
Comments
Share


@KaungKaung
Follow
Floragro/micro/Bloom At what age should i give it to you?

Likes
18
Share


@Sabac
Follow
Plantitas sanitas.
2 semana de flora y van creciendo muy bien.
Hoy les Hice defoliacion..


Likes
10
Share


@420DeepGrow
Follow
Gracias al equipo de Zamnesia, Marshydro, XpertNutrients y Trolmaster sin ellos esto no sería posible.
💐🍁MAC 1:
La MAC 1 es una variedad muy solicitada, creada originalmente por Capulator y distribuida solamente a determinados criadores y cultivadores. ¡Pero ahora ya puedes cultivar este tesoro en casa y disfrutar de sus cogollos densos, jugosos y potentes!
Gracias a su densa copa y vigor, la MAC 1 es una opción ideal para LST, poda apical y otras técnicas de entrenamiento (incluido el lollipopping). Cuando entra en floración, las plantas de la MAC 1 se estiran bastante y una vez maduras pueden alcanzar una altura de 160cm en interior y más de 180cm en exterior. De media, las plantas feminizadas de la MAC 1 necesitan un total de 9-10 semanas para terminar la floración, momento en el que estarán repletas de cogollos índica pequeños y compactos.
🌻🚀 Consigue aqui tus semillas:
https://www.zamnesia.es/10906-zamnesia-seeds-mac-1.html
Código Descuento 20%: ZAMMIGD2023
💡TS-3000 + TS-1000: se usaran dos de las lámparas de la serie TS de Marshydro, para cubrir todas las necesidades de las plantas durante el ciclo de cultivo, uso las dos lámparas en floracion para llegar a toda la carpa de 1.50 x 1.50 x 1.80.
https://marshydro.eu/products/mars-hydro-ts-3000-led-grow-light/
🏠 : Marshydro 1.50 x 1.50 x 1.80, carpa 100% estanca con ventanas laterales para llegar a todos los lugares durante el grow
https://marshydro.eu/products/diy-150x150x200cm-grow-tent-kit
🌬️💨 Marshydro 6inch + filtro carbon para evitar olores indeseables.
https://marshydro.eu/products/ifresh-smart-6inch-filter-kits/
💻 Trolmaster Tent-X TCS-1 como controlador de luz, optimiza tu cultivo con la última tecnología del mercado, desde donde puedes controlar todos los parametros.
https://www.trolmaster.com/Products/Details/TCS-1
🍣🍦🌴 Xpert Nutrients es una empresa especializada en la producción y comercialización de fertilizantes líquidos y tierras, que garantizan excelentes cosechas y un crecimiento activo para sus plantas durante todas las fases de cultivo.
Consigue aqui tus Nutrientes:
https://xpertnutrients.com/es/shop/
📆 Semana 3:
Muy buena semana, he aplicado un riego solamente con agua de manantial para reducir la cantidad de sales acumuladas en el sustrato y se ha notado una mejoria .
Creo que le quedan unas dos semanas por estirar, parece que va a ser una buena cosecha.
Se mantiene un buen control del cuarto de cultivo gracias a @marshydro y @trolmaster.
Mantengo las dosis de 1/3 de nutrientes recomendados por el fabricante.
Potencia del foco 80%

Likes
3
Share


@Cortez_The_Konqueror
Follow
Got 2301 into her final home in a 3 gallon pot, I used grow dots at 1 table per gallon of medium and made the bottom 3rd of the soil a little hot with fresh ocean Forrest soil, and purple cow non manure compost.. and moved her to my new ac infinity 3x3 tent!

Likes
158
Share


@love_2_grow
Follow
D64.
We're at the start of the fifth week of flower, and today, the Purplematic moved out, and now the Gorilla girl is all alone in the tent.
I also switched out her light from the big Kingbrite to the much smaller Viparspectra P600. I need the bigger light in my other tent, and even though the Viparspectra is a low-power light, I believe it should be enough, considering how small the Gorilla girl is. I could have put in one of the Greenception lights from my other tent, but it honestly was too much of a bother.
------------------------------
D66.
Yesterday, I gave her 2.5 liters of water @ pH 6.5 with humic acid and calmag.
Today, the green lacewing larvae (Chrysoperla Carnea) for combatting the thrips in my photo tent arrived, and I also dispersed a few of them in this tent. I haven't seen any thrips damage on the Gorilla girl, but I figured it wouldn't hurt to be proactive.
I also did minor defoliation to increase light penetration and air circulation.
------------------------------
D68.
Not much to report besides that this is one STINKY girl. She stinks up the entire lungroom, and I have ordered a new carbon filter.
Her senescence is slowly increasing, and I suspect she will be done soon-ish, although I haven't even looked at her trichomes yet.
------------------------------
D70.
We're at the end of the fifth week of flower, and chop day is getting close.
Her senescence is progressing nicely, and today, I checked her trichomes for the first time and already found quite a few amber ones.
She is coming down in a few days, but it won't be a large harvest due to her stunting. However, she smells fantastic, so I'm counting on a great smoke.
I went to WAR today against the spider mites we have in our ornamental plants in the apartment. I sprayed all plants with my homemade pesticide (capsaicin, alcohol, horticultural soap.) since I had it at hand. If that fails to knock the spider mites back, I'll bring out the neem oil instead.
The infestations aren't bad (yet), but it would suck to get mites into my tents, so better to be proactive.
------------------------------

Likes
4
Share

Likes
154
Share


@CBD_Sweden
Follow
@FAST_BUDS,
Hi all the happy people here in GrowDiaries.
This is my second cultivation ever and it will be fun to try a bigger space than my closet grow.
First, I'm just going to say I'm done with the construction of my new growroom.
I put some pictures on the construction here in week one.
The room is 2.14 meters by 1.7 meters and has a ceiling height of 2 meters.
It provides a floor area of 3.6 square meters.
I use a 54 Watt Lightwawe T5 for germination and 2 Pcs 400 Watt HPS lamps.
I have a channel fan that replaces the room air about 40 times an hour to get a comfortable environment in the room, the air enters a fresh air intake from the outside.
The air is purified through a carbon filter to then leave the room to the rest of the basement.
Then I use that heat to heat the rest of the basement.
I will use 8 pcs 15 liter Autopots to grow with and a 100 liter water tank that supplies the pots of water and nutrition.
I will grow completely organically in soil and will watercure my buds to get the best possible medicine for me.
But there are no cultivation rooms to be displayed here, so I continue with what is most important.
Today I have put my seeds in my moisture dome and hope the seeds have germinated within a few days.
I am very excited to see how the new growroom will work and how this new secret CBD plant from @FAST_BUDS, will turn out.
..............................................................................................................................................................................................................................................................................................................................................
Update 2017-08-15. Both seeds have germinated and planted in small pots inside the humidity dome.
I'm so glad it worked so well and now it's just hoping they'll start growing and become 2 big healthy girls :)
...............................................................................................................................................................................................................................................................................................................................................
Update 2017-08-16. I have mixed my own soil today. Its 40% sieved peat harrow H2-H4 0-30 mm, 45% sieved peat harrow H4-H6 0-30 mm. 5% sand and 10% of compost soil. And i use 15% of perlite and mix it all together.
....................................................................................................................................................................................................................................................................................................................................................
2017-08-21 The 2 sisters are doing great, Nr2 is a bit after Nr1 . Some new pics.
............................................................................................................................................................................................................................................................................................................................................................................
2017-08-23. Transplanted from humidity dome and the small germinating pots to 15 liter autopots.
................................................................................................................................................................................................................................................................................................................................................................................
2017-08-27. The girls have settled in to there new home of the 15 liters autopot after a little transplant chock. Now the real week 1 starts for me and the girls. 4 new pics.
---------------------------------------------------------------------------------------------------------------------------------------------------------------------------------------------------------
2017-08-29. New movie of the girls. Its no water for 3 days now so the roots develop more and match the plant above the soil. The temp controlled fan is awesome, its easy to set what temp you like to have in the room. Right now its 28 celcius. And humidity is 56%.
--------------------------------------------------------------------------------------------------------------------------------------------------------------------------------------------------------------------------------------------------
2017-08-29.
Hello to you who read my diary, I just want to say that I am pleased that you have chosen to check in with me and in my diary.
I just want to say that I do this for myself and for a steady flow of my medicine.
Everything you read and see in my diary is 100% honest and I will never distort or beautify anything here.
I document my crops so that I can learn from my mistakes and also to look back at those different crops.
I try to update with pictures every day and with text if something special has happened in the garden.
This is my strainhunt for the best medicine and the beginning of my journey with cannabis and the cultivation of it.
-----------------------------------------------------------------------------------------------------------------------------------------------------------------------
2017-08-30. Cleaned the room this morning, just vacuuming and cleaning with chlorine solution. Im testing the fan to control temp and humidity, it works great.
Added some pics with measurements and a movie. Everything is looking great right now.
-----------------------------------------------------------------------------------------------------------------------------------------------------------------------------
2017-08-31. New video of the girls.
-------------------------------------------------------------------------------------------------------------------------------------------------------------------------------
2017-09-01. New pics and videos. Gave each of the girls with 2 ml Alg-A-Mic, 4ml Bio-Grow, 4ml Bio-Heaven and 10 ml Formulex mixed in 2 liters of water.
I hope they like it :)
-------------------------------------------------------------------------------------------------------------------------------------------------------------------------------------------------------------------------------------------
2017-09-02. New pics and the girls liked the water and nutrients yesterday.
-----------------------------------------------------------------------------------------
2017-09-03. Video of the girls this morning.
Kl 16.00. Did some defoliation on the girls. Videos added.
KL. 23.00. New video.
----------------------------------------------------------------------------------
2017-09-04. The start of week 3. New pics. Im trying to LST the girls.
KL 23.00. Added new video.
--------------------------------------------------------------------------------------------
2017-09-05. KL 08.00. Cleaned the room this morning, just vacuuming and cleaning with chlorine solution.
KL 12.00. The girls got 2 liters of water each with nutes in it, added a video.
-----------------------------------------------------------------------------------------------------------------------------------
2017-09-06. KL 08.00. The girls woke up after their beauty sleep, the leaves are always a bit down after 6 h of darkness, but they will stretch now when the HPS lamp starts.
Everything looks good and I keep trying to tuck the leaves so they get the maximum amount of light where needed. Added pics and video.
KL 23.30. Did some LST and leaftucking.
--------------------------------------------------------------------------------------------------------------------------------------------
2017-09-07. This is day 21 from sprouting. I have never tested PH in my grows, when growing organic in soil iv learned that it adapt PH by it self. But im curious by nature so i had to test.
Kl 10.00 Tested PH in the soil, it was 6.9 and tested my tap water and it was 6.8. Added video/pics of the girls, its 10 H after defoliation, LST and leaftucking. I think its looking good.
Kl 22.30. New pics
-------------------------------------------------------------------------------------------------------------------------------------------------------------------------
2017-09-08 KL 08.00. Good morning, added new video.
2017-09-08. Kl 23.50. Gave every girl 3 liters of water and nutes, added new video.
-----------------------------------------------------------------------------------------
2017-09-09. Kl 21.00. Defoliated a lot today, new pics.
---------------------------------------------------------------------------------
2017-09-10. Kl 08.00. Last day of week 3. New video.
2017-09-10. Kl 23.00. 3 New videos.
---------------------------------------------------------------------------------------------
Likes
10
Share


@Yogsothoth
Follow
Nothing much to say, enjoyed it. Can't wait to see how the next grow goes. Very happy with the harvest here, i was hoping to pass the 100g cap, and it's done. By a large amount. If the next grow gives me anything like that, i'll have to stop growing so I can actually smoke all that!

Likes
7
Share

@GERGrowDesigns
Follow
Welcome to Flower Week 4 of Fast Buds Purple Haze Auto
I'm excited to share my grow journey with you from my
FastBuds Project . It's going to be an incredible ride, full of learning, growing, and connecting with fellow growers from all around the world!
For this Project , I’ve chosen the Feminized Auto Purple Haze:
Here’s what I’m working with:
• 🌱 Tent: 120x60x80
• 🧑🌾 Breeder Company: Fast buds
• 💧 Humidity Range: 60
• ⏳ Flowering Time: 8 Weeks
• Strain Info: 23%THC
• 🌡️ Temperature: 26
• 🍵 Pot Size: 12
• Nutrient Brand: Hy-Pro
• ⚡ Lights : 600W x 2
A huge thank you to Fast Buds for allowing me to try my Best with this amazing collection from Automatic and Photo Strains they managed to Sponsore . Big thanks for supporting the grower community worldwide! Your genetics and passion speak for themselves!
I would truly appreciate every bit of feedback, help, questions, or discussions – and of course, your likes and interactions mean the world to me as I try to stand out in this exciting competition!
Let’s grow together – and don’t forget to stop by again to see the latest updates!
Happy growing!
Stay lifted and stay curious!
Peace & Buds!
Likes
2
Share


@Indicaianer
Follow
Die Samen wurden für 48 Std in Wasser gelegt, als sich die ersten wurzel zeigten wurden die automtiks in den endtopt (11liter) und die Feminisierten erstmal in einen kleinen Topf, wird später umgetopft


Likes
6
Share

@MadeInGermany
Follow
Hey guys .
My cutting heating broke 3-4 weeks ago, which was fixed immediately and everything went wonderfully.
Now, 3 days ago, the central heating broke down in the entire room, so that at night I only have temperatures of around 13 degrees :-( .
One or the other lady is slowly starting to see a phosphorus blockage, as this can no longer be absorbed at temperatures below 15 degrees, like many other nutrients :-( .
A friend looked at the heating yesterday and came to the conclusion that a real company had to do it, which is by no means possible for a stranger to enter my room.
I quickly ordered heating mats for all the boxes so that the ladies could at least get warm feet.
That's all I have this winter full can do .
Let's hope everything will be fine 🙏🏻.
As soon as the heating mats are attached in the coming days, I will post them in the pictures.
Now for the update.
Despite the severe cold, the ladies are still doing well and have made good progres .
The ladies only had to be watered once this week, each time with 1 l, because it absorbs the water very slowly because of the cold and I don't want to overwater it.
I took every single plant in the pot to take a close look at their roots.
These are snow white and look very healthy 🙏🏻.
It was also the last time neem oil sprayed so that the last trips are finally gone.
Otherwise everything was checked and a lot of planning was done, like I do with the heating mats.
Since a friend had the same problem in one winter and the heating mats got 10 degrees plus on the pots, I am very confident that it will at least bring something for the last cold month 😃
🙏🏻.
I'll start flowering tomorrow by switching to 12 / 12 h because the ladies mustn't get too high because the small flowering tent is only 160 cm high :-)
until then have fun and stay healthy 🙏🏻
👇🏼👇🏼👇🏼👇🏼👇🏼👇🏼👇🏼👇🏼👇🏼👇🏼👇🏼👇🏼
You can buy this Nutrients at :
https://greenbuzzliquids.com/en/shop/
With the discount code: Made_in_Germany you get a discount of 15% on all products from an order value of 100 euros.
👇🏼👇🏼👇🏼👇🏼👇🏼👇🏼👇🏼👇🏼👇🏼👇🏼👇🏼👇🏼
You can buy this strain at :
Clearwater Seeds
Water 💧 💧💧
Osmosis water mixed with normal water (24 hours stale that the chlorine evaporates) to 0.2 EC. Add Cal / Mag to 0.4 Ec Ph with Organic Ph - to 5.8 - 6.4
MadeInGermany
Likes
15
Share


@HylianGrass
Follow
Week two is upon us ! I have a new pocket size humidifier and it works great!! The low temperatures of my nights already bring out some purple on the leaves. Im pleased to see this so early in its lifespan. Although i have to be careful not to stunt her with too cold nights. I mixed a 1/4 of the recommended dose of nutrients for her first feeding. By doing so im reducing the risk of nutrients burn. To be honest i will get a few burnt tips on the firs set of leaves but id rather have a bit too much then less at this stage. The first leaves will drop first so i wont mind them being less attractive. The internode distance is good for a indica so far and i am pleased of the results so far. The glasses i use are yellow tinted and apparently they do a good job at correcting the colours for spotting deficiencies
Likes
Comments
Share


@Shoeless31
Follow
All caught up. Transplanted into 3 gallon pots. Lightly watered with some calmag and recharge
Roots were good and just about ready for the upgrade. No pics but I’ll keep this in mind for my next grow and take some. I know I looked on here and watched YouTube videos to see how was done and it has been very helpful

Likes
58
Share


@Mrs_Larimar
Follow
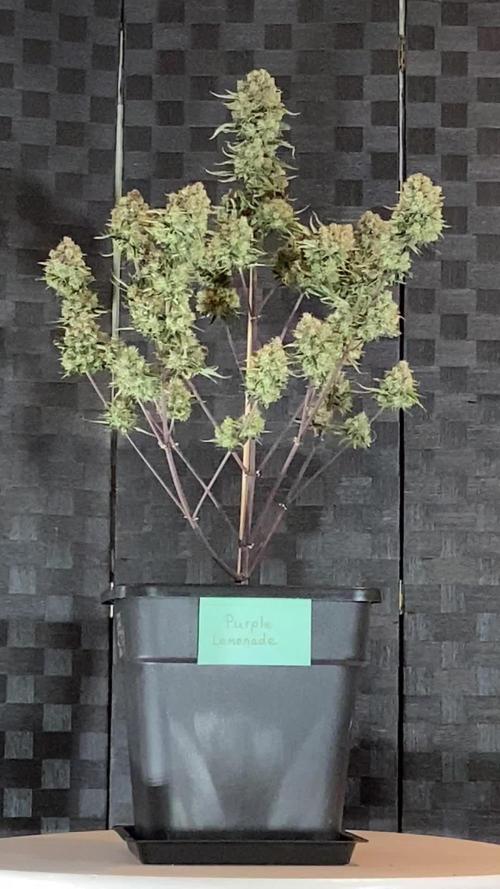
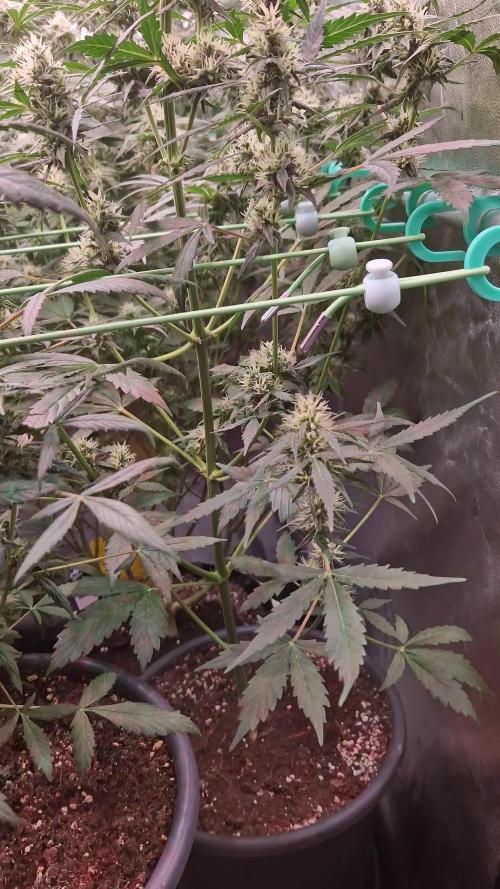
April, 5th
I think San Fernando Valley stopped Streching
she can concentrate no in developing the Buds😆
It is getting quite full in the Tent, the Plants growing with alot of Plantmaterial
Iam watering Dailly with beneficals, and feeding every other Day, until now with the
Vegetation Fertilisers, but from tomorrow on they get Bloom fertilisers
The silica Todressing worked wonderful, i could strenghthen the connective Tissue
Iam quite happy with this Gentics, they were vigor Growers
Hoping for delicious Buds😜

Likes
11
Share

@TrickzGrowz
Follow
Ich komm aus den Staunen nicht raus, wie riesig der Headbud jetzt schon ist!


Likes
11
Share


@Professor_Daank
Follow
Google doc for nute schedule: https://docs.google.com/spreadsheets/d/1HtHnZOxMHtBK5DFQjpBun2lbhDxYVhI7lJaq4W6xbyk/edit?usp=sharing (Choose Advanced at the Bottom)
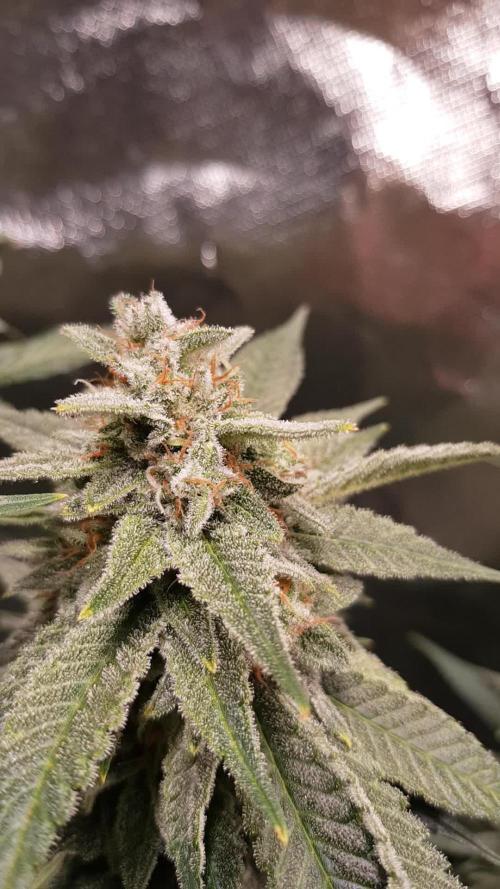
They are so sticky. Trichomes are everywhere.
Cruise control, no issues. This BP3000 by BloomLED is doing fantastic.
Sensi Coco Bloom A - 16ml
Sensi Coco Bloom B - 16ml
B-52 - 8ml
Overdrive - 8ml
Bud Candy - 8ml
Nirvana - 8ml
Sensizym - 8ml
Rhino Skin - 8ml
Bud Factor X - 8ml
Fish Sh!t - 6ml


Likes
79
Share


@Nebula420
Follow
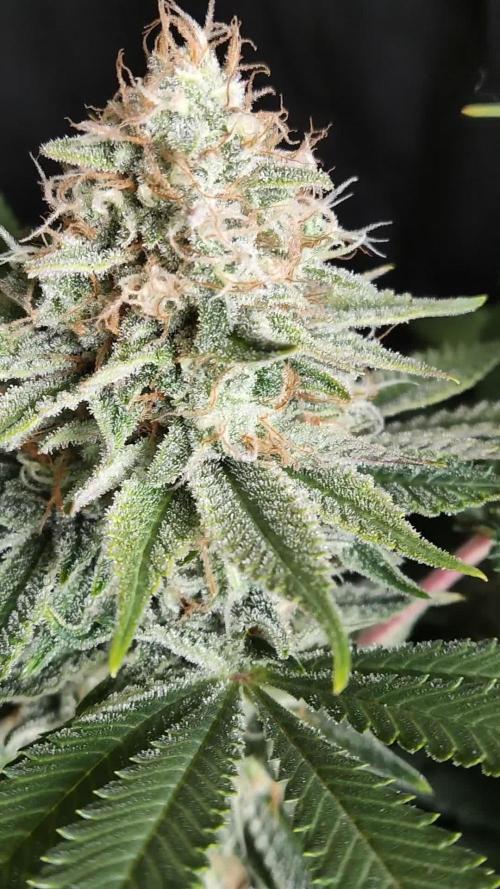
ShiskaBerry grow well, everything is good, no have any problem.
ShiskaBerry is very high-yielding strain, very dens frosty buds.
Smell very strong, amazing smell like berries, and pine.
Thanks to everyone who follows my grow reports, and Barney's Farm for nice genetics.