Likes
Comments
Share
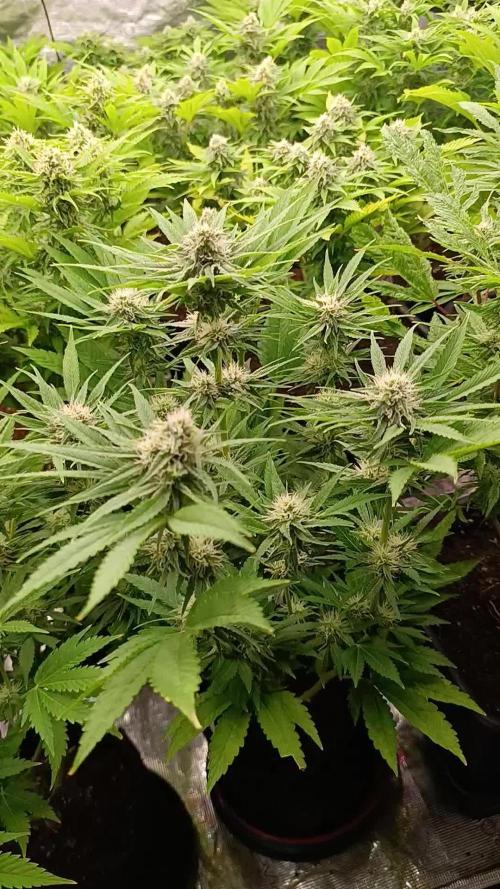
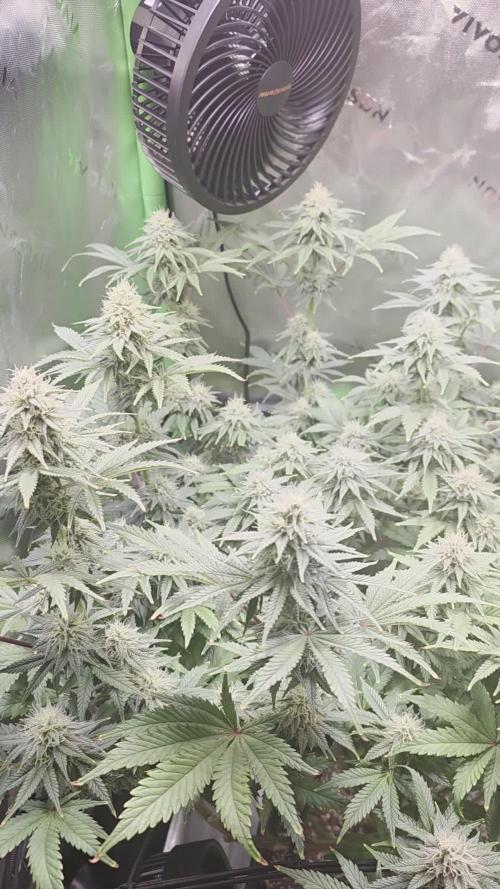
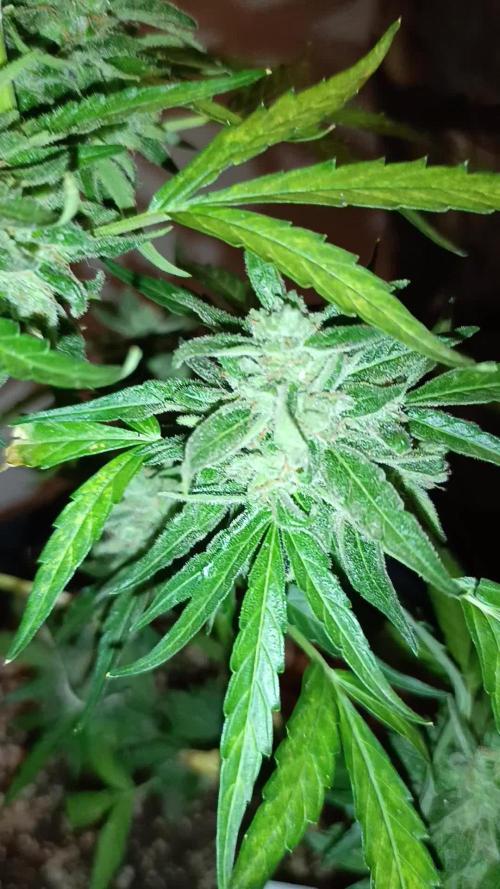
So this is day 40 of flowering,I had a slight PH issue with the Lionheart (Granddaddy Crack) plant which is the light green plant, back right. I was able to fix the PH issue by flushing with 6.0 Ph'd water. Other than that everything is looking beautiful. Lot's of trichome development and the buds are setting nicely.The Malawi plant at the back left (tall 100% sativa) is also starting to set beautifully. Malawi has a long flowering time (up to 70 days!) which means the colas will be huge hopefully.
Likes
10
Share
Unos días más y ya pasamos a florar. Realizada un poco de la defoliación y saqué los esquejes. El día que pasemos a florar, haré una nueva defoliación más “violenta”, conocida como Schwazze o Schwazzing. Veremos qué sale de este cultivo, viene todo muy bien 👍 😎💪
Likes
6
Share
@Ninjabuds
Follow
It's a nice change of pace to have these warmer temperatures, even if it's not quite spring yet. Low 40s during the day is a lot more comfortable than what we've been dealing with lately. Hopefully, this is a sign that spring's around the corner. It's crazy how much my permanent marker plants have grown! They've really taken off. One's got these super cool purple stems, and the other's covered in buds – it's gonna be beautiful when they bloom.
Likes
42
Share
Hey guys, Like I said last week, this week was another cold rainy week. Discoverd some budrot on my Shamans, but not mayor problems. Therefore I decided to Harvest my Shamans at the end of this week. Knowing that in the upcomming weeks it will get even more colder, more rain and more bud rot. Luckly I only gave them water and one time with Humic-Blast and enzym+. Thats not a proper flush but better then full nutrients in the soil/plant. If it wasn't for the colder climate, i would had let them flower for another 1 to 2 weeks because they really started to thicken and the flowers were swelling. But at the end i rather have smokable buds then budrot buds,,, Weather for the upcomming week is 70% to 92% rain with 11-14 degrees Celcius and at night even 7-9 celcius. So there is no point by risking all of my buds to rot, in hope for some swelling which may never come with this colds The Critical Kushes where in their 4th week of flowering, going into the 5th. I have no other choice to keep them at least for another 2-4 weeks, lets see how it goes. I don't mind spending nutrients on maybe a lost cost. Somehow GD minimalize the videos after putting 10pictures on the diary, Just click on the next picture and click on the right arrow to go to the videos. See yall next week :)
Likes
5
Share
We are on week two of flowering and the ladies are loving it .. we defoliated and pulled some branches around increasing air movement and light penetration.. The cheese has been a little picky .. lighter on the nutes and doesn't like training very well..The team @seedsmen seeds have bomb genetics and I can't wait to stArt my next seedsman diary sooo good ..keep an eye out for week three ..
Likes
39
Share
The veg cycle went well and with out any major issues. Even the the pH was bouncing, she never showed signs of deficiency or stress. It wasnt until flower set in that they got real sensitive to the pH fluctuations and I had to change up some of my nutes to get her back in line but damage was doe that prevented her from swelling up in time before the trichs started to really go amber. Lesson learned, stick to tried and true nutrients and only change up a bit at a time. I have not given up on masterblend nutrients, they veg'd great on it. I will try it again this time with proper pH down instead of the TNB. Once I have processed the trim and larf into dry ice hash, I'll update with more pics and weights of hash. I also feel that heavy defoiling would have helped greatly as well. They both had thick bushy centers and I let Lloyd go more natural and Harry I defoiled some along the way. Harry produced more and nicer quality buds vs no defoil Lloyd. Running a dutch bucket set up for the first time was a big learning curve from using the largest grade perlite to reservoir size to system layout and maintenance. I really enjoyed the overall hands off watering but would recommend going with a much larger reservoir than twice your buckets capacity, milder ec swings and less top offs. Now I am fully impressed with the lighting. I only used 220 watts in a 4x2 tent, yes only 220 watts but still yielded 344g of dried buds or 1.57g/watt plus another 200g of larfy stuff for the hash/edible pile plus a good amount of trim. Never had any heat issues and they just simply put out the PAR like no other for the watts. I have ordered a 3rd qb288 to go in my tent for my next run going on now. Lloyd dried over an 11 day period at a temp range of 64 to 69F with rh 58 to 64%. Harry had a better manicure trim and I removed a lot of small leaf matter from Harry and harry dried out in only 6 days in the same room. Harry is more foxtail sativa in structure vs Lloyd. Smoke report I decided to try not flushing this grow to see how it goes. Being a hydro run, I feed all the way until harvest and the taste is very smooth, not harsh by any means. Very strong culinary herbs and spice flavors with a subtle fruit pie finish (think spiced christmas fruit pies). Absolutely delicious even without a long cure. Aroma is gaining daily and it just gets better. Effect is immediately felt in the cerebral cortex. Very uplifting creative feeling pleasant high. It's great for brain storming, organizing the grow room, and very conversational (I'm more of a resevered person but cant shut up on this). If I had to guess potency, i would put her in the 15 to 20% range. Effects linger for hours but the main rush is done in about 90 to 120 minutes. I would definitely grow again. Made dry ice hash today, hand shredded up 8 oz of larf and 2.5 oz of trim, sifted over a parchment paper lined table. I only have a 73 and 220 bag. 73 or purest yielded 9g, 220 first shake yielded an additional 16g, and 220 2nd shake yielded 30g for a total of 54g of kief
Likes
10
Share
2022-12-18 Harvestday for the Mimosa Cherry Kush. That was an easy Job. Great ratio from leaves to buds biiig sticky smelly Buds, an explosion of orange, lemon and other Terpenes very pleasing as you can see on the pictures , they gave me agood harvest. they love the Spectrum of HYPHOTONFLUX, HPF-4000 website for for my Fertilisers: https://greenbuzzliquids.com/en/shop/ Code: GD42025 gives you discount of 25 Percent Inbetween my Grows, i clean the Room and all Stuff with Purolyt (Hypochlorus Acid HOCl ) But its not only for Desinfection, iam spraying my Plants twice a Week,( iam Priming them) to make them strong.in pushing their Immunesystem so i can run the optimal VPD- without stressing the Plant and protect them of Mmildew, Mold etc. here is more to read about 👉https://purolyt.de/vpd-kalkulator 👉https://purolyt.com/hygiene-management-in-horticulture.pdf BREEDER INFO The recognizable fruity Mimosa scent is amplified because of the sweet Cherry Kush influences that give this indica dominant hybrid an extremely sweet flavour. It’s not just the extremely sweet flavour that makes Mimosa Cherry Kush exceptional, the relaxing euphoric happy high makes this strain a true recommendation for experienced growers and kush smokers. With a THC count of around 19 to 20%, this indica dominant hybrid is on the strong side and guarantees a long lasting effect. This strain is also very popular amongst medicinal marijuana users due to the strong, relaxing and cheery effect. The ancestors of this extraordinary strain ar Purple Afghani x OG Kush x Mimosa and therefore has gotten a very colourful mix of genetics. The plants of this feminized Mimosa Cherry Kush seeds are perfect eye candy with deep blue, purple and red tones. They don’t grow too much; about 100cm on a 10-liter pot. On open ground they grow to be around 150cm and 200cm depending on the climate and the amount of hours it gets in the sun. This Feminized Kush is therefore perfectly suited for growing both indoors and outdoors. In colder climates the plants grow very well too and guarantees a great yield. The many colours remain even after drying which makes them look even better. If you’re looking for an eye catching strain with a very nice flavor and strong effect, then Mimosa Cherry Kush won’t disappoint
Likes
3
Share
I harvested my pollen sacks plant looks healthy at this point I dont feed till harvest just water every 3-4 days. think o got 21 more days to go b4 harvest but until then I'm just checking out my trichomes so that I dont harvest to late .....one love and dont forget weed is love so share the love with those you know .......
Likes
27
Share
Gibt diese Woche nicht viel zu melden. Die Pflanzen werden durstiger und werden alle 4 Tage gedüngt. Eine Pflanze habe ich ein wenig entlaubt um ein Gefühl für die Auswirkungen zu bekommen. Position der Pflanzen wurde entgegen des Uhrzeigersinns verändert. ###English### Not much to report this week. The plants are getting thirstier and are being fertilized every 4 days. I defoliated one plant a little to get a feel for the effects. The position of the plants has been changed counter-clockwise.
Likes
9
Share
📆 Semana de Cosecha – Alien Moonrocks La Alien Moonrocks llega al final con un aspecto de otro planeta. 🚀 Los cogollos están densos, pesados y absolutamente cubiertos de resina, con un brillo que recuerda a cristales espaciales. La formación es compacta, con cálices apretados y una estructura bien aireada. El perfil aromático se ha vuelto intenso y complejo, con notas afrutadas y terrosas, envueltas en ese fondo potente que delata su genética exótica. Los tricomas ya están en su punto, entre lechosos y ámbar, marcando el momento justo para el corte. Una genética que respondió con fuerza, sin complicaciones, y con un resultado final que promete tanto en efecto como en sabor. ¡Cosechamos fuerte con la Alien Moonrocks! 💪🛸
Likes
2
Share
Through the 3rd week of stretch now and the plants are doing great. Cottonballs everywhere and the scrog is relatively even with minimal tie backs in only weeks 1&2. Chopped out and lollipopped a bunch of foliage and we’ll prune various fan leaves around the canopy to expose some of the smaller side branch heads. What would a grow be without at least one issue. I hate doing this dtw crap manually - I forgot I left the pump on and accidentally ran like 30L of solution. Flooded out the tent and part of the basement at the same time and thought I had drowned out the plants…. They took it just fine and were looking great by the next morning so minus the cleanup it wasn’t really a bad thing I guess. We’re generally on autopilot while we wait for the buds to fatten and finish. So far - we’re still on track and well on the way to mid-flower phase👌.
Likes
59
Share
Week 7 Day 43 to 49 of flower I fed them half nute flush water this week. Feed this week was 1.25 gallons 1 time. I used 400ppm Bloom concentrate mix (recipe week 5). However, I also added .5ml/gal of CaliMagic (General Hydroponics 1-0-0) and 7ml of Roots Organics HP2 (Aurora Innovations 0-4-0). PH balance this week was 6.3. Since P2 looked mostly ready to harvest I decided to dry out after the first feed this week. Next week is play by ear week. Currently day 48 I plan to harvest p2 tomorrow and leave p1 for another week. So I will feed p1 once more with the same half nute flush water feed that I used this week then let her dry out again.
Likes
2
Share
Plant is growing good. Still really pretty to me. Hoping to flip around day 60
Likes
170
Share
Bonjour à tous les padawans et les maîtres jedis Jour42 ma plante entre bien en floraison je pratique sur elle une defolliation pour permettre aux têtes de prendre la lumière La floraison des plantes de cannabis La plante de cannabis passe par différentes étapes de vie avant de parvenir à la récolte. Ces étapes sont : la germination, la pré-croissance, la croissance et la floraison. Pour les autofloraisons il n'est pas nécessaire d'avoir de changer le cycle de lumière elle entre en floraison automatiquement voilà d'où elle tient son nom "d'autofloraison" L'origine de l'auto-floraison vient de la sous-espèce "cannabis sativa ruderalis" , qui à l'origine produit de très faibles niveaux de THC. C'est en croisant cette variété de marijuana avec d'autres qui produisent des niveaux de THC plus élevés qu'à vu le jour ce magnifique compromis que sont les variétés auto-fleurissantes avec des taux de THC très satisfaisants. En parallèle, cela a permis d'améliorer la production de ces variétés, qui initialement étaient exceptionnellement basse. Pour des résultats optimaux, en culture Outdoor (extérieur), je recommande que la germination des graines de marijuanaAuto-flo se fasse entre avril et août. En culture Indoor(intérieur), la photopériode idéale que ce soit pour la croissance comme pour la floraison est de 20h de lumière. N'oubliez pas que ces graines ne sont pas tributaires de la photopériode pour passer en floraison. Il est préférable d'utiliser des pots d'une capacité de 10 à 20L dès le début, étant donné que leur cycle de vie est réduit, les auto-flo n'ent pas besoin de plus de volume pour se développer. Vu sa petite taille (et la discrétion) elle fait l'objet d'un bon choix pour la culture de cannabis sur balcons. La première variété de Lowryder auto-floraison a été créé à partir de cannabis indica sativa croisé avec des génétiques de cannabis sativa rudelaris par la banque de graines de marijuana "The Joint Doctor". Puis vinrent la White Dwarf de "Buddha Seeds", la Roadrunnerde "Dinafem", l' Auto Stoned d' "Autofem", la Speed Devil de "Sweet Seeds" , la Maxi Gom de "Grassomatic", la Flash, la Gnomo de Kannabiaet bien d'autres. Jour42 defolliation (video) Avant toute chose n'oublions pas de bien désinfecter ses outils et bien ce laver les mains. Quesque la defolliation ? LES CULTIVATEURS AMATEURS, PRENEZ GARDE, MAIS NE PRENEZ PAS PEUR La défoliation consiste à retirer les feuilles des plants de cannabis en intérieur afin d'accroître le rendementfinal. Le cultivateur amateur doit faire preuve de vigilance lorsqu'il commence à appliquer cette technique de taille. Malgré le débat sans fin entre ceux qui prônent cette technique et ceux qui la dénigre, il n'y aucune raison pour qu'un amateur ne s'y essaie pas afin de voir si ça lui convient ou non. COMMENT DÉFOLIER Que vous tailliez les feuilles ou les branches des plants de cannabis, il vaut mieux utiliser un sécateur stérile qui est confortable en main. Arracher des feuilles à la main manque de finesse et engendre souvent par accident, l'arrachement des couches d'une tige en plus de la feuille. L'objectif principal de la défoliation est de permettre une meilleure pénétration de la lumière et de promouvoir la production de plus grosses têtes. Les feuilles éventails qui font de l'ombre doivent être retirées. Tailler la tige principale et/ou les pousses secondaires n'est pas de la défoliation. La règle d'or lorsque vous donnez à vos plantes un rafraîchissement est de commencer avec les feuilles nourricières les plus grandes et les plus larges, en taillant du bas vers le haut. Il est important de retirer les feuilles stratégiquement et non pas au hasard. Pensez également qu'il vous faut limiter votre rafraîchissement à approximativement 10 à 20 % des feuilles totales de votre pied. Il est très facile de s'emporter durant la taille et de se retrouver avec des plantes chauves. Un excès de taille de feuilles empêchera la photosynthèse et paralysera vos plants. QUAND FAUT-IL DÉFOLIER Il est assez rare d'appliquer la défoliation comme seule technique pour obtenir un fort rendement. La taille des feuilles est généralement associée à d'autres méthodes de tailles et de palissage pour un meilleur rendement telles que le topping ou étêtage, le FIMming, le LST, le manifolding, le supercropping et le ScrOG. Les cultivateurs utilisant la méthode ScrOG auront besoin de retirer toutes les croissances inférieures ainsi que les feuilles et les tiges se trouvant sous le filet. Les plants de cannabis peuvent être défoliés dès lors qu'ils sont passés de la phase de plantule vers la phase de croissance végétative. Cependant, il est recommandé aux cultivateurs amateurs de laisser aux plantes 1 à 2 semaines de croissance végétative avant de s'attaquer à la défoliation de celles-ci. De plus, certaines variétés sont plus sensibles à la taille que d'autres et de ce fait, seront plus stressées par la taille des feuilles. Surveillez minutieusement le comportement de vos plants après la taille. Une période de convalescence de minimum 3 à 7 jours avant de recommencer la défoliation est fortement recommandée pour éviter trop de stress aux plants. Les cultivateurs peuvent également défolier pendant la phase de floraison, ce qui permettra à l'énergie de la plante d'être concentrée vers la production de têtes tout en limitant l'ombre et l'excès d'humidité. Néanmoins, il est important de ne pas défolier trop tard sous peine de simplement blesser ses plants inutilement. LES AVANTAGES DE LA DÉFOLIATION Évidemment, l'avantage numéro un de la défoliation, c'est l'augmentation du potentiel de rendement de cette technique de taille pour tous types de cannabis allant de la photopériode aux variétés autofloraison. Ce n'est pas un secret que les fleurs qui reçoivent plus de lumières deviennent plus grandes et larges que celles dissimulées dans l'ombre des feuilles. De plus, retirer les feuilles intérieures des plants touffus aide à prévenir toutes menaces de moisissure. Les plants très feuillus avec un feuillage intérieur dense produiront une quantité importante de têtes pop-corn. Dans le pire des cas, les branches de têtes et les têtes qui sont denses succomberont au pourrissement. Si vous observez des gouttes d'eau se former sur la surface des feuilles, il est grand temps de penser à faire de la défoliation. Libérer la zone inférieure et médiane des feuilles est un excellent moyen d'améliorer la circulation de l'air. LES DÉSAVANTAGES DE LA DÉFOLIATION Les plants de cannabis en intérieur bénéficient de la défoliation pour deux raisons. La première est parce qu'ils reçoivent la lumière d'une source stationnaire au-dessus d'eux, et la deuxième est parce que les conditions environnementales sont contrôlées par le cultivateur et non Mère Nature. Les plants d'extérieurs eux, n'y gagnent pas beaucoup, car les cas échéants se vérifient pour eux. Le soleil traverse le ciel, illuminant sur sa route, différentes portions de la plante de son lever à son coucher. Les cultivateurs en extérieur n'ont pas besoin de manipuler les plantes afin qu'elles se développent en adoptant une structure plate puisque le soleil est infiniment plus puissant que n'importe quelle lampe de culture et qui plus est, il est toujours en mouvement. Tailler les feuilles des plants extérieurs les rend également plus vulnérables aux conditions humides et brise leurs barrières naturelles contres les nuisibles. De nombreux cultivateurs d'intérieur peuvent, et malheureusement, c'est souvent le cas, réduire le rendement final à cause d'une défoliation faite au mauvais moment et/ou excessive. Tailler les plantules n'est pas conseillé et engendre souvent des plants nains. Scalper les plants matures est encore pire, et au lieu d'obtenir de longues branches de têtes, vous obtiendrez probablement encore moins de fleurs. De même, tailler des plants malades ou en mauvaise santé à n'importe quelle période de la croissance risque de paralyser la croissance plutôt que d'encourager la formation de fleurs denses. Jour44 Arrosage une fois sur 2 topmax de biobizz Jour46 arrosage avec de l'eau ph6.3 à laquelle j'ajoute 0.8g par litre d'eau de feeding enhancer greenhouse. Jour47 léger arrosage. Jour48 léger arrosage
Processing
Likes
Comments
Share
@Txumy2020
Follow
Ya están bajo el Led 300 en crecimiento. Última semana de vegetación.
Likes
67
Share
@Dunk_Junk
Follow
Only a few days till I start staggered harvest. Whatever buds look ready I will cut off her. Short video this week, sorry guys, technical problems 😑
Likes
28
Share
@Sators
Follow
Hi good fellows!💚 🌱Day 50. Watering with 3L 6.8ph 150ppm clear tap water. Run off water get 115ml and measures is 6.7ph 650ppm. MP4 included.💚 🌱Day 52. Watering with 2.7L 7ph 150ppm clear tap water. Run off water get 115ml and measures is 6.7ph 550ppm. Worry about ppm level. Keep watering with clear tap water!💚 🌱Day 54. Watering with 2.5L 7ph 150ppm clear tap water. Run off water get 35ml and measures is 6.7ph 400ppm.💚 🌱Day 56. Watering with 2.7L 6.8ph 150ppm clear tap water. Run off water get 55ml and measures is 6.7ph 400ppm. Amazing!💚
Likes
9
Share
Bueno, pues así se ve una planta revegetada. Se juntaron muchas condiciones para que en la balanza hormonal de floracion/vetetativo ganase el vegetativo. Primero el calor con +30°, a eso le sumamos las 14 horas de luz (aunque tuviese 14 de oscuridad) y finalmente y como colofón, los bloqueos nutricionales que provocaron que tirara del nitrogeno de reserva, lo cual todo junto hizo que prevaleciese el estado hormonal vegetativo frente al de floración y así es que no se llegaron a formar cogollos como tal. Cuando le quite las hojas a la hora de secarla veré la estructura que tiene pero tiene toda la pinta de ser una estructura suuper espigada. Esta planta la usaré principalmente para sacarle el polen a toooda, hojas e intentos de cogollos, ya una vez seca, con el Pollinator, hacerme hash con ella, y ademas, guardaré toda la parte que no es hoja para hacer comestibles, así tras sacarle el polen, esos comestibles que haga no serán tan killer como alguno que he hecho y mis amigos que no están acostumbrados a comerlos podrán tomarlos sin quedarse a dormir en casa 😂😂😂. Cuando arranque el cultivo de sus esquejes, ese si será 12/12. Por el momento, hasta que no salgan cosas nuevas o mas investigación sobre el 14/14 voy a quedarme en el 12/12, que he de reconocer una cosa respecto a mi experiencia de cultivo xD empecé por el tejado jajajaja las primeras fotoperiodicas que cultivé y pude cosechar las empecé a 14/14, aun no he tenido ocasión de hacer un cultivo a 12/12 satisfactorio 😂😂