


Likes
Comments
Share





Likes
18
Share


@TheCannaProphet
Follow
~ FASTBUDS CHEMDAWG AUTOFLOWER~
'The history of the Chemdawg strain starts in the early 90s where a group of cannabis breeders from Colorado were following a band on tour and took some of their weed with them, they had named this weed “chem bud” due to the unique chemical and diesel flavors.
When they got to one of the shows, they sold a couple of grams to a group of friends who quickly realized those were some special buds and, lucky for them, the buds had a couple of Chemdawg seeds (before they actually knew what they were) which they stored.
When one of the friends, who was also a cannabis grower, went back to his home on the East Coast, he germinated some of the seeds and started selecting the best phenotypes to continue developing those genetics even further.
As you may know by now, his effort paid off, and soon enough there were two versions of this strain going around, one was Indica-dominant and the other was a Sativa-leaning hybrid.
Both of these versions quickly spread around and several breeders developed new strains with these genetics, getting known by almost every cannabis consumer, becoming extremely popular and giving birth to a lot of famous strains such as Sour Diesel and OG Kush, although this isn’t confirmed, several old-school growers swear by it.' *content credit to FastBuds
_______________________________________________________________________________________________________________________________________________________________________________________________________________________________________________________________________________________________________________________________________________________________________________________________________________________________________________________
The Spec's:
'These precious genetics were boosted by the Fast Buds team to provide a super tough, potent, and easy-to-grow strain.
This Chemdawg Auto from their 'Originals' line grows around 90cm and is very resilient to diseases and colder climates but watch out because if you’re growing outdoors, your neighbors will be able to smell it easily!
This strain can be cultivated even by beginner growers due to it requiring minimal maintenance and can produce up to 400gr/m2 in 8-9 weeks, this is one of the shortest varieties FastBuds offers and can be the perfect choice for those growing on a balcony or in a limited grow space.
As soon as the trichome production starts, you can expect a terpene profile that resembles a mix of chemicals that is a delicious blend of diesel, gasoline, and petroleum.
With up to 20% THC, you can expect a super potent high that will take you into another world and leave you there, while you relax with a strong corporal high that will leave your whole body melting, a perfect effect to relax after a long day of work or inducing a good night of sleep.' *content credit to FastBuds
~Chemdawg Auto~
Genes: Sativa 20%/Indica 80%
Genetics: Chemdog Autoflowering
Flowering: 8 – 9 weeks
Harvest: 350 – 400 gr/m2
Height: 60 – 90 cm
THC: Up to 20%
CBD: < 1%
Autoflowering: Yes
________________________________________________________________________________________________________________________________________________________________________________________________________________________________________________________________________________________________________________________________________________________________________________________________________________________________________________________
THE SETUP:
~Planted into Jiffy Peat Pellets that were hydrated with de-chlorinated water with SuperThrive added then ph'd to 6.0 @ 80℉
~Grown 100% organic in 10g fabric pots with Mother Earth 70/30 Coco/Perlite medium amended with 2tbs/g of Down To Earth 4-4-4 / 2 cups/g of Earthworm Castings / 1tbs/g of Dr. Earth Flower Girl 3-9-4, 1tbs/g of Dr. Earth Bat Guano, 3/4 cup of Down To Earth Azomite and 1 tsp/g Down To Earth Fish Bone Meal.
~24hr light cycle during Germination / 19/5 light cycle for Vegetation and 12/12 for Flower
~Straight water ph'd @ 6.2-6.8 when needed and weekly Compost Tea's.
________________________________________________________________________________________________________________________________________________________________________________________________________________________________________________________________________________________________________________________________________________________________________________________________________________________________________________________
WEEKLY UPDATES:
9/6- Day 37 of flower and harvest time is fast approaching with her trichomes, which are now checked daily, maturing rapidly being 80% milky now with the remaining being clear.
Daily watering's continue with 1g of straight de-chlorinated water ph'd to 6.7 @74℉ and also I'm turning her pot 1/4 turn daily as well.
9/8- Well, her trichomes are right about where I like them to be and she's ready for 48hrs. in the dark before I chop and hang her to dry for 10-12 days.
I'm watering her with 1g of straight de-chlorinated water ph'd to 6.7 @74℉ and will continue to water her while she's in the dark (cannabis continues to carry on with it's growth processes even while in the dark) so that her medium doesn't completely dry out. Keeping her watered will also help to extend her drying time to that ideal 10-12 day target.
This should be some epic smoke as her buds are absolutely crystalized with trichomes and her smell is AMAZING! 😛💚
9/10- Well she's been in the dark for 24hrs. now with 24 more to go. I'm keeping temperatures in the low to mid 60's℉ and the RH @ 45%. Tomorrow is 'Chop Day'! I'll be taking some pic's of her when she comes out of the dark and during harvest...Stay tuned, this is some 🔥!
I am continuing to water while she's in the dark with 0.5g of straight de-chlorinated water ph'd to 6.8 @67℉ to keep her hydrated.
9/12- Well she's out of the dark where she spent roughly 60 hours. I kept the temp's @ 64℉ and the RH at 45%.
After I brought her out I shot a few pictures of her, then plucked off all of the shade leaves. I then cut her off at her base and hung her whole. I'll keep the RH in the room @ 50% for the first 24hrs., then raise it to 55-60% for the remainder of the drying. I have the temperatures in the Dry Room at a constant 65℉ to help preserve the terpenes.
Hopefully she'll take 10-12 days to dry to the point that she's ready to be trimmed and jarred! Stay tuned for the harvest of this phenomenal cultivar! 💚🔥
~Thanks for stopping in! Things are wrapping up and harvest is right around the corner....Stay lifted and be Blessed! 😎🙏~

Likes
13
Share




Processing
Likes
3
Share


@MMatos
Follow
Week 1
Today, I started 2 Gorilla Cookies Auto from Fastbuds. 🍪
I'll start by giving 18 hours of light and controlling the ph 6.5 without nutrients
Let's see if they want to grow or not.
Likes
8
Share


@cannacat777
Follow
8/26 - sporty looking great, praying hard! Posh is working on it. But look who finally showed up to the party! I’m calling her Baby spice. She sprouted 12 days after going in the soil. Way to be a fighter girl!
This is going to be a tricky thing to manage I feel like my gals are tracking a week apart. I’ll keep this journal’s timeline on sporty spice. -1 week for posh and -2 weeks for baby spice. spice girls let’s grooooow!
8/30 - exactly two weeks from sprout for Sporty and Posh. Pretty wild how big a difference there is between the two. Baby is getting her footing. Now.
Sporty already pushing 4-5 nodes and I saw a tiny root through the drain hole. Wanted to pot her up! About 8 cups pro mix, one cup perlite. About 1.5 tbs of Gaia green 4-4-4, some worm castings and sprinkled mycorrhiza around where the rootball would be. God speed girly!
9/3. Potted up Posh today. About a half gallon pro mix, plus about 1.5 tbsp of the Gaia green 4-4-4. Plus about a cup of worm castings, perlite, and mycorrhiza. Sporty is looking very happy, 5 nodes and counting. Added back my second light, let’s go girls!!!
9/5. Wrapping up week 2 here, so far I’ve been really impressed with the pro mix Gaia green and soil support so far. The girls seem happy and healthy. See you in week 3!

Likes
54
Share


@GarciasGarden
Follow
DAY 11 !! can someone let me know if my plants are looking healthy ? It’s my first time so I’m trying not to fu** up... and should I be worried that some of them already have purple stems? They have been purple for at least 4-5 days and nothing else looks wrong with them?


Likes
Comments
Share

@discopriest379
Follow
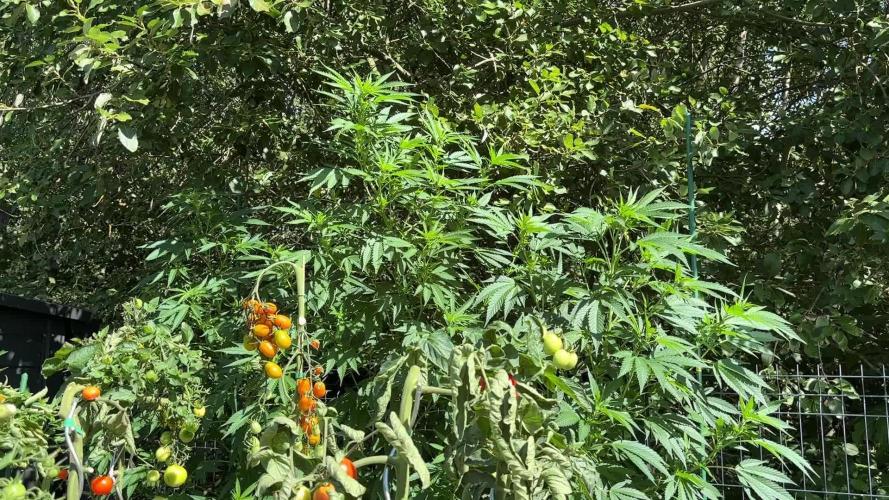
And here we are at week 16 😄 — this is the first week they’ve officially started flowering. Their height is absolutely insane: they’re around 220 cm tall! 😳🌱 I really hope they don’t stretch much more, because I’ve already had to trim the trees above them to give them enough space 😂🌳
The leaves are beautifully green and everything looks healthy and happy so far. The buds are starting to form, although the development is nowhere near as noticeable as it was with the autos. I have to admit, I’m a little unsure about that… 😅 I just hope they have enough time to finish before the ugly autumn weather arrives. 🍂🌧️
I’m also thinking about treating them with Polyversum this week as a preventive measure against fungal diseases. 🌿💨

Likes
67
Share


@GanjaReaper
Follow
Day 10:
The plants and the leafs grew a bit in size, they are still focusing on rooting.
Added some veg nutrients today to the feeding schedule, because I saw some green spots,
not to confuse with full green leafs, which is normal with new leafs and young plants or in later stage a (n)itrogen deficiency.
No this indicates that they need just a little bit nutrients.
Normaly this would not be the case with normal soil(it has nutrients in it for the first weeks), but again it can happen with cocos as a soil.
The leafs on the pictures are like that because the lights are off + the humidifier makes the leafs wet which results in it getting heavy😝.
Will update again this week,
Enjoy for now 🙏
Likes
92
Share


@DogDoctorOfficial
Follow
Week 9 - First Week of Flowering 🌸
The dark period has ended, and these ladies came back into the light fully energized and ready for action! It’s just the first week of flower, and they’re all praying, stretching, and absolutely thriving—filling up every inch of the tent. This grow space is officially packed from wall to wall, with each plant competing for its share of light and showing off some of the biggest, healthiest leaves I’ve seen yet! 🌱
A few strategic plucks here and there have kept airflow smooth and light penetration balanced. Those big leaves? They’re a sign of happy, healthy growth. Large leaves help the plant capture maximum light energy, essential during this stage, especially as they start focusing on developing those flowers. When plants grow huge, vibrant leaves like these, it means they’re well-nourished and content in their environment—a true testament to the well-balanced conditions we’ve got going in the tent!
Flowering Parameters 🌡️
Room Environment:
• Temperature: 26.7°C
• Humidity: 63.3%
• CO2: 960 ppm
• VPD: 1.29 kPa (prime zone for flowering health!)
Lighting:
• Light Intensity: 835 PPFD (ideal for boosting flower growth)
• Solution: pH 5.96, TDS 460 ppm, temp 21.1°C
• Medium: Moisture: 100%, TDS: 520 ppm, Temp: 21.6°C
Carbon Filter Installation & Smell Management 🌬️🌱
With the transition to flower, the scent profile is already starting to kick in—crazy for the first week, right? 🌸 To keep everything fresh and under wraps, I’ve set up a carbon filter system. Here’s how it’s working: I’ve connected the filter to my Aerofan, which pulls air directly from the tent. This air is cleaned by the filter and released into the main room, where it then passes through another filter before exiting my space. This dual-filter setup means no scent escapes into the wild, keeping things stealthy and the grow room a peaceful, scent-contained environment. Perfect for anyone concerned about keeping their home free from that telltale aroma! 🕶️🌬️
Enhanced Lighting with Emerson Effect 🌞
This week, I’ve introduced an extra 15 minutes of red light at the beginning and end of each light cycle. Why? Well, this red boost taps into the Emerson effect, enhancing photosynthesis efficiency, especially during the flowering stage. By stimulating a little extra wake-up and wind-down light, we’re mimicking the natural sunrise and sunset experience for these plants, which can help reduce flowering time. Not only does it encourage smoother transitions into day and night, but in theory, it’ll help these ladies finish a bit faster, while giving them a little nudge to build more substantial, quality flowers. 🌇
Nutrient Adjustments 🌱
Now that we’re in flower, I’ve swapped out the Start Booster for P-Boost and TopBooster to specifically support flowering needs. Here’s why:
• P-Boost brings in additional phosphorus, vital for energy transfer and cell division as the plant channels more resources into budding sites.
• TopBooster supports the flowering phase by improving flower quality and density, helping to build those big, aromatic buds we’re after.
These changes bring the nutrient mix in line with what’s most beneficial at this stage. All this precise dialing in is easy to manage thanks to the TrolMaster system. From pH to nutrient scheduling, the TrolMaster ecosystem and ThinkGrow LEDs have been the ultimate teammates in this grow journey, giving me real-time data, fine control, and peace of mind. 💯
(Not introducing UV light just yet, but stay tuned as that’s coming soon for an added boost!)
Looking Forward 🌟
Next week, we’ll be upping the reds, giving us an even greater chance of activating those flowering signals for a smoother, faster transition through the cycle. I’ll keep tweaking and fine-tuning every parameter to make sure these ladies get exactly what they need to thrive.
Big thanks to the TrolMaster system for keeping everything in balance and optimized, along with the supportive Grow Fam following this journey! Your enthusiasm, advice, and support are a huge part of this grow’s success. Keep following for more updates, and stay tuned for what’s next! 🌿✨
P.S. Deep Dive: TrolMaster’s MBS-S8 CO₂ Sensor & Smoke Detector 🚨
The MBS-S8 CO₂ Sensor from TrolMaster is a powerhouse for growers, especially when it comes to optimizing plant growth and efficiency in a controlled environment. This sensor continuously monitors CO₂ levels and integrates directly with the TrolMaster ecosystem, giving you real-time data on CO₂ concentration. Ideal levels of CO₂ can significantly boost growth and yield during certain stages, so understanding and managing CO₂ is key. With the MBS-S8, I can control CO₂ levels precisely, keeping them within the optimal range for photosynthesis. This sensor is a game-changer because it adjusts CO₂ delivery automatically, giving plants exactly what they need without any extra monitoring from me.
Meanwhile, TrolMaster’s Smoke Detector is an essential safety device, especially in spaces with electrical equipment, lights, and heat-generating components. This detector can be set up to alert me instantly via the TrolMaster app if any smoke is detected, allowing me to respond immediately to any potential issues. Fires and smoke are rare in controlled grow setups but having this safety measure provides peace of mind and lets me focus on the plants without constant worry. It’s an incredible tool for any grower prioritizing safety and proactive monitoring.
Discount Codes so you can save big on your next check out 💚💚💚
Kannabia - DOGDOCTOR 30% off
SeedsmanSeeds - DOGDOCTOR 10% off
CannaKan- DOGDOCTOR 15% off
terpyz.eu - DOCTOR 15% off
The Neutralizer - PORKIT5-DOG 15% off
As always thank you all for stopping by, for the love and for it all , this journey of mine wold just not be the same without you guys, the love and support is very much appreciated and i fell honored and so joyful with you all in my life 🙏
With true love comes happiness 💚🙏 Always believe in your self and always do things expecting nothing and with an open heart , be a giver and the universe will give back to you in ways you could not even imagine so 💚
Friendly reminder all you see here is pure research and for educational purposes only
Growers Love to you all 💚💚💚


Likes
14
Share


@UKBUDDOCTOR
Follow
The wedding cookies so far is smelling really sweet and a gassy diesel aroma. Thc is starting to stack now. I didn’t really have any high hope for this as I bought it not really knowing about genetics and breeders! But it’s starting to do me proud lol as of the Bruce cookies which will be the biggest one you see In the pics has been doing great the whole time. Also I will probs just do an all in one diary for!!! 😄

Likes
14
Share


@Sensilover
Follow
Its running perfect, but my Photos want to flowering. 🌼🌸🌺 I think the pineapple and papaya needs round about 10days to harvest. 🍍 The trichomes are currently still in the milky stage. 🥛✨

Likes
33
Share

@KurtHighgrade
Follow
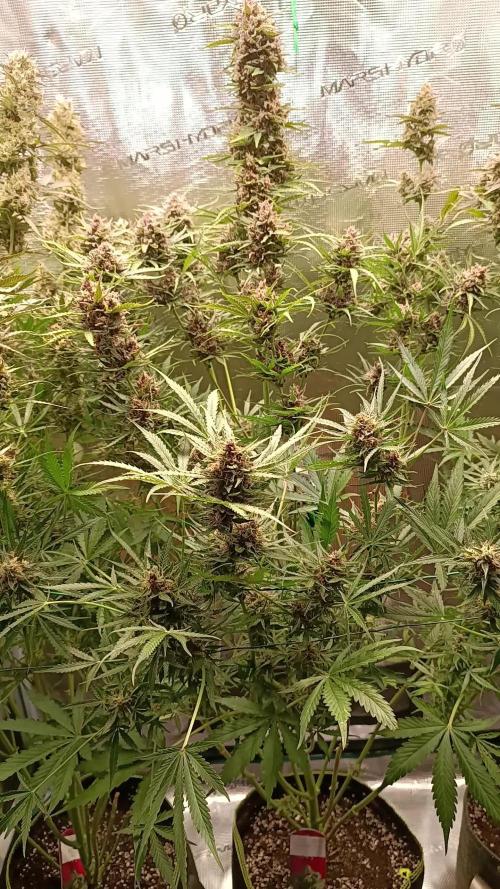
Hi💚 Jack Frost Widow after 71 days. As fast as promised and she has been harvested a few hours later. Nearly all Trichomes were milky, a very few amber.
She's got a fruity scent, I'd say strawberry. Her sister smelled like orange bud.
It was fun taking part in the ATAMI competition with this plant and I can definitely say that all ATAMI fertilizers, booster and stimulants I used seem to be quite effective as some pics also tell.
Easy to handle, not too costly and save to use.
I've been using more aggressive mineral nutrients in the past when I started indoor growing and experienced symptoms of overfeeding many times back then.
This ATAMI line I used is much smoother, yet effective.
Unfortunately I didn't read the rules of the contest correctly and didn't take six pics of the living plant with ATAMI products. So I had to take them after having harvested her nearly completely😂🙃 I'll be wiser with the other two strains in the contest🍀
Peace and happy growing 💚 🍀 ⭐🖖🏼
Likes
3
Share


Likes
15
Share


@Waveform
Follow
Day 17 (starting Aug. 2nd afternoon): Will water them with a lightly enhanced RO water that was imprinted with frequencies via a PEMF coli for about one day when their day starts.
After being away over the extended weekend, on day 20 ladies have grown very nicely. I topped nr# 1 and #2 after I took the photos and will give them a bit of water with Root Complex to compensate for the shock later. Sadly my brilliant control equipment has crashed completely and will not even take a photo currently. Yikes. Hope I can get it back alive this week again. Also turned the left light up by another 20%, now running at 40 W, and lifted it a bit. Eye inspection told me lights were lower here and ladies can get a bit more.
At the end of their day 20, they seem to have survived the topping well. I managed to cut right above the new nodes which are already growing. Ladies are at 20 cm height before going to sleep.
Day 21 shows great growth again, with lady #1 being at 22 cm now and lady #2, while being a bit less tall, extremely good side branch development. I hope that the rearranged lighting on the left side of the tent will make #1 grow a bit bushier too.
Besides from that, I am really happy I tested Hesi HPE. I had such enormous success with room plants that made me want to see how Cannabis plants react to it. It will not add much to salinity, so I dared to add it quite early. While the photos are processed to compensate the lighting, I did not add much to saturation, so leaves are indeed of a very vivid, luscious green and ladies looking extremely healthy. Speed of growth has increased too as the added video shows. It also tells me lighting is enough – they are turning their leaves away right at the end of their day. I am really uncertain if I will change to usual Hesi grow fertiliser at all …
Did a bit of LST to the lowest branches of lady #2 which spread almost to the border of her pot.
Both temporary girls will leave the tent soon, so that the competitors will have maximum space to develop.
Day 22, end of week 3:
Outside girl went to get fresh air from now on. Wishing her luck, good weather and not a single male in the vicinity.
I rearranged the lights and positioned them a bit higher. First preflower signs appeared on the ladies, so I will change the lighting phase when I return next week. Currently, I have them at 18/6, 45 cm above heads, with 80% running to a total of 80 W.
I wasn’t so lucky topping #2. She has only one "top side" branch now … But grows extremely well, so ok!



Likes
105
Share


@Green_Friends_Inc
Follow
Overall a great strain. Would def recommend to just about anyone!

Processing
Likes
25
Share


@Fibro_Witch
Follow
CBD Caramel is still doing stellar and is at the top of the class as far as height. Still getting a little bug damage tho, so I sprayed with neem oil, again. Going to water in some Big Bloom and Molasses later. Really good week.
Likes
5
Share


@Growverse420
Follow
Watered a gallon between the four of them this week (goal to maintain moisture in the beds.) found mycelium growing on top of the beds today, a great sign for soil health! The runt is still runty; if one of the seeds in the solo cups overtakes her in growth, I will probably cull the runt and replace her. Going to be topping in the next day or two, deciding if I am going to do a full “mainlining” run or just top them. TBD

Likes
3
Share


@Black_Widow
Follow
Привет садоводы !!!
Растение чувствует себя хорошо
поливаю ее примерно плюс - минус раз в неделю , литров по 6-7
чередуя с водой и удобрениями
PH 7