
Likes
Comments
Share


@tokesly
Follow
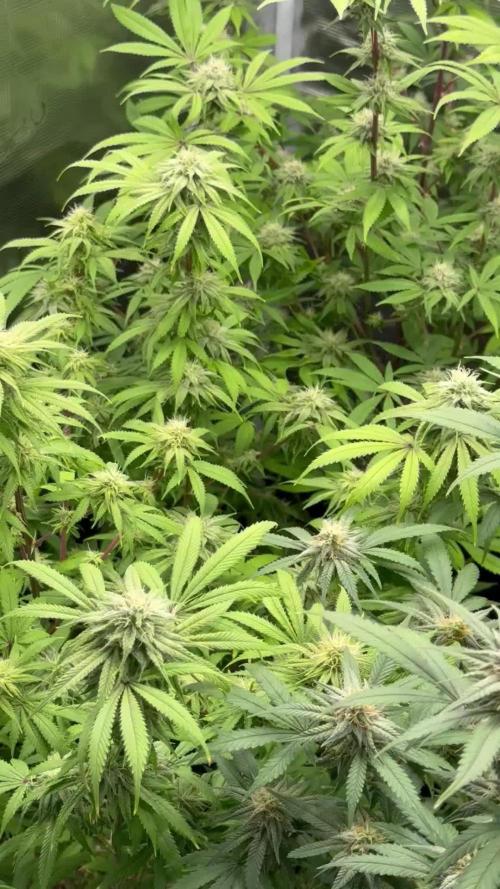
Flush ended two days before the darkness period. Decided on a 48 darkness periods though some prefer 24 or 72. The darkness did help trichomes reappear at the tops of the canopy. Going for a longer dry of 10 days, best temperatures are 60-70F to preserve the terps with 50-60RH. This has been an amazing experience, definitely putting in more passion into the next run.

Likes
36
Share


@MrJoint
Follow
⏰PP #1 is really late.
✨PP #2 and #3 are pretty nice.
🌴 I made an LST on PP #1 to try to ensure reasonable performance with main line, despite delay from this girl.
⭐️I’ll start a new diarie for PP #1.
✌️🎃Thank you for checking my cultivation.

Likes
1
Share


@DrBud420
Follow
17.05.
I don't have anything special to say, of course the weather is terrible... it's 6-7 at night, 15-16 during the day, so they're inside... the temperature inside is 20-21 during the day, at night from 15 to 17 when it's this cold...
the plants were exactly 3 weeks old yesterday, today they entered the fourth week and most likely they will wait inside for the fifth week as well because the weather is terrible and there is no point in transplanting yet.
Stay High!


Likes
93
Share


@Hou_Stone
Follow
👨🚀👋
My 4 plants from this limited edition are still here and continuing to grow.
(Genetics of this limited edition: Hawaiian Snow x Wedding Cake x Gelato 33)
This week I start cutting a few lower branches from each plant. This way more energy should be available for the upper branches.
All the plants survived my cuts! And keep growing 🙌
For this culture, I would like to let each plant grow with a main bud without "topping". I would like the tent to be filled and look like a Sog in flowering. (a total of 16 plants with 5 strains in this culture)
My goal: at least 300g of dry buds🤞
------------------------------------------------------------
💧Watering each pot:
Day 15 : 0.75 L With a little Bio enhancer ( 0.8grams/L)
Day 21 : 0.75 L
I use tap water, adjust the ph to around 6 and water
------------------------------------------------------------
🔥❄️Temperature of the week :
Day : 19-23°C (Humidity : 60-75%)
Night : 14-17°C
------------------------------------------------------------
🤩Equipment of the week :
Light FC3000 Mars hydro. power 95% at 50cm
Extractor 6 inch Mars Hydro. power 1/10. ON 24/24h
2 fans to circulate the air inside the tent. Each on for 30 minutes then off for 1 hour. this rhythm repeats itself in a loop
Heating mat 95x95cm. ON 45 minutes. OFF 30minutes. In a loop. The day only
------------------------------------------------------------
Thank you for your visit, it's always nice to see you!💚😀
------------------------------------------------------------
My Instagram 🌱❤️️ :
https://www.instagram.com/hou_stone420/

Likes
183
Share


@OrganicNature420
Follow
Germination date 🌱 12/07/2021
Day 57 09/09/2021
Strain 🍁 Ethos Genetics Banana Hammock R1
(Mandarin Sunset x Grapegod)
THC% • Unknown
💡 Mars Hydro FC4800
• Power draw 480W + 5%
• Max coverage 5 x 5
• LED 2070pcsSamsungLM30B1&Osram660nm
• Max Yield 2.5g / watt
• Noise level 0 DB
• Removable Driver +2m cable
• Daisy chain (multiple lights)
https://marshydroled.co.uk/products/mars-hydro-fc-4800-led-grow-light-samsunglm301b-commercial-greenhouse-medical-indoor-kit 🇬🇧
https://www.mars-hydro.com/buy-fc-4800-480w-4x4-energy-saving-full-spectrum-commercial-led-grow-light-mars-hydro-for-sale 🇺🇸
PROMO CODE • (ORG420) DISCOUNT 👍🏻 marshydroled.com
⛺ Mars Hydro 120 x 120 x 200cm
📤📥 AC infinity 6inch
💧 10lt dehumidifier
❄️ 3.1kw air con system
💉 Nutrients GreenBuzzLiquids
Organic Grow Liquid • 1-4ml until 2wk flower
Organic Bloom Liquid • 2-4ml flower stage
Organic More PK • 2-4ml +wk3 of flower
Organic Calmag • 1-2ml/lt whole grow
Fast Plants Spray • first 3days at night lights off
More Roots • 2-5ml veg +2wks flower
Fast Buds • 5ml +wk2 of veg until 1wk flower
Humic Acid Plus • 2-5ml whole grow
Growzyme • 2-5ml whole grow
Big Fruits • 2-5ml flower stage
Clean Fruits • 5ml flush 1wk
Ph powder
Root Gel
Living Organics
PROMO CODE • organicnature420 15%off ✌️🏼
https://greenbuzzliquids.com/
🥥 Growing Media • Coco Coir
Notes 📝
Undergrowth catching up nicely so nets working well. Leaves look nice dark green and HD and out if the 4 girls, looks the healthiest. Nothing to worry about so I will see you all next week 💚 thanks for all the love GD
Remember PROMO codes for both GreenBuzzLiquids and MarsHydro.com in the grow bio above 🖕🏼
Happy growing fam ❤️🌱🍁👍🏻


Processing
Likes
3
Share


@teahousecompany
Follow
Bad vent and lack of temperature and humidity Control. High temperature because of 600w HPS.

Likes
2
Share


@FrenchLivingSoil
Follow
Entretien classique plus fragilisation de l’apex. Une bonne croissance et un bon espace inter nodale.

Likes
11
Share


@Purrple_Haze
Follow
Bloom Mode On 🌺⚡️
Big shift this week—after 24 weeks of vegging, I’ve officially flipped the light cycle to 11/13 and kicked off flowering! She’s standing strong and ready for the next chapter. You can even catch the tent peeking in the background on the pics.🏕️💡
Why now? In my region, September and October tend to be wet, and I’d rather not risk losing these gorgeous buds to mold. Plus, the high summer sun is peaking, and I want to give her the best light intensity possible for an explosive bloom. ☀️🔥
She’s still running on the same feeding routine as my autoflowers—Effective Microorganisms a few days ago, followed by a dose of BioBizz Grow and Alg·A·Mic to keep her both green and stress-free as she stretches into flower. 💧🌿
To keep her strong and resilient, I’m also spraying silica on the leaves every three days—just a little armor for the battles ahead. 🛡️🌱
Let’s see what she does with all that sunlight and freedom—this Red Hot Cookies is about to turn up the heat! 🍓🌶️🚀

Likes
15
Share


@MrGrowMan
Follow
10.01 FLUSH pH problems.
Week 10-11
1 nutrient water
1 non nutrient water
LsT and Scrog
Diesel and Mimosa (front 2) auto
2 break up cake no flowering, i guess my flowers fem and
If it continues like this for another 1-2 days, I will switch to 12/12 light period.// day 62 start 12/12 light period
day 67 break up cake' s 12/12 start flowering

Likes
14
Share


@Spiritual_Herb
Follow
the little one is rising quickly this week, I think it will last another week, a week and a half at most, before dedicating itself to full flowering. the seedling entered the pre-flowering phase a few days ago (2/3 days ago)
Likes
435
Share


@Ju_Bps
Follow
Hello my friends grower 👨🌾👩🌾🌲
This first remote grow 🎥 week look nice, girl look nice grow up.
With 1l/bottles/plant around 8 days,
My friend came this Saturday to remplace the bottles.
Water + rhizo PH@6
And took the weekly video 📹
See you next week for the second remote grow week.
Thanks community for follow, likes, comments, always a pleasure 👩🌾👨🌾❤️🌲
Also to @marshydrococo2 , @News_SweetSeeds for sponsoring 💕💕.
Mars Hydro TS 1000
https://www.mars-hydro.com/ts-1000-led-grow-light
Gorilla Girl F1 fast version
https://sweetseeds.es/en/photoperiod-dependent-seeds/3065-gorilla-girl-f1-fast-version.html
See you next week my friends
Have a good week end 😁💕


Likes
36
Share


@JeyGanesha
Follow
L'attesa si fa sempre più lunga,🤣più si avvicina il giorno del taglio netto e più sembra non passare... .. questi profumi mi fanno venire l'acquolina in bocca 😜🤤🤤🤪🤣😂 beh dai ancora poco e la gustero per bene😂👍🙏
Likes
8
Share

@Islandboi340
Follow
Was extremely busy for the last two weeks but here’s my girls at 8 weeks goin try push dem to 9 weeks still a lot of white hairs also got some videos of my 3x3 and 2x4 tents


Likes
28
Share


Likes
2
Share
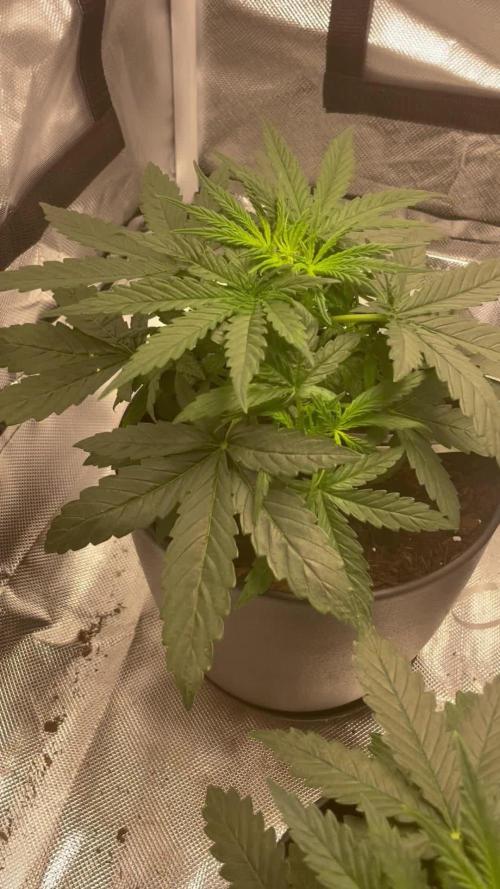

@Allybearx3
Follow
Little babies are thriving, wish I would of did some lst on them but the stem is too hard now so just going to let them be and see what they can do on their own, they have been thirst lately so upped the watering on them all in all they are doing good