
Processing
Likes
Comments
Share


@FyahBurn
Follow
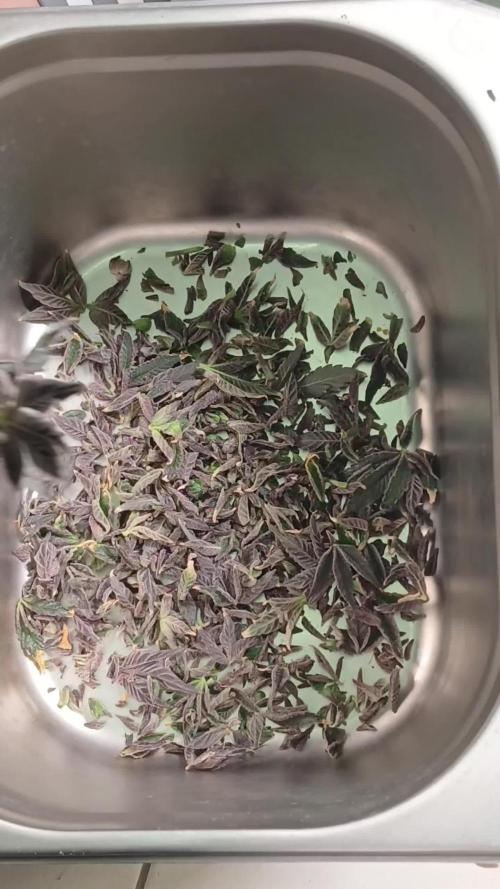
Début de 3 ème semaine. 1 d'EC dans la terre. Je commencerais à amener 1 ml de grow biobizz en milieu de 3 ème semaine pour monter à 1,3 d EC. Les plantes restent assez courtes "ramassées" car les lampes ne sont pas très hautes à 52 cm des apexs. Finissez bien l année "aussi mauvaise fut elle" essayons de la finir avec plein d espoir pour l année 2021 ! 💚💛❤️ Blessing mama Earth 🙏

Likes
43
Share


@TheCannaProphet
Follow
~Entry for the 'Best Rarest & Smallest Pot by Seedsman' contest~
Starring 🤩....
~ Seedsman Zkittlez Auto ~
Zkittlez (Grape x Grape Apple) Auto x Auto Fruit (Auto Fruit Cheese x Auto Blueberry)
Zkittlez Auto is one of the very sweetest-tasting auto strains available anywhere. It is a sativa-dominant (60%) strain that was bred from Zkittlez (Grape x Grape Apple) Auto crossed with a male Fruit Kush Auto, the latter a remarkable fruity strain bred from Fruit Cheese Auto and Blueberry Auto. Growers can expect to harvest some good yields of high-THC buds.
Zkittlez Auto remains a fairly short plant, rarely exceeding 120 cm. in height wherever it is grown. This is a vigorous plant which is able to metabolize a high level of nutrients and she's a thirsty girl too! If growing indoors close to neighbors it is strongly advised to ensure good and effective carbon air-filtration in order to neutralize powerful odors. This strain's life-cycle is approximately 90 days from seed to harvest.
The leaves on this plant are big and wide serving to convert every lumen available into Zkittlez goodness. Indoor growers should obtain between 400 - 500 gr/m2 while plants cultivated outdoors will produce slightly more at 500 - 600 gr/m2. Lateral branching is very good and it is recommended to use supports/ties to prevent snapping and keep buds close to the light source.
This strain's scent is sweet and fruity with candy and berry notes. Its high-THC has been measured at between 21 - 24% with less than 1% CBD. The effect is well-balanced, cerebral and euphoric, and is very good for social situations as well as for relaxing in front of the TV either alone or with company. It also has the added effect of helping to relieve chronic pain, helping with nausea, insomnia and depression as well as stimulating the appetite.**
**Credit to Seedsman.com
______________________________________________________________________________________________________________________________________________________________________________________________________________________________________________________________________________________________________________________________________________________________________________________________________________________
~ The Setup ~
~ Grown in a 2qt plastic popcorn pot filled with Mother Earth Grow 70/30 Coco/Perlite with Xtreme Gardening Mykos added.
~ Seed was germinated directly in the medium without any 'pre-soak'
~ Feeding will be by Dutch Pro Nutrients
~ 24hr light cycle while germinating
~ 20/4 light cycle after first leaves appear.
~ 4x8 Gorilla Tent
~ HLG 650R w/ 30w Supplemental UVA Bar controlled by a Trolmaster Hydro X controller set for a 15min Sunrise/Sunset simulation. (also a HLG Blackbird for additional side lighting if necessary)
~ Supplemental co2 controlled by an AutoPilot APC 8200 co2 controller
~ AC Infinity Cloudline T6 with Controller 67 using a Terrabloom 6x24" carbon filter
~ De-Humidifier and Humidifier when needed.
~ 14k BTU IdealAir portable A/C unit plumbed into tent for temperature control.
~ BlueLab testing instruments
~ Two Hurricane 18" oscillating fans
~ Two 6" Clip-on fans
~ Two 10" floor mounted fans
______________________________________________________________________________________________________________________________________________________________________________________________________________________________________________________________________________________________________________________________________________________________________________________________________________________
Weekly Update:
1/24- Well, here we go into the Seedsman Zkittlez Auto's 9th week of flower which will be her last! This fine looking lady has been growing for 80 days since she broke ground and has turned out simply AMAZING! 🤩❤️
I'm flushing every day now with well water that's ph'd to 6.5-6.7 @ 71℉ until I have good runoff and that's exactly what I did today in addition to giving her pot a 1/4 turn.
1/26- Today I flushed the Zkittlez Auto for the last time and I'm going to put her in the dark for 72 hours today after checking her trichomes one last time.
1/30- Yesterday the Seedsman Zkittlez Auto was released from 'Dark Jail' and looked absolutely amazing, covered in frost and sporting some gorgeous coloration on her flowers!
After snapping some pic's I chopped and hung her to begin the drying/curing process. She's hanging in total darkness with a fan, de-humidifier and humidifier to keep the air circulating gently and the RH at 60% (I usually run the RH down to 50% for the first 24hrs, then up it to 60% for the remainder of the hanging time). The air temperature in my drying room stays a constant 53-60℉ which I find ideal for getting the drying time to the 12-14 days I like it to be to ensure a nice S L O W drying which, I've found, ensures a super delicious product after it's finished curing for 3-4 months in jars!
This has been such a fun grow to participate in, and as always, I learned a few things I didn't know previously as I've always grown in much larger containers which made this grow that much more interesting to me! I hope you enjoyed following along half as much as I did growing this little gem from Seedsman Genetics, I truly appreciate all the love and positive comments that I've received throughout this run.... THANK YOU!❤️❤️❤️ See you at the Harvest! 😎🤙
~ Thank you from the bottom of my heart for following my grows and for all the ❤️and support you give! 💚What you grow - Grow what you💚

Likes
147
Share


@MrJones
Follow
MrJones Black Berry OG
🔹🔹🔹🔹🔹🔹GOALS🔹🔹🔹🔹🔹🔹
🌞Flowering Environment - 75/80℉ and 50% Humidity
💧 Feeding - Advanced Nutrients Bloom Regiment - Great APP!
🍃Training / 1 Trellis in place, looking to install a second, may have to do more defoliation..
🕷️ IPM - Will be using Green Cleaner" 1 OZ per Gallon, and CannControl from Mammoth alternating between product each month for Integrated Pest Management.
💡Mars Hydro LED / Veg TS-1000 / Flower 480W FC 4800, this light is just performing very well!
🔹🔹🔹🔹🔹🔹🔹🔹🔹🔹🔹🔹🔹🔹🔹🔹🔹🔹
📜 Rambling - With week 11 here, the ladies are about 3 of 8 weeks into flower, they continue to stretch nicely, and starting to stack on some buds!
🔹🔹🔹🔹🔹🔹🔹🔹🔹🔹🔹🔹🔹🔹🔹🔹🔹🔹
▶️ Friday - 03.26.21/Feeding 40 OZ of Advanced Nutrients
▶️ Saturday - 03.27.21/Feeding 40 OZ of Advanced Nutrients
▶️ Sunday - 03.28.21/ Feeding 40 OZ of Advanced Nutrients
▶️ Monday - 03.29.21/ Feeding 40 OZ of Advanced Nutrients
▶️ Tuesday - 03.30.21/Feeding 40 OZ of Advanced Nutrients
▶️ Wednesday - 03.31.21/Feeding 40 OZ of Advanced Nutrients
▶️ Thursday - 04.01.21/Feeding 40 OZ of Advanced Nutrients
🔹🔹🔹🔹🔹🔹🔹🔹🔹🔹🔹🔹🔹🔹🔹🔹🔹🔹
📜 Cultivar Information - We have created this strain by crossing the best Black Domina available with Very Berry and our own Lost Coast OG Kush, this plant produces large colas with a super intense sweet berry flavor with a sweet-smelling aroma that varies from fruit and berries to sweet candy. This lady offers tight internal stacking giving a perfect structure for those super heavy colas, which is perfect for growth both indoors and out, if grown outside she is fairly resistant to mold and powdery mildew which is a real bonus with such large colas.
🔹🔹🔹🔹🔹🔹🔹🔹🔹🔹🔹🔹🔹🔹🔹🔹🔹🔹

Likes
7
Share

@Caertner
Follow
Warten war mir jetzt zu blöd.
Hab eh schon 6 Tage mehr als beim letzten Stecki. Irgendwie werden die dieses Jahr im Sommr alle etwas später fertig. 2 Kollegen berichten ähnliches.

Likes
10
Share


@CanadianFillmore
Follow
Start of week 4, the blueberries had major bud growth during week 3 and they filled in nicely. There are a few signs of deficiency in the larger fan leaves, but overall I'm very happy with how the blueberries are growing. The Super Lemon Haze is showing signs of deficiencies, she's also hungrier than the blueberries, she got an extra 2 liters of nutes at 1/4 mute strength, the last two weeks. She may require full strength nutes in the extra feeding, to help with the deficiencies. Still, bud site development is coming along nicely on the SLH.

Likes
13
Share


@frenchysmoker
Follow
It went pretty good this week (*I'm sorry because of ly work I could not take pictures this week so you have 2 videos*). I will not cut anymore branches before turn into flowering next week, normally it will be a 20 week grow from seed to budd I hope great results with this Cheese from Greenhouse Seeds Company :)

Likes
2
Share


@Bwright_315
Follow
She is growing like a champ! And has a really strong smell. Praying it stay warm out as we are heading to October
Likes
14
Share


@BLAZED
Follow
Week 12 (17-4 to 23-4)
17-4
Temperature: 23.1 degrees (lights on) 19,1 degrees (lights off)
Humidity: 62% (highest) 50% (lowest)
18-4
Temperature: 22.5 degrees (lights on) 17.9 degrees (lights off)
Humidity: 61% (highest) 52% (lowest)
Opened the reservoir for a couple of minutes. ec 1.4 ph 5.7
19-4
Temperature: 22.5 degrees (lights on) 18.4 degrees (lights off)
Humidity: 64% (highest) 54% (lowest)
No pictures.
20-4
Temperature: 24.1 degrees (lights on) 19.1 degrees (lights off)
Humidity: 65% (highest) 54% (lowest)
Light increased from 50% to 60% strength.
I also made a new 10L feed, and added it to the reservoir, there was still 2850 ml in the reservoir, so i can calculate how much they get per watering.
Opened the reservoir for a couple of minutes.
21-4
Temperature: 24.4 degrees (lights on) 19.3 degrees (lights off)
Humidity: 66% (highest) 54% (lowest)
No pictures.
22-4
Temperature: 23.7 degrees (lights on) 19.7 degrees (lights off)
Humidity: 67% (highest) 42% (lowest)
Opened the reservoir for a couple of minutes.
23-4
Temperature: 23.6 degrees (lights on) 17.7 degrees (lights off)
Humidity: 64% (highest) 50% (lowest)


Processing
Likes
28
Share


@basementgrown
Follow
Day 64/F22: 8/13
-in a rush again, watered BD 1.5L and got runoff (late day watering yesterday), watered the rest at 1L and all got runoff except GB, gonna let dry out until tomorrow
-runoff ppm for orange was 6.4ph 320ppm
-planning on dropping second net tomorrow
-very pleased with bud production so far and they dont seem phased by the haircut
*all journals are day by day so i apologize if this diary feels slow
Day 65/F23: 8/14
-GB 3L feed (no runoff)
-BD 2.5L feed
-shang/orange 1.7L feed
Day 66/F24: 8/15
-BD 2.5L feed-373 ppm runoff
-Shang 1.7L feed- 447 ppm runoff
-Orange 1.7L feed- 453 ppm runoff
-GB 3L feed- 445 ppm runoff
Day 67/F25:8/16
-BD 2.5L feed
-Shang 1.8L feed
-Orange 1.8L feed
-GB 3L feed
Day 68/F26: 8/17
-BD 2.5L feed
-Shang 1.8L feed
-Orange 1.8L feed
-GB 2.8L feed
Day 69/F27: 8/18
-BD 2.5L feed
-Shang 1.8L feed
-Orange 1.8L feed
-GB 2.8L feed
Day 70/F28: 8/19
-BD 2.5L feed
-Shang 1.8L feed
-Orange 1.8L feed
-GB 2.8L feed

Likes
19
Share


@adam_pawloski87
Follow
Let’s go Day 85 from seed !! This has been another great week ,ladies are coming close to the finish line an looking so beautiful!! This week we will continue flushing on these 3 ladies an jump em into there 48 hrs of darkness on Friday or Saturday will see ! Let’s have another great week ,, peace love an positive vibes to all y’all Keep them eyes peeled for next weeks update !! Cheers 😶🌫️💨💨💨💨💨🤙🏻


Likes
5
Share


@Deltatigrou0169
Follow
Salut salut les Amis
Nous voilà déjà à la fin du mois, mes fifilles viennent de passer en pré-floraison depuis vendredi je suis trop content de mes fifilles.
J'ai commencé à leur mettre de l'engrais (PRO ORGANIC Grow et Bloom) pour la pré-floraison.
Je mettrai le (Bloom Booster) pour la floraison.
Je vous souhaite une bonne soirée à tous et à dans deux jours 😉🙃🙃


Likes
8
Share


@Audi_grows98
Follow
Apricot got got the chop last night! That’s why I’m late on my diaries,I knew she’d be ready! But man,she was an amazing plant to grow. There towards the end she started throwing new pistols but I think that’s just due to going a little too long cause i was wanting amber tricombs. They’re all fully cloudy with slight amber,can’t wait to see how she dries and cures🔥🔥
Likes
14
Share


@BlueDream123
Follow
Still at it. Now I have another tent on the go with some DWC and Autos
Likes
43
Share


@Sabac
Follow
Última semana de mis plantitas
Hoy corto 12 de 16
Fue un cultivo sin problemas.
Y creo que viene buena producción
Recomiendo 100% los fertilizantes hesi buenísimos.
5 cultivos con ellos y 0 problemas.
El sustrato Biobizz light mix excelente
Las semillas de barneys farm uff pura crema. Eva seeds recomendables y las sweed seeds buenisimas semillas para seguir cultivando. Los Led yxo para ser de un perfil bajo qué no a toda la gente les gusta cumplen la. Función 480w de pura potencia en un espacio de 120x120 los recomiendo para gente que tenga un presupuesto bajo.
Ahora voy por unos sobre 600w aunque los reforzaría estos con unos led de 100w
.
Bueno feliz con los resultados.
Esta semana mostraré los resultados de las plantas cortadas.
Se vienen más cultivos
Salu2


Likes
37
Share


@Ruediger
Follow
Tag 89 - heute wahrscheinlich das letzte Mal 1,2l gegossen.
Die Trichome schauen langsam schön milchig aus.
Jetzt heißt es regelmäßig nachschauen und Kontrollieren.
Leider ist die Luftfeuchtigkeit immernoch um die 65%


Likes
8
Share


@Chubbs
Follow
Weekly update on these beautiful ladies. Did another defoliating this week as well as lollipopped them up another node. I feel it helps mature the lower flower sites and allows plenty of airflow though the leafs. I introduced bloom nutes as well as P&K.
All in all Happy Growing.
Likes
12
Share


@Hazeberg
Follow
Day 92 Pink Cookies 102 cm: Nothing to do today.
Day 93 Pink Cookies 102 cm: Nothing to do today.
Day 94 Pink Cookies 102 cm: Nothing to do today.
Day 95 Pink Cookies 102 cm: Nothing to do today and we are getting closer to harvest.
Day 96 Pink Cookies 102 cm: I turn off the AutoPot System and the lights. She will be harvested soon. See the pics of the trichomes from mid to top buds.
--------------------------------------------------------------
🙏 Thanks for visiting and follow for daily updates 🌱


