


Likes
Comments
Share


@UKauto
Follow
Onto her second round of flushing now, be down by Tuesday I think.
Done better than I though she would give my the training, she said tiny and I wont get much off her at all but it's all good I just wanted to Get that structure with the mainline and further topping. Took it pretty well I think.
Smells amazing by the way and go to one that real nice colouring 👌🏻 Buds aren't really compact or anything and there's a load o fox tailing but again it's all good 😁 Next entry will be the harvest

Likes
1
Share


@fabialien
Follow
Semana del 9 al 15 de septiembre 2024.
Estas Autos BSF van con todo, muy vigorosas, excepto una blueberry y una Orange Blossom que van un poco lentas.

Likes
15
Share


@Wizzel420
Follow
Loved the small amount of nutes I gave her, light a bit closer seems to be handling it well. Next feed will boost ppm to 200 and see what happens


Likes
5
Share

@FourTwenty_Plants
Follow
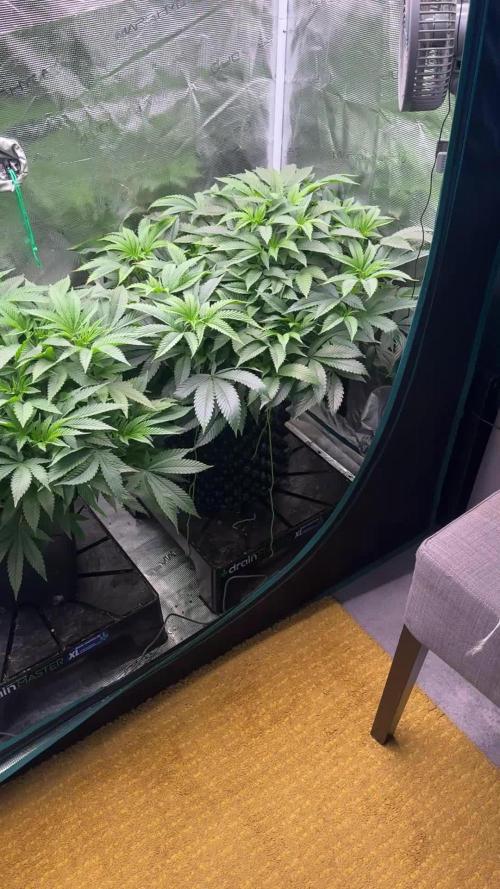
Last days in veg. I did the final defoliation before flipping to bloom. I’m really excited — the veg phase was super easy and a lot of fun with her. She’s definitely a training beast and constantly asking for nutrients.

Likes
9
Share


@BB_UK
Follow
She’s a beauty like her sister purple punch! She was number 2 to pop up (strawberry pie) and took to training straight away top of the class on mission catch up to purple... I defoliated and tied down through the weak shape shifting her into a lovely little bush! She has started to show signs that she also will start her pre flower stretch, so I’m excited to see what happens! I shuffled them around to suit age height etc as I will have to start raising my lights! In bloom I set these mars hydro leds to 12” and 18” during veg!


Likes
11
Share


@adam_pawloski87
Follow
This week has been great! Germination on all 4 Pre 98 Bubbas and 2 Dirty Blondes was a success!! We planted them in there pots an through out the week we gave em each a very light spray down of pure water phd at 6.5 and by Friday they all popped out the soil Let’s go!!!!! Next week we will start light feed on nutrients , so y’all keep them eyes peeled for next updates an I appreciate y’all for following my grow !!😶🌫️💨💨💨🙏🏻💚💯🤙🏻


Likes
22
Share


@eldruida_lamota
Follow
Que hay familia, Estas critical a granel están yendo de lujo , tienen un buen ritmo en cuanto a su crecimiento, y se ven sanas.
.
La humedad anda entre 60/70% la temperatura está entre 23/26 grados , y como siempre el ph , ya que es de lo más importante,está en 5,8/6,0.
.
AgroBeta:
0,8 ml x L Growth black line , vía radicular.
0,2 ml x L Tucán , vía radicular.
0,15 ml x L Flash Root , vía radicular.
0,05 ml x L Gold Joker, vía radicular.
.
Esto es todo fumetillas, muy pronto las veremos echando flores 💨💨💨 buenos humos.

Likes
2
Share

@DogDoctorOfficial
Follow
🌱 Week 4 - Black Diamond Auto - Plant A
8×8 Adventure | Learning What Nature Wants to Teach
Another week has passed inside the 8×8 Adventure, and every day reinforces why this project is so exciting.
Unlike traditional autoflower grows, every plant in this room was germinated directly under a 12/12 light schedule. There was never a long vegetative period waiting before flowering. Instead, each plant has had to build its entire structure while already living under flowering conditions.
It is a technique that fascinates me because it reveals just how different every individual phenotype can be.
Some decide to begin flowering almost immediately.
Others invest precious time building roots and branches before finally committing to reproduction.
That is exactly why every plant receives its own diary.
This week belongs to Black Diamond Auto - Plant A.
⸻
🌿 A Completely Different Personality
While several sisters have already started showing obvious flowering characteristics, this lady had other plans.
Instead of rushing toward bloom, she kept investing energy into building herself.
The result is becoming obvious.
She is developing into one of the strongest structural plants inside the room.
Long internodes.
Strong branches.
Excellent vigor.
Beautiful symmetry.
She almost seems to be saying,
“I’m not in a hurry… I’m building something worth waiting for.”
Sometimes the slow starters end up becoming the biggest surprises.
⸻
🌱 Why Growing Under 12/12 Is So Interesting
One thing I always enjoy explaining is why this project exists in the first place.
Most growers veg their plants for several weeks before switching lights to 12/12.
Here, the challenge is completely different.
The plants experience flowering light from the day they emerge.
That means every single day matters.
Every root developed…
Every leaf produced…
Every branch formed…
…is competing against the plant’s internal biological clock.
Watching each phenotype decide how it responds to that pressure is one of the most educational parts of this entire adventure.
⸻
🌿 Gentle Training Instead of Force
This week continued with very gentle Low Stress Training.
Rather than forcing dramatic bends or aggressive shaping, I’m simply helping light reach every future flowering site.
Leaf tucking.
Soft branch positioning.
Small adjustments every day.
Sometimes even gently bending large fan leaves out of the way instead of removing them.
At this stage every healthy leaf is still acting like a solar panel, producing energy for everything that comes next.
The goal isn’t to force the plant into a shape.
The goal is to guide her while allowing genetics to express themselves naturally.
⸻
💧 A New Chapter Begins: AutoPot Time
One of the biggest milestones this week is that Plant A has officially graduated into the AutoPot system.
This is something I’ve been looking forward to throughout the entire grow.
For anyone unfamiliar with AutoPots, they are a completely passive self-watering system.
There are no pumps.
No timers.
No electricity controlling irrigation.
Instead, everything revolves around one incredibly clever little device called the AquaValve.
The AquaValve constantly monitors the water level inside the tray beneath the pot.
As the plant drinks, the tray empties.
Only then does the AquaValve automatically open, allowing fresh nutrient solution to refill the tray before closing again.
This creates a natural wet-and-dry rhythm while giving the roots constant access to perfectly oxygenated nutrient solution whenever they need it.
The plant decides when to drink.
Not me.
It’s a beautiful example of letting nature control the schedule.
⸻
🔬 Why This Is Such A Fun Experiment
Even more interesting…
Plant A won’t be alone for long.
The current plan is to compare her performance against another Black Diamond that may remain outside the AutoPot system.
Same genetics.
Same room.
Same environment.
Different irrigation method.
It’s still early, so I won’t draw any conclusions yet, but this comparison could become one of the most educational parts of this entire project.
Sometimes the best lessons come from simply letting the plants answer the questions for us.
⸻
🌡️ Environment
The room continues running very consistently.
Environment
• 🌡️ Day Temperature: 33°C
• 🌙 Night Temperature: 25°C
• 💧 Relative Humidity: 63%
• ⚡ EC: 1.35
• pH: 6.1
• 💨 CO₂: 639 ppm
• 💦 Solution Temperature: 26°C
Even with the warmer daytime temperatures, the plants continue showing healthy metabolism and vigorous growth.
⸻
🍽️ Feeding This Week
Current nutrient program:
• Terra Grow — 1.8 ml/L
• Power Roots — 1 ml/L
• Pure Zym — 1 ml/L
• Sugar Royal — 1 ml/L
The feeding remains intentionally balanced.
No need to chase high EC values while the plant is still investing heavily into structural growth.
Healthy roots first.
Strong stems second.
Flowers will come naturally.
⸻
🌱 Looking Ahead
By the end of the week, she’s finally beginning to show the first signs that flowering is approaching.
Nothing explosive yet.
Just those subtle little changes every grower loves spotting:
slightly tighter node spacing…
new vertical growth…
the first hints that she’s preparing to transition.
Considering the structure she’s already built, I have a feeling she could become one of the larger plants in this room.
Only time will tell.
And that’s half the fun.
⸻
💚 Final Thoughts
One of my favourite things about this hobby is that every plant writes its own story.
We provide the environment.
The nutrition.
The light.
The care.
But ultimately, genetics decide how the story unfolds.
Plant A is teaching patience.
She’s showing that not every plant needs to sprint into flower to become something special.
Sometimes building a strong foundation is the smartest strategy of all.
I’m excited to see what she becomes over the next few weeks.
⸻
🙏 Thank You
As always, thank you to everyone following this journey.
To GrowDiaries for giving growers around the world a place to document and learn together.
To Plagron for providing the nutrition that keeps these ladies thriving.
To FOG LEDs for delivering the photons that fuel every new leaf.
To Zamnesia and the talented breeders behind these wonderful genetics.
To every grower who leaves a comment, shares advice, asks questions, celebrates the victories, or learns from the mistakes.
To the silent readers following along from around the world.
To the supporters.
To the critics.
To the old friends.
To the new ones joining every week.
Thank you for being part of this adventure.
Growers Love and see you all next week.
🌱💚
Likes
5
Share


@Nvchods3
Follow
esta semana se le realizo lavado de raiz con 22 lt de agua.
amarre dos de las plantas a una guia ya que el peso las estaba tirando hacia un costado.
quda poco para la tan esperada cosecha
Likes
17
Share


@Sativa_Juice_Grows
Follow
Shes killin it. Nugs are starting to
Fill in nice. More and more trichomes growing
Slowly getting more and more dense.
Thinking about giving this last week of
the nute schedule for biobizz
then im gonna give her the water treatment until shes ready
Super happy with this girl!!
Finally think i got the weeks to sync.
this video is the start of week 8 flower.
getting some purple hues on her
Had to give the branches some support
buds are gettin fatter and fatter each day
Super excited

Processing
Likes
1
Share


@Ferenc
Follow
Day 29: LST is done. 600W LED, 20 hours on 4 hours off the same with ventilation. Insetvrhe lamp approx 36 cm away. Water intake: 75 ml per plant plus triggering, humidity around 60 percent. Fertilization is on Monday, Wednesday, and Friday with BioBizz family, Tuesday, Thursday, Saturday bat guano and Epsom salt. Critical Orange Punch started flowering se grows very quick. Rest of them are OK as well they are on the way...
Day 30: I did LST again. I didn't have enough elastic band yesterday so I bought today and bent them better. I also set the lamp closer approx 32 cm.Day 31: I did LST yesterday and bent them. They already "lifted up" their heads toward the lamp. As they grow I will keep bending the main stalk and the side ones. I will try to create a spiral form and spread the plants with time.
Day 32: Almost all of them started flowering except Sour Stomper.
Day 35: Auto Critical Orange is the monster here. She is the most developed and tallestbwoth approx 28cm. (Hard to.measure property because of LST). Pre flowers developing nicely along the plants. I changed the lamp as it needed to my other tent because my other lamp is shit. So I will swap them one week here other week there... End of the week the tallest is Critical Orange Punch with approx 28 cm and the shortest Sour Stomper with 14 cm.


Likes
10
Share


@Jozef_Balcerek
Follow
PH ziemi się stabilizuje i to dobra wiadomość:-). Niestety to automaty i pewnie rzeczy są już nie do odrobienia. Prawdopodobnie za szybko były podlewane, trzeba poczekać aż ziemia przeschnie dokładnie. Przy następnej uprawie zwrócę na t6o szczególna uwagę. Jeden Chemdogging wygląda dobrze jeśli chodzi o wielkość rozłożenie, reszta słabo
Likes
229
Share


@OrganicNature420
Follow
Germination date 🌱 12/07/2021
Day 120 12/11/2021
Strain 🍁 SinCity seeds Frosted Biscotti
(Biscotti Sundae x Whitenightmare)
THC% • Unknown
💡 Mars Hydro FC4800
• Power draw 480W + 5%
• Max coverage 5 x 5
• LED 2070pcsSamsungLM30B1&Osram660nm
• Max Yield 2.5g / watt
• Noise level 0 DB
• Removable Driver +2m cable
• Daisy chain (multiple lights)
https://marshydroled.co.uk/products/mars-hydro-fc-4800-led-grow-light-samsunglm301b-commercial-greenhouse-medical-indoor-kit 🇬🇧
https://www.mars-hydro.com/buy-fc-4800-480w-4x4-energy-saving-full-spectrum-commercial-led-grow-light-mars-hydro-for-sale 🇺🇸
PROMO CODE • (ORG420) DISCOUNT 👍🏻 marshydroled.com
⛺ Mars Hydro 120 x 120 x 200cm
📤📥 AC infinity 6inch
💧 10lt dehumidifier
❄️ 3.1kw air con system
💉 Nutrients GreenBuzzLiquids
Organic Grow Liquid • 1-4ml until 2wk flower
Organic Bloom Liquid • 2-4ml flower stage
Organic More PK • 2-4ml +wk3 of flower
Organic Calmag • 1-2ml/lt whole grow
Fast Plants Spray • first 3days at night lights off
More Roots • 2-5ml veg +2wks flower
Fast Buds • 5ml +wk2 of veg until 1wk flower
Humic Acid Plus • 2-5ml whole grow
Growzyme • 2-5ml whole grow
Big Fruits • 2-5ml flower stage
Clean Fruits • 5ml flush 1wk
Ph powder
Root Gel
Living Organics
https://greenbuzzliquids.com/
PROMO CODE • organicnature420 15% off ✌️🏼
🥥 Growing Media • Coco Coir
Notes 📝
⭐⭐⭐⭐⭐
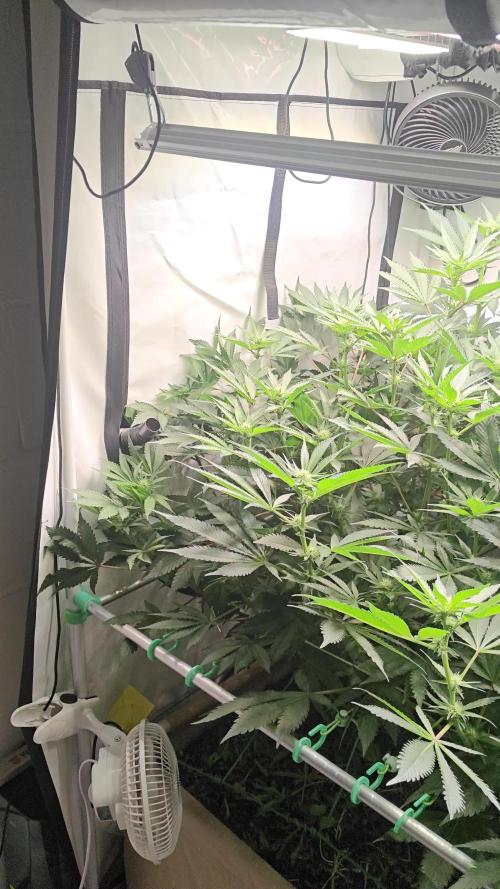
If this thing doesn't win a GD 🏆 then I'll eat my hat! What a beast of a plant.... 10/10
Monster Genetics 🌱
Monster nutrients 💉 = some dope ass bud 🍁
Monster light 💡
Sincity seeds, GreenBuzzLiquids and MarsHydro are on another level. Honestly this bud looks & smells top shelf. Going all out next time and doing the rest of this batch of seeds. Obviously I've purchased more aswell. Money well spent. 14days hang at 15c 60%.. might purchase some Grove bags for the final cure as reviews seen far better than jarring and burping. Happy growing fam see you in a couple of weeks ✌️🏼
Discount codes in bio for Mars and GreenBuzzLiquids 👍🏻



Likes
37
Share


@The_Bearded_Grower
Follow
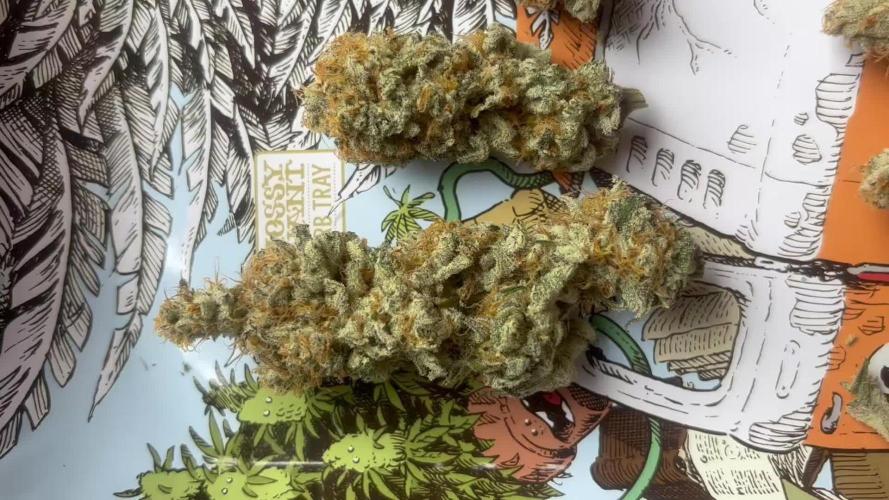
Welcome to Day 57 2/12/21 it's 35 days into flower and she is looking good. I have seen lots of growth and she looks healthy.
I have just realized that I have been doing the rez wrong all along but I think I can fix the mistake without dumping the rez.
I should have been mixing a new rez every week but instead I was just adding 18 L . I put 2 18L bottles in the rez when it should only be 1 that way I have less waste and keep the nutes fresh
that's all for this week's update so as always Happy growing and keep your stick on the ice 🙏


Likes
54
Share


@MrJones
Follow
MrJones Cream Mandeiran Auto XL - ViparSpectra XS2000 240W Infrared Full Spectrum LED Grow Light
´🍪⊱╮🍪╰⊰🍪 WEEKLY GOALS 🍪╰⊰´🍪⊱╮🍪
🏡Indoor - 3"x4"x8" Custom Built Grow Closet
🌞Environment - 80F and 60%Humidity - using Humidfyer as needed.
🌾LST and Defoliation - this strain likes to stretch!
🗓️Week 6 Flower
⚱️5-Gallon 📊5.8/6.2 PH
💧 Feeding / Using Dr. Earth Dry Organic Amendments - Home Grown & Bud / Bloom Booster
🌞ViparSpectra XS2000 240W x2 Infrared Full Spectrum LED Grow Light
🕷️ IPM - Will be using Green Cleaner" 1 OZ per Gallon, and CannControl from Mammoth alternating between products each month for Integrated Pest Management.
´🍪⊱╮🍪╰⊰🍪 PLANT UPDATES 🍪╰⊰´🍪⊱╮🍪
📝 Notes - With week 8 underway, Started the week off with an IPM treatment of Green cleaner, the buds are hard and getting very fat, the ViparStrectra XS-2000 lights are just blowing up on these ladies, just amazing!
╰⊰🍪╰⊰´🍪⊱╮🍪╰⊰🍪╰⊰🍪╰⊰´🍪⊱╮🍪╰⊰🍪╰⊰🍪╰⊰🍪⊱╮
🔶Sunday 08.01.21/ Just watering with H20 PH to 5.8/6.2
🔶Monday 08.02.21/ Watering with 32 ounces daily of H20 PH 5.8 / 6.2 - The plants are starting to show signs of nutrient lockout, adjust the PH to see if I can correct it, just not much time to do anything else.
🔶Tuesday 08.03.21/ Watering with 32 ounces daily of H20 PH 5.8 / 6.2
🔶Wednesday 08.04.21/ Watering with 32 ounces daily of H20 PH 5.8 / 6.2
🔶Thursday 08.05.21/ Watering with 32 ounces daily of H20 PH 5.8 / 6.2
🔶Friday 08.06.21/ Watering with 32 ounces daily of H20 PH 5.8 / 6.2
🔶Saturday 08.07.21/ With the week ending, the ladies ae looking great, just Watering with 32 ounces daily of H20 PH 5.8 / 6.2
╰⊰🍪╰⊰´🍪⊱╮🍪╰⊰🍪╰⊰🍪╰⊰´🍪⊱╮🍪╰⊰🍪╰⊰🍪╰⊰🍪⊱╮
Cream Mandarine XL Auto®️ Information
Tall-stemmed auto-flowering strain. This high-yielding 4th generation auto-flowering strain is the resulting hybrid from the cross between selected specimens of our Cream Mandarine Auto®️ (SWS29)) and a Super Tai’98 elite clone.
The genetic coming from the Super Tai’98 elite clone contributes with interesting Sativa characteristics to this hybrid, such as bigger size, but also subtle aromatic and spicy tones with hints of wood and nuts. The so much appreciated Cream Mandarine Auto®️ genetic contributes with traits from the Indica side, such as high flower and resin production, but also sweet and fresh aromas with tones of citric fruits of the mandarin orange type.
DATA SHEET
Variety SWS55
Indica: 35% / Sativa: 63,4% / Ruderalis: 1,6%
THC: 18-23% · CBD: 0,6%
Indoor Yield: 450-650 g/m2
Outdoor Yield: 50-300 g/plant
Indoor/Outdoor Harvest: 9 weeks from germination
Height: 110-150 cm
Likes
27
Share


@Mookzer
Follow
Elle fleurissent bien malgré un manque de chaleur et et lumière elle tienne bon au grand froid :)