
Likes
Comments
Share


@eldruidamx
Follow
Day 92. Watering with fertilizers.
Day 93. Watering with clean water.
Day 94. Watering with fertilizers.
Day 95. Watering with clean water.
Day 96. Watering with fertilizers.
Day 97. Watering with clean water.
Day 98. Watering with fertilizers.


Likes
8
Share


@ManilaGrowOp
Follow
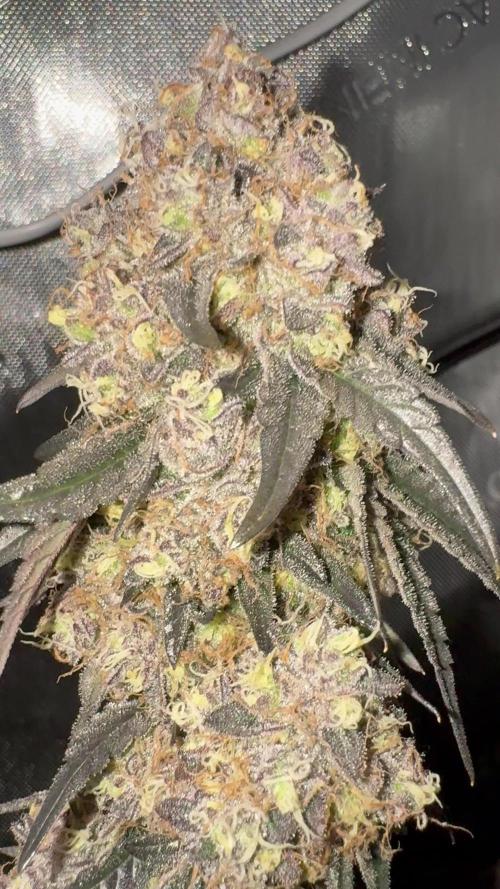
She’s starting to look like “real” cannabis lol
Buds are much nicer and fragrant. Some tops smells like candy, some of them smells like pastry and coffee. Weird but good!
Likes
2
Share

@Chrisandweed
Follow
Pues de van viendo mas gordas las pelotas de golf que tiene esta planta por cogollos y no tan mal oye jajajajaja. El olor es muuuuuy muuy muy dulzón y la resina se siente muy abundante a estas alturas. Con esta variedad juraría que le queda un riego mas con encimas, y ya despues paso a arrancar un lavado de raices de 2 semanas y corte... No lo tengo aún claro porque lo dicho, se están resistiendo jajajajaja pero es inevitable que les vaya quedando menos.
Os juro que es absolutamente asqueroso subir un video a la plataforma, seguramente no suba mas videos, son como 15 minutos de tener el telefono con la pantalla encendida en esta pagina mientras se sube, con todo absolutamente bugeado y funcionando fatal, así por cada video que pueda subir, cuando antes no era así ni de lejos y se que no es mi conexión porque hasta conectándome por cable con un hub tira bien, y el teléfono que uso un mi11 ultra, no será de los mas modernos a dia de hoy, pero no deja de ser un pepino de telefono.
Likes
2
Share


@gr3g4l
Follow
A los 9 dias ya se veian raices por los orificios de drenaje de las macetas por lo que me decidí a trasplantarlas a maceta de 6L textiles y meterlas en el armario donde pasaran el resto de sus dias. Aumenté primero a 150 W y en cuanto estuvieron un par de dias volví a aumentar hasta los 220W.
Se añadió también el humidificador para mantener una humedad relativa más alta.
After 9 days, roots were already visible through the drainage holes of the pots, so I decided to transplant them into 6L fabric pots and put them in the grow tent where they would spend the rest of their days. I initially increased the lighting to 150W, and after a couple of days, I increased it again to 220W.
I also added a humidifier to maintain a higher relative humidity.


Likes
12
Share


@eldruida_lamota
Follow
Que pasa familia.
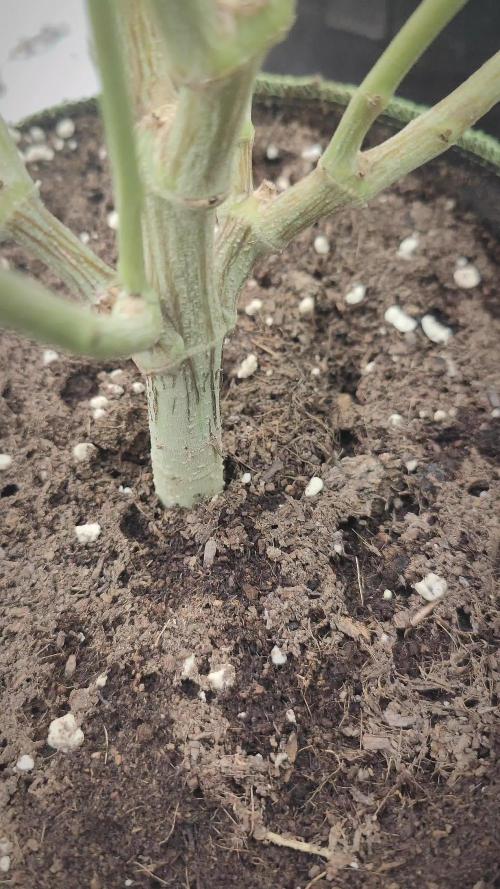
Noticias buenas y malas, de 3 ejemplares, uno nos salió hermafrodita. Empezó a formar plátanos esta semana y al estar tirándolos en ramas distintas, cortamos por lo sano y ADIÓS.
Quedan 2 subimos cantidad de comida, pegaron buen estirón, y las flores están formando sin problema alguno.
Dejo muchas imágenes y vídeos de esta semana, y ya deducen ustedes.

Likes
62
Share


@Tuki3
Follow
Pequeño update!
Pasamos a Pre Flora! Ahora si, estamos con 12 horas de luz y 12 de oscuridad, de a poco se pueden ver los "pistilos" (sé que no es el nombre, pero lo que se puede observar cuando sexa la planta).
Viene muy linda y adquirió buen tamaño para el espacio que tengo de indoor (50x50x110)
Veremos como evoluciona estas próximas semanas!

Likes
5
Share


@Revolberss
Follow
En observación, ya no realizare mas técnica. En este punto aumente el fertilizante 5, 6 ml X litro de agua, no tiene ninguna plaga, me preocupe de eliminar algunas de sus ramas y hojas en las que no llegaba el sol.

Likes
1
Share


Likes
24
Share


@3lementa1
Follow
This is the 8th week. Thursday will be 9 weeks of 12/12. Some trichs are amber. They just added a good bunch of girth over the past few days, but most of the pistils are red now. The rest of them have been dropping leaves consistenly but the canopy remains full so they must be putting out more leaves.
I just flushed to 80% runoff and found out that I had 1200ppm. I just got an ec meter but my last reading said closer to 600 so idk what happened there.
I flushed until I had runoff ppm of about 150. Now they're back in the grow tent. I don't want to keep assaulting them with my microscope. I think they're ready. Just gonna let them settle another day or two to dry out a bit.
I took one small branch off the small Wedding Cake plant on Thursday and I've just been watching it dry on my counter. It's been 5 days and the stem snaps but still leaves a fiber connecting. I put it into a small jar with a 64RH thing. I just want to try it. It already smells amazing.
The leaves on the big CBD Blue Shark plant are going really yellow and some other colours are starting to come out as well.
The buds all fattened up and got more frosty again. I was worried they were foxtailing but they got more calyxes underneath the peaks and have been making more of a pyramid shape. They're really close to peak. Harvest day will be March 17 or 18.
March 17 1023pm chopped and hung after lights off all day. RH was 65% before I chopped and 50% after I closed the window and cut the plants off the saturated pots. I did a wet trim to prevent mold. The buds are sticky af. Gonna hang them to dry for 7-9 days before curing in jars :)
March 18 : checked the RH when I woke up and it's chilling at 45% 😎
March 19 : just checked to see how they were drying. There are seeds in every plant. RIP
I'll update when I put them in jars and again a few weeks later for final review. Overall it was a good grow despite the rocky start and a good introduction to the mainline technique and my new grow space. Next grow I should have everything pretty well dialed in.
March 23
They were hanging for 3 days. Rh was around 45, then spiked to 65 overnight when I forgot to turn the fans back on. Temp was high at around 26.they felt wet after 2 days, and bone dry after 4 days. The stems still didn't snap but I put them in jars anyway. A day later, jar RH was 50%. I burped all the jars and there was a smell from the new jars. I took all the weed out, washed out the jars, and did a dry trim on the weed.
One of the Wedding Cake plants must have gone hermie. I didn't see any bananas and didn't even realize there were seeds until the very end. The seed pods looked just like calyxes while the plants were growing. Many of the nugs are unusable. Under the sugar leaves are just layers and layers of seeds. Some weren't hit that badly. The CBD Blue Shark is much better off but still has some seeds.
I'm trying to stay positive. It's a bit of a shock though. I'm anxious to try the finished product. If the flowers at least taste good and have a good effect, all is not lost.
Likes
4
Share

@Growlicious
Follow
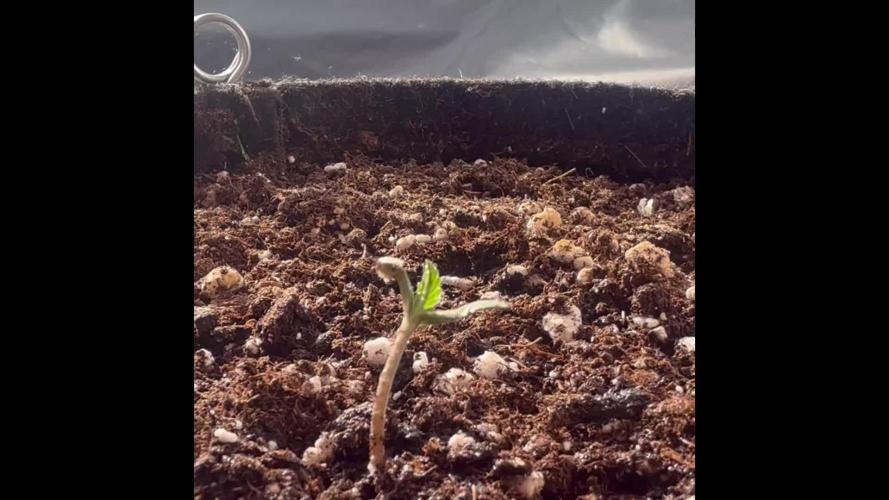
🌱 Day 3 – A New Beginning
On Wednesday, the journey of my Tropicana Cookies Auto began. It’s still in the germination phase, but every grow starts right here—with a little patience and a dose of anticipation.
It will grow entirely outdoors and is therefore exposed to natural conditions. I’m curious to see how it develops over the course of the season and look forward to documenting every milestone here.
Here’s to a successful grow 🌱✨
Likes
1
Share


@Cannabees_grows7691
Follow
The nugs are starting to get orange hairs on them. Item 9 has thick nugs and red velvet is frosty.
Likes
5
Share


@LeedsCityFarmz
Follow
Repotted into 20L pots. Accidentally snapped a stem while using plant bends but she will recover nicely so not to worry. Again not enough pictures/videos in early veg unfortunately. EC also upped slightly.
Likes
6
Share


@Sato_Growing
Follow
Going to add week comment soon cause i have a lot of work to dooo ! :P
You can understand i suppose happy new year with a lot of trimming job to do <3


Likes
16
Share


@ChewiesGrow420
Follow
Added Exhale c02 and top dressed in each pot with 1 tablespoon per gallon of growing medium my pots are 3.6. I added 3 tablespoons. It is my hopes that with adding the slow release dry amendments and once the c02 bag sarts growing my plants will finally grow. They are short but have 4 nodes at day 21. What is an exhale c02 bag? “The ExHale bag is a patented strain of mycelium that produces an abundance of CO2 without fruiting. This means that when our bag is activated, the mycelium grows, eating the substrate it comes with, giving off heaps of CO2 straight into your garden, and it does all this for 6 months - guaranteed!”
At day 25 I am not impressed with the size of these girls? Hope they hit a growth spurt soon? Their internodes are stacked very nicely.
At day 28 growth is very slow. Practically none existent since my top dressing at day 23. 2 plants have received a very minimal nutrient burn. As I do not have a soil ph tester? I will be watering with a ph of 6.0 rather than 6.5, hopefully that helps. ONWARD!
Likes
7
Share


@Papabro2k
Follow
Growing amazing stayed small and fat smell ya great frost and very sticky I removed a few fan leaf today am so happy with fastbuds there autos are amazing
Likes
24
Share


@DeepRootsGrowTrees
Follow
SWISS DREAM ROSE CBD 🌹 AUTO ORGANIC GROW
WEEK #12 Overall
Week #9 Flower
This CBD plant is 👏 amazing first she's just a beautiful plant with her dense purple buds that just pop with the orange hairs and trichomes she even has a nice aroma about her. She's got a few weeks left. Stay Growing!!
Kannabia.com
SWISS DREAM ROSE CBD AUTO

Likes
3
Share


@BLAZED
Follow
Week 9 (12-8 to 18-8)
12-8
Temps: 22.2 to 29.1 degrees
Humidity: 47% to 61%
Watering: Both 1500 ml.
Dry Weight #1: 2.6 kg. #2: 2.7 kg.
13-8
Temps: 23.8 to 28.6 degrees
Humidity: 57% to 70%
14-8
Temps: 25.1 to 29.8 degrees
Humidity: 56% to 65%
I found out that i had the timer on 16/8 instead of 18/6 for the entire 9 weeks.
Maybe this is the reason why the plants dont grow that fast.
15-8
Temps: 24.8 to 29 degrees
Humidity: 46% to 66%
Watering: Both 1500 ml.
Dry Weight #1: 2.5 kg. #2: 2.4 kg.
Today is the first watering from the bottom.
Also removed some leaves.
16-8
Temps: 24 to 28.4 degrees
Humidity: 49% to 68%
17-8
Temps: 20.4 to 26.3 degrees
Humidity: 45% to 79%
18-8
Temps: 21 to 28.3 degrees
Humidity: 40% to 59%
Watering: Both 1500 ml.
Dry Weight #1: 2.6 kg. #2: 2.7 kg.
Did some mainlining/scrogging
Likes
85
Share


@CRiSPrGrow
Follow
So this week is a flowering week for the C99, still the shotest in the bunch , stll got those elongated thin leafs growing, she's doing great, loads of flower nodes up and down the main cola and the side shoots too. Added some NPK and some Micro, got the smart protein on the go too. This one really like the extra light and the extra magnesium, she's really promising, really hope i get the result i'm dreaming of . Did a last defoliation last week, these took it in their stride, totally . Any advice is welcome, write me a message if you want


