
Likes
Comments
Share


@tontodedoverdee
Follow
18/1
New week and we are coming close to the end! let's keep rolling

Likes
4
Share

@Borberad
Follow
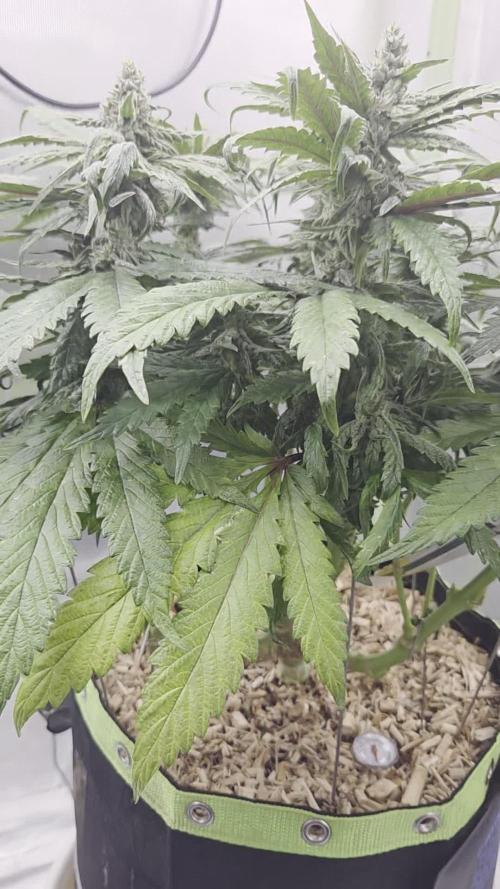
Woche 13
Kaum Stempel, viele Trichome, fast schon fertig. Lustiges Mutantenblümchen. 🤔 Sollen wir sie weiter stehen lassen und sehen ob sie noch etwas Volumen aufbaut? Datum der Kamera setzt sich leider immer wieder zurück, sobald sie vom Strom genommen wird, also nicht wundern, wenn das demnächst mal nicht passt.
Likes
11
Share


@Hempface86
Follow
Okay, here we are on day 7 officially done with the first week, and so far so good.. Last attempt I use reused soil, which is why this diary is called redemption runtz .. i just gave a very minimal feeding and only went around the edge of the pot so the roots have to go searching.. Big thank you to Kannabia Seeds for making this grow possible 🙏 .. Thank you all for stopping by and showing love. I hope everybody's having a great day.God bless and happy growing ✌️

Likes
Comments
Share

@BlunthumbMD
Follow
She grew easy and smells great. Chopped at day 91 after 48 hours of darkness, ended up with 37 grams of dried and cured nuggets. Very interesting bud structure, very dense, first time I saw literal dripping. The smell is sweet, skittles, tropical fruit. The flavor on the smoke hasn't tasted as pronounced, still tasty. The high is good for a sativa, still somewhat motivated. RQS has sold me some great genetics so far, and the cheapest as well.

Likes
4
Share


@SherbGrows
Follow
Ganja Farmer Seeds
Mandarine Auto
Day 25 from sprout
Light: ViparSpectra XS2000 dialed in at 75%
Watering top and bottom every other day to every 2 days
I am very happy thus far with the genetics from Ganja Farmer Seeds. Mandarine Auto is doing well responding to LST and is starting to grow at a faster rate moving into week 4. My hopes is that she takes another week or so to begin pre flower.
See you all next week! happy Growing!

Likes
1
Share


@growzindeleve
Follow
Fertilizer according to feedchart from manufacturer, pro line.
For details, contact me.
@growzindeleve

Likes
9
Share


@Houdini
Follow
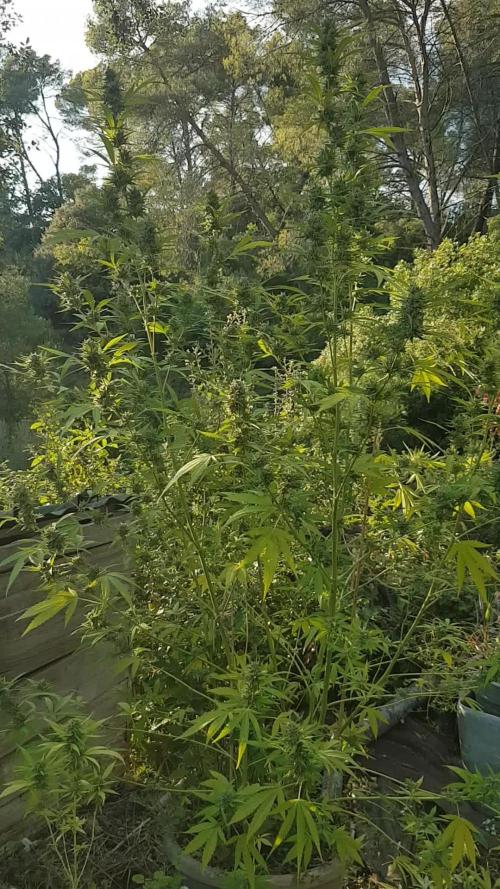
Greenhouse to prevent from mold cause autumn is coming and I think he's a bit late 👌🏼
Likes
38
Share


@Ukfarmer420
Follow
Hi guys
This week I been tucking and pulling off selective leafs.
The stretch is still real the blue cheese has exploded In growth and absolutely stink. I will be doing a major end of the week and removing little nodes that didn't make it.
I finished a week flush as I did burn them, but now there back on the nutes, 2ml per litre of bloom and 1ml per litre of top max. I put 25l In the resivour so will see how long that lasts.
Both plants are showing calyx and pistils.
Looking forward to this one hopefully the nutes will kick in and the dark phoenix will be healthier green again.
I will keep you updated thru the week as I expect a few changes in thru the week.
Happy growing guys 👌💪💚
Day 16 12-12
So I done a little defoliation, I will be doing final one one day 21.
So on there back on nutrients now at half dose.
Autopot system is working brilliant.
Felling good for this run.
I'll keep you all updated if any major changes occur.
💚👊💪


Likes
6
Share


@Karl_Heinz420
Follow
🦍 - Love !
Der erste Eindruck der Buds ist sehr positiv. Die Buds sind enorm klebrig und fest, dazu ein fast schon stechender Geruch von Diesel in der Nase, der von einer süßen Note abgerundet wird. Das Tasting folgt nach dem curen ⛽️🍦
OSS Gorilla Glue #4 kann ich jedem Grower empfehlen! Der Strain lässt jegliches Training mit sich machen ohne Zeichen von Stress zu zeigen und beglückt den Grower mit dicken köstlichen Blüten 🔥 Daher werde ich den Strain zu 100% ein erneutes Mal kultivieren. Mein persönlicher Lieblingsstrain ✨

Likes
29
Share

@secretcedar
Follow
Day 175
Flowering is progressing and the weather has cooled down.
I'm wondering when I'll start cutting back on fertilizer.
I think I'll do it for another week or two.
There's just a little rain this week.
I think the buds are small, but they're dense.


Likes
75
Share


@DogDoctorOfficial
Follow
Greetings, Green Champions!
We're diving headfirst into the first-week update of our vibrant Panty Punch Auto, and the journey has been nothing short of spectacular. Building on the magic of germination, the little one has truly taken off, and I couldn't be more thrilled.
As I transitioned into the feeding phase, my trusty partners at Aptus Holland have been steering the ship. A heartfelt shout-out to them for being my main sponsor and providing the only organic mineral line I trust with my green companion. The regimen includes 0.15ml/L of Regulator, 0.5ml/L of CaMag Boost, 1ml/L of All-in-One Liquid, and a touch of 0.25ml/L from Startbooster.
Maintaining a TDS of 260, a pH of 5.9, and a solution temperature of 21 degrees has been my recipe for success. The Panty Punch Auto is thriving in this carefully curated environment, and it's fascinating to witness the impact of these precise conditions on her growth.
Aptus Holland Nutrients :
Regulator (0.15ml/L): This vital component has been the guardian of my plant's health, ensuring optimal nutrient uptake and resilience against stressors.
CaMag Boost (0.5ml/L): Playing a crucial role in bolstering calcium and magnesium levels, this has fortified the plant's structure and overall health.
All-in-One Liquid (1ml/L): The all-encompassing elixir, providing a balanced blend of nutrients essential for every stage of growth.
Startbooster (0.25ml/L): The kickstarter for early development, contributing to robust root formation and vigorous vegetative growth.
A monumental shout-out to Trol Master for blessing this grow with their Tent-X System Main Controller (TCS-1). This innovation is a game-changer, and I feel incredibly blessed to be one of the fortunate few testing it out during this run. Stay tuned for updates on this cutting-edge technology!
To the brilliant minds at Seedstockers, who crafted the genetics that sparked this green symphony, your ingenuity is truly appreciated. Grow Diaries, you remain my go-to platform for sharing this and all my journeys, connecting with fellow cultivators, and gaining insights that elevate my cultivation game.
To my followers and the entire green community, your support fuels this journey. Each like, comment, and share is a reminder of the shared passion we have for cultivating life.
Here's to the Panty Punch Auto, to Aptus Holland, to Trol Master, to Seedstockers, Grow Diaries, and to the incredible community riding alongside me. Together, we grow!
Genetics - Panty Punch Auto - https://seedstockers.com/
Plant nutrition - Aptus Holland - https://aptus-holland.com
LED Photons - Lumatek - https://lumatek-lighting.com
Controls - Trol Master - https://www.trolmaster.eu/
Watering - myself
Love and attention - Me, myself and i
As always thank you all for stopping by, for the love and for it all , this journey of mine wold just not be the same without you guys, the love and support is very much appreciated and i fell honored and blessed with you all in my life, With true love comes happiness. Always believe in your self and always do things expecting nothing and with an open heart , be a giver and the universe will give back to you in ways you could not even imagine so
More info, the ocasional give-away and exclusive updates from all my adventures can be found - links in the profile description
Friendly reminder all you see here is pure research and for educational purposes only
Growers Love To you All 💚 💚 💚

Likes
1
Share


@jaydee702
Follow
plant is doing well 3 more days and i will defolate and lolly pop for day 21

Processing
Likes
14
Share


@Reforced
Follow
12/3 Gave all the plants a much needed trim & watered ones that needed it.
12/5 Had to throw away one of the blue cookies because it turned into a male.
i think it was because I left the light on for 24 hours accidently. I kept it on the same 12-12 schedule & It didn't seem to phase them much.
12/6 Watered 5 of them

Likes
6
Share


@BioGrowBayer
Follow
Die Pflanzen entwickeln sich gut, Buds werden dichter und zeigen erste Harzentwicklung. Stickstoffmangel erkennbar aber ich habe die Düngung leicht angepasst


Likes
2
Share


@Fatbudz
Follow
Incredibly, they both gave almost the same, 70 grams each.
good quality but it was below expectations
I felt a difference compared to the cars in the first round
maybe my fault or genetics 🤔😅🤪
Likes
4
Share


@Bluntblazer66
Follow
Mar 31st
Week 16
Mar 30th changed nutrients
First 2 days will be straight Dense Bud Compactor @ 900-1000 ppm
I use 1 gram / litre
On April 1st I will add all other nutrients to the existing solution and check ppm level is not to strong
April 1st
Changed nutrients from straight Dense Bud Compactor to a full nutrient mix
I used 8 litres of fresh water + 6 litres of the Dense Bud solution to make a mixer that is @ 1100 ppm

Likes
144
Share


@roro_204
Follow
I received the clones from An out of province breeder.
It reached me after three days of driving on the road with no light. Their future was not certain.
I didn’t think I would need that many fans for the clones because they are so tiny, I figured they didn’t need that much maintenance.
I was 100% wrong when I’m working with this many plants.
I ended up getting mild mildew on top of the soil on the first week because there was barely any air circulation.
At this point I didn’t have any Ventilation put up yet. And one fan on the floor. I ended up installing three fans in one room. No issues
Likes
33
Share


@The_Moz4rt
Follow
I've started this week with a heavier defoliation. Not sure it's worth it but I want to try it anyway, might as well make experience.
I want to take a break from defoliation though, she's still my first plant so I really don't want to overstress or damage her.
Pistils are getting bigger and I can't wait to see the bud! Watching carefully the flowers development as I've never seen that before.
Hoping in some final stretch.
End of the week: she stretched almost 10 cm in four days. I love this plant.
I also rised the EC to 1.7. Still waiting before switching to Canna Flora nutrients.
She's beautiful and bushy, I definitely need to slow down with those little frequent defoliations tho. Don't want to stunt her growth, especially now.
Likes
2
Share


@Pechu420
Follow
They're gaining quite a bit of weight and shouldn't last much longer. The smell is strong and delicious, and the resin is getting stronger. Ak1 is more depleted, more yellowish, and also has a lot of fat buds.
12/12 from seed
Watering with filtered tap water every 2/3 days, when the pot is lighter, 500-1000ml
Soil:
peat, coconut powder, perlite, carbonized rice husk, sheep manure and worm humus. essential mineral mix, vegetable flours, vegetable cakes, biochar, bokashi EM1 and other organic inputs, Algae ascophyllum nodosum
small pots 3,7liters // 1gallon
light: lm301h-evo
120watts with other plants