


Likes
2
Share

@greenixx
Follow
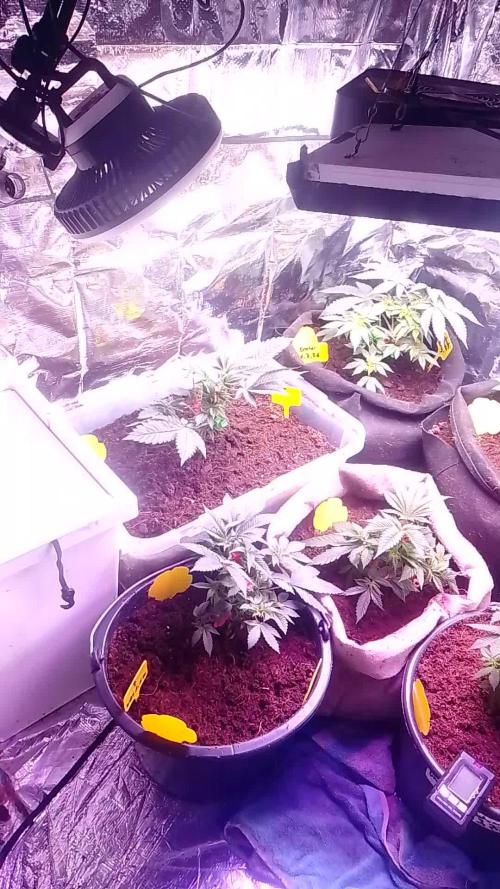
letzte Mal heute umgetopft alles für die bluete vorbereitet ab heute ist 12/12


Likes
5
Share


@Gingercannacat
Follow
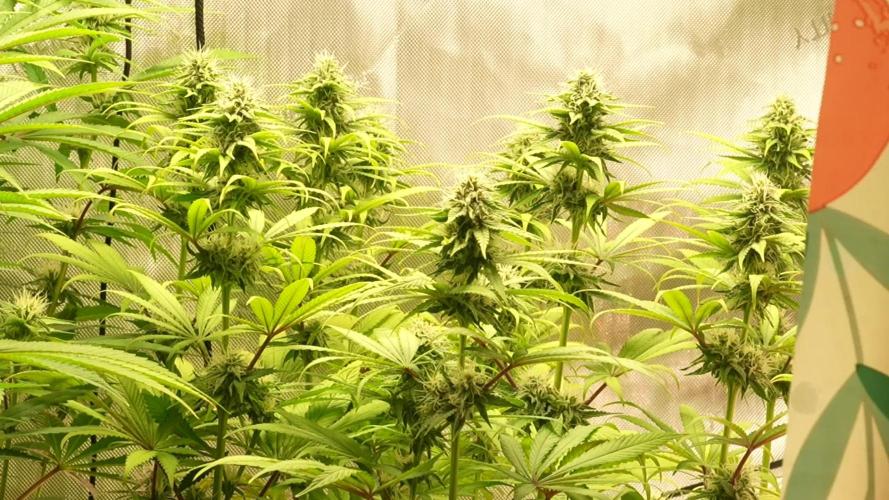
Smooth week to be honest. Nothing major to report. Growing green and are stretching well.
Fertilizers.
Plagron: dropping the grow and roots fertilizers. Only feeding bloom, power bud, and vita Race this week.
I hope this smooth ride continues till harvest.

Likes
6
Share


@AutoCrazy
Follow
Week 2 of flower
The Red Hot Cookies and Lemon Orange are really stretching out. Glad I put them at the back of the tent. The Mimosa X Orange Punch is taking her time as far as flowering goes. The Black Apple Hitchcock (there is a separate diary for this plant) has been even slower transitioning into flower. But all in all the plants are happy so I am happy.
6.0 pH
500 ppm
65F water temp
71 tent temp
41 % RH

Likes
1
Share

@Garys_Mod_Green
Follow
6/17/2026, WEEK 11 renaming my little growery to Verdant Fool! I am going to be making video diaries from now on I hope you follow along my account if you enjoy this format ! It's a much more personal view of my garden. Please leave comments on what you like and any suggestions you have . LOOK AT THOSE MACRO SHOTS AREN'T THEY COOL !

Likes
2
Share

@fabialien
Follow
Semana 4. 20 - 26 de octubre.
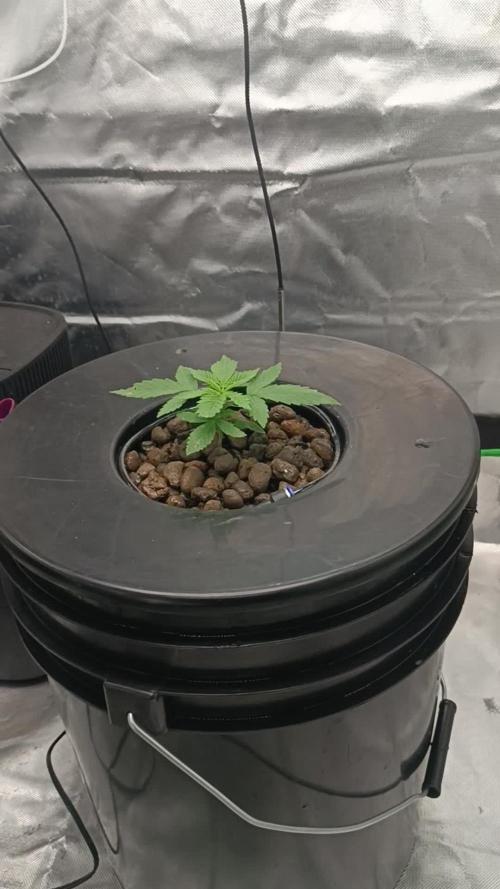
Se mantiene en maceta de 1 galon, con Anillo de riego y solución nutritiva.
Agregamos tarantula el 24 de octubre y al día siguiente 25 de oct, retiramos esa agua por acumulación de bacterias. Misma nutrición sin Tarántula.
Likes
17
Share


@CanadianFillmore
Follow
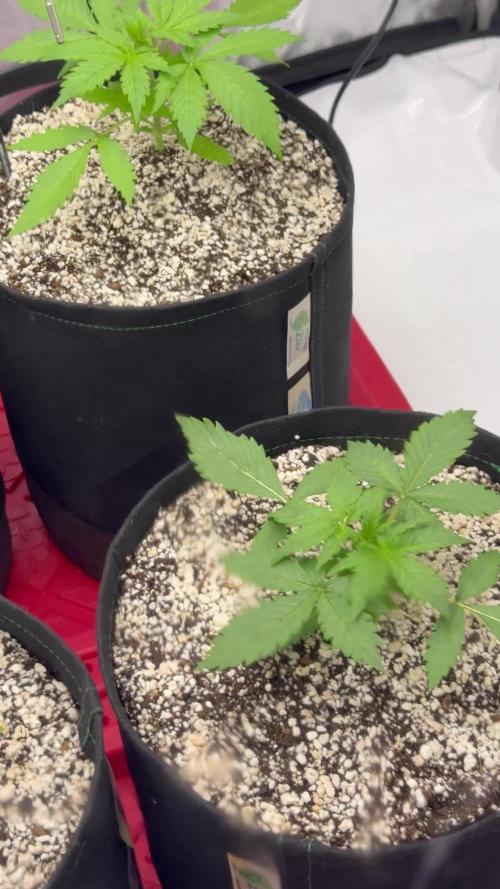
Week 3 veg begins. Not feeding at this time as the pots are still heavy and the medium feels moist from last week. Plants look healthy and happy.
Nothing more to report at this time, thanks for stopping by, see you next week! 👽🌳🔥


Likes
2
Share


@narniamars
Follow
Will update further after cure complete.
Harvested at beginning of 14th week from seed. Of the three plants that finished in this run, this one probably got the best flush even though it wasn't the longest. Started to see yellow and blue by the time it was cut. Mild trimming at harvest. Went 10 days drying at around 60-70RH. Dried on string in boxes, dry trimmed some, moved to paper bag for a few days where RH ended up at 58. May have over dried slightly. Sealed paper bag inside a plastic bag for a few days before continuing to jarring. My drying process was experimental, but wanted better smell from buds than what I'd achieved with other plants grown with this one. The smaller stunted cheese smelled amazing, but the smell faded during dry/cure and it didn't taste the best. That one got the least days flush, but its potential was still evident.
This cheese had more dense buds (still not as dense as Early Miss). Some of the buds turned out bluish, most likely because night temps were 57-60F and it was colder during 48 hours dark. It smells just like the other cheese--both Canuk freebies from separate orders. The smoking experience is mild to moderate with a heavy indica lean. Mild-to-moderate head. No anxiety. Heavy body. Too much and it can cause drowsiness. Good night cap cultivar for me. At first, I thought this one didn't smell as strong as the first cheese, but I must be getting desensitized because others say it reeks.
I would definitely grow this again, but I doubt mine got up to the advertised 22% THC. More like 15. Yes, this plant was stressed in early grow, but rebounded nicely. Relative to the Early Miss from CKS also in this grow, this cheese is maybe a little less potent even though the Cheese is supposed to be more potent according to the respective company's information. It would make sense that Canuk's cheese is similar to other/original cheese strains which seem to be listed around 15% THC, but who knows, maybe it could become killer with a better grow/grower.

Likes
2
Share


@Ninjabuds
Follow
Skunk apple runtz I'm probably only going to keep 1 of these guys seeing the 2nd just has really bad growth so far. I'm sad about this I made this cross out my last grow and was hoping for the better end of things. The other plants is decent but we will see I hope it has the growth pattern of the lit farms Rick bobby and the bud structure of the obama runtz I grew
It's looking like a good start to a week the plants are strong they are getting to the point I can let the dried dry out completely. I'm thinking by the end of this week the plants will be starting to be sold.
Last week I put all the plants into my bigger 2x4 tent with my medicgrow mini sun 2 the 500w version. Only a few of the plants were ready for that light. Seems like the only plants that really have good resistance and have a strong start are the weedseedsexpress.com seeds. Shout out to weedseedsexpress.com for the strong plants.
I ended up putting all the plants back into my 2x2 tent with the 55w amazon light it has alot more blue light in its spectrum. It's kinda weird b4 I switched the plants to the 2x4 tent they were getting 220umol under my amazon 55w led then when I put them under the 500w light 25% strength about 50in from plants and they were getting only about 195umol in that tent but it was stressing most the plants. I assume a larger light has more side lighting hitting the plants. I think when useing larger lights it's good to measure umols from the top but also coming from the sides. I think durring seedling stage they only need about 50% the umols coming from the side the plants as the top is receiving.
When I put the plants back in the small tent about the same umols as they were getting b4 the switch and they were still a little stressed. So for a few days I put the small light at the top the tent giving them 100umols for a few hrs then 130umols the rest the day.
Likes
152
Share


@EBxAH
Follow
Week 13 and 3rd week of flower started today 8/29. I did some Schwazzing last night! They were definitely ready!!! And today they are absolutely LOVING their new cut, leaves justa pointing right up 😎 Now I just sit back for a bit and watch the progress 😁 I have a video on my YT of me doing the Schwazz: https://youtu.be/gV8Ca02IJIY If it doesn't click here with a link you can just copy and paste!
Happy growing everyone ✌️🍀✌️
UPDATE: 9/1 Everything is looking good! The ladies are still taking well to the Schwazz and flowers are coming along nicely! Starting to get that beautiful aroma 🙃 It's hurricane season so we'll have some rain coming up but I'm only 3 weeks in flower so that will be gone come crucial time. Temps outside are starting to go down so it's looking like a nice, gradual transition! You don't want to immediately adjust your temps, rh, etc. You have to ease it all down during early flower 😉 That's about it for now, just wanted to share my vibes with yall. It's all about the VIBES 😎
Happy growing everyone ✌️🍀✌️


Likes
7
Share


@CannabisAprendiz
Follow
Esta cosecha fue muy buena con excelentes resultados de flores muy compactas y demasiado resinosas , la genética en sí es muy resinosa con olor muy característico , con sabores terrosos muy marcados .
Likes
23
Share


@SirSmokeALot333
Follow
Week 9 :
Day 59 :
Hey all
So week 9 started and some of the lady’s are bulking up , like Westcoast O.G and some of the Strawberry Pie . But the Westcoast O.G in the picture gonna be first one to harvest and also gonna give me some fat dense buds , i can see that clearly 🤤.
About the Gelatos I am a bit dissapointed cause all of them 3 are like normal plants with no strong structure or a big yield sign . I hope the taste gonna prove me wrong cause I like this strains , one of my favorites . I also can’t wait to try this Westcoast O.G and Strawberry Pie again , I growed them both on one of my last runs and they turned out pretty good , especially Strawberry Pie 🍓.
I hoping for a 25-30 g per plant , but I guess this gonna be a hard one this time.
Like my Gorilla Glue the only one Sativa in the tent but also the slowest in growing flower and she’s eaten much lesser than the her indica sisters . But wow she got s crazy fruity smell with full of crystals on her .
Cream Cookies she growed so fast in the last week , that she has come close to the other ones . I think this strain is a very fast bloomer , my last one was ready on day 69 from seed to harvest with a good amount of amber . Also a very flavoury strain 🍪
Yesterday I started to feed them Batguano , this should bring some green healthy leafs again and fat smelly buds .
My first Chem on the picture is really hungry right now , I started a bit late for her but this should be ok .
Updates coming
Likes
6
Share


@Frutalba15
Follow
Sie entwickelt sich wunderbar! Ich dünge aktuell bei jedem Gießen. Alle 2-3 Mal gieße ich mit normalem Wasser. Sie riecht richtig intensiv und ist so klebrig und harzig. Beim vereinzelten Blattentfernen muss man aufpassen dass man nicht kleben bleibt 🤣

Likes
57
Share


@Todzilla
Follow
4 Purple Push Pops PPP (grew 2023 outside)2 Black Cherry Gelato BCG (love to smoke it, first time growing)
Clones- from my clone guy
1000w LED, 4G Autopots,, coco/perlite 65/35, GH 3-part+ flourolicious, calimagic, SI, chelated iron, and humic acid , RO water, AC pro Controller and T8, 5x5 GG Tent with extension
Garage grow SoCal
This week I was out of town and let my grow grow. The autopots did their thing at about .6g a day. I did battle multiple hot days in the garage.
We’re running just under 1000ppm with no issues. I ran out of bloom and used some powdered kool bloom and it worked well. Thinking of switching to jacks RO but it’s working so good now I don’t want to switch.
This weeks accomplishments:
install two more autopots - for the gelatos.
I put the gelatos in fabric autopots, one 5g xl and one 15g xxl.
Scrogging the gelatos to flatten the canpoy
Long term issues
Cooling and VPD targets during heat waves
Preventing pest and mold issues - my humidity crept up high when I was gone and I saw a few powder leaves which were promptly removed upon my return.
I had to take my fiancé to a swanky resort for a few days.
I hope you all are having as much fun as I am.
Best of luck gromies.
Check out my black cherry gelato grow.
Soon I’ll be posting my outdoor light dep grow - side by side with my indoor grow- same clone batch. This should be a great comparison of indoor versus outdoor grows side by side 👍


Likes
8
Share


@Marianolst
Follow
Me fui de vacaciones y la planta creció mucho.
Tuve que volver a hacer LST por qué aún queda crecimiento y se me van muy hacia arriba lo que no puede pasar por los ladrones.
La verdad espero una gran producción si todo va bien Familia Gorilla son unas bestias

Likes
422
Share


@Crashoverite
Follow
Hi everyone.
Welcome to my🍌💜👊 week update.
Hope everyone keeping well and having a great week.
Daily updates and uploads so if week not over yet. Please revisit to see full week content😊
Thank you all for such amazing support 😊🤗💜
So far everything is going great. No issues at all. Both girls started preflower on Tuesday and already I can see that they started stretching nicely. Scrog net will be installed by the end of this week.
Week 5
13-19 Nov.
13/11 day 36
First runoff experience for girls. Loaded both pots with approx. 2.5 ltr each in 4 stages of 500-700ml. Runoff 100-150ml from each. Runoff PH 5.9. Nutrients for this watering were same as on previous week and added only calmag. Next watering possibly Friday but with new measurements.
14/11 day 37
Both 🍌💜👊 girls started preflower on same day. Xena is catching up quick to her larger sister and possibly soon they will be sharing this growing space 50/50
15-16/11 days 38-39
Just happy and healthy days 😁 nice steady growth.
17/11 day 40
Second watering for this week. 5.5l beetwen both. Runoff Ph 6.1
19/11 day 42
Most busiest day so far. Both girls got very bushy in last few days and they stretched enough to install scrog net. Before installing net applied selective defoliation on both girls. 8-10 fan leaves from each.
It's the end of this amazing week 😁
Thank you all again for such a great support 🤗✌️💚