


Processing
Likes
Comments
Share

@CrackinBeans
Follow
Well I'm a bit upset last week I ended up dropping my ph meter in a tank of nutes I was mixing and by the time I got it out the meter was junk. I was planning on flushing the crystal but had to wait another week for the meter.
I suppose the good thing to take from this was I found out why I was having issues with my plants. When the new ph meter came in I went to check my run off and my nutes that I had all ready mixed up. It turns out that my meter i had been using this whole grow was off by about -2-2.5 so this whole time I had been feeding the plants at around 3ph smfh. I cant believe they look how they do knowing what went on this whole time.
Fastbuds crystal meth is 3days into flush and i will be cutting it down this weekend most likely.
Mephisto hubbabubbasmelloscope is smelling like sweet sweet candy and is thick in resin
Bighead seeds freeze berry/ blueberry crumble has a dank pungent stank to it and also is frosty but larrfy
Big bomb is still growing thick and have bud sites everywhere
Now I'm ready for the next batch and ready to get dialed in!



Likes
8
Share


@GuniGugu
Follow
- BioBizz Light Mix soil
- BioBizz Nutrients used according to their schedule
- stopped LST

Likes
34
Share


@rhodes68
Follow
1/10 Week 10
Both are in flush and from the looks of the tricones these are the most potent plants we have grown to date.
Drinking has really slowed down but keeping the un-PH one gallon daily flush since tap water is cheap.
Annie doing very well under the LED lamp, TS-1000 plenty large enough for one plant in flower. This is encouraging for plans to replace the HID with either a TS-2000 or TS-3000(preferred) this spring before the summer heat.
Just a few more days....😎
1/11 Bud pics
Harvest Belle on 1/13 - Annie 1/16
Just getting them ready. taking off some useless leaves etc...
1/14 Harvesting Belle today, let her dry out one last day. Annie harvest at weeks end.
Harvest pics and total numbers at end of week when I take Annie
👉BELLE HARVEST
963 grams wet 👈
Annie got her last watering today, harvest in two days
1/15 Harvesting in about 12 hours, pics and numbers then
Likes
49
Share


@masterofsmeagol
Follow
8/1 Took another video but didn't upload either videos when I was in town. I'll have to upload later. I have a lot going on and I need to consult my diary more often. The Temps dramatically changed. I watered yesterday just a few that were light but then it poured all night. This morning things looked SUBSTANTIALLY better. I think as long as I can get some sunlight the next few days things will be alright. That streak of weather in the 100s really did a number on me and my plants. Everytime I go they seem to be looking better so I hope that they bounce back and I don't lose anything after all this work. Plants seem "strong" though. They appear very healthy. This just seems like a mistake I made that was substantially worsened by severe thunder storms we weren't supposed to get. If they don't come back before rain I may move the plants that haven't recovered yet inside the barn for the night. It really depends. I want them to dry out. I'm thinking of going and putting a fan in the cage on the smart pots. I just need to keep an eye on them.
UPDATE: I was worriedly watching my plants from the cams and got a message from my father saying my plants were "REALLY DROOPY." I got there and noticed they were WAY worse then earlier and it was sunny and 70's. I got my dude on the phone and sent him several pictures. Luckily I had a second opinion also from my father. A 3cu ft bag of 707 is 22 gallons. These pots were light like that. They just have a seven foot plant in them lol. I'm so happy. I was planning on bringing them Inside tonight in case of ANY rain, luckily I was able to ascertain THE REAL problem, consult my diary and askother growers. Things are looking good. I'm so happy I'm not overwatered.
8/2 Thank the Lord! And my father for his constant vigilance and my commercial buddy for always being there for me. I went over this morning and everything is back up. Plants definitely got stressed though. I think I was OVER and UNDER watering during those days where it was 100 degrees. It'd 68 today. I say this because as soon as I watered the plants they started picking right back up. Luckily I had a dry bag of 707 to pick up and compare with my 20 gallon grow bags and had my father check the weight as well. He's a forester and told me the weight was about tge same. I gave the big blue cheese in the back closer to 2 gallons until I saw some water coming out the bottom. The reason I think I may have overwatered is that the water evaporated as i had watered during the day or at night but not the 10% that they needed. I didn't QUITEgive them all their 10% last time more like I split the difference and did a gallon amd half. Some did get two though. I noticed some light yellowing going up one of the plants that I've watered the most. These plants are transitioning fast to flower. I think I've got the watering schedule down better and that's "don't water them on a schedule". I'll have to individually take note of the plants. Also on that plant and a few others I see minor nute deficiencies so as soon as I can feed I'm going too. I'm going to show my buddy all my info and ask his advice before i take the next step though. I can't believe they made it through this. Talk about anxiety. Wow.
UPDATE: Talked to my commercial buddy. He advised to pick off any of the dead leaves, (which I mostly already have there weren't many) and to wait until next water to feed. He broke it all down in a way i could understand. Then he broke the feeding down further for me so I now know where to start. He did say he thinks my only problem this year will be, "finding a place to store it" lol. I thought he was joking but he went out back and brought out five gallon buckets with screw top lids lol. This back and forth dialogue (with a professional) is seriously lowering my anxiety and giving me confidence that im doing the right thing. Hes never led my wrong and hes always been there. So has my dad. He said to take the old man out for coffee because he saved my ass! I opted for the bottle of whiskey instead. I'll be checking them later. I'm waiting to feed until next watering and I'm waiting to apply BT. I don't want to do anything to a plant that has been that stressed. I'm giving them a few days to chill. Then the twenties will get a quart of grow big, big bloom and calmag and I'll convert that measure to the same amount for the 30's, and 50's. I'm not sure EXACTLY how big that tote is but I think it's closet to 30 than to 40. So I've got a solid plan for the week. I think what I'll be looking to do next is get my supports up. The wind has been crazy but these plants (even when stressed) seemed super strong! Still no fungal stuff knock on wood.
UPDATE: Had to take the car to the mechanic and snag my wheeler to make it home. I sefoliated quite a few bog yellow fan leaves and some smaller leaves down low. Plants went through some stress thats for sure. I HAD to leave my phone with the wife as she had a telehealth appointment so I couldn't take pictures. I wish I could've because things are looking great. I can't wait until things dry out a bit and I can feed! I'm STILL in awe of how my plants look RIGHT NOW and how the looked yesterday. Another buddy said If I didn't see it (and I didnt know you) I wouldn't have believed it was even the same garden! I'll check AGAIN later if my car is ready. I'm anxious to feed and get my supports up. Plants are STRONG though.
8/3 Plants looked great this morning. I did notice what looked like nute deficiencies on the plants I've watered most. After speaking with a few local growers I decided to water. I watered everything a gallon. The containers got more. The 10 got less. Then i mixed up a feeding solution of 1 tsp grow big 2 big bloom and .5 calmag and fed the 20s approx 1.5 pints. A little less for the 10 and a little more for the bigger pots. I'm going to go back over and if I see no negative effects from earlier I'll use the rest of the solution. I'm hoping this was the right decision. It hasn't been enough time but the bags were light. Not SUPER light but last time I waited it didn't work out well for me. Two local growers have told me theyve been watering daily and they have plants in raised beds and right in the ground. I want my watering to be in the morning anyway. Hopefully this works out. I'll update.
UPDATE: Went back over and everything was standing up nice. They loved that water and the small dose of nures hasn't burned them so ill be able to use more next time. I used a Gatorade bottle thats 1.25 pints amd went from there. A total of two gallons was used on the garden. Things look amazing. Things are changing on the daily. I'm losing some leaves now. Well they aren't dropping off but I'm plucking them before they yet that far. I need to water in larger volumes I think. Plants are drying out too quick. Others are saying they are watering much more often as well. It really hasn't been raining and these plants are huge. I have lush green leaves but this transition and the added watering I think has leeched a lot of the nutrients from the soil. Since I have the fox farm that's what I'll be using. I still have a couple leaves that are destroyed by a fourkined plant bug. It's very identifiable so theres another I need to find. Also seeing chunks missing from leaves. I need to up my ipm game. I don't want to do more than one thing at a time though so I know what happened if anything goes wrong. Since i did the nutes today the spraying of BT or captain Jack's I'd going to have to wait. Despite losing these old fan leaves my plants are dense. Defoliating really helped with airflow. I also noticed some chlorosis on a few leaves. That's why I'm going to start doing the 10% minimum. I'm waiting until they are real dry then I'll give everyone (but big blue) their 10%. I got run off from big blue just from like a gallon amd a half today. I hope my 2 minute video uploaded. It says it dis but u bet it didn't. I'm trying again and I'm at 12%. Let's see if my patience lasts. Looks like it doesn't want to upload
8/4 Thunderstorms and heavy rain all night. It's supposed to rain steadily all day. Plants werent drooped or blown around looking or anything after this storm and I only have minimal supports up. I defoliated anything that needed it. Just a few yellow leaves on the bottom interior. More like nitrogen deficiency. I am watering to frequently though. Im noticing some chlorosis (minor) on old far leaves. Could just be that the soil is getting depleted but "if the brown surrounds your plant is drowned" and I noticed a few leaves like that. Just a couple bit i know what to look for. I hate to say it but i think ive almost got things dialed in for this grow. I will need to put up further supports. These are some STRONG plants. I shook them all off today. The seemed to love the nutes. Plants looked way better this morning than I was expecting. I need to up my watering volume to 10% everytime. I DID fine more pillar damage when defoliating and a four lined plant bug mark on the purple punch in the ten.
8/5 It's not raining right now but it Rained all day and night. Plants really seemed to likecthise nutes. I'll up it to a quart next feed. I defoliated what needed it. Found my FIRST totally yellow leaf of the season. Big old interior leaf i must've missed earlier. Smell has greatly increased. Seeing that these plants seem to have no ill effect from all this water I feel more confident about my ability to fully water them their 10%. Especially since they are massive plants. I have one daln near 8ft and it's damn near as wide. Real good airflow. I think this is gonna be my year. I certainly hope so. I need to get rid of that fourlined plant big but more importantly I need to deal with pillars proactively so next nice night I'm going to treat with bt. Super proud of myself so far.
8/6 Didn't rain much yesterday. In fact I stepped out my door and the sun was fully visible and bright while rain poured down around me. It wad a cool experience but the plants dodnt get much for water. I checked the weight this morning (heavy) and shook off the plants and did my normal morning inspection. I news to remove a pallet so I have more room. Plants are really trying to flower. Next week I'm gonna yet them with a stronger dose of nutes. Last year this was about the time I lost my crop. Knock on wood but this is the healthiest crop I've ever had. I MAY apply BT tonight. Haven't decided yet. I'll keep the diary updated.
UPDATE: Went over to check the plants that were WET and HEAVY this MORNING because of the windstorm. If dried the bags out completely. Everything but the 10 was drooping right over like before. Good thing I've got some pretty good intuition. I took two videos. I gave everything their 10% 2 gallons each and for each container plant. Plants were back up by the time I was done adding supports.
8/7 Sunny this morning. Plants looked good. Had to defoliate some dead leaves. I can't believe those grow bags dried out so fast yesterday! Its just the wind was so strong! Plants were right sideways! They got some syrong roots thats for sure. One of them (my canary) seemed light this morning! But we are getting an inch and a half of rain starting tonight into tomorrow so im not watering ANYTHING. I'm not sure what I'm going to do IF anything. I added to my supports. I COULD put EVERYTHING in the barn where we put heavy equipment. I'll probably at least bring a couple inside in case something horrible happens. Things arecreally doing good. Flowering up nice. Found a cicada on one yesterday. First time I've ever seen one. I'll update with what I decide to do.
UPDATE. My canary seems a little light and is losing lots more leaves im not sure if it's because of the transition to flower but I assume that has something to do with it. Plants still have MORE than enough leaves. Found a couple pillars and killed them. Took a video. I have one blueberry cheese that I hope doesn't have a fungal infection as it's losing more leaves. But it takes more water and is greener and fuller up top. I think I'm just worried because of last year. I've done what I can gor the storm so let's see what happens if I NOTICE it get too bad I can bring some indoors.


Likes
4
Share


@MistaOC
Follow
**************
13.03. Day 1
**************
🤞🏼😎
I have new cuttings. Sour Frootz from Karma Genetics. I planted the cuttings in 0.2 L pots. I only applied fertilizer to the large pot.
So Let’s grow again 💚💯
*******************************************
18.03. Day 6
sprinkled with bactrex and transferred into the large pots
*******************************************
Likes
12
Share


@ciansta
Follow
Germinated for 24 hours in a glass of water, 48 hours in a paper towel and then I planted them into biodegradable seedling pots. Northern Lights looking a bit ahead of the Dosidos seeds but that was expected I’ve grown Northern Lights before and they sprout real quick. One of the Dosidos’ first true leaves is looking a bit wonky but we’ll see how it goes I suppose.


Likes
25
Share


@Kakui
Follow
Veg15, han crecido como 2 centímetros desde el transplante, aún no necesitan riego, desde ahora regaré cada 3~4 días, cuando el sustrato este un 80~90% seco, han estirado un poco desde que subí la distancia del LED y bajé su intensidad, mañana haré Main Lining.
Veg16, hoy se torturaron las plantas con Main Lining, se cortó arriba del segundo nodo y se cortaron también las hojas de un dedo bajo el primer nodo, las plantas que tenían suficiente crecimiento de les hizo LST también, cuando se apague la luz se efectuará un spray foliar con B-52, y mañana un nuevo riego.
Veg17, riego con 5.5 pH y EC 1.8~1.9, se regaron con 1.5 litros y no se obtuvo drenaje, próximo riego tendrá que ser con más cantidad de agua para obtener drenaje, el agua se calentó a 23 grados y se oxigenó antes de regar, mañana se ajustará el LST ya que siguen creciendo muy bien.
Veg18, hoy solo se ajusto el LST, siguen creciendo bien.
Veg19, ajuste de LST, nada más que anotar.
Veg20, siguen creciendo, talvez hay que ajustar la cantidad de luz DLI.
Veg21, tuve que poner una estufa para aumentar la temperatura en el indoor y bajar la intensidad del LED a un 50% para alcanzar un DLI óptimo. Hoy haré ajuste de LST y revisar la humedad del sustrato.


Processing
Likes
15
Share


@No_Clout
Follow
06/03/19 - These plants have grown so fast, normally at this stage my previous plants have been much smaller, only 14 days old and got a 8-9 wingspan on the fan leaves, I’m really happy I’ve turned to mills as I’ve had no faults with them yet, I did see a slight cal defiency on one of them but this was my own fault not the nutrients, I heard I dident have to add cal mag as their A&B had extra in it, but as I’m in coco I made a mistake but I’m hopeing that it’s gonna be a quick fix and they will be back to normal in the next few days 🤞🏻
09/03/19 - the gelatos seem like their doing fine, had a few brown specs but nothing progressed and it looks like their doing good.
12/03/19 - started to LST/leaf braid today as their already big enough for it and should be switching to flower at the end of next week



Likes
111
Share


@DreamIT
Follow
There is little to say yet. I recommend everyone to try this technique at least once. Maximize your harvest and increase your personal experience. If you want more serious proof of how mainlining works, take a look at the diaries of @Canamatoes, my teacher and mentor. More updates later, stay high🤘😁🦄
Likes
29
Share


@Jjthejetplane79
Follow
Fastbuds with the heavy weight autos! Holy crap I thought she was a photoperiod
Likes
9
Share


@W00zY
Follow
Some Bud pics & a quickie video for this weeks special :D
Sadly enough the foxtailing is evolving more and harder. Did turn down the light to 75% output on monday in hopes it would stop the foxtailing but it doesnt looks like it will

Likes
3
Share


@Grower_Resina
Follow
A gorila passou e só deixou os caroços
Aqui estão elas, pesadas e intermináveis.
Água em abundância.



Likes
4
Share


@ChiloteAnonimo
Follow
resistió a menos estrés que todas. (ambas misma cepa y banco) no tiene olor ni gusto. Es como pasto
Lo ocuparé para cocina


Likes
57
Share


@Zurban_Poison
Follow
Incredible cool variety!
clones take root without problems .. excellent variety for cloning .. not whimsical .. resistant to heat)) in general showed excellent growth and a great harvest with an excellent effect!

Likes
3
Share

@AKGorillaGrow
Follow
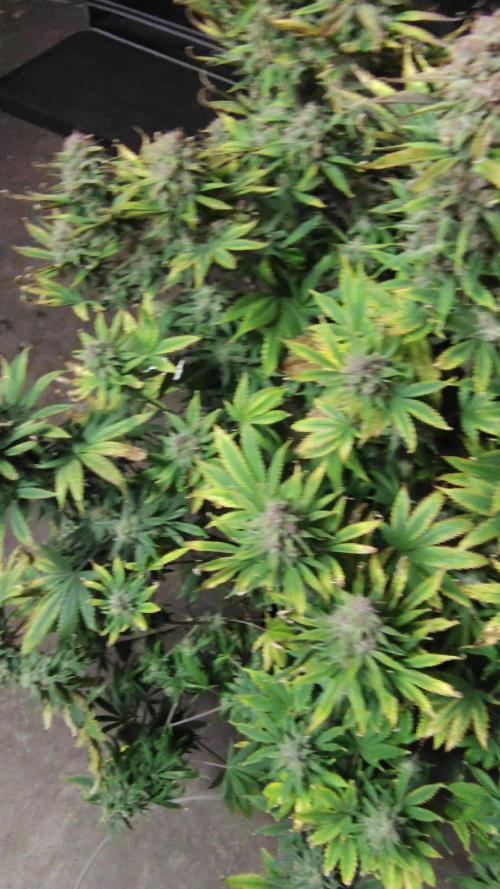
Constant feed seems to produce big plants. Cost more that's for sure. We will see if it pays off in the long run. I have to say that the smells that are coming out of my tent is fire. So berry lemonade kush and ⛽ couldn't of asked for anything more. Can't wait to see what my weight is going to be off my first 4. I'm guessing close to 3 to 3.5 lbs. Next week I will have some trimmed up with some pictures.
Likes
4
Share


@kathlane24
Follow
Freshness in every hit. Citrus terps refresh your mind and body.
Smells hard, hits harder. 26% THC that’ll blow your taste buds off.
The best of both worlds. Perfectly balanced effect, the ideal all-day strain.
Extremely resilient. Top-shelf harvests with minimal maintenance!
Sour citrus terps. Loads of orange terps make for the most delicious hash and extracts.
Likes
39
Share


@J_diaz420
Follow
Realmente muy feliz con lo obtenido, 307g en 0.8me me parece genial, estas flores tienen un aroma genial entre el típico haze mezclado con cacao, un efecto muy agradable y confortable, rica al fumar y muy poco picante gracias al lavado de raíces con flawles finish 👌👨🌾🏻
Totalmente recomendable esta genética de royalqueenseeds muy agradecido por la oportunidad 👍👌👨🌾🏻