
Likes
Comments
Share


@BastiFarm
Follow
Han crecido bastante estás Kukulkán, van de maravilla.
Se ve bastante bien todo esperemos siga así.

Processing
Likes
6
Share


@MissSolasolita
Follow
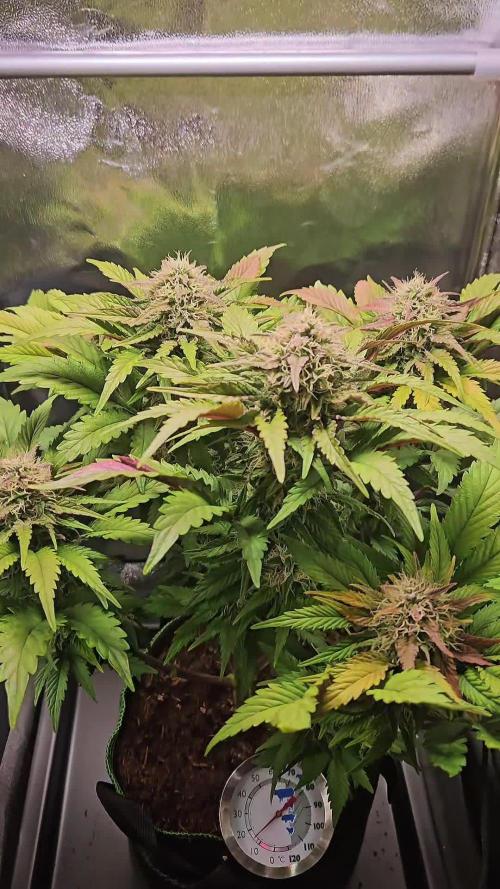
End of week 4
No sign of pre flowers yet
Looking healthy and strong

Likes
55
Share


@Reyden
Follow
Devo dire che le due Gorilla RQS sono contente e stanno bene nei loro nuovi vasi da 11 L ed in confronto a settimana scorsa sembrano più sane e in forma, purtroppo sono stato quasi una settimana senza misuratore PH perché mi dava problemi e quindi per una volta non ero effettivamente sicuro quanto era bilanciata la soluzione ma penso di non aver fatto danni…andiamo avanti, ieri ho sciacquato solo con acqua a PH 5.9/6 e ora aspetto che asciuga bene questa volta salgo con EC e arrivo intorno a 1250…vediamo come reagiscono 🧐😶🌫️

Likes
2
Share


@Semi-Auto
Follow
I topped the two healthiest the Bruce banner and the bigger blackberry auto I also tied down two of them I will let the smaller blackberry run naturally I don’t know if I will do lst though I will see with a little more observation I am still trying to get the watering schedule down pat so I will let the soil dry out a little at least to half the weight it is now oh yeah Ac Infinity holla at me let work!!!!!
Likes
14
Share


@Cannabot
Follow
Plants taking nice shape at 2 months old.Not bad for about 9 hours a day from seed.I think the purple kushes are going to be my biggest yielders this season.Really impressed thus far.They seem to soak up lst ,responding positively in this method.Bonus is the purple pheno

Processing
Likes
10
Share


@The_Bearded_Grower
Follow
day 93 ( 34 of bloom ) so yesterday i watered the plant and dropped the silicate out of the mix over all plant health looks great. i am starting to get some orange hairs 1 or 2 per cola so im in the end game now 2 or three weeks till harvest. i may do one more feeding then all flush till the end.
- update day 94 ( 35 of bloom ) i am going to go into flush i think as i am seeing more and more orange hairs and i don't want to start late.
Update had to harvest early because of pollen sacs


Processing
Likes
14
Share


@OutForReal
Follow
07.12 - Big change this week : the Sweet Dreamz is finally outside for her full life cycle as the tent was overloaded with 4 plants so I took that one out.
The plant is now around 80cm in a 7L pot , the structure is tall and a bit stretchy like her parents.
I also spread some STS on the lower stem to make a sex reversion and make seeds with the 2nd Plant of that run ( the one I bearly shows you ) and with my other strains like the Cream Cookie , C4 Matic, BlackBerry and 6 shooters from my others diaries , it would be my largest breeding project.
What would be your favourite cross from my actual strains ? Tell me your thought in the comment section 😁✌️🏼🌱🦎


Likes
10
Share


@majic_happen
Follow
day 44
- The growth process continues unabated. I am waiting for the desired size. 8 days after flowering it didn't grow as much as I thought it would, so we went back to the growing season. 👽
day 49
- I decided not to cut the leaves anymore after much defoliation. It easily tolerates strong stress easy to grow.

Likes
4
Share


@LittleBigTrees
Follow
Second week of flower and I defoliated again.
There are small bud sites starting to form at the end of week two flower.
The apple fritter has fascination which is making the stems grow interestingly with lots of bud sites.
Likes
20
Share


@Ultraviolet
Follow
The most important contribution that any man can make to a garden -- even more important than water or compost-- is the radiation he himself puts into the soil while cultivating it.
Epinoia
(ἐπίνοια) is a Greek term meaning thought, intention, purpose, or conception, stemming from "mind" (nous) and "upon" (epi), representing the mind's reflective or creative process, used in philosophy (Aristotle, Gnosticism) and theology to discuss understanding and divine names, appearing once in the New Testament for the "intent of your heart" (Acts 8:22). It signifies the mind's operation to form ideas or designs, contrasting with raw data or innate perception, and in Gnosticism, it's an emanation of divine wisdom (Sophia).
Exclusion Zone and Coherent Domains in water, broken down into layman’s terms. Imagine you have a glass of water with tiny particles (like dust or dye) mixed in. Now, put a special surface—like a gel or a hydrophilic (water-loving) material—into that water. Next to that surface, a layer of water forms that is totally clear. All the particles and dye are pushed away from it. This water is not just liquid; it has changed into a structured, gel-like state. It "excludes" solutes (particles), hence the name "Exclusion Zone" or EZ water. To understand why the water behaves this way, scientists look at "Coherent Domains" (CDs). Molecules move randomly, like a chaotic crowd. A group of water molecules gets energized and starts acting as one single unit, moving together in perfect rhythm. This state is created by electromagnetic energy and quantum effects, forming organized, crystalline-like structures. Think of a flock of birds or a school of fish. They aren't tied together, but they move in perfect unison, reacting as one. In a Coherent Domain, water molecules act like this synchronized flock rather than independent, random molecules.
Coherent Domains are the "rhythm" or the "structure" inside the water.
The Exclusion Zone is the physical space where this structured, coherent water builds up next to surfaces.
The interaction of light—specifically UVB light—with liquid water generates quantum Coherent Domains (CDs).
This type of water is believed to be vital for biology, acting as an energy storage system inside our cells, as EZ water forms naturally around membranes and proteins.
Light has a duality fundamentally. It can act as a particle or a wave photoelectrically. You do not have to understand or like this, just accept it because nature is absurd at times in what she gives us. When the EZ forms, the EZ then begins to absorb light in the 270 nm range to increase the EZ power and potency. This is in the ultraviolet range. Water absorbs ideally in the red frequency range 1500 nm -3000 nm. Red light builds the battery, and once the EZ is formed, UV light adds massive power to the EZ to drive all biochemical reactions via enzyme flux using proton tunneling. Releasing millions of almost free electrons.
Great book
Library of Congress Control Number: 2020930536
ISBN 978-1-64502-009-7.

Likes
26
Share


@Jsammy09
Follow
This was a fairly smooth week. Right now there is not a whole lot to do. I mainly just try to ensure that my environment stays in check and kind of just sit back and watch the growth take place. I did have one pretty major issue this week with some of my equipment. I want to share incase anyone else comes across this issue, but if you are running AC infinity setup and using their humidifier, it could mess with your AC infinity controller. I woke up this week to find my temps were high and humidity was way down. I went to check what was going on and my conrtoller 69 was going crazy. I couldn't figure it out. I called and there is a known issue somehow when the humidifier is plugged in with other ports being used it may cause the other ports to not work. After a few hours of trying to get everything working, I finally got it resolved. I had to unplug humidifier, reset the controller to default, delete and redownload the app, and somehow everything started working again thankfully. I have my humidifier on a spare controller for the time being as I cant send for a replacement right now, but that seems to be working fine. Other than that though, everything is going great. Going to continue to monitor and keep an eye on things.
As always tips and recommendations always appreciated. You guys rock and I have learned a ton from everyone, so thanks!

Likes
4
Share


@CannaIGrow
Follow
Topped this girl this week. Growing pretty good so far. I’ll be potting up to 3 gal pots next week sometime. I also have a Bison Brew that I’ll be using sometime after transplant.
Processing
Likes
19
Share


@Deepgrow
Follow
Esta semana he cometido el error de añadir nutrientes y he sobrefertilizado las plantas. A partir de ahora riego con agua , 1 gota de ph- por cada 15 litros de agua y 0.1 ml de ata clean por cada litro de agua. Esto lo hare durante 2 semanas y quiza solo 1 vez mas abonare.
Ademas creo haberme pasado con la cantidad de agua, reduzco el agua a 1/2 litro cada 2 o 3 dias
Likes
35
Share


@Ganjagrandaddy
Follow
Update: what a week full of activity and positive growth.
The Amnesia is a big beast of a lady now. She is nearly 2.5ft across her canopy and growing. I have had a shuffle round in the grow space and she is now under the sp250 with her soil friends. The supercropped knuckles are nice and chunky to support the spiked colas I plan on her having. She has flattened out nicely too. I expect her to get even wider by the flip time and with so many growing tips she should be a good producer.
Sweet Afghani Delicious has thankfully now started her real recovery from the root rot after a week in new feed. She has some good potential for a decent finish by the way shebhas bounced back over the last 2 days with new growth and now starting to fill up wirh chlorophyll again.
Red Hot Cookie is also on the road to recovery with way more colour and actual vertical growth starting too. Her 5th node looked done for so i left it to fall off if it wanted and concentrated on the 4th nodes but she had other ideas and has now began growing the 5th again. Overall inam happy to see a recovery in them as i thought I was going to lose the nft girls from all the damage. Now at 100% power on the sp3000 with an rh of 67% and room temps at approx 24.5°c.
With another weeks growth I am hoping to be close to flipping them all as the Amnesia is in danger of total room domination!!.
Be safe and well. GGD

Likes
7
Share

@vivibeats
Follow
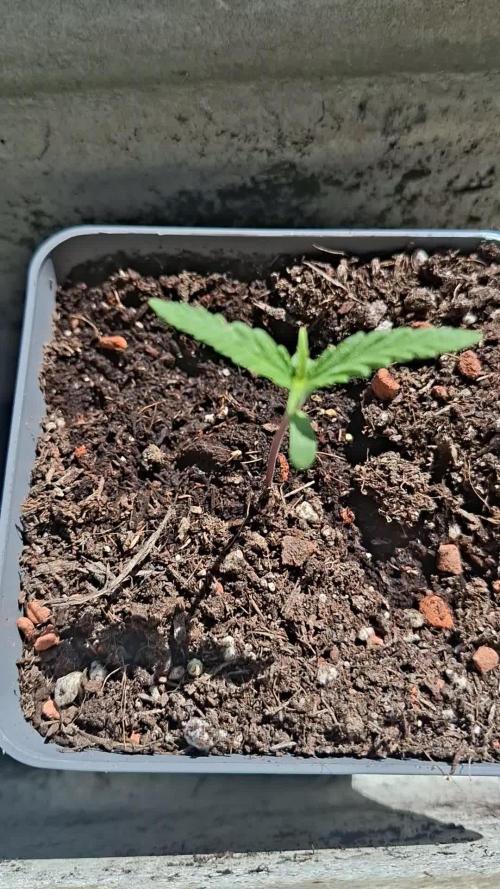
day 18 wheter is finaly good enoug so she coul stay outside except for the night
Likes
15
Share


@GardenOfEden
Follow
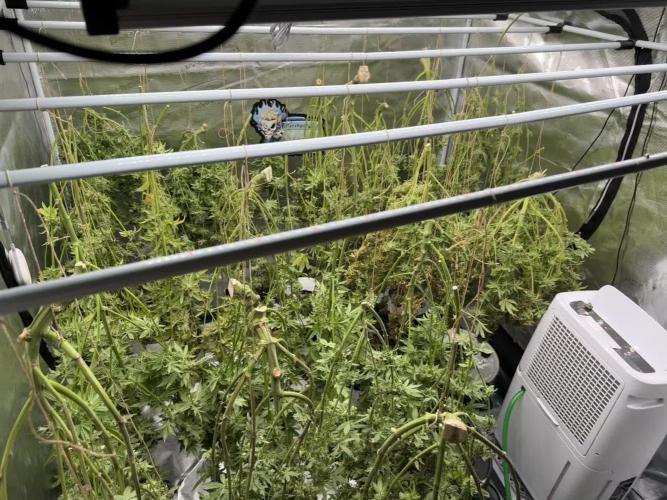
Harvest wet weight was 65.5 grams as a whole plant. Have her drying at 70 degrees and around 50% rh with a fan to circulate air. Will update with more info and pics when I start the cure.
Update: dry weight is 12 grams. Buds were not as dense as I would’ve liked but very potent and sticky. Smoke is smooth and taste is more pronounced. After cure I’m sure it will be even better. I’m not upset at the final weight as it was 1 of 3 plants in a tiny 12x24x24 inch tent with weak lighting.
