
Likes
Comments
Share


@Galaxeeds
Follow
They’re going well, I pushed the dimmer at 100% on the light last sunday and they appreciate,, cool down the temperature and ajust nutrients


Likes
17
Share


@ButterfliesLittleFarm
Follow
Hello Diary.
The second week of vegetation is over and the Purple Punch has already started to form flowers. Otherwise a pretty quiet week, I had one watering and more or less it was all action on “Farm”.
Conditions are more or less good, I would like the humidity to be a bit higher but ok.
Purple Punch # 1 that sprouted first reached 23 cm, which is double from the previous week, while Purple Punch # 2 that sprouted a few days later reached 15 cm.
The tips of the leaves as well seen in the photos have taken on a bright green-yellow color, I don’t know if it’s from the light or something else? If anyone has an idea why this is happening, feel free to share with me.
I didn’t add any nutrients, the soil is still rich in nutrients from Easy Boost Organic Nutrition, Mycorrhiza Mix and substances in the soil. From next week I will start adding BioBizz.
With two Purple Punch on the “Farm” there is also one Watermelon Auto that keeps them company.
Let’s see how it was this week.
07/02/2021 - Day 12.
Watering. I regulated the water with Plagron’s Lemon Kick. In my case the tap water is about 8 p.H. so I lower it to a value between 6.0 and 6.5. I pour water into the bucket the day before to evaporate the existing chlorine from the water. I should have watered more often with less water but now it turned out that way.
Temp / Humidity on the farm - 25 degrees and 49% humidity.
09/02/2021 - Day 14.
Photographing plants, measuring height and analyzing the week.
Temp / Humidity on the farm - 23.5 degrees and 40% humidity.
Purple Punch Auto # 1 - Day 14. - 23 cm
Purple Punch Auto # 2 - Say 14. - 15 cm
I’ll see what happens to the leaves but I hope everything will be cool. See you soon.

Processing
Likes
5
Share


@Noxey
Follow
First week setting up my DWC!
Assembled the reservoir and cloner/seedling starter and figured out temperature control while waiting on the seeds to be delivered.
June 8th, PM: Started germinating the seeds. Germinated in paper towel for 3 days.
June 12, afternoon: Transplanted seedlings to the cloner to start seedling growth
June: 16, morning: Transplanted to their final reservoir.
June 16th (end of Week 1) is really the start of the grow, as it's when the seedlings finally made it into their res. This week was more a "Week 0".

Likes
30
Share


@valiotoro
Follow
Week 9🤓!!
Im entering in the last PuSsSh
Green ZenZaaation💥
FCE-6500 100% + adlite UV IR deep red🔛
Happy growing💚👨🏻🌾

Likes
4
Share

@The_Doctor_Green
Follow
Hola a todos!!!.
Esta preciosa sigue engordando💪🙌🤩.
Seguimos con el mismo riego de fertilizantes como la semana pasada.
He comenzado a combatir trips con jabón potasico.

Likes
12
Share


@Chubbs
Follow
420FASTBUDS
ORT2108 WEEK 8
I've enjoyed seeing these grow as the weekly updates are very noticeable. I decided to do some LST training and it seems to have made an improvement. I also backed off the nutes with only leaving the calmag and ph the water before watering. All in all Happy Growing.
Likes
8
Share


@dauntless
Follow
10/28 Last 10 days or so... no more nutes, just ph 6.5 water, minding environmentals and keeping an eye out for random crap like my 15 amp breaker going out in the early AM -- but fine in the heat of the day, go figure. I added another heat pad so I am sure that is running hot in the colder temps and drawing more power. I have an idea how to fix it, I'll keep you posted. Humidity is naturally so perfect right now, weather finally helping me out. Humidity is 55% naturally and 50% in tent with no lights on. With lights on it was 33% to 40% during the day. Day temps 82 F 28 C degrees. Night temps down to the 50s F 13-14 C. So the colds temps and relatively low humidity are helping my last weeks of flower, hurray for once. Pretty excited to harvest and pensively planning and muttering about the impending curing cycle to come! Got the AC Infinity on seven, all three fans are moving air. Two seedling heat mats keeping stuff warm (kinda low tech, buy hey), little de-humidifier churning. Got five plants still flowering and not much time left before it gets cold cold! As long a weather holds I know its gonna help.
Update 10/30 Mando!
Anyway, new video showing what is in the flowering tent. It's hard not to get excited looking at the fruits of all this labor and time ... and money spent. It's like worse than golf or something, all I look at are new growing techniques, new tools, new lights. I have to avoid Amazon! I think the key is buying the best stuff you can afford and what you think you need, then adding 20% that way you will end up not regretting it later when your light is too weak. I ended up running three lights in a 3x3 to get the coverage and lumens I needed. Still not happy with my setup.
Anyway, back to the video. Left side is Northern Lights, middle is Vanilla Frosting, towards the front all along from left to right, those are the three trimmed White Widows, and those are some dank buds... they are pungent. The VF smells like candy, the NL smells like some indica drama. The WW is almost skunky its so heavy, but not.


Likes
7
Share

@Organic473
Follow
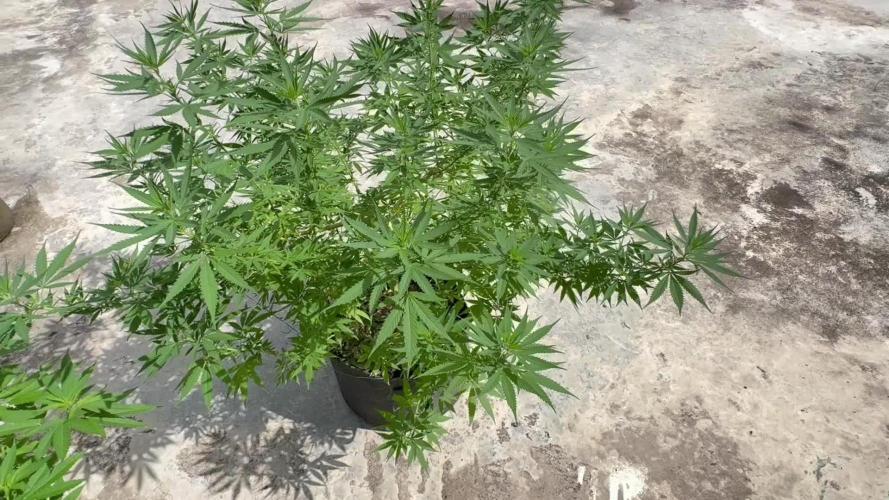
I’ve been trimming and adjusting her LST in preparation for flower. She is almost there…I read she stretches during flowering…2 more weeks and I would add her to a 25 gallon pot then flower her.

Likes
4
Share


@XoticGROW666
Follow
Happy wk for this gelato41 (pheno small busy)
All organic grown compost tea & SST TEA


Processing
Likes
28
Share


@Zannabis7
Follow
Day 12 of organic grow and all is well. Seemed to have dialed in the conditions and able to keep good air movement, CO2 levels, and consistent temperatures/humidity with the ThruWall Closet Fan (Model TW108 ), and the Holmes Twin Exhaust/Intake Fan (Model HAWF-2041). Humidity is maintained with a Lovoit 6L Ultrasonic Programmable Cool Mist Humidifier (Model# LV600HH). Added a SCROG screen (just a cargo net) and bought the Sample Pack of organic nutrients from Nectar for the Gods (just pay shipping and they will send you the sample nutrients - check out the website). People say their line of nutrients make the buds smell and taste like no other! I have always been an organic Earth Juice nutrient guy, so I am going to experiment with combining the two.
Lights are on 24/0 and she has tight internodal spacing with good vertical growth. Room that closet is in is beginning to smell skunky at times, and like diesel at other times. Will begin light organic nutrients with next watering. If you made it this far, please check out my other autoflower grows.
Day 13 - Watered today with very low strength nutrients added. - Zannabis7

Likes
3
Share


@drewnagy0510
Follow
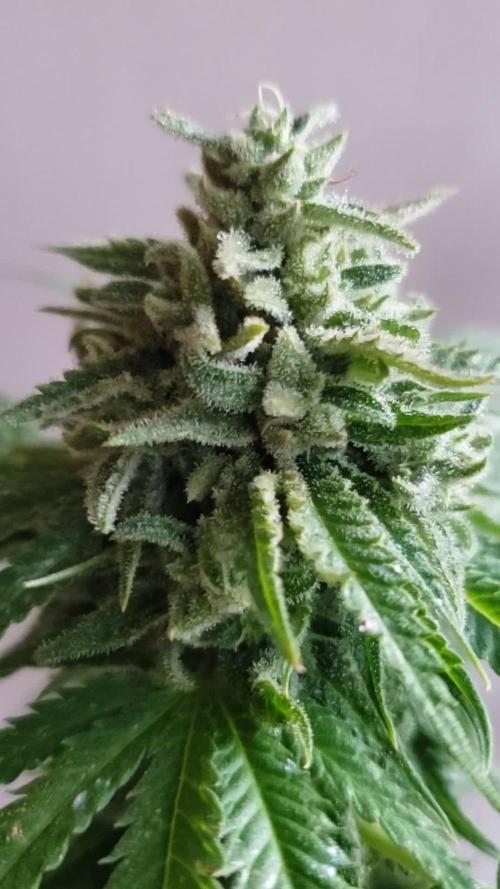
Really light hairs. Smells really sweet with a little kick and a great way of double toping

Likes
18
Share


@Onlygrow99
Follow
Bueno pues el sábado 4 y el domingo 5 de marzo realice las defoliaciones y el lunes 06/03/23 puse las luces a 12/12 para inducir la floración.
Las autos ya estaban en prefloración hace 1 semana. Son 12 plantas en macetas de 7L con 44 días desde que se empezaron a germinar las semillas.
Uso la gama completa de nutrientes, Boom nutrients
Están bajo la luz del panel LED 780W ResinX de GBLIGHTING
Pretendo poner una malla de scrog y en floración avanzada otra, para sujetar todo bien.

Likes
5
Share


@LockDownGrow
Follow
Coming along real nice now and starting too show the very start of flower too ,


Likes
47
Share


@Jimmy89
Follow
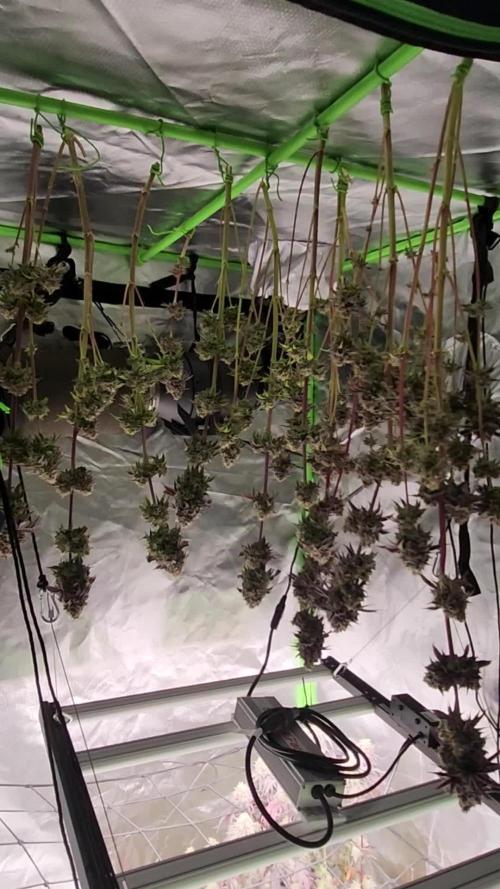
The the buds were small so it made trimming a nightmare! But it’s done and the end product is worth all the time. I have loads of trim and small popcorn buds that will be dry Ice sifted and pressed into a hash brick. Will update the diary when I have some bcp hash
Weighed up the trim at 588 grams, used my trim bins with dry ice to sift the trim and pressed it into blocks using a rosin pre press, I’ll now jar this and put it to one side. My first time doing this, definitely worth the effort!


Likes
18
Share


@Wrongholn519
Follow
It's been an interesting week. I had to ask for help with resolving the intense smell coming from my garden... I can smell it from my driveway at this point.. I was advised that I probably turned my fan up way too high, which overloads the carbon filter on the end of my exhaust. I ordered another new one.. turned it down.. and I also had to cut down the cheese auto... all her trichomes were cloudy bit I definatly could have left her for another week... just couldn't handle the smell lol.
Ask for help and you shall receive, thanks Growdiaries. And thank you Oozlefinch for the solid advise.. ✌️
I bought a rosin press this week and it's awesome.. she will be used for this grow as soon as things are ready.
I cut out my backyard to plan for round #3 for all these plants.. plus a whole lot more!
Process/ Environment changes:
-Turned down my exhaust fan.. the carbon filter can't keep up with the amount of air being pushed through it.. in the water industry we would call this 'short circuiting'....
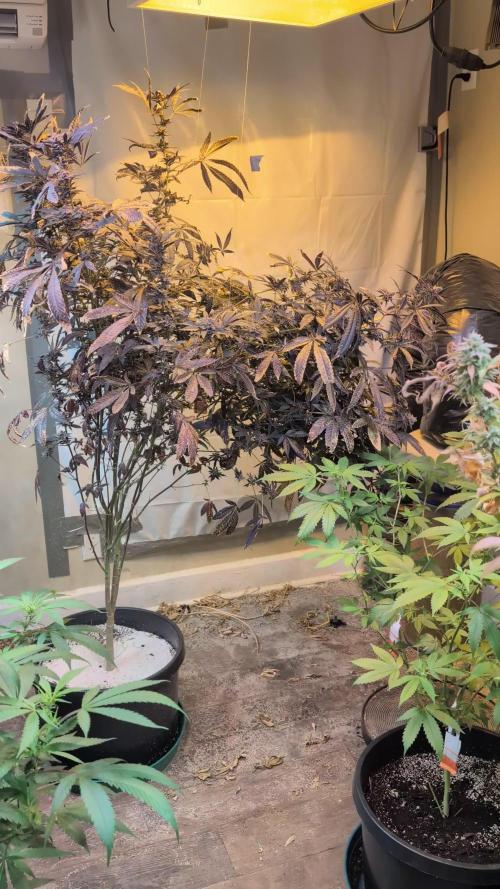
The Gorilla cookies is growing well. It's a tall plant with long nugs ( I hope the full out a lot more). I would recommend supporting the branches at this point in the grow. There's a slight smell coming off her and trichome production was late to start compared to most the other plants I have... I suspect she will go past 90 days unfortunately, but I'm excited to see what the finished product looks like.
Hitting her with compost teas at a pH of around 6.7
That's it.. I'm on auto pilot at this point.. there's not much I can do except sit back and wait.
Thank you Fastbuds
Likes
6
Share

@Wilstang
Follow
IPM
https://www.arbico-organics.com/product/mite-predator-phytoseiulus-persimilis-plus-sachets/mite-predators
https://www.arbico-organics.com/product/spidermite-destroyer-stethorus-punctillum-adults-larvae/pest-solver-guide-mites
