
Likes
Comments
Share


@Belverde
Follow
Welcome
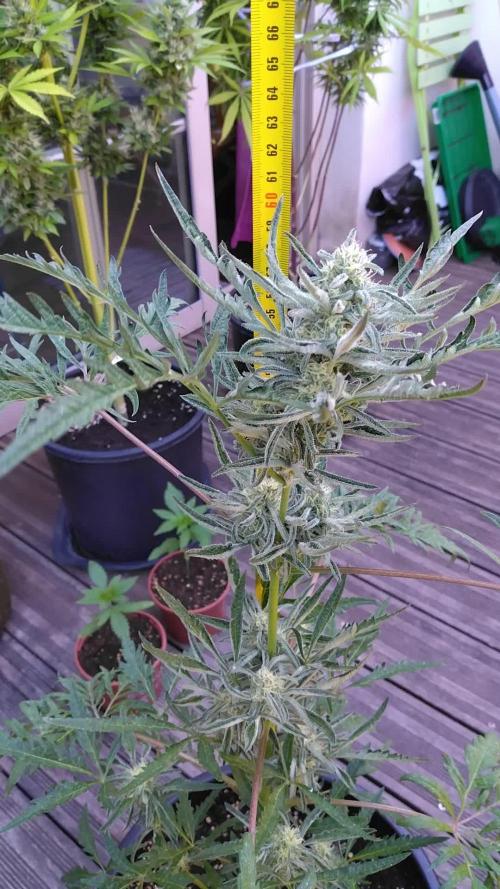
We are at the final conclusions for this premium Kush strain 💯
Breeding by Microgenetica Seed
bank
Italian made since 2015, based in the beautiful city of Amsterdam
This variety has won already three cannabis cups, both in Ams and both in Barcellona 🏆🏆🏆
So, maybe isn't a mainstremm seed bank, but they works very well 👌
Especially the breeder/owner wich is call Stefano Lillo, a great person and super disponible
But anyway
Almost two months are passed from the final cut and now the flowers are in their best moment
Especially the Kush varietyes, probably the strain with a good amount of myrcene, in my opinion take the best and complete taste after this amount of time..
The "Sativa" ones , in the other hands, can be very tasty after only a months ,or less...to be precis the cultivars with mostly fruity tone !
That's my experience..
Coming back to this Mature woman 😎
The taste is obviously very kushy , intense and persistent in smoke session 🔥🔥
I personally prefere to vape it 🙌
Best temperature for a complete taste and effect around 182° and then up to 192°
Dipends always from a wich types of vaporizer you use !
With all the famous seriese from the "Vulcano company" , for any their vaporizer, you can follow the temperature up here..
But for example with the Ghost MV1, the best for me is around 190° to 200°
Anyway
For test at the best if the quality can be ok, i always roll up a spliff...no tobacco or other things..
I do that for see how it burns...slow or fast and especially white ash or contamineted
My way for having that is pretty simple..
Only water for the last 20 or more days, no flush like a shower 🚿
I cut the plant in one time and leave it hanging upside down inside a wooden cabinet with always a slight change of air (for example an oscillating fan a few meters away)
I leave almost all the leaves still attached (these will give a good indicator of where we are in drying)
The whole process must last a maximum of ten days !
Temperature and humidity must always be equally balanced ... even if there were 25 ° there is no problem ... the important thing is that in this case the humidity is not too low, risking to dry the flowers (in this case can be good around 60/62%)
The meaning is to always try to stay within the ten days ... + or -
So, after a little more than a week the flowers will be crunchy on the outside .... but the stem must not break cleanly, only bend almost reaching the crack..
If the popcorn buds peel off nicely, then it's time to take out all the blooms..
Cleaned the branches from the inflorescences, I usually place them for another two days in a brown paper bag..
Then I put everything back in the jars..
I don't open for 24h !
After this time I start to open and close every about four hours..
I continue like this for about two and a half weeks and every five days, about, I reduce the openings and closings until I get to feel the aroma in its true form.
Ah and i do not leave too much air in the jars when the flowers are ready...terpenes oxidize faster...air and light are our enemies ☝️
{ But not during the cultivation 😂 }
And that's it
For more info on this grow cycle you can search in the several weeks where I tried to bring everything back to the best 😉
Thanks so much for the support 🙏🙏
Thanks to Microgenetica for the trust 🙏🙏
And thanks as always to Growdiaries for this space 👍👍👍
Ciao ✌️
🇮🇹🌏🌎🌍

Likes
10
Share


@Skinnytalls420
Follow
Very easy strain from fastbuds to grow!!! didn’t have to pay much attention very good genetics looks amazing!!!

Likes
2
Share


@autofloweronly
Follow
Jelly cak3 I can’t wait. She smells dank and look great. I can’t wait. Jelly cak3 smells more like fruity cak3. I smell grape I smell berries I smell cherries I can’t wait jelly cak3
Likes
15
Share


Likes
41
Share


@Mother
Follow
Hey everybody! Kaiydaan, Kaiydan, Kaiydaan. I have no idea what's going on with this gal, she isn't doing to much of anything. Unlike, Freeman who's just flourishing, showing all shades of pinks and purples and swell calyxes. Anyone got any advice on Kaiydaan?
I'm watering pH'd tap water. I tried to indicate that in "Nutrients", but the Diary made a Frown Face at 0 nutrients.
Aug. 26, 2021, Thursday. I watered Kaiydaan and Freeman.
Aug. 27, 2021, Friday. Freeman is doing well no issues. Kaiydaan, I just don't know. Her calyxes are not swelling, they're growing in and what seems to be dying off a bit. Her leaves are dead, dry, brittle and yellow. I don't know she is a complete nightmare compared to "Freeman"
Maybe I'm reading to much into it and Kaiydaan is going through a natural fade. Any ideas?
Aug. 29, 2021, Sunday. Nothing new to report.
Aug. 30, 2021, Monday. Nothing to report.

Likes
99
Share


@Kitties_and_Colas
Follow
~_~_~_~_~_~_~_~_~_~_~_~_~_~_~_~_~_~_~_~_~_~_~_~_~_~_~_~_~_~_~_~_~_~_~_~_~_~_~_~_~_~_~_~_~_~_~_~_~_~_~_~_~_~_~_~_~_~_~_~_~_~_~_~_~_~_~_~_~_~_~_~_~_~_~_~_~_~_~_~_~_~_
❤️💡🌱😽💨
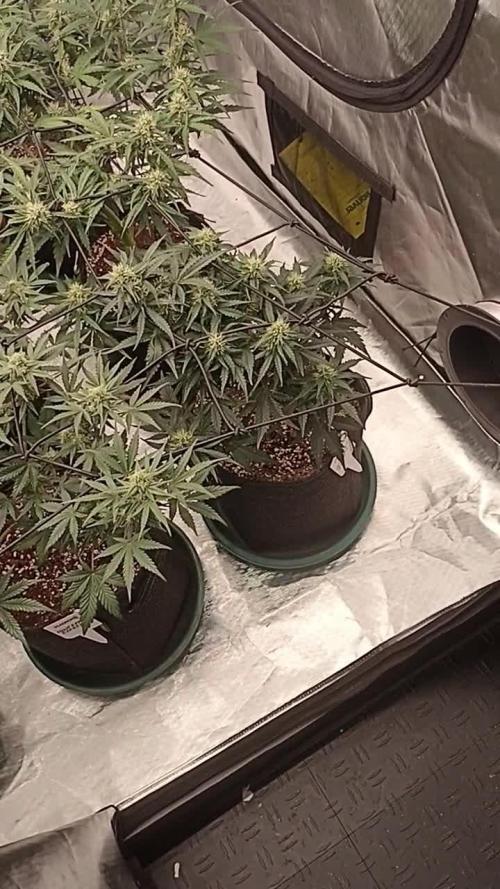
It's been a good week however our largest plant had started getting limey again so we lowered the light to 60%..I hate that we don't have a light meter 😿.. besides that buds are developing very fast.. week 3 of flower looked much closer to week 5, maybe our long veg had something to do with this?..idk..
The cheese terpenes are very strong now, I think I'm really going to enjoy this strain and it appears we'll have a lot of it too ❤️🌱.. about 4-5 weeks to go!!
_~_~_~_~_~_~_~_~_~_~_~_~_~_~_~_~_~_~_~_~_~_~_~_~_~_~_~_~_~_~_~_~_~_~_~_~_~_~_~_~_~_~_~_~_~_~_~_~_~_~_~_~_~_~_~_~_~_~_~_~_~_~_~_~_~_~_~_~_~_~_~_~_~_~_~_~_~_~_~_~_~_

Likes
7
Share


@xX_The_Chef_Xx
Follow
What a crazy few weeks ! Got all settled in with the current madness going on in the world. The plants are flowering big time and have a really nice smell. @MarsHydro really put together a good light with the SP250 model and the plants have loved them the whole grow. No trimming this week, just a little foliar feeding when I get to pop by and check them. Feeding is still basically the suggest on the general hydroponic charts. Happy growing and thanks for checking my grow out

Likes
14
Share


@CampaCavallo
Follow
7ª Settimana di Fioritura 💐💐💐💐💐💐💐
La ragazza cresce bene e diventa sempre più bella 🌼🎇🤩
... Peccato aver avuto una perdita di foto / dati di questa settimana di fioritura.... Ma ci siamo rifatti con qualche screenshot dal video😘👍🏻

Likes
4
Share


@OHighOBoyz
Follow
Plant decided it wanted to switch to flower so I guess week 4 is officially flower for her. there’s a smell beginning to linger as well hard to describe but very delightful.

Likes
8
Share


@SoakingThePot
Follow
Almost done on the banana purple punch and gorilla cookies, strawberry banana is stacking nicely
Likes
7
Share


@PoshGrow
Follow
Welcome to LSD-25 Grow by PoshGrow!
🍀 Week #6 2020 December 8th. - 15th.
General Info:
When planted: 2020 October 28th.
Week: 6
Days: 35 - 42
Last Update Day: 2020 October 16th.
Plants: 6 LSD-25 girls by @FastBuds.
NOTICE: Check vegetation week 1 for full equipment list.
Comment:
Likes
13
Share

@LandraceCBDLover
Follow
ça murit tranquillement par ici !
Les 2 Mazar sont magnifiques, elle arrivent au bout !
La récolte est dans les jours à venir, en fonction de l'évolution des trichomes. Je surveille chaque jour au microscope.
Actuellement il y a environs 5% d'ambrés ? J'attends +/- 20%, pour avoir davantage de stone et de relaxant.
L'Afghani va suivre avec 1 semaines de plus.
Il reste encore quelques semaines à la Libainaise et la Sinaï, qui sont très belles aussi ! 😍


Processing
Likes
12
Share


@BloodBath
Follow
I will be focusing this diary on the smoothie strain but you’ll be seeing some other plants in the tent that are not the same strain. I only have room in this tent so bare with me. There are 2 Smoothie, 1 CNC, and 1 Stardawg (dog). The smoothie are the two bigger ones in the back of the tent.
Now, the Smoothie from FastBuds is just killin it right now. Since I popped the beans they have done nothing but show signs of greatness. I don’t think this one is gonna slow down much either.
I’m going to push these plants harder than my last harvest. I had a really really amazing harvest last time. I was even able to pull sap out of all 4 plants. 2 Zkittles and 2 LSD-25. This was all done by feeding at the right times and keeping a “moist” soil. Also I want add that I ran pretty much the entire line of Nectar for the Gods at a little less then the recommended ratios. This time I plan on going a tiny bit over the recommended ratios just to see what these plants will do. Trust me, if the plants have a bad response I will go back to the recommended ratios.
The reason I want to do this is because I really think these auto strains can handle a lot more than a regular flowering cycle plant would. They can handle more stress, that’s for sure.
When do you think I should add a compost tea into my regimen? Soon or wait till the plant is a little larger?


Processing
Likes
12
Share


@Tazard
Follow
These are clones that I managed to take from my summer garden that became a disaster due to a heat wave that we had breaking 100 year records. I expect everything to be 48” in height at maturity.


Likes
17
Share

@Marijuanaut
Follow
Another week down! 😁
Everything running smooth. 😃
Finally a grow without so many issues 😂
And cold weather so I can push the led to the MAX 😎
Processing
Likes
5
Share


@Greenbean15
Follow
Bud development going strong this week, seeing lots of sugar leaves and new bud sites forming each day. Hoping to see the buds stack a little more soon.
All seven plants are in flower now, this purple trainwreck plant being the furthest along. She should have another 4-6 weeks left before her chop.
Likes
59
Share


@Mastr
Follow
Hi everyone I chop her down day 86 and let her dry in 19° temp and RH 65 % I'm going to slow drying for best results 7 to 8 days
She is very dense and sticky bud and so heavy too I think she yield over 150g plus but the bud are not 100% purple its mix with light purple and green ass you can see in pic or video but still I'm very very happy and already germinate another purple lemonade 💜 next week I will update smoke reviews and final dry weight 😀
Likes
18
Share


@Hawkbo
Follow
Finally got the temps up to an average of 78°F with the lights on and things turned right around. Someone on here reccomended I try putting a small 250w heater inside the tent with a fan behind it and it worked so shootout to @lionsshare. I took the autos and clones out and put them in the other tent. I have to take cuts of everything in here in case there is something special. It's been non stop work. The video was taken on day 2 of flower. I gave them a 36 hour dark period as well so they should stretch a little more and I might throw a few more plants in if there is room.
These are nice and healthy very bushy full plants, I did a little LST on one of them just pulled it back a little to open it up some.
Likes
6
Share


