


Likes
Comments
Share


@VicFor
Follow
So I chopped the plant today on day 48, so now it’s drying time. I’ll be back in one week to see the results.

Likes
6
Share


@HUMO_Cultiva
Follow
We put 40ml of pure water and we add 5 drops of oxygen water and then put the seeds

Processing
Likes
2
Share


@Flixx57
Follow
so she was suppose to auto flower but she got too big so I took her out of the tent and switched the light time to 12/12 at the end of week 10


Likes
5
Share


@TheStaffedition
Follow
Хочу обратить особое внимание на качество семян и генетику!
У меня все кустики один в один.
Всем мира и добра а так хороших добрых всходов!
За качество семян 10 звёзд
За качество всходов 9 звёзд
За качество роста 10 звёзд
За устойчевость 10 звёзд
Не забудь поставить лайк❤️, если понравилась как прошла неделя
И читайте наш TELEGRAM: https://t.me/smail_seeds
#Smail_Seeds 😀
Processing
Likes
5
Share


@Mr_nugs_lover_David
Follow
She looks very super big and beautiful for her 3rd week since planted, let's see how she keeps developing, looks super happy.


Likes
14
Share


@LokalGrenz
Follow
Still just water and some fish shit
Jan. 1 Happy New Year welp to start new year off drop my very cheap PH meter in the bucket water and now the readings are off and I probably watered them today with wrong pH water Sour diesel looks cool didn’t water today soil was still moist but the amnesia haze be


Likes
12
Share


@Kenpowarrior
Follow
●heavy defoliation done and 2 days drying out they were to wet. Then i got some brown tip leaves.😔😟
●got drinks and food again.(24/1) hope the rest will not do the same.
●honeys still weak🤔
●wrong settings of nutriens on diarie. All set to 2,5L before. Changed it to 1L
●when white is your new favo color!🤤😎👍❄️😁
Likes
65
Share


@Jayvo
Follow
Stretching has officially stopped as I haven’t seen any vertical growth the past few days, so all growth must be going into buds therefore I did some super cropping to even out the canopy.
I have some yellow marks on the leaves which I’m guessing it’s a nitrogen deficiency due to giving the girls only 700PPM throughout flower, I’m happy with the growth although I think the trichomes are less sticky compared to my last grow, I can only blame myself as I should have given her 1100PPM from Day 1 of flower.
Overall though there are bud sites everywhere, so many that I decided to buy a new light as I don’t think these buds will fulfil their full potential with mars hydro, with this new light my tent light spread is completely even so I have high hopes for this grow.
Some other phenos are purple at this stage so I will most definitely be buying more runtz muffin seeds until I find the purple pheno that I can clone.
Still currently feeding the girls 2 litres in the morning and 2 litres before the lights turn off. Considering adding molasses as a third feeding depending on how the growth goes.
Likes
6
Share

@DogDoctorOfficial
Follow
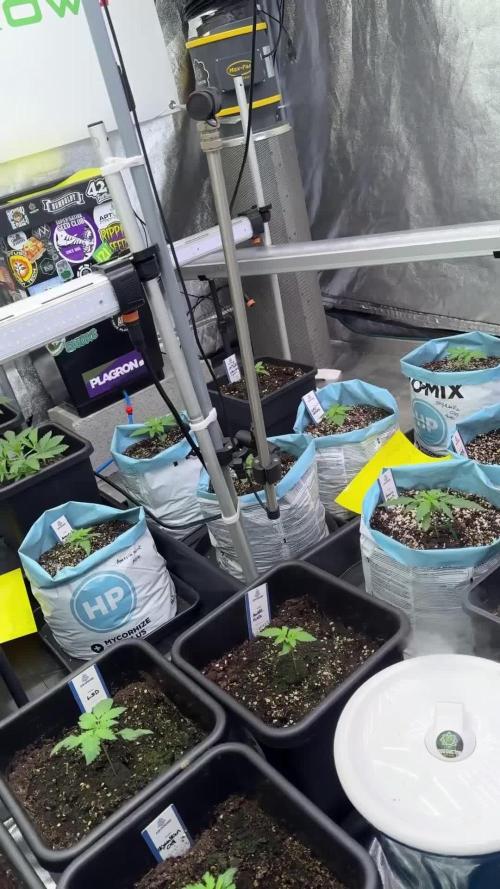
🌱 Folder #1 — Lemon Cherry Gelato
Week 3 Veg — 12/12 From Seed
This run continues to surprise me in the best possible way.
This plant is an autoflower, grown 12/12 from seed, and honestly… it’s performing well beyond expectations. This is my first time ever running autoflowers under a strict 12/12 cycle from day one, and I didn’t know what to expect going in. What I’m seeing now is clear, confident growth — calm, structured, and healthy.
We are currently moving into the third pair of leaves, and what’s interesting is how balanced the behavior feels. At moments it almost feels like:
• the autoflowers are behaving like photoperiods
• or the photoperiods are behaving like autos
Either way, the plant is responding beautifully.
⸻
🌿 Growth & Structure
• Stage: Week 3 veg
• Light cycle: 12/12 from seed
• Height: ~10 cm
• Nodes: Third pair of leaves forming
• Overall vigor: Strong, steady, controlled
The leaves are lush, vibrant green, with excellent posture and spacing. Growth is compact but not stalled — exactly what I want to see at this stage, especially under 12/12.
⸻
🎨 Leaf Expression & Personality
We’re starting to see a bit of personality show up — nothing problematic at all.
There is some light discoloration / pigmentation variation on the leaves, creating a subtle, almost camouflage-like pattern.
Important to note:
• No signs of deficiency
• No stress signals
• No structural issues
Just natural expression, and honestly, it looks beautiful and unique. This is one of those moments where observation matters more than reaction. I’m loving it, and I’m very curious to see how this expression evolves as the plant matures.
⸻
🌡️ Environment & Feeding
All parameters remain identical to the previous report, keeping consistency across the room:
• Same temperatures
• Same humidity
• Same solution
• Same EC & pH
• Same airflow philosophy
Nothing changed — and that’s exactly the point.
The plant is responding positively within the system.
⸻
🧠 Observations So Far
What stands out most is how comfortable these autoflowers seem under 12/12. There’s no rush, no panic, no weird stretch — just calm, confident development with a strong focus on structure and roots.
This run is already teaching me something, and we’re only in week three.
FOR DISCOUNT CODES AND MORE JUST FOLLOW THE LINK https://website.beacons.ai/dogdoctorofficial
📲 Don’t forget to Subscribe and follow me on Instagram and YouTube @DogDoctorOfficial for exclusive content, real-time updates, and behind-the-scenes magic. We’ve got so much more coming, including transplanting and all the amazing techniques that go along with it. You won’t want to miss it.
GrowDiaries Journal: https://growdiaries.com/grower/dogdoctorofficial
Instagram: https://www.instagram.com/dogdoctorofficial/
YouTube: https://www.youtube.com/@dogdoctorofficial
⸻
Explore the Gear that Powers My Grow
If you’re curious about the tech I’m using, check out these links:
🔆 Lighting & Environmental Control
• Future of Grow — Advanced LED lighting technology
https://www.futureofgrow.com/
DISCOUNT CODE: DOG20
• Lumiflora — Under-canopy LED lighting
https://lumiflorade.com/
• TrollMaster — Environmental controllers and automation gear (past collaboration)
⸻
Genetics
• Zamnesia Seeds — Genetics used in this project
https://www.zamnesia.com/
⸻
🌱 Soil, Substrates, Boosters & Root Support
• Plagron — Substrates, bio mixes, and supportive products
https://plagron.com/en/
⸻
🎒 Storage, Curing & Preservation
• Grove Bags — Curing and storage solutions
https://grovebags.com/
⸻
📸 Photography Equipment & Tools
(Not sponsors, but part of my creative toolkit)
• Sony A6700
• Sony full-frame macro lens + few more
• Stacking photography workflow - learning
• iPhone (for behind-the-scenes shots)
We’ve got much more coming as we move through the grow cycles. Trust me, you won’t want to miss the next steps, let’s push the boundaries of indoor horticulture together!
As always, this is shared for educational purposes, aiming to spread understanding and appreciation for this plant. Let’s celebrate it responsibly and continue to learn and grow together.
With true love comes happiness. Always believe in yourself, and always do things expecting nothing and with an open heart. Be a giver, and the universe will give back in ways you could never imagine.
💚 Growers love to all 💚
📸 P.S. – The Eye Behind the Lens
All photos in this diary (for now — except for the ones showing the camera, which I took with an iPhone) are taken with a Sony A6700 paired with a Sony full-frame macro lens and a few more.
Photography is part of the story — it’s how we share the fine textures, the glow, and the quiet details that words can’t always capture.
I’ve also started experimenting with photo stacking — a technique where multiple images, each taken at a slightly different focus point, are layered together to create one perfectly sharp image from front to back.
It’s not digital enhancement or AI; it’s pure photography — a way to reveal the plant’s beauty in microscopic depth, from trichome to petal.
You’ll even see a few shots of "ghost me" capturing the shots — camera, lens, setup — because every grow deserves not just to be cultivated, but documented like art.
FOR DISCOUNT CODES AND MORE JUST FOLLOW THE LINK https://website.beacons.ai/dogdoctorofficial
NEW DISCORD - Official Server Invite Link : https://discord.gg/ksjAkA5T74

Likes
19
Share


@Dutch_Grower
Follow
Few lower leaves turned yellow, i gave them some more nutes with water. Everything is okay now.
Every friday around 7 pm new upload.
Don't forget to like (helps with the algorithm)
Thank you, have a nice one!


Likes
14
Share


@eldruida_lamota
Follow
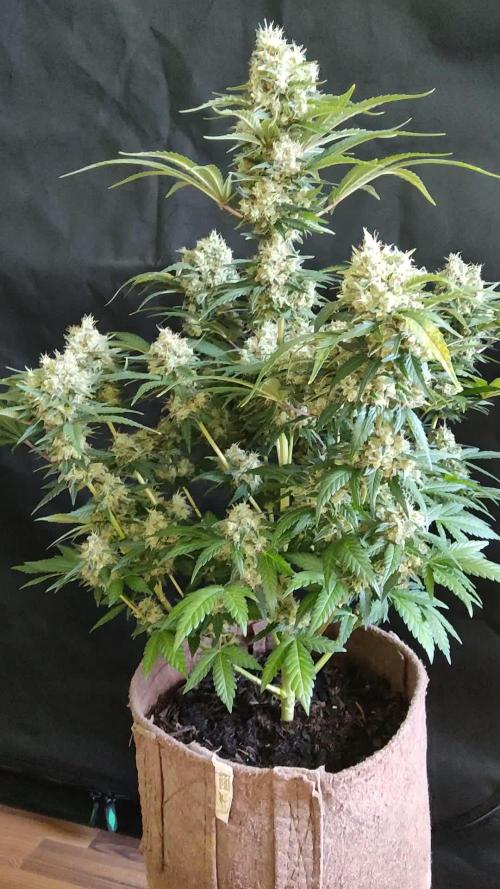
Que pasa familia, vamos con la segunda semana de crecimiento de estas Gorilla Zkittlez Auto de FastBuds.
Tiene muy buenas reseñas y pues me animé a colocar 5 plantas.
La tierra que utilizamos que está en la publicación anterior es top crop all mix, aparte alimentamos nuestras plantas con Agrobeta.
Por supuesto el ph se mide en cada riego y se mantiene en 6.2, regando cada 72 horas e intentando mantener la humedad un poco alta al principio.
Las próximas semanas vamos viendo cómo avanzan.
Mars hydro:
Code discount: EL420
https://www.mars-hydro.com/
Agrobeta:
https://www.agrobeta.com/agrobetatiendaonline/36-abonos-canamo
Hasta aquí todo, Buenos humos 💨💨💨



Likes
3
Share


@Spankstheedanks
Follow
hey Growies just another week actually on time this time. not much to say still super hot high 90s so my tent stays in the hundreds even with the fans but other then that she's loving everything finally broke the 2 feet mark this will be the last time I defoiliate her till I flip her next month thanks for stopping by see you next week hope you like what you see🙏🌱💪
Likes
8
Share

@Suemchen
Follow
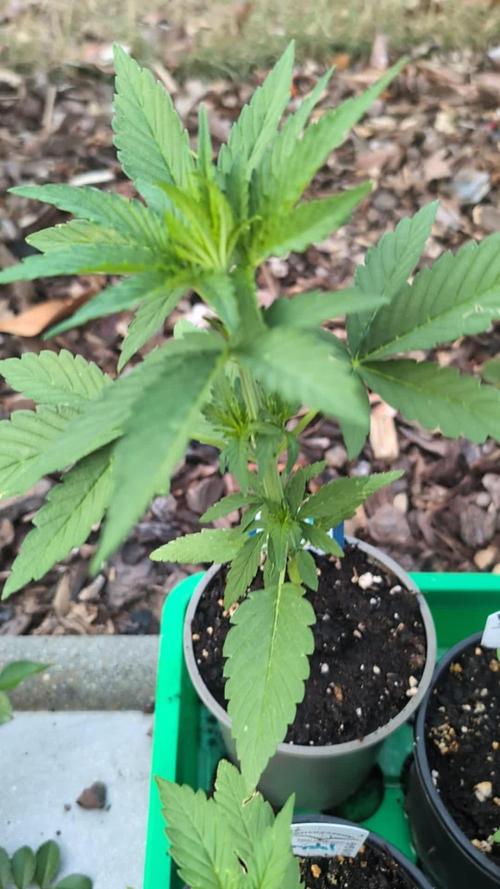
Outside right now untill there is room in the tent
Day 15: Looks good 👍🏻 watered with rain water 👌🏻 keeping the soil moist 🌧️
Day 16: watered with rain water again 👌🏻
Day 18: watered with rain water again 👌🏻
Day 20: Looks good 👍🏻 watered with out supplements 👌🏻 just rain water. She'll get a new pot in the next couple of days ?

Likes
14
Share


@MrJones
Follow
Fastbuds Smoothie Auto
🔸🔸🔸05/03/2023🔸🔸🔸
Day 73 - Above Ground
📝Sunday 07.02.23 - The girls are very small but doing very well for their size, not sure why sometimes autos get stunted, the buds are hard as rocks and have an amazing smell!
📝Wednesday 06.28.23 - The buds continue to pack on weight and ripen, the smell in the tent is amazing, fed with a Mayan tea from Humbolt Nutrients, loved the way it looked, they have great products.
🔸🔸🔸🔸🔸🔸🔸🔸🔸🔸
▪️Grown By: MrJones
▪️Medic Grow Smart 8 LED / Settings 60% & F1
▪️@medicgrow420
▪️@fastbuds_genetics_official
▪️@gaiagreenorganics
▪️Soil - ProMix HP
🔸🔸🔸🔸🔸🔸🔸🔸🔸🔸
📝Smoothie Auto is the result of a cross between Somango and Blueberry, and really brings out the best of both worlds; a well-statured plant ideal for all types of growers. Reaching up to 23% THC, this strain delivers an uplifting giggly high. Not to mention its exceptionally fruity taste making it an ideal choice for extractions.
▪️Bud Appearance Fruity, sticky, resinous buds, as potent as they are tasty. Rock-solid nugs that’ll crumble when touched.
▪️Smoke Report Balanced, yet Potent. This strain blends a euphoric head high with relaxing body effects. A great strain for a sun-time smoke, a weekend getaway, or a relaxed afternoon with friends.
▪️Plant Appearance A well-structured plant that will grow a large main cola accompanied by some lower side branches, somewhat resembling an Indica, yet still with a good average inter-nodal spacing. During the later weeks of growth, some can expect purple hues to appear on the leaves.
🔸🔸🔸🔸🔸🔸🔸🔸🔸🔸
Likes
11
Share

@The_Wanderer
Follow
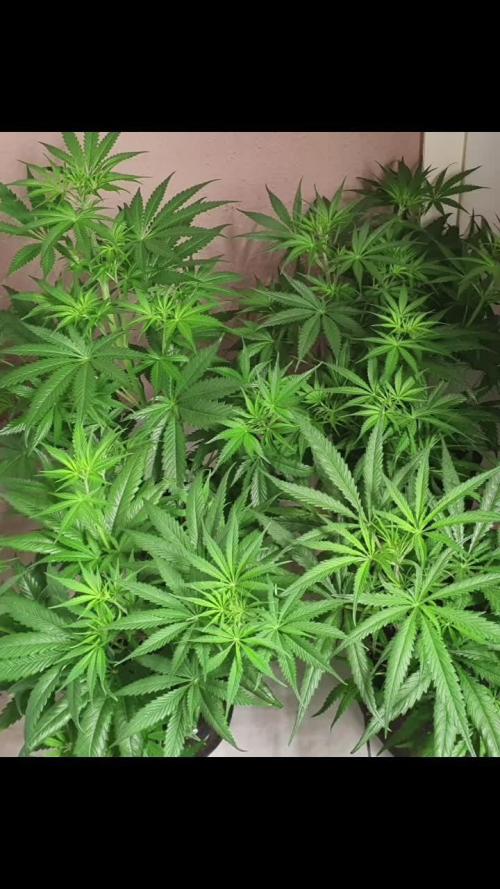
Authentic Thin Mint (GSC) The F1-hybrid that reshaped modern cannabis hybrid genetics.
Part 1
Likes
3
Share


@HookahCli
Follow
d68
Llevamos todo el mes de abril con lluvias y las plantas no reciben las horas de sol que quieren, por desgracia, la planta de LST ha sacado unos pistilos y para que no continúe con la floración le tendré que hacer una poda apical.
El resto de plantas parece estar bien respecto a esto, pero voy a estar observando a Mimosa Evo, puede que le pase lo mismo que a la LSD.
d69
Le he hecho la poda apical por la mañana a la LSD.
He realizado poda apical a Mimosa Evo.
He regado con 8L de agua a estas 4 plantas y 2 más, he utilizado la mezcla de arriba.
d71
Parece que crecen bien, todavía estoy dudoso porque LSD parrce que quiere sacar flores, la dejare una semana a ver como progresa, Meganuska necesita agua, esta muy liviana la maceta será la única que se riege hasta la proxima semana.
Estan empezando a llegar los insectos, la semana que viene empezare con los preventivos.


Likes
21
Share

@Staffedition
Follow
Привет друзья. Моей растихе сегодня 137 дней
Всё утеплил. Отопление сделал. Девочек своих отогрел)
Шишки наливаются но медленно.
20.10 перевёл свет в режим 12/12
Начал применять LST технику на 19 дне, а 18 августа добавил ДЕФОЛИЗАЦИЮ
С 20.08 ДЕФОЛИЗАЦИЮ
С 20.08 LST технику
На сегодняшний день влажность 54%
5.09.2023 заметил высокий Ph 7.9
С 48 дня Ph не ниже 5.8
На сегодняшний день Ph 6.0
Начал кормить с 60 дня Canna Terra Vega
PPM 870
Всем мира и добра!
Не забудь поставить лайк❤️, если понравилась как прошла неделя
И читайте наш TELEGRAM: https://t.me/smail_seeds
#Smail_Seeds 😀