Recommended
Likes
4
Share
@UrbanBoer
Follow
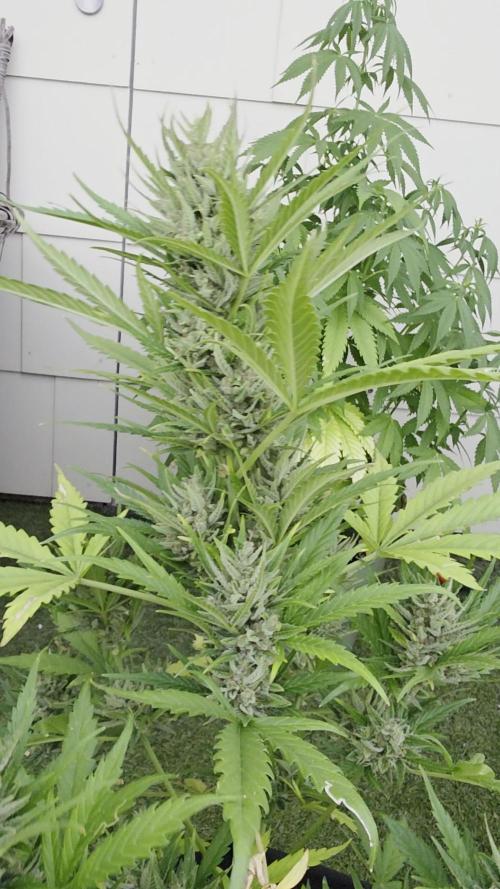
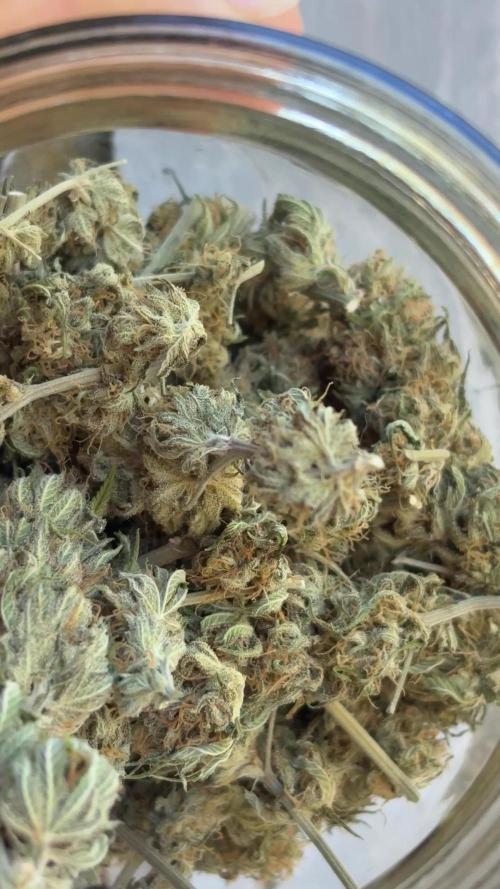
Finally A successful process I can finally harvest… 😭 1 of 6. When I thought an Auto, turns out got myself a traditional 6 month seed to harvest, she got a whole month of flushing, want that smooth smoke, besides presentation it must the smoke must be subtle on the throat. She just fooled me with her flowering, she has truly took her time maturing. Next week I am harvesting, and I will definitely post my experience, and how I dry and cure my harvest.
Likes
36
Share
The cultivation was very easy and relaxed. I just watched the insanely fast growth and did LTS. 😄 But by my mistake, the plants received a small nutrient burn, at the moment when the plants were at the end of the peak of maturation. This did not do much damage to the plants, but after that the plants were watered with clean water and washed with FlashClean. The inflorescences are dense and have a large number of trichome crystals 👌
Likes
46
Share
Overview of my grow: Tent: Secret Jardin DS120 4 x 4 (120 cm by 120 cm) Lights: 2 x 120 Watt CTlite c4 clusterled Climat: Trotec Dehumidifyer 240 watt- 10L/24h Filter: Prima Klima carbon filter PK2600 fan: 2 x Secret Jardin 20watt osc. fan Pots: Gronest 4 x 11 liter airpots Water : automated water system PH: bluelab Nutrients: Plagron cocos A + B Plagron PK 13/14 ATA cal/mag Epsom salt no rights to music in the videos Week 9 She is a beautifull plant, she smells delicious very sweet it reminds me of the auto Lemon Kix like candy. I'm looking forward to the taste of this strain, banana on the exhale 😋 Also hope she is going to make me feel banana. See ya next week in week 10 of the bananablaze grow Thanks for checking !!!
Likes
14
Share
Week 14 Day 92 (13/11/2020)💧: Great start to the week with watering today and because all the girls are entering their 4th week of flower, I will again be increasing the BioBloom as per the commendations on the watering chart, but since the pH has been increased they are definitely looking great and have enough nutrients between the watering days. So today I gave the girls 4.5 ml of BioBloom, 1.5ml of BioGrow, and 1.5ml of TopMax for 1.5L of water. I think I will be giving the same nutrients for the rest of the week as well. Day 93 (14/11/2020): Not that many updates today actually. The girls are looking amazing as always Day 94 (15/11/2020): I wanted to check the trichomes on the girls today with a loupe to see how they are developing up closer but I have no idea where my loupe is :( Really wanted to look closer at the flowers but will have to find it first to take some close up pictures as well Day 95 (16/11/2020)💧: We watered the girls today and gave them the same nutrients as before. They were watered with 4.5ml of BioBloom, 1.5ml of BioGrow and 1.5ml of TopMax. I think the TopMax is definitely making the buds fatten up Day 96 (17/11/2020): Took some lovely pictures of the girls today. Was finally able to capture on camera the redness of the flowers (or at least on girl#1). It’s quite difficult to the get the true colours because of the way the camera perceives the light. Day 97 (18/11/2020): Just can’t get enough of the smell of the girls omg they smell so great. It’s kind of a mixture of citrus and spicy at the same time. Cannot wait to taste them Day 98 (19/11/2020)💧: I keep wanting to measure the pH to make sure that it is still above 6.0 but I haven’t had enough time because it takes a while, but I will make sure to measure the pH before the next watering. So as mentioned at the beginning of the week, I will be giving the same nutrients. I watered the girls with 4.5ml of BioBloom, 1.5ml of BioGrow, and 1.5 of TopMax. So far the girls are looking good and happy with the nutrients. I’m only noticing yellowing leaves at the very bottom because there is not enough light, other than that the leaves seem like all the nutrients are balanced well. Also it looks like have finally stopped stretching length-wise and started focusing on growing the buds because the height is the same as last week. But really amazing progress this week, I’ve included a video of all the girls in the tent as well so it’s easier to see how different they are!
Likes
4
Share
Premier test de one bud sur cette variété et au top pour ce mode de culture de bon bourgeons bien remplit et bien coloré . Pour un poids final de 75gr j'ai bouturé a nouveaux mon pied mère et je vous ferait un nouveau journal avec celle ci et des la croissance cette fois si ;) Bon grow à tous😉
Likes
74
Share
Gracias a @James, Royal Queen Seeds y MarshHydro sin ellos no sería posible hacer este diario. La Tropical Mirage es la última creación de los maestros de la cría de Royal Queen Seeds. Trabajando mano a mano con el DJ y productor Henry Saiz, nuestro equipo se propuso crear una variedad que sirviera como chispa de inspiración para las personas creativas de cualquier ámbito de la vida. Y ahora, por fin podemos presentar el resultado. La Tropical Mirage desciende de la todopoderosa Zkittlez, uno de los híbridos más populares del mundo. Es el resultado de un cruce entre un esqueje seleccionado de la Forbidden Zkittlez y la Melonade, y es afrutada, edificante e inspiradora. Sus flores densas, alargadas y resinosas desprenden intensos aromas y ejercen un subidón energizante capaz de impulsar cualquier proyecto creativo, desde la música y las artes visuales hasta la escritura, el baile y mucho más. En el cuarto de cultivo, la Tropical Mirage es rápida, fiable y muy productiva. Con una serie de cuidados básicos, esta variedad tan resistente te dará suficientes cogollos para mantener tu flujo creativo en acción durante todo el año. 🌻 🚀 Consigue aquí tus semillas: https://www.royalqueenseeds.es/semillas-feminizadas-de-marihuana/647-tropical-mirage.html 💡 Mars Hydro TS 3000, como la lámpara de cultivo LED más grande de la serie TS, ofrece suficiente cobertura para un área de 4 × 4 pies con un precio asequible y rendimientos de calidad; a cambio, se puede aplicar tanto al cultivo doméstico como al cultivo comercial. Potencia - 450w Cobertura Vegetal – 5×5 pies Cobertura de flores - 4 × 4 pies La opción abrumadora para la mayoría de los productores que la aplican en tiendas de campaña. Consigue aqui tu lámpara: https://marshydro.eu/products/mars-hydro-ts-3000-led-grow-light/ 📆 Semana 8: Creo que va a ser la última semana que aplique nutrientes, los cogollos se han hinchado mucho esta semana. Finalmente quedaron cargadisimas de resina y con unos tonos morados que impresionan, el lavado de raices va a ser facil, estoy deseando cosechar esta variedad 😁⛽ Me hubiera gustado cubrir mas la carpa pero debido a la mudanza y posterior adaptación no ha sido posible.
Likes
190
Share
@Burmese
Follow
Hi everyone, Here’s the update for this week along with some beautiful videos. Please enjoy... 😊 ✌️ BTW Grow with Mars... 😉 Soil-Organic-LST Day 92~98 This week I topped up my soil with 50g of my potting mixed,25g of tea leaves fertilizer and 15g of bone meal. Soil RO water Coconut water- 15ml/L pH- 6.5 ppm- 85 Run off pH-6.7 ppm-650 Soil Potting Mixed Recipe -Coco peat: 30% -Soil Compost: 20% (Soil,Sand,Cow manure,Ash) -Bone meal: 10% -Earthworm fertilizer: 10% -Perlite: 15% -Marble stone: 5% -Crash egg shell: 3% -Chicken manure: 3% -Banana peels: 2% -Gypsum: 2% ——————————————— Coco-Inorganic-ScrOG Day 92~98 Becoming foxtails... Coco RO water Bloom- 4.0ml/L Micro- 2.0ml/L B52- 2.0ml/L Bud Candy- 2.0ml/L Cal-Mag plus- 1.5ml/L pH-5.5 ppm-890 Run off pH-5.9 ppm-800 Coco potting mixed recipe Coco peat : 70% Perlite : 30% Transplanted from 1gallon coco/soil mixed pot at Day-42. Scrog size Area : 1ft x 1ft (30cm x 30cm) Hole size : 2” (5 cm) Material : iron welded by four steel pillars. Height from base: 6” (15cm) Stay tune friends. Happy growing to you all... ✌️ 🇲🇲
Processing
Likes
3
Share
@darkc0de
Follow
Week 2 —— Wednesday: Day 8 —- Started blues main nutrient feeding. She seem to be loving life at the moment. Getting bigger by the day. Run off:30% Run off ph: 6.1 Run off EC 2.4 I believe the run off ec is so high is because the coco mix I used is pre blended with charge. The reason I think this is today feed was the highest EC I’ve done and that was 1.5 EC. —- Day 9 —- Increased her base nutrients by .5ml/l it added an extra 0.3 ec that yesterday feed, but the sound of the medium Snap crackle and popping it quite relaxing. Is this the zen water at work? Final EC: 1.8 Run Off: 27% Run Off PH: 6.0 Run Off EC: Still way over what it mean to be but it’s going down, I still believe it’s too do with Ecothrive Charge being in the coco already. Blue looking very healthy even tho the high ec run off. —- Day 10 —- Feed: 900ml PH: 5.8 EC: 2.0 Run Off: 275ml Run Off %: 27 NOTES: Looking healthy as usual. —- Day 11 — Feed: 900ml PH: 5.7 EC: 1.8 - Run Off Amount: 220ml %: 24 Ph 6.4 Notes: All is well in the garden this morning. Still trying to bring the run off ph down to 5.8 during veg. Still the ec of the run off is still stupid, read somewhere re top dress on week 4, which I’m not as not using charge. So touchwood it would of sorted itself out. Blue look like she enjoying the feed mind. —- Day 12 —- Just the same as yesterday just bigger. Today going to start to research how to lst etc and to see if can find out what EC charge is at. —- Day 13 — Feed: 1l PH: 5.7 EC: 2.0 Note: Thought today was the best time to start to use my base nutrients at full dose. Not much new to report but starting to enjoy waking up just to see how much she has grow. She has started to lean one side so I have proped her up with a plant label stick. —- Day 14 — Water: 2L PH: 5.8 EC: 2.0 Notes: Seem to be enjoying the nutrients. She looks very healthy. Roll of week 3 as think maybe to start of her lst training
Likes
14
Share
Que pasa familia, vamos con la quinta semana de floración de estas Gorilla Zkittlez Auto de FastBuds. La tierra que utilizamos que está en la publicación anterior es top crop all mix, aparte alimentamos nuestras plantas con Agrobeta. Por supuesto el ph se mide en cada riego y se mantiene en 6.2, regando cada 48/72 horas e intentando mantener la humedad un poco alta al principio. Se ven bien sanas tienen buen color , ya empiezan asomar aromas y el tamaño bueno no puedo quejarme, estas semanas vemos como maduran las flores. Agrobeta: https://www.agrobeta.com/agrobetatiendaonline/36-abonos-canamo Hasta aquí todo, Buenos humos 💨💨
Likes
18
Share
@Lonnert
Follow
Did some low stress training on the GC again. My Clone rooted and received a 15 L autopot, flipping to flower next week on the 3th to 4th June once the clone has some decent rooting, Reservoir running with 3.0 EC and PH 5.9. Plan for the next days: Dryback into irrigation Phase before i switch to flower next week in order to prevent salt buildups and a fair usage of already applied nutrients from the Reservoir.
Likes
35
Share
Bonjour à tous les padawans et les maîtres jedis Pour cette semaine je prévoit de pratiquer comme technique spéciale le LST et juste un arrosage. Pour cela comme à mon habitude j'attend le cinquième noeud ou que je juge la plante robuste. Je profite que cette semaine qui va être relativement calme pour faire un LST appliqué et vous faire un rappel de ce qui est pour moi la meilleure technique pour arroser une autofloraison et la façon dont je pratique le LST. En suivant ces quelques simples conseils vous obtiendrez un résultat optimal tout au long de votre culture : Le cannabis est une plante qui n’aime pas recevoir un léger arrosage en continu. Il est impératif de l’arroser en grosse quantité, puis d’attendre que la terre soit bien sèche avant d’arroser à nouveau! Pour calculer la quantité d’eau nécessaire à chaque plante, suivez cette règle : Le volume d’eau à donner lors de chaque arrosage doit représenter au moins environ un quart du volume du pot !! Exemples : pour un pot d’1L, donnez 0,25L d’eau à chaque arrosage pour un pot de 4L, donnez 1L d’eau à chaque arrosage pour un pot de 12L, donnez 3L d’eau à chaque arrosage pour un pot de 30L, donnez 7,5L d’eau à chaque arrosage !etc… Pour donner un tel volume d’eau, il est souvent nécessaire d’arroser en deux (voir trois) fois, lentement et uniformément sur toute la surface. Disposez de bonnes coupelles sous les pots, celles ci se rempliront d’eau qui remontera dans le pot par capillarité en moins d’une journée. Il est également très important d’utiliser un bon terreau de qualité, avec une bonne capacité de rétention d’eau mais qui assure également un bon drainage (celui ci doit contenir de la perlite, et/ou de la coco, etc..) Il vous faut alors maintenant attendre quelques jours en sous-pesant régulièrement les pot avec vos bras. Quand ils seront redevenus très légers, vous pourrez arroser à nouveau !! En effet, comme l’eau pèse beaucoup plus lourd que la terre, un pot gorgé d’eau pèse plusieurs fois le poids d’un pot d’une plante prête à être arrosée. Avec un peu d’entraînement, vous apprendrez donc très rapidement à sous-peser vos pots pour savoir quand une plante a soif. C’est une technique à la fois très facile et très efficace, et qui peut être appliquée à toutes les plantes en pots ! En arrosant de cette façon, en général vous devrez arroser vos plantes tous les 3 à 6 jours. Pour cette semaine 3 au jour 17 ma plante fais 12 centimètres et son cinquième noeud apparaît je décide donc de pratiquer un LST sur ma plante. Pour ce j'utilise du fil de fer galvanisé que je plante directement dans le substrat en faisant attention de ne pas endommagé les racines car n'oublions pas que ce qui pousse dessus pousse aussi dessous. Jour 17 je pulvérise du une solution composé d'une cuillère à café de savon noir mou dilué dans un litre d'eau en prévention d'éventuels nuisibles. Je corrige mon LST suivant la pousse de ma plante ... Pour ma par c'est la manière dont je procède. Comme promis petit rapel de: Quand commencer à appliquer la technique LST De nombreux cultivateurs commencent la manipulation dés que les plantes possèdent entre 3 et 6 nœuds ou une paire de feuilles. Durant cette première étape de la croissance, le tronc encore flexible est pliable sans risque qu’il ne se casse, même si au fur et à mesure du développement de la plante il sera de plus en plus difficile de le plier. Nous pouvons continuer à guider la croissance des branches durant toute la culture, même durant la floraison, ce qui pour cette étape représente un grand avantage face à la taille, qui n’est pas du tout recommandé une fois que la formation des têtes commence, cela stressera en effet la plante, ce qui aura pour effet de retarder la récolte. Comment appliquer la technique de guidage LST Si nous sommes prudents, la flexibilité naturelle des fibres du cannabis permet de plier leur tronc et branches avec une relative facilitée, même durant la floraison des plantes. En utilisant une corde fine, nous pouvons accrocher la pointe de la plante à la base du pot par exemple ou à un tuteur que nous aurons planté dans le substrat. Nous plierons le tronc avec précaution et nous le fixerons avec la corde, à partir de là, nous pouvons augmenter progressivement la tension de la corde, chaque jour un peu plus, jusqu’à obtenir la position souhaitée. Soyez attentif à la réaction de la plante, essayez de ne pas appliquer trop de pression sur la corde et rappelez-vous que la flexibilité des branches peut varier d’une plante à l’autre. Pour obtenir de meilleurs résultats, il suffit de suivre quelques règles simples. Pour commencer, nous devons choisir une corde fine mais pas trop pour ne pas blesser les troncs au fur et à mesure qu’ils grandissent et qu’ils deviennent plus gros. Nous pouvons utiliser des crochets en plastique souple ou de n’importe quelle autre matière flexible pour éviter d’endommager les plantes. Spécialement en intérieur, utiliser des cordons en plastique de couleur (voir les diaries de @Silky) est très pratique pour voir facilement les accroches et faciliter le travail au milieu du réseau formés par les cordes, les tuteurs, les mailles ou les supports que nous aurons dans la culture. Bien entendu, en culture extérieure et surtout en guerilla nous ferons juste le contraire et nous utiliserons des matériaux de couleur qui n’attirent pas l’attention pour que notre jardin reste discret. Pour stresser les plantes au minimum, la mieux est de réaliser ces manipulations le soir ou juste après que les lampes en intérieur s’éteignent, ce qui leur permettra de se remettre durant la nuit. Normalement, le jour suivant nous pourrons observer comme les pointes des branches que nous avons pliées se dressent de nouveau vers le haut à la recherche d’une source de lumière. Que la force soit avec vous
Likes
22
Share
@GR0WER
Follow
New week starts. __________________ 🌞19.04 Spraying by the 'Sea Weed' solution, but it's usual. Waiting for crone forming, doing nothing. It's a last week of vegetation, next one will be 12/12 hrs of light. 🌞20.04 Nothing today except clean water spraying. I was thinking about HST making to lower a middle brunches of my 'stack'. But I'm too scared to cause a lot if stress to my girls. They can become hermaphrodites, it's too risky. Theoretically, I can wait one more week them to be healed from the lasd defoliation and then break some brunches. But I don't want to wait more. 🌞21.04 Nothing today, we just growing. 'RG'#2 has alot of yellow tips on its yong leaves. It's definitely a feeding deficit, but I already giving them nutrients in 80% concentration. Next feeding (two days later) will be 100%/full dose and then light schedule will be changed. 👉Upd: I made HST (Supercropping) to eight middle branches of 'HB' and 'RG'#2. They were too tall compared to others. Now they have five days for healing before light schedule will be changed. It will be a great experiment for future grow cycles. 👉Upd_2: All eight broken future colas turned themselves to the 'Sun'. HST procedure was successful. Now my garden is as flat as an 🌊🌊🌊 (almost). 🌞22.04 Nothing today, even spraying. I want them to heal faster, not to rot... Broken branches of 'HB' and 'RG'#2 feels great. Leaves aren't withering, their stems are hard. They'll be OK after a few days. I think I'll made one more defoliation on wednesday. Wright after that I'll turn on 12/12 light shadule. 🌞23.04 Today I measured drainage water. There are too much sault was gathered in pots: 2.8Ec I drained 60 liters of nutrients solution (20l each pot). And EC fell to 2.6 only - it's too damn high numbers! In wednesday I'll water my plants with 'GHE Pro Clean' before light schedule changing. It will clean them well. Upd: 12hrs after this procedure they look much larger then they were before. I'm starting to run out of space in my box. 🌞24.04 Nothing today. A soil is too wet, Ec is too high, the broken branches haven't healed yet. I'll wait for two days, then flush my girls with a 'Clean' solution. Upd.: Light defoliation (~40 leaves total) was done at the evening to all except 'HB'. It was a last leaves cutting before flowering time. Details on photo. 🌞25.04 It's a last day of vegetation light schedule. I'll turn my lamps to 12/12hrs tomorrow. Also I will turn on a third 100W lamp in the box. This was a normal week. ____________ Week ends.
Likes
422
Share
Hi all 🧑‍🌾 Welcome to my 🍌💜👊 week update. Hope everyone keeping well and having a great week😁 Thank you so much for so much support on this bananas ride 🙏💜💚💜💚 Everything still going pretty well. Girls are developing and stretching like crazy. Athena currently Dec 14 90cm and main stem of Xena is not far of this height either. Unfortunately noticed first signs of calcium deficiency(my opinion) on Athena. Thankfully started feeding both girls with calmag weeks back but the dosage wasn't not enough for Athena. Started small treatment very next day on Dec 11 (see description below) I belive got my baby back on right track. Week 9 Dec 11-17 Dec 11 Watering was planned for Tuesday but due to calcium deficiency decided for a little treatment. Watered both girls with mixture of reduced content of growth nutes by 50% calmag at 1.2 ml per ltr. Reduced solution PH to 6.2 as apperently it's ideal for calcium consumption. Over period 4h I have watered Athena with 5ltr with couple runoffs. Xena 3ltr. Total of 7-10 leaves affected mainly at top colas close to the light. Dec 12-13 Purely observation and all looking well. Of course all affected leaves will progres of showing signs but good news is that growth and development booming and don't see any new leaves with symptoms. Very nice trichomes development in recent days and more and more colours. Dec 14 Second watering for this week 6.5l Increased calmag to 1.4ml per ltr and if still things will be looking well reduce to 1 or 1.2 on next feeding. Dec 15 Very nice respond on yesterday feeding. They definitely fatten over night and getting more and more frosty. Will need to remove some foliage soon as getting extremely bushy again. Dec 17 Xenas main stem top cola almost touched the light today. Tied her to left side of the cabinet, applied selective defoliation on both girls, tied few branches to netting and on the end of this busy day a third watering for this week. 7 ltrs beetwen both. Runoffs Xena PH6.4 Athena 6.3. Very nice week have to say. I belive that calcium deficiency on Athena is no longer a case here and both girls developing very nicely. Both are still stretching, buds are gaining in size and both girls started exploding with trichomes, Thank you all again for such amazing support 🙏peace and love brothers and sisters ✌️💚💜💚💜💚 Stay tuned for new week update 😉🧑‍🌾✌️💚
Processing
Likes
3
Share
Bad vent and lack of temperature and humidity Control. High temperature because of 600w HPS.
Likes
34
Share
great strain hard buttons heavy total life of 88 days. 84 after being born, besides having broken it will give me a good yield I will wait 90g to dry, for an automatic with 5.5 liter pot I think this is great. easy to grow very, very cold, sweet, sour, aroma, I'm happy .. final summary the lady still gave me 110g dried without branches and leaves very clean .. I am very very satisfied with the result both in the quality of the herb and the yield @Fast_buds @spiderfarmer @advancednutrients @growdiaries
Likes
4
Share
@pzwags420
Follow
On day 1 the reservoirs PH is 6.2. I defoliated leaves blocking the inside/lower canopy to give more light to lower growth points keeping the top 2 leaves on cola tops. The girls are deff still stretching :) So far so good. I'm glad I flipped to flower early this run and could see even dropping the veg time by another week. Its tough working in a small grow space but I'm determined to master it lol. I lowered the lights intensity from 85% to 75% to give my tops 600-800 PPFD. Usually I just blast the plants with 100% until the stretch is over but I'm realizing that I'm way over doing it based on my quantum sensors data. On day 2 the reservoirs PH is 6.1. The girls are still stretching and putting out new preflowers. My tallest cola is 9" from the light(the other lower colas are between 10"-12" away from grow light). On day 3 I adjusted the reservoirs PH up from 6.0 to 6.3. My tallest cola is 8.5" from the grow light. Lower colas are mostly 10" away from light. On day 4 the reservoirs PH is 6.3. My tallest cola is 7.5" from my grow light and the average/lower cola distance from grow light is 10-11". I defoliated large leafs that are blocking lower bud sites and or touching each other causing wet spots on the leaves. I want as much airflow as possible as I can not control my night time humidity which can be as high as 80%-90%. My last run I noticed some sugar leaves touching my grow box walls and this caused them to start rotting. I want to avoid that this time around so I'm being careful not to have any wet spots from leaves laying on each other as well as keeping all colas far enough from my walls. In the future I would like to have the ability for de humidification but being in a small grow box in a garage makes it difficult to control my lung room. On day 5 I adjusted the reservoirs PH up from 6.1 to 6.3. My tallest cola is 7" from the grow light. Lower colas are mostly 9"-10" away from light. I defoliated and removed lower bud sites not receiving enough light. On day 6 the reservoirs PH is 6.1. My tallest cola is 6.5" from the grow light. Lower colas are mostly 9"-10". My tallest cola is getting 1000 PPFD while my lowers are 600-800 PPFD. On day 7 I changed out the reservoir and adjusted the PH to 6.1. The tallest cola is 6" from the light. Lower colas are mostly 9"-10"