


Likes
Comments
Share


@ChitownCannaChica
Follow
She’s taking her sweet time now! I found a nanner and pulled it off, but I have to keep an eye out. You can see from the trichome shots that she is not ready yet... thinking maybe 1-2 more weeks—-hoping for sooner. Going to start a flush because of the leaf yellowing. Otherwise, she’s moving along! ✌️🏻💚🌿💨

Likes
22
Share


@Siriuz
Follow
18/6 from seed
Only water twice a week
Only once with nutes
When in low pot now in bigger pot we will see how much she needs
Very abundant roots you will see the video and notice how well she is growing
I really doubt the stress from this fast transplant so we will see it's behavior
We already added bloom nutes since she didn't have anything before but whoa so fast did not expected that from red poison but makes me feel great to have you I think you will be my favorite haha
Happy growing guys
Sweet smokes
Thanks for that guys

Likes
53
Share


@Mastr
Follow
Week 11 come along and she finished nicely I already flush her now i just feed her with water and bloombastic
and take off all fan leaves to bud recive more energy I will chop her down at day 75 so not long left
Today day 72 and guys she is ready but I don't wanna rush so let her 3 more days to get best results

Likes
14
Share


@nonick123
Follow
Día 36 (17/02) Riego con 500 ml H2O EC 0,45
Un stretch espectacular!
Día 37 (18/02) Riego ligero con 250 ml H2O EC 0,45
Ha disminuido un poco el consumo de agua
Día 38 (19/02) Riego con 250 ml H2O EC 0,45
El stretch es increíble y precioso 😍💥
Día 39 (20/02) Riego con 500 ml H2O EC 0,45
Hoy se muestra más sedienta después de unos días con menos demanda de riego
Día 40 (21/02) Riego con 350 ml H2O EC 0,45
Día 41 (22/02) Aplicación foliar con Sales de Epsom a 4 g / L (La planta presenta carencia de Magnesio con manchas necroticas en las hojas de abanico inferiores)
Riego con 350 ml H2O EC 0,45
Día 42 (23/02) Lollipopping y defoliación ligera!
Debido a que tiene un stretch espectacular (alrededor de 57 cm de altura) elimino todas los nudos / ramas que no superan el 50% de la altura de la planta
Elimino un par de hojas de abanico grandes
Riego con 400 ml H2O EC 0,45
🚀 Khalifa Genetics - https://khalifagenetics.com/product/lemon-blanco-v3/ @khalifa.genetics
💦 BioTabs 15% DISCOUNT code "GDBT420" biotabs.nl/en/shop/ @biotabs_official
🌱Substrate PRO-MIX HP BACILLUS + MYCORRHIZAE @promixmitch @promixgrowers_unfiltered
💡2 x Mars Hydro FC1500 EVO Led Grow Light (2024 NEW FC 1500-EVO Samsung LM301H 150W LED) - https://marshydro.eu/products/fc1500-evo-led-grow-lights/ - https://www.amazon.de/dp/B0CSSGN5D8?ref=myi_title_dp


Likes
41
Share


@Growing88
Follow
Sono felicissimo,abituato alle hps e cmh e non riuscivo ad ottenere grandi risultati, con una hps 600 watt massimo 450 grammi,con un led 730 ho fatto 1500 grammi,waooo😍😍😍


Likes
14
Share


Processing
Likes
4
Share


@DrewbieDoobieNoobie
Follow
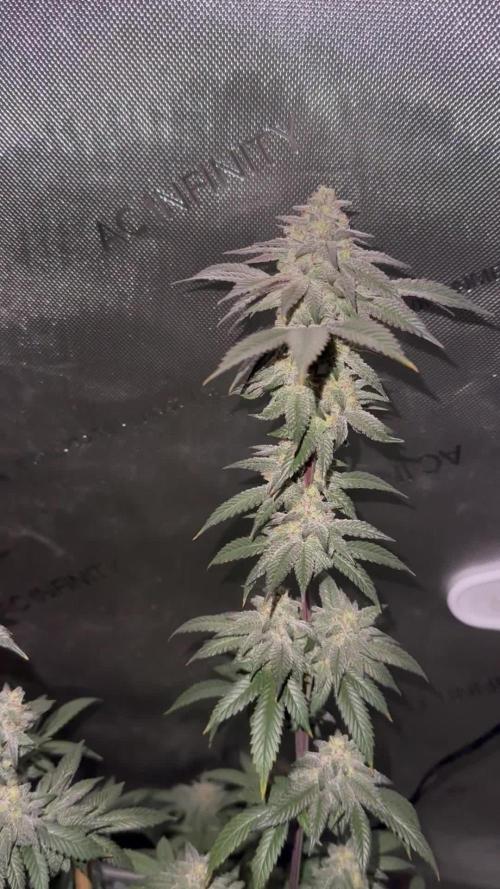
Super Hot in the tent this week 90-97 the plants have been hanging in there thanks to the CO2 blasts. They are drinking a lot from the heat, LST all 3 to even out the canopy before the stretch of flowering. Week one is done the start of week 2 seeing hairs finally and have been spraying MILF A twice a day with the CS. I transplanted the clones as well, the roots were filling up the solo cups. I up potted to 3 gallon fabric pots and straight into flower. should get some colas to dust with Feminized pollen in a few more weeks. Im so Freaking Happy that they were all girls I got the hairs to prove it😅
UPDATE: 5/12/30 I'm happy to report the CS is doing its job. I am seeing well defined Sacs in the one branch I am spraying 2 times a day for 13 days I have read that it can take up to 2 weeks so this is right on target. Clones are recovering well I top dressed all the plants with the Sea blast Bloom in the Nutrient list up top all the others were put in to a 5 gallon bucket of water PH to 5.8 and drenched the plants. that's all for now. cheers
Likes
Comments
Share


Likes
20
Share


@RunWithIt
Follow
I mean, overall this was an extremely painless grow. The test of whether we should or shouldn't top autos is still TBD imo. Our topped candidate produced denser, frostier buds, but weighed slightly less, at 14 grams of bud total. And our lst plant produced 18 grams of bud, not as frosty, and almost as dense as our topped girl. I'll be topping autoflowers from here on out only under the circumstance I have 4+ to grow at the same time. Seems like it could be used to speed up the autoflower grow cycle if done properly, like with right. Since I'm doing a perpetual cycle, it's still a viable option for me in the long run. A few tips I have for anyone growing this strain in organics:
Start feeding bloom nutes a little bit prior to flower transition - this makes the transition more seemless. From weeks 1-3 flower, I slowly dropped the grow dosage until I cut off grow nutes week 3 flower.
Starting the flush around week 6 flower seemed to really bring out this plant's potential. But I think you could get away with starting the flush around week 5. I hope this helps anyone trying this strain out. It's a good one, I hope to see more journals of it, eventually.
Cheers everyone! Time for me to take a well-deserved puff. :) ☁️ 🌼
Likes
21
Share


@MG2009
Follow
01/27/2021
Flowering going well
Flowering #2,#3,#6 #6 is a week ahead of#2,#3 will put others in on week 4 for a staggered harvesting
01/30/2022
watered with fungal tea and some aloe mixed in for amino acids and other goodness. Well see how she progresses in 4 days
Also working on some banana peel tea to give a boost of potassium if I do next week it should be available for week 6-7.
Ps.
Fuzzy Mellon (bag seed male)
I will pollinate one lucky branch on #6 as she is my favorite. But number 3(tall and lanky one) will get pollination of one branch as well.
I can't wait to see how they recombine with fuzzy melon smell mixed with burnt rubber and model glue and pine.
#2 no pollination (smaller one) #5 (bonsai) and #8 are males. So 3 female out of 8 seeds. Going to make some feminized seeds next time,so I'll have plenty of female's for a staggard harvest.
Likes
8
Share


@therealgrowmie
Follow
It’s looking fantastic, fam!
The top leaves are turning a gorgeous purple now, which—not only stunning to look at—also highlights the massive central cola beautifully.
I’ve elevated the left plant to even out the light distribution across the canopy. In hindsight, I probably should’ve done that a bit earlier!

Likes
23
Share


@MadeInGermany
Follow
Hey everyone 😀.
A lot has happened this week 👍.
Flowering day 28
Today 1.2 liters were poured.
(See nutrient table for nutrient addition).
The humidifier was refilled with an Ec of 0.4. The tent has been cleaned.
Flowering day 29
Today the plants and buds were checked for health and cleaned.
Flowering day 30
Today was poured again.
This mam she got 1 liter of water.
(See nutrient table for nutrient addition). Of course, the plant was checked for its vitality 🧐😅.
Flowering day 31
The humidifier was refilled a little and the tent cleaned 👍.
Days of flowering 32
Today 1.2 liters of water were poured. (See nutrient table for nutrient addition).
Fans, fans, electrics have been checked for functionality 😊.
Flowering day 33
The plant has been carefully checked for pests, etc.
Flowering day 34
Today 1.6 liters were poured, so that it had about 10% drain 👍
For nutrient addition, see the nutrient table.
The tent was plastered and rubbed with disinfectant.
The buds look beautiful, and already smell extremely tasty again 😍.
I wish you a lot of fun with the update, let it grow 🍀 and all stay healthy 🙏🏻
You can buy this Strain at
https://thecaliconnection.com/seeds/girls-scout-cookies-34.html
You can buy the fertilizer at
https://www.greenbuzzliquids.com/
Type:
Girls Scout Cookies
☝️🏼
Genetics:
GSC Tint Mint
👍
Vega lamp:
2 x Todogrow Led
Quantum Board 100 W
💡
Bloom Lamp :
2 x Todogrow Led
Cxb 3590 COB 3500 K 205W
💡💡☝️🏼
Soil :
Canna Coco Professional +
☝️🏼
Fertilizer:
Green Buzz Liquids :
Organic Grow Liquid
Organic Bloom Liquid
Organic more PK
More Roots
Fast Buds
Humic Acid Plus
Growzyme Big Fruits
Clean Fruits
Cal / Mag
Organic Ph - Pulver
☝️🏼🌱
Water:
Osmosis water mixed with normal water (24 hours stale that the chlorine evaporates) to 0.2 - 0.4 EC. Add Cal / Mag 2 ml per l water every 2 waterings . Ph with Organic Ph - Pulver to 5.8 .
Like
1


Likes
3
Share


@Peter777
Follow
Yoo, finally we finished our first grow and Are very happy with the results.
Anyone who smoked it says it's better then the Canadian stuff the people are selling here.
We learned a lot while practicing and have already plans and improvements for our next grow.
Once you have such a good harvest you will get addicted to it :)

Likes
Comments
Share

@hassehujasse
Follow
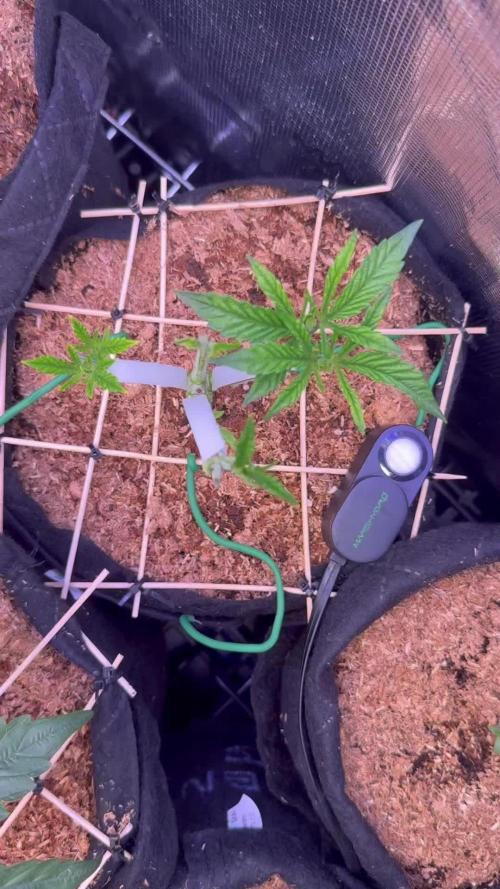
I can see her bright future under high light intensity and Co2 enrichment
Responding well to all my errors and 4sure she is gonna be pretty woman


Likes
26
Share


@elevensixty6
Follow
Nothing but plain water this week as the bulking has continued.. trichomes are cloudy and pistils are at least 60/70 percent red depending on the pheno. That tells me its about time to harvest. Also would like to get these ladies down to avoid any bud rot or mold in the larger buds as they are getting quite big and will hold much more water and have lost quality top buds before due to over flushing and the buds having to much water in them at the time of the actual chop and hang. Anyways, they look great I cant wait to give them a try.

Likes
74
Share


@Secretflower
Follow
Hello my friends,
🎎...April 14th 2021...🎎
🎌...Day N°74...🎌
Half of the 11th week of growth for my two Feminized Shogun from Royal Queen Seeds.. 👑 👑 👑
The plants are beautiful, thanks to a grower I found why my Girls were growing gently, it was the lamp that was placed too high, and the power was too strong, since then my Shogun are growing vigorously.. 👍
I gonna switch my light to 12/12 soon..
📰...Le 15 Avril 2021...📰
J'ai changé en mode Floraison, lumière en 12/12..💣
🍼... Nutrients...🍼
It's written at the top, lol.. 😁
🔦...Light...🔦
#MarsHydro Tsw 2000 at 40% power and 50 cm from the canopy, this product working very well..😁
🐜...Pest...🐜
Nothing to report.. 👍
That's all for now my friends, thank you for going through there, take care of yourself and your loved ones while staying safe.. 😷
I wish you good things with your plantations..😘
📭 ... See you soon.. 💨 💨

