


Likes
Comments
Share


@Koekie90
Follow
Even problemen gehad met de ph-waarde, waardoor er waarschijnlijk geen correcte voedingsopname was.
Mijn planten werden lichter van kleur en sommige bladeren werden zelfs duidelijk geel tussen de nerven.😕
Ik ga er althans vanuit dat dit het probleem was, aangezien ik eventjes kraantjeswater gaf voor de cal en mag maar dit niet afzuurde.
Vandaag testte ik de ph-waarde van het kraantjeswater met mijn nieuwe ph meter en kwam ik uit op 7.2, niet goed voor kokos dus.
Ik schakelde meteen weer over naar regenwater, wat met voedingsstoffen in mooi uitkwam op ph 5.8👌
Hopend dat ze zich herstellen, update volgt.
De groei gaat gelukkig mooi door!💚
Update 11 mei:
2 planten toonden magnesiumtekort door vorige ph problemen met kapotte meter.
Je kan dit nog zien op de foto's tussen de nerven.
Zwaar aangetaste blaadjes weggehaald.
Intussen kokos verbetert met kieseriet (magnesium) en geen Epsomzout omdat ik dit een lapmiddel vind en liever op lange termijn werk.
Na problemen met de ph en substraat gespoeld te hebben, nu ook weer voeding aan het opbouwen👊
Planten voor buiten in een kas, maar hier kreeg ik de luchtvochtigheid niet onder controle (bleef boven de 80 zitten).
Ze zijn nu verhuisd naar hun nieuwe verblijf, mijn schuur waar ik altijd kweekte.
Buitenkas was een test, maar is dus geen goede optie👎
Op de foto's en video kan je zien dat ze nu veel beter wonen🌱
Update 14/05 : Eerst laten herstellen van magnesiumtekort.
Fimmen + LST gestart.
Ik leg mijn planten graag plat💚

Likes
6
Share


@GrowTF
Follow
Sehr sehr schöne Verfärbung.
Die etwas später angepflanzte Epsilon(Links) wächst buschiger und Kompakter als die erste (rechts).


Likes
17
Share


Likes
89
Share

@RockoCalenberg
Follow
Tag 108 | Blütetag 64
Rocko's Terp Test featuring: Apokalypse Grow ☀️🔥
Das Wetter bleibt momentan der Chef. Um den sommerlichen Temperaturen entgegenzuwirken, wurde der komplette Lichtzyklus in dieser Woche auf die Nachtstunden von 20:00 bis 08:00 Uhr verlegt. Zusätzlich laufen die beiden XS1500 Pro nur noch mit 40 % Leistung. Ich habe sogar kurz überlegt, den Zyklus auf 21:00 bis 09:00 Uhr zu verschieben, um die größte Nachmittagshitze noch weiter zu umgehen. Vorerst bleibt es aber bei 20:00 bis 08:00 Uhr. In dieser Phase geht es nicht mehr darum, den letzten Ertrag herauszupressen, sondern die Pflanzen möglichst schonend ins Ziel zu bringen. Das Ziel bleibt klar: Fruchtbombe statt Hitzebombe.
Das gesamte System läuft aktuell eher in einer warmen Suppe zwischen 26 und 31 °C, statt wie noch vor einigen Wochen zwischen kühl und heiß zu pendeln. Die Klimadaten lesen sich zunächst kritischer, als die Pflanzen tatsächlich aussehen. Trotz der schwülen Wetterlage zeigen die aktuellen Bilder ein erstaunlich stabiles Bild. Die Pflanzen zehren inzwischen sichtbar aus ihren Blattreserven, ohne dass die Blüten selbst deutliche Anzeichen von Hitzestress zeigen. Angesichts der sommerlichen Temperaturen unter dem Dach sind rund 30 bis 31 °C während der Lichtphase derzeit ein durchaus akzeptabler Kompromiss.
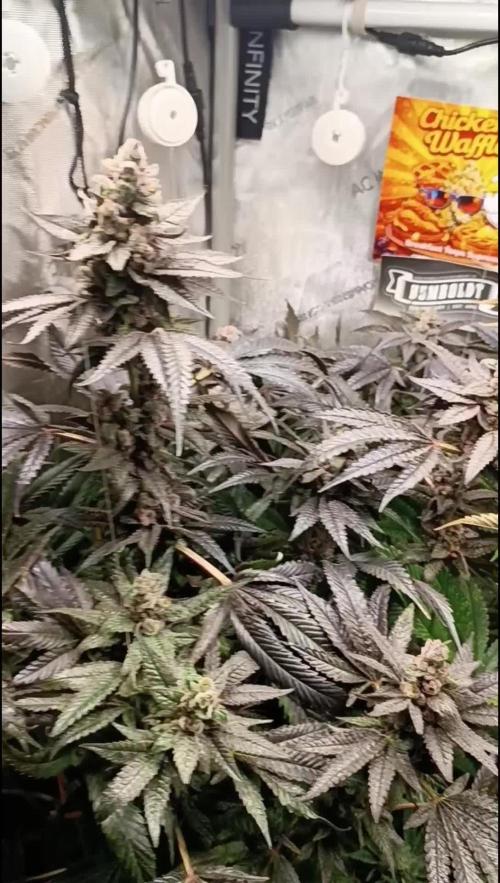
Chicken & Waffles liefert in dieser Woche den wohl spektakulärsten Anblick. Die Zuckerblätter präsentieren sich inzwischen in tiefen Violetttönen bis hin zu nahezu Schwarz und zeigen stellenweise bordeauxfarbene Nuancen, die sich auf Fotos nur schwer einfangen lassen. Zusammen mit der massiven Harzschicht wirkt die Pflanze beinahe eingefroren. Die Spitze erinnert an mehrere kleine Zwiebelkirchtürme. Mit ihren organischen, leicht verdrehten Formen wirkt sie fast wie ein Bauwerk, das einem Hundertwasser-Entwurf entsprungen sein könnte. So eine Optik hatte ich bisher noch in keinem Grow.
Fruit Bomb Punch zeigt in dieser Woche eindrucksvoll, welchen Einfluss das Training auf ihren Wuchs hatte. Durch das wiederholte Herunterclipsen während des Stretchs konnte sich keine klassische Hauptcola entwickeln. Stattdessen bildet die Topblüte aus der Draufsicht einen regelrechten Fünfender mit nahezu gleich hohen Spitzen. Von der Seite wirkt derselbe Bereich dagegen wie ein schlanker Turm aus übereinander gestapelten Blütensegmenten. Die übrigen, weniger beeinflussten Seitentriebe zeigen dagegen die sortentypische Blütenstruktur und machen den Einfluss des Trainings besonders deutlich.
Strawberry AK bleibt ihrer Linie treu. Die klassische Kerzenform mit ihrer markanten Hauptcola ist bis heute erhalten geblieben. Gleichzeitig zeigt sie den deutlichsten Herbst-Fade und verwertet konsequent die letzten Reserven aus ihren Fächerblättern.
Auch bei den Trichomen zeigen sich inzwischen Unterschiede. Chicken & Waffles liegt aktuell leicht vorn, Strawberry AK folgt überraschend dicht dahinter. Fruit Bomb Punch beginnt dagegen gerade erst sichtbar einzutrüben. Ob sie in der kommenden Woche aufschließen kann, werden die nächsten Makroaufnahmen zeigen.
Am Ende entscheidet das Glas. 🍯🌱



Likes
5
Share


@Bread_n_Buds
Follow
Here our Zookies, as I anticipated, have started off great and are starting to give their best
In this diary you will find the plant worked with the techniques in this case the first topping was done, we cleaned everything else creating the Mainfold and we are going to work everything with the main lining. We are at the first topping and we have two mini branches growing.
The other one you will find in the diary next worked without the application of techniques that involve cuts to preserve its speed.
Comparison is the salt of experience.
We have started the Plagron fertilization program, we are in 100% organic configuration, the soil is recycled Promix + 1/3 fresh soil + 10% Perlite + RQS Mycorrhiza Mix (4gr in the mix, 1 gr under the small fiber pot).
We are administering // 1 ml/l of Power Roots - 1 ml/l of Pure Zym - 1 ml/l of Sugar Royal - 3 ml/l of Alga Grow
I have doubts about the compatibility of Pure Zym with mycorrhizae. If in doubt, ask the experts, do not mix too much at random.
https://plagron.com/en
The doubts about the compatibility Pure Zym / Mycorrhizae have been dispelled, they can go well together according to Plagron experts. If someone tells you that enzymes eat mycorrhizae, which in principle may seem possible, explain to them that it is not true.
https://www.royalqueenseeds.it/growing/452-easy-roots-mix-di-micorrhize.html
Try this variety, it is a top strain of the last few years very high level of thc ---- https://www.zamnesia.io/it/11174-zamnesia-seeds-zookies-auto.html
Brief description of Zamnesia // The result of the cross between Animal Cookies, GG#4 and ruderalis, this compact variety produces top quality buds, maintaining all the charm of a modern US hybrid. Thanks to the hard work of the Zamnesia genetics team, Zookies Automatic is easy to grow, fast flowering and exceptionally vigorous. Regardless of whether you grow indoors, outdoors or in a greenhouse, if you are looking for a stable autoflowering strain that is quick to harvest, Zookies Automatic is definitely the one for you.
Like all Zamnesia autoflowers, Zookies Auto promises rapid harvests of top-quality bud with minimal effort. And she delivers on that promise. After germination, Zookies Automatic plants grow vigorously for around 3–4 weeks. At the end of the pre-flowering phase, plants typically reach a height of between 90–110cm, depending on the size of the pot.
You can find the whole world of growing on Zamnesia and more, just check out the site and you will find "all the best that nature has to offer" in various shapes and colours.
The new strains are fantastic and the old ones are no exception... p.s. no hermaphrodites so far, can you growers say the same?
---- // www.zamnesia.com

Processing
Likes
3
Share


@Reaper
Follow
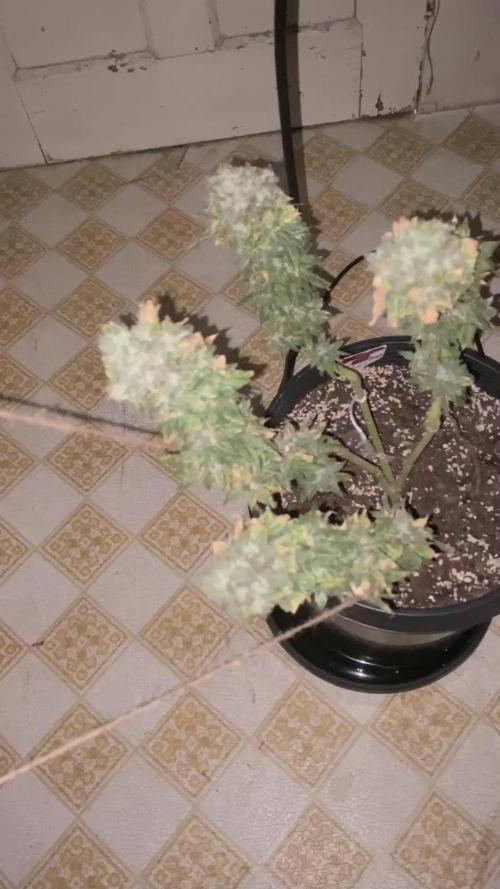
these are 6 clones from the critical HUGE PHENO in the rdwc, i want to keep 1 clone as an motherplant with my autoflowers.
april 11:
all rooted / transplanted and show color and healthy growth. feed em around 400ppm


Likes
7
Share


@GreenHouseLab
Follow
I've released the top which was being held down for some LST the last 3 weeks. She slowly started to stretch but I think she will be this size until the very end. Tight spacing between each nod its hard to actually show with pictures how bushy this one actually is. Defoliation will be necessary but I'm giving her another week at least to finish her growth and to avoid any stunt before defoliation.
This week all plants but the Sweet Tooth will be getting Massive nutrients from Green Planet which does wonders for getting those fat colas.

Likes
5
Share


@Ensign420
Follow
Greetings fellow growers 🖖 and welcome to my first grow ever. This adventure actually started several months ago when I decided to stop buying flower from dispensaries and just grow my own bud. How hard can it be!?
This is actually my second seed of this strain. The first bean sadly died due to over watering (sorry girl, RIP). I was literally watering the cube to the point where water was dripping from the bottom, then heavily sprayed the humidity dome and tray with the vents completely closed. Everyday. Multiple times. I never let the dome or try dry out. So after about 8 days of not sprouting, there was a funky smell of rot. So that was that.
Later I learned that rockwool retains a lot of water and can easily drown seeds. So a wet/dry cycle is best for rockwool germination.
So even after hours of researching and digging through forums and tutorial videos, I was still under prepared for this journey. Did not consider how delicate the germination phase is. Oh well. Lesson learned. Reset and try again!
I hope everyone is safe and stoned during this corona crisis. Just like everyone else in the world, I want this pandemic to be over with. But in the meantime, let's grow some weed! 🖖
[START OF WEEK 01]
Day 01 - Monday - 08/03/20 - Total Days: 001
-----------------------------------
- [0830]: Light Schedule: 24Hrs/0
--- Soaked cube in 5.5 PH water for 10 min. Did not shake water out.
--- NO NUTES! Only PH'd down to control the PH levels.
--- Did not use the default hole (way too deep).
--- Flipped cube upside down and made a shallow hole for the seed (less than 0.25" deep).
--- Placed seed in and pinched hole close. No additional water added.
--- Sprayed the tray and dome with straight water (5.5 PH).
--- Vents are cracked opened a for ventilation (about 1/4 opened each).
--- Distance between the light and tray was 53"
--- AC was set to 80 °F
--- Exhaust fan was set to 86 °F
--- Room average temp was at 85 °F
--- Dome humidity was at 85-99% when sprayed.
--- Allowing to completely dry before respraying.
- [2200]: Dome and tray were completely dry! Sprayed only tray and dome with more water.
Day 02 - Tuesday - 08/04/20 - Total Days: 002
-----------------------------------
- [0845]: Sprayed dome and tray in the morning. Everything was dry.
--- Hoping for the best!
- [2130]: Everything was dry again, so sprayed dome and tray at night along with a light spray on the cube.
Day 03 - Wednesday - 08/05/20 - Total Days: 003
-----------------------------------
- [0830]: Everything was dry again. Resprayed dome and tray. Slightly sprayed cube.
- [2125]: Hooo damn!! She popped! Am little stub is visible! Resprayed dome and tray again.
--- Still going 24/0 for lights.
- [+0033]: Just checked up on her and I swear she grew a bit taller! Getting excited!
Day 04 - Thursday - 08/06/20 - Total Days: 004
-----------------------------------
- [0845]: Wow! Went from a little stub to fully sprouted overnight! Everything was pretty dry again so resprayed dome and tray.
- [2200]: Tap root is visible! Over 1" long too! Just resprayed dome and tray again.
-- Going to prep for hydroton transplant tomorrow!
Day 05 - Friday - 08/07/20 - Total Days: 005
-----------------------------------
- [0930]: She keeps growing!
-- Added a bit of CalMag to the spray bottle (8 drops to 650ml of distilled water). Resprayed dome and tray. Water was at a 5.4 PH with 141 PPM.
- [1045]: Prepped the bubble bucket with 4.5gal of water. Water is high enough to reach about 0.25" above the bottom of the net pot.
--- Added 3 drops of Superthrive
--- Added 3.5ml of CaliMagic
--- Added 2ml Hydroguard
--- Then PH'd down to 5.6
--- Solution Strengh: 120 PPM
--- Water chiller is set to 20 °C
- [1100]: Transplant time!
--- Filled the net basket 1/3 with hydroton. When placed in the bucket, air bubbles are not visible, but are slightly below the surface (slight digging will reveal the water/bubbles below).
--- Removed plastic on rockwool cube and placed in basket, then filled around and covered with hydroton. Making sure to block any light from passing through the net pot and into the nutrient solution.
--- Covered with a half-bottle dome sprayed with the CalMag water from earlier.
--- Hoping for the best!
- [1300]: Raised Bucket 5" higher. Now light distance is 48" to top of bucket.
- [1820]: Lowered tent exhaust temp to 76 °F
--- Lowered AC to 75 °F
--- Raised bucket even higher so light distance is 30" to top of bucket.
- [2300]: Looking good!
--- Sprayed dome and surrounding hydroton with more CalMag water.
--- Attached timer to light! So new 18 Hrs On/6 Hrs Off light schedule.
--- Lights On: [1600] (4pm)
--- Lights Off: [+1000] (10am the next day)
--- Decided to go with lights on during the evening/night and off during the later mornings/afternoon (the hottest part of the day) to see if temps can be controlled better.
--- Please survive girl!
Day 06 - Saturday - 08/08/20 - Total Days: 006
-----------------------------------
- [0800]: Everything was dry. Resprayed hydroton and dome.
- [2000]: Here first night cycle seemed to go well! Get'n taller!
--- Dry again. Removed the dome.
--- PH went up to 6.5 so PH'd down to 5.7
--- Ran the top feed drip ring for a bout a minute to wet the hydroton and rockwool with the nutient solution.
---Too scared to leave the top feed on 24hrs (I don't want over water her and cause dampening-off). Will let dry before re-watering.
- [2100]: After closer inspection, I think she's looking a bit yellow.
--- Decided to add a bit of grow nutes to the bubbler solution.
--- Added 2ml of Sensi Grow A
--- Added 2ml of Sensi Grow B
--- Solution strength after adding more nutes: 176 PPM
--- PH went up to 6
--- I hope that the extra chelating properties of the 'PH Perfect' solution is enough of a buffer for proper nutrient uptake.
Day 07 - Sunday - 08/09/20 - Total Days: 007
-----------------------------------
- [0800]: Water dropped a bit (mostly due to evaporation) so solution strength was at 190.
--- Checked PH again. Was still at 6, so PH'd down to 5.4
--- Ran the top feed for a minute to wet the hydroton a bit.
- [0915]: Since she's looking perky but still a bit yellow. So decided to up the nutrient concentration even more before lights out.
--- Added 2ml more of Sensi Grow A
--- Added 2ml more of Sensi Grow B
--- Solution strength after adding more nutes: 199 PPM
--- PH went up to 5.8
- [1700]: Checked nutrients.
--- PH: 5.9
--- Solution strength: 202 PPM
--- Added 4ml of Voodoo Juice
--- Added 4ml of B-52
--- PH after adding more nutes: 5.9
--- Solution strength after adding more nutes: 238 PPM
- [2130]: Decided to make a new foliar spray to address the continued yellowing.
--- Started with 500ml of distilled water.
--- Added 3 drops of CaliMagic
--- Added 3 drops of Sensi Grow A
--- Added 3 drops of Sensi Grow B
--- Added 3 drops of B-52
--- Added 1 drop of Superthrive
--- Solution strength: 164 PPM
--- PH was at 5.9 and did not adjust.
--- Gave her one spray.
--- Also sprayed the surrounding hydroton.
[END OF WEEK 01]


Likes
18
Share


@Ganja_Victoria_Aus
Follow
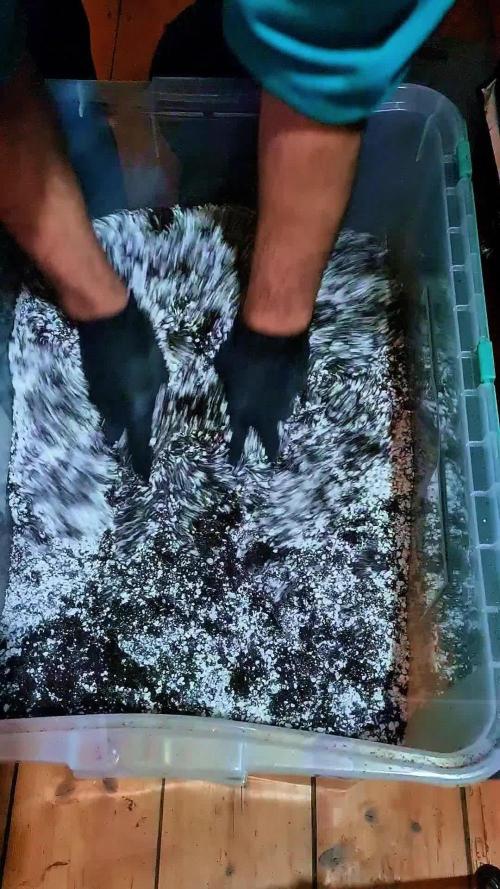
Cheese and Mexican are a bit behind the other Lady due too the training, strain gentecics traits. This week hopefully blueberry and GDP will depart the greenhouse. 🥦


Likes
22
Share

@Borberad
Follow
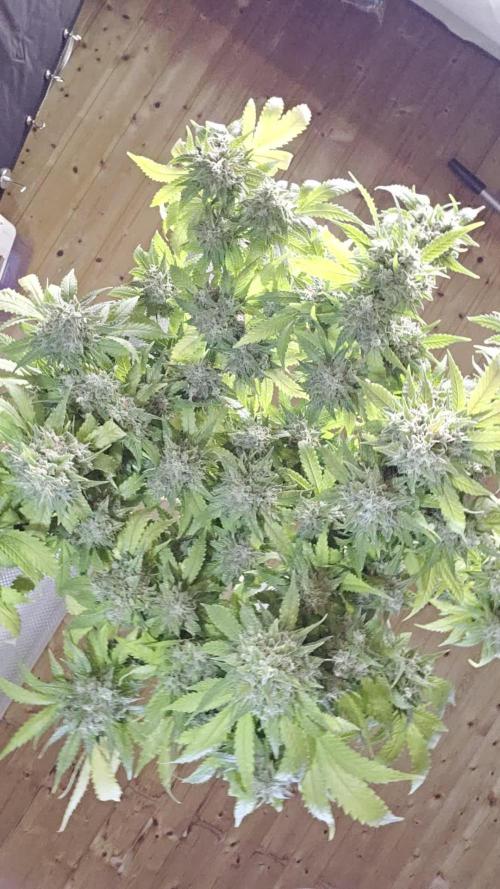
Die letzte Woche lief ohne Störung und Probleme, wahrscheinlich hätte man noch 5 bis 10 Tage warten können für 20% Bernstein, aber das ist eh nicht unser Ziel. Jedoch sind 74 Blüte Tage für ein Fast Flower schon ordentlich. Es sei aber bemerkt das auch die Frühe Ernte schon gut schmeckt, jedoch ist die Buddichte der frühen Ernte nicht mit dem Aktuellen Zustand vergleichbar. Also warten lohnt sich, wie immer! Gesamt Gewicht Nass 750g ungetrimmt mit Stängel ohne Stamm.



Likes
8
Share


@Jays_Not_Here_Man
Follow
Week 3-Day 21 of flower. These ladies have been on autopilot. The environment is controlled, we have been having some temp and RH swings, but the equipment is dialed in. I have a portable AC when it is humid and hot, only needs to run for 15 minutes from time to time to keep the lung room/tent at the perfect temps.
I can’t say enough how important it is to test, test and dial in your environment. I can already see big advancements in my photo periods from when I started, to today just a 1 1/2 years later. Having your environment as close to perfect as you can, can compensate for A LOT of rookie
Mistakes 🤓
Anyways, still keeping to Feed, Feed, water schedule, despite the tip burn, I’ve dialed it back to about 900 ppm and seeing how the plant reacts. Did a light defoliation, which will probably be the last one. Seems like all I am doing at this point is watching and watering. Happy Growing Folks 🇨🇦❤️🌱😎💨

Likes
8
Share

@Jays_Not_Here_Man
Follow
The ladies are doing great 😊 They have been in flower cycle for a full 7 days and are stretching nicely, while also showing all kinds of flower hairs 😍
I’ve been lowering some of the Nitrogen Based nutrients and upping the Phosphorus, Potassium and Micro Minerals. In a couple of weeks I’ll be switching from Cal/Mag to Mag/Sulphur with the Bug Bud from Advanced Nutrients.
I’ve been bending and tucking, and did a little defoliation to increase airflow and get rid of some leaves blocking tops. It’s been very rainy this week, RH has been high, but the next few weeks are looking much nicer! Happy growing 🇨🇦❤️🌱
Processing
Likes
5
Share


@Mr_nugs_lover_David
Follow
She's looking very healthy and getting bigger every single day nonstop, she's growing very fast, love the beautiful green color she has, think I'm gonna enjoy working with her in this indoor run! Let's see what we can do! 💚 🌱 ✌️ 💎

Likes
21
Share


@krewgrew
Follow
This or maybe next week haaaaarvest tiiiime.
I dont know how many Phenos out there for Skywalker Haze, but all 3 of mine appears very different, smells very different, "behave" very different.
D64 03.25:Theres nothing to do today.
D65 03.26:Today's water: 3L tapwater+2ml molasse. Ph 6,31.
D66 03.27:All good.
D67 03.28:Today's water: 3L tapwater PH 6,40.
D68 03.29:Today a sheared them a little. They look/smell better and better.
D69 03.30:All good.
D70 03.31:Today's water: 3L tapwater+1ml bloom, 1ml topmax.

Likes
57
Share


@MadeInGermany
Follow
Hey everyone 😊.
The two women will be in the vegi tent for the last time under 6/6 this week, and will come to the flower tent 🤗 next week.
Otherwise there is nothing to report this week, except that both are developing really well 😀.
Have fun with the update and everything stays healthy 🙏🏻☘️
You can buy this Strain at :
https://sweetseeds.es/de/red-mandarine-f1-fast-version/
Type:
Red Mandarine F1 Fast Version
☝️🏼
Genetics:
Red Poison Auto®️ (SWS39)
X
Tangie (California Orange x Hybrid Skunk)
👍
Vega lamp:
2 x Todogrow Led
Quantum Board 100 W
💡
Bloom Lamp :
2 x Todogrow Led
Cxb 3590 COB 3500 K 205W
💡💡☝️🏼
Soil :
Canna Coco Professional +
☝️🏼
Fertilizer:
Green House Powder Feeding
☝️🏼🌱
Water:
Osmosis water mixed with normal water (24 hours stale that the chlorine evaporates) to 0.2 EC. Add Cal / Mag to 0.4 Ec Ph with Organic Ph - to 5.5 - 5.8 .
Likes
35
Share

@Growbody
Follow
Willkommen zu meinem Growbericht der Gorilla Cookies Auto von 2Fast4Buds. Der Strain wurde 2022 zur besten Indica beim Autoflower World Cup gewählt. Laut FastBuds deren meistverkaufter Strain. Grund genug, den Strain zu testen. Ganz Aktuell wurde die Gorilla Cookies Auto von 2Fast4Buds hier bei den Grow Awards 2026 in der Kategorie Best Strain auf Platz 3 und in der Kategorie Best Autoflowering Strain auf Platz 1 gewählt. Das macht mich noch neugieriger...
Für den Grow verwende ich 15 Liter ROOTiES Stofftöpfe.
Ich war sehr zufrieden mit der Sonnenerde, deshalb habe ich nachbestellt. Sonnenerde hat seine Mischung für die Bio Hanferde letzten Oktober/November geändert. Jetzt sind da kleine Tonkügelchen drin und kleine Gipsstückchen. Laut Sonnenerde soll das die Erde luftiger machen. Auf den Fotos kann man die unterschiedlichen Mischungen gut erkennen. In den AirPots ist die alte Sonnenerde, in den Stofftöpfen die neue. So kann man das Wachstum in den verschiedenen Erden schön vergleichen.
Die Smart Start Plugs von zamnesia hab ich wieder verwendet.
Tag 79: Die Gorilla Cookies Auto von 2Fast4Buds bekommt dicke, klebrige Blüten die nach Linoleum riechen und 1,0 Liter Wasser.
Tag 82: 1,0 Liter Wasser.
Tag 83: 1,0 Liter Wasser.
Schön, das du dir meinen Bericht ansiehst. Schau gerne wieder rein 👋😎