
Likes
Comments
Share


@Mrs_Larimar
Follow
I had alot of Fun with this Grow, and a lot of Growers, had a Story about the Strawaberry Cough. Thank you all for sharing that with me!!! I learned alot about the heritage of this Strain and its appearing in Movies and Music. Mr. Kushman itself had a great Story about Strawberry Cough, and how he got them as a Present
But back to the Grow
fast Germinating, Germiating Rate 100 Percent, fast grower, and then the Journey began......
One Pheno turned out with Cottoncandylike Buds , The other Pheno with Fistsized Dense Buds
Booth showed a wonderful Scent, and they were a Pleasure to look
One Plant is still growing
Thank you @Miister_lee , for the opportunity to grow them
And LEGALIZE WORLDWIDE

Processing
Likes
2
Share


@highview_autoflowers1
Follow
It's getting cold don't know how good she will hold up
Likes
12
Share


@Ferinky
Follow
Estamos con el lavado de raíces y esperando al ámbar.
Hubo unos días de mucho viento pero aguantaron perfectamente gracias a la red de scrog.

Likes
74
Share


@Mr_Maes
Follow
Nothing but colas on all 3 this is going to be a big harvest. Another 2 or 3 weeks max.


Likes
102
Share

@Schnabeldino
Follow
📅 Week 8 | 🗓️ Day 50–56
Day 56 – Lemon Cherry Runtz 🍋🍒 (flipped to 12/12 on Day 50)
🔸 She put on some size this week. The canopy is compact and even, with many side branches sitting at the same height. Tape reads ~50 cm.
🔸 Leaves are a rich, healthy green with no spots or burnt tips. I’m still tucking the big fans every day so the lower sites stay lit.
🔸 At ~700 PPFD on 12/12, that’s a DLI ~30 mol/m²/day—right where I want it for the transition/stretch. SANlight 80% @ ~40 cm feels dialed in.
🔸 Looking ahead: in Week 9 I expect the first tufts of pistils on most tops. I’ll do a light defoliation/lollipopping if needed and keep stakes ready. She’s still a touch smaller than Papayton, but she’s catching up nicely in her own tempo.
📈 Current Conditions
🌡️🔆 = 24°C
🌡️🌜 = 19°C
💨 Humidity = 60%
🔦 PPFD = 700 µmol (12/12)
🛠️ Setup (unchanged)
💡 2 x SANlight Evo 4 - 120
⛺ 120 x120 x 180 Spiderfarmer
🍯 Pots: 18 liter fabric pots
🌱 Soil: Bio-Bizz light mix
💊 Nutrients: BIO Tabs only water method
💧 Water: Tap Water 0,5 EC
🌱 “Easy, organic, only-water method. Save 15% with GDBT420. biotabs.nl/en/shop/”
Likes
24
Share


@CanarianGrow92
Follow
First of all we had quite some rainy days, which is almost impossible as in July this didn't happened for years, but of course i plant something outside and it automatically needs to rain...😡
Then some stupid worms decided to build a colony inside the plant and screwed a couple of leaves, i killed them all for being disrespectful to my plant, that will teach them a lesson...
As last we celebrated the plants birthday and threw some firework around the city 🤣😝 it was a nice party, the plant is still recovering from the party
For the rest all good, more and more tricomes are appearing and in around 2 weeks we are harvesting 😁👌


Likes
39
Share


@Mastr
Follow
Hi everyone Today day 30 and I stop feeding with silica and I take co2 bag off too due make high humidity also I reduced bio grow from 3ml to 1ml for this week next week i will stop bio grow till harvest
And I done aggressive defoliation on bottom almost take half leafs down
Update day 39 I done another defoliation and some lst to keep them separate from each other guys the orange sherbat is thirsty strain and seems she love nutrients she drank twice a day and each time 1.5L nutrients whitch is
.5 calmag
2ml heaven
2ml activera
2ml alg amic
2ml bloom
1ml top max
Because they are in small pot so I don't wanna give lots off water so I prefer to feed them twice a day
Likes
17
Share


@SuperGlue
Follow
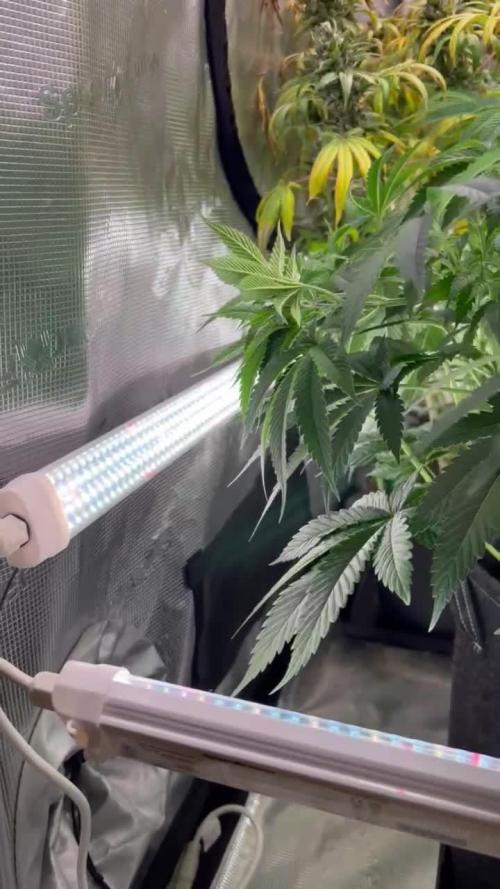
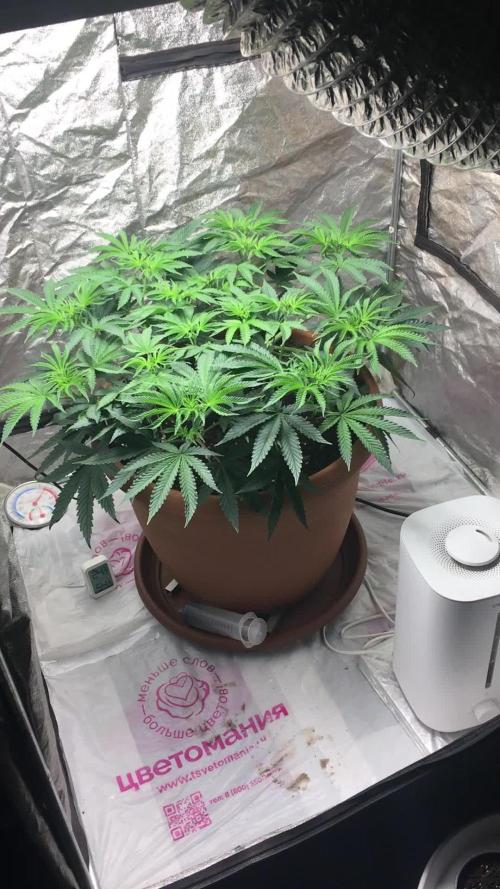
Все отлично , визуально выглядит здоровым растением , не смотря на мои манипуляции с ним , в замедлении роста замечен не был :) в течении следующей недели плавно переходим на 12/12 . Свет программируемый на ежедневное сокращение часов освещения, так же как это и происходит в естественных природных условиях.
28.10.20 последний день Веги , завтра переходим на 12/12


Likes
2
Share


Likes
9
Share


@StoneyMelony
Follow
Gorilla Glue #4 auto is a big plant,She has a lot of side stalks and is a bit bushy. She has even as well as uneven internodes. All filled in very nice and a was suprised how big of buds there where forming near the end. A little bit of LST did help to get the cannopy more even. EC levels never raised EC 1.4 and i had never a problem with feeding her. She matured very fast and i was amazed by her speed. I harvest this plant at day 73. This plant had a wonderfull smell of pine with lime and huge cola, buds are a bit hazy covered with some nice crystals.
Overview of my grow:
Tent: Secret Jardin DS120 4 x 4 (120 cm by 120 cm)
Lights: 2 x 120 Watt CTlite c4 clusterled
Climat: Trotec Dehumidifyer 240 watt- 10L/24h
Filter: Prima Klima carbon filter PK2600
fan: 2 x Secret Jardin 20watt osc. fan
Pots: Gronest 4 x 11 liter airpots
Water : automated water system
PH: bluelab
Nutrients: Plagron cocos A/B
Plagron PK 13/14
ATA cal/mag
Epsom salt
no rights to music in the videos


Likes
20
Share


@Automaniac
Follow
Welcome to week 7 / week 4 of flowering!
She has been growing perfectly so far. No more vertical growth. Looking for lots of horizontal growth now as those buds start fattening up!
✅Day 43: No water.
✅Day 44: No water.
✅Day 45: 64oz water.
✅Day 46: No water.
✅Day 47: 128oz of water. The pot was bone dry, but there was a tiny bit of runoff. Stick to a max of 96oz of water at any one time.
✅Day 48: No water.
✅Day 49: No water.
Likes
3
Share

@EchoEcho77
Follow
Ok, week 11, here we go! These girls are getting stinky! Upward growth has completely stopped, no change since last week, the main stem from about half way up has turned completely purple, it's now pushing to the leaves. Buds are starting to fatten, and nutrients have been consistent. Older fan leaves have faded in favor of bud production I suppose. I'm guessing about 2 more weeks to chop.
Likes
14
Share


@vavaro
Follow
04/02/2024 - All the plants are looking healthy but Im suspecting that one of them is a hemafrodite, i would like to read your opinion about it, guys.


Likes
48
Share


@McBubatz
Follow
14. Woche, P1 fällt morgen, die ist soweit gut denke ich (ca. 20% aufwärts Bernstein Trichome).
P2 braucht leider noch ca. 1 woche länger.
93. Tag ist für P1 das Ende, sie wurde heute vorgetrimmt und zum trocknen aufgehängt.
Ergebnisse gibt es wenn die P2 auch geerntet wird, denke nächste Woche um die Zeit.
Aber eins kann ich euch versichern, is mit Abstand die schwerste die ich ist jetzt hatte😊🍀🍀.
Gebt euch auch mal wie viele Trichome die gute produziert hat, Duft is noch sehr pflanzlich, Blüten sind ziemlich fest gewesen hoffe das es nach dem trocknen noch so ist. Alles in allem super Run.
Hoffentlich is die gute bei den Top 10 das wäre ein träumchen, wobei ich es wirklich jedem gönne zu gewinnen und bei soviel starker Konkurrenz geht ich wahrscheinlich unter.
ABER was ein geiler Contest trotzdem, hier ein dickes fettes Dankeschön an Zamnesia und Plagron für die Möglichkeit hier überhaupt mitmachen zu dürfen 🙏💙💜
98. Tag , werd die gute am Samstag/Sonntag je nachdem wie ich Zeit finde, umlegen und zum trocknen aufhängen.


Likes
5
Share


@Kikiwindsurf
Follow
I went too far with root juice and Top Veg because the Sunset Sherbet shows some burning in the leaves.
Gorilla Breath never appeared so I hope the quality of the seed wasnt the best (gift seed that traveled from California(USA) to Mallorca (SPAIN), im pretty sure its because it was seed-gift quality and no bought-seed quality)
Our indoor will be full by Sweet Seeds . Tropicana poisson is the fastest and strongest by the moment ! I dont know why it do not appear in GROW DIARIES seeds but its a GIRL SCOUT COOKIES x TANGIE x RED POISSON (Only this auto).
The zkittles do not deserve any review yet, they are doing their thing little by little, nothing expectacular.
REMEMBER ALL MY DIARIES ARE FOR SELF CONSUMPTION
REMEMBER ALL MY DIARIES ARE A SHARE-POINT OF INFORMATION !
dont be affraid of comment,suggest and share your experiences with me !
