
Likes
Comments
Share


@Smokey89
Follow
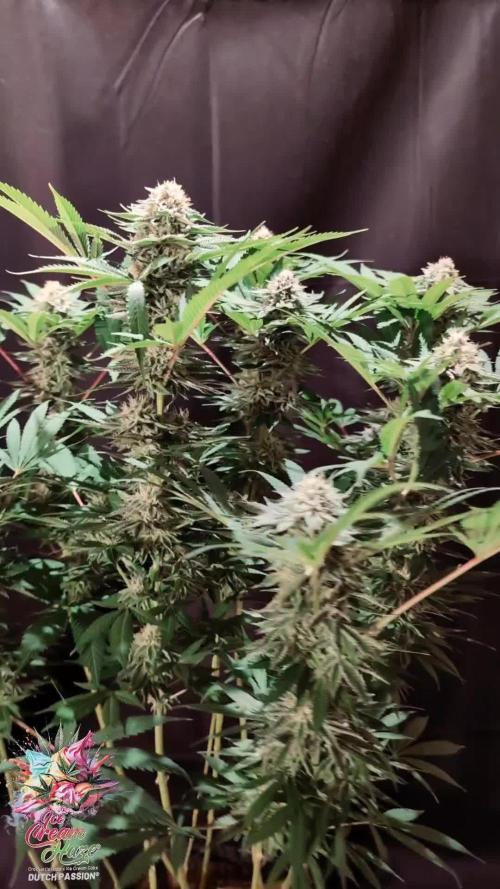
Week 4 and these girls are looking great the cheese is looking as though it's a week behind the bubblegum but still looking nice and healthy and I was expecting it to be slower as it has a longer flower time.
My 2 bubblegum are growing really well pheno number 2 is by far the biggest even after I snapped a branch completely off.
I've noticed an uptake in water I'm now giving them 2 litre of 6.5 ph plain water every other day.
Theres a slight hint of candy as you enter the grow tent makes my mouth water every time I walk in.
The LST has gone well (baring the one snapped branch) all bud sites are exposed/tied out towards the exterior of the pot, looking forward to watching them develop and I will be keeping an eye on them for signs of pre flower as the bubblegum is supposed to be 8 weeks or less.
Day 31
I think pheno 2 is in early pre flower stage, she is consuming 1.5 litres of water every day and is growing at a great rate.
Pheno one is a little smaller and has no signs of flower as of yet, she has had the same feeding and watering as pheno 2
Cheese critical I think is looking good but I'm not seeing much growth I'm wondering if she may be stunted I'm going to check the ppm run off and see if theres any indication as to what's going on
That's all for now guys and gals happy growing

Likes
12
Share


@CaliforniaOGkush
Follow
all 6 plants are starting to flower but its still 100 degrees out here


Likes
6
Share

@GoodTimesOrganics
Follow
Hi liebe Community! 💚 Nach der fünften Blütewoche schreitet dass Blütenwachstum richtig vorran!
Ein Dichter Tepich aus Stigmen überzieht die Blütenansätze und es bilden sich sehr viele richtig Trichome aus, was der Pflanze einen unfassbar schönes frostiges Aussehen verleiht.
Die Blütenstruktur zieht sich nun den Großteil des Stammes entlang und es entsteht ein dich besiedelter und immer dicker werdender Blütenteppich.
Dies Woche kam zum Boostern der Pflanze noch der Biotabs PK Booster Compost Tee zum Einsatz, welcher sich meiner Meinung nach bei einem soliden Organics Grow nicht mehr weg denken lässt.
Hierzu muss auch gesagt werden dass sich die Blüten sehr rasant entwickeln.
Die Buddichte beträgt bereits 7 cm an der dicksten Stelle.
Insgesamt ist die Pflanze sehr Vital und hat eine sehr schöne und geradlinige Blütenstruktur😉
Sie liefert eine sehr gute Performance ab
Die Wachstumsbedingungen im Growzelt sind weiterhin am Optimum und Stabil:
———————
🌞 Temp: 24,3°C
🌚 Temp: 20 °C
💨 RH: 56%
VPD: 0,97 kPa
😎PPFD: 830 mqm
———————
Stay Tuned! 💚

Likes
37
Share


@Organic_G
Follow
Es ist offiziell, die Ladys werden mein Zelt sprengen 😂💀
Hätte nicht mit so einem explosiven Sprung schon in der ersten Woche gerechnet 😭
Hab ein zweites Netz eingesetzt um die Stämme später in der Blüte stabilisieren zu können, vor zwei Tagen 😳 werde mir ein drittes besorgen und wenn die zu weit oben sind muss ich die wohl einfädeln ins Netz.
Hab mir ansonsten noch eine Migro Aray Intra 160W für das under Cannopy besorgt, bin gespannt was draus wird 🤩
Die trinken aber auch wie verrückt, habe vor zwei Tagen den 47 L Tank voll gemacht & jetzt seieht der Tank so aus😭 [ Bild ]
Es ist einfach nur verrückt


Likes
9
Share


@bigolebuds
Follow
Week 8 Day 1: how did we get here?! No major issues. Still learning the ropes when it comes to LST, so the focus these next couple weeks is getting this canopy flat and ready for flower. Any advice is much appreciated. Still need to get those clones out of the tent and need to think about any changes to fertilizing schedule over the next couple weeks. Kids were fed liquid nutrients for the second time 9/8, and will be recieving them once a week moving forward (hopefully every other watering). Gotta find a way to make watering a smoother process tho, might invest in a home RO filter 😂
Big dreams being discussed, this could be the start of the only cultivation, breeding, and distribution center that has a primary focus on re-entry and subsequent business development.. That’s how you do socially responsible business and policy.
You heard me?

Likes
3
Share


@mquintero7
Follow
Plant looks well. Buds are beautiful. Smell is very good. Some leaves are turning yellow, I believe is normal, maybe a little bit early given that is only week 5 of flowering. But still, the plant looks very healthy.

Likes
18
Share


@pifflestikkz
Follow
Day 36F
This skunk is kicking OUT 😍
I love it, smells so damn good! Nostalgia of 90s back with a sweet skunk but pungent nostril pinching aroma 👌
Buds forming amazing in my opinion concidering the abuse she has taken and sharing 3gal pot.
Still just alternating feed/water and there happy 💚
Day39F - skunk is absolutely thriving, swelling and increasing her blanket of thc all over, and the colours are of a golden orange and green 😍
Likes
36
Share


@Ganjagrandaddy
Follow
Day 50 Flowering: Hi growmies. A great week again with these gems. They are all now in their final stage of flowering and I expect them to swell a little more and also to begin the ripening of the trichromes to all cloudy with a few amber ones. They are all doing really well and look to be fed as they need and also no signs of any deficiency. I do kot flush as I am in Living organic soil/coco and also do not use salt based nutes throughout the grow to need to wash from the medium. I also do not believe that flushing has any benefit besides error correction or to reset the medium again. With a slow dry , they use all the harsh chlorophyll that is mistaken for nutrient traces often in quicker drying methods.
Herz Og by her standard growing cycle , should be finishing now but I think she can be easily pushed another week or so. Her smell is really sweet now up close with a nice tacky feel to her too. She isnt a big plant but is really well laid out for those pollen transporters to sand the wind to get through .
Strawberry Colais am absolute trichrome monster. She is really packing the trichs onto her budstacks and sugar leaves tonwjere they don't look real close up. The camera focuses and tries again to refocus when I take pics of her .lol Certainly knew of the heaviest trichrome producers I have grown to date... I can see hownthe cola name is relevant too with how "fizzy" they appear . She smells candy sweet and very nice .
Monster Mash looks alone and like the lanky girl at school who tries to look smaller. lol
Her buds are fairly spaced out on the long stems and look more clumpy than joined up. I had to bend the main one over to allow the lights to be kept even for the other plants but she is getting more light to the lower portion now. Her buds are not very fat or chunky yet but i am hoping this week and the shogun Dragon force will help change that. Smell wise shebjas a fuel/sweet aroma to her which is familiar. lets see how she finishes now.
So it seems that this last few weeks will sort the wheat from the chaff with a yield report soon. These strains have been very simple and easy to grow and manage with very little effort on my part. If your up for a grow with an auto , definitely consider these genetics from Exotic seeds , my experience so far has been all positive and their end results are top shelf buds and taste. Great work Exotic breeders and staff alike. Roll on another week and diary report. be safe and well folks.
Likes
69
Share


@Qutro
Follow
Hi there,
Here we go with the 4th week of veg.
As soon as they woke up from the stress of the transplant, they were given another dose of training session . We topped them on the first day of the week. Not yet, but two days later we removed 4-4 large fan leaves each and it became clear how much the lower branches of Marshmallow OG didn’t develop in the shade. I already had the feeling that this variety was not genetically stable. These shots looked quite mutant. They seem to adapt more slowly to the hard plant trainings I use most of the time. On this day we also bent the branches with a tent hook to allow better light penetration to the lower parts.👨🏻🌾🌱
They show quite strong indica characteristics at this early stage of the vegetation which is also clearly visible in the shape of the leaves.
It is possible that the planned 6-week veg won’t be enough, as they need much more time to regenerate than most varieties I’ve grown so far. Never mind, maybe even this way the possibility of a harvest before Easter can be maintained.
After the hard training session they got only half dosage of nuts as they lost a lot of foliage. On the last day of the week watered them again with full dosage. 💦
All in all, they seem healthy but not very happy. I'm adjusting to them a bit and hopefully we'll be just fine for next week.
Running the Ts3000 on 65% 42 cm above the canopy which means 450-480 ppfd. 💡🌞
Have a lovely weekend everyone!


Likes
12
Share


@Naturalist
Follow
Pics are a little droopy as most are taken late in the day but moving along looking more sativa all the time.
Processing
Likes
9
Share


@kush_dreams
Follow
Hoping she stops the stretch soon as she'll
be getting very close very close to the light if she doesn't.
Very happy with how the canopy and defo turned out.
Still stretching, OH LAWD.
She was 25 cm away from the light, that's lightburn just waiting to happen.
Got the two tents in series now with all the equipment in the larger tent so this light can literally kiss the roof, which was very much needed.
Canopy was looking a little dense in parts and the corners had nothing at all so I fixed that.
This really is turning into a very nice run for me.
Last defo day 21, I'll have the choice between a 45 and 30 cm deep canopy it seems.
I think I fucked up the defo, I think I took way too much fan leaves.
I left 3 fan leaves at least to the top of each main.

Likes
22
Share


@Slobasian
Follow
Love every plant each one is growing differently stacking different even the visual difference of one strain growin two different ways combined smells of diesel, pez candy and lemons


Likes
3
Share


@CaptonianMoneymaker
Follow
Grow very quickly little stretchy bud took off in bloom buds started small then just exploded after 4th week green house grow with 2 fans super clean buds patiently waiting on buds to dry


Likes
32
Share


@PEAKYPLANTERS
Follow
Hi guys
welcome to the pages of my diaries
we will try a new set of fertilizers as soon as we arrive
stay updated to test their efficiency with us

Likes
5
Share


@AustinRon
Follow
TH 1Q2025 - Week 12 - Flower 9
(ON Haze X Original Haze) X Northern Lights #2
“Todd’s Haze”
Objective
- 8 Female Plants, Topped ONCE @ Flip, 12” when topped
- Modified Sea of Green
Seeds Wet: 1139PM, 28.2.2025
Germinated: 2.3.2025
Flip: 21.3.2025
Harvest: 77 Days, DATE: 6.6.2025
_________________________________________
__
Fri May 23, 2025
TH 1Q25 64:F:9:1
It’s a new day …
__
Sat May 24, 2025
TH 1Q25 65:F:9:2
__
Sun May 25, 2025
TH 1Q25 66:F:9:3
1/2 gal runoff @ EC: 3.2 mS/cm
2 gal refresh @ EC: 1.6 20xA,B; 10 ml SLF-100
__
Mon May 26, 2025
TH 1Q25 67:F:9:4
__
Tue May 27, 2025
TH 1Q25 68:F:9:5
__
Wed May 28, 2025
TH 1Q25 69:F:9:6
Need to CalPhos to day.
We’re a week from our ‘scheduled’ harvest- that’s not happening. We could have another FIVE WEEKS of flower to remediate reveg Flower Week
I think we’ll need up to 40 days more - to Flower Day 109 . . . (6 more weeks?)
__
Thu May 29, 2025
TH 1Q25 70:F:9:7

Likes
14
Share


@sunshinegroww
Follow
Very easy genetics did only topping at 21st day and just light feed throughout,she is very thirsty for cal-mag from early flowers ,not very much purple going on but i can see some pink going around ,produced very big colas ,now whole plant hanging to dry for about 7-10 days and will update soon 🌞🌞💚✂️😍
End result im pretty happy with love the purple colours too will defo run this again
💚💚💨🍑
Likes
4
Share


@TEAM_Piff_Paff
Follow
The first white pistils can clearly be seen now. I guess that's why she's getting more yellow leaves at the base but this also means that she is in the preflowering phase :)
Due to this and the fact that the weather is great, she needs more water now.
Aside from that she is starting to smell a bit more in the morning.
