


Likes
Comments
Share


@Reefer_MAdness
Follow
Sorry for the late update so for that I included a video of my grow room.
This week is the last for the horizontal growth and is is now going vertical. Can’t wait for that tall growth going forward.

Likes
120
Share


@DogDoctorOfficial
Follow
The Harvest Prelude:
After a patient wait and 48 hours of darkness, the moment arrived. The Tropical Tangie Lego Ninja, standing proudly like a silent guardian, was ready for the grand harvest. The sound of each cut echoed through the grow space, reminiscent of felling a mighty tree. The compact structure of the buds was awe-inspiring, a testament to the ninja's disciplined growth.
The Lego Ninja, like a stoic warrior, was then hung upside down, beginning a two-week drying ritual. Maintaining an ambient temperature of around 21°C and a relative humidity of 60%, this slow-drying process allowed the buds to retain their essence, preserving the symphony of terpenes and cannabinoids.
The trimming phase unfolded like a fragrant masterpiece. Each bud, adorned with a glistening layer of resin, transformed the trimming process into a sensory delight. The zesty aroma of oranges enveloped the room, a tangible expression of the tropical lineage. The compact buds made every snip a careful dance, revealing an abundance of frosty trichomes.
The moment of reckoning arrived with the scale's unveiling. The Tropical Tangie Lego Ninja, from a single plant, bestowed upon me 309 grams of dried medicine. Each gram was a treasure trove of cannabinoids, a promise of euphoria and relief. The sheer compactness of the buds translated into a concentrated potency that left me in awe.
In parallel, the clones, nurtured with equal care, showcased a fascinating divergence. A twist in the tale unfolded as the intense oranges of the mother transitioned into vibrant tangerines. This unique expression, I believe, was a testament to the clones weathering a summer heatwave differently, bringing forth a distinct personality.
The clones, resilient and generous, gifted me a bountiful 549 grams of pure joy. This now my keeper of the garden, an embodiment of the Lego Ninja's legacy. The harvest dance, though familiar, carried the nuances of tangerine zest, a refreshing twist that left me eager to explore its intricacies.
Both harvests shared a common thread—their resinous abundance. The trim bin, akin to a treasure chest, gleamed with golden trichomes and fragrant joy. Sticky fingers became a badge of honor, a tangible connection to the resinous richness that filled the room.
Shout Outs:
No harvest report is complete without expressions of gratitude. A special nod to @DutchPassion_Official for crafting the genetic marvel that is the Tropical Tangie Lego Ninja. Their expertise paved the way for this epic journey, and I tip my hat in acknowledgment.
In conclusion:
As the dust settles on this epic harvest saga, my heart brims with happiness and excitement. The Tropical Tangie Lego Ninja has proven itself not just as a plant but as a living masterpiece. Stay tuned for the smoke report, where we delve into the true essence of this botanical ninja's legacy. Until then, fellow cultivators, may your gardens flourish, and your harvests be as bountiful as the joy they bring.
As always thank you all for stopping by, for the love and for it all , this journey of mine wold just not be the same without you guys, the love and support is very much appreciated and i fell honored and blessed with you all in my life<3 <3 <3
#aptus #aptusplanttech #aptusgang #aptusfamily #aptustrueplantscience #inbalancewithnature #trueplantscience
With true love comes happiness <3 <3 <3 Always believe in your self and always do things expecting nothing and with an open heart , be a giver and the universe will give back to you in ways you could not even imagine so <3 <3 <3
Friendly reminder all you see here is pure research and for educational purposes only
<3 <3 <3 Growers Love To you All <3 <3 <3
P.S- I must extend my sincerest apologies for the missing video reports. Regrettably, Grow Diaries is still facing some technical issues that are preventing me from uploading them. Rest assured, as soon as the situation is resolved, I'll share those videos to give you an even closer look at this fascinating journey. or in my case apparently GD dont let me do uploads over 100mb with is super small file if you working and editing videos , doing my best here to upload them all but GD is not making my life easy on this <3 <3 <3

Likes
2
Share


@FourTwenty_Plants
Follow
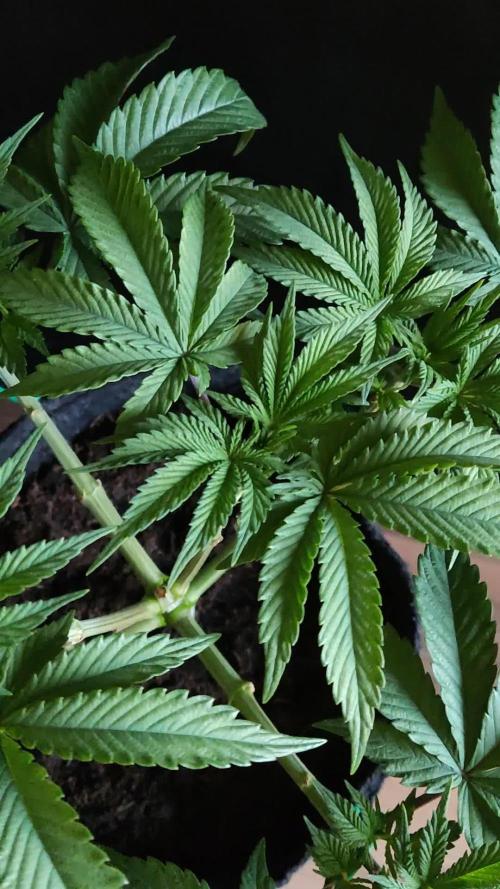
Been on the Spananbis so I wasnt able to check on them but they did really good the last few days. Put a net on them to spread them out a bit cause im scared of not enough airflow between the plants




Likes
38
Share


@Cariboo_OG
Follow
Utopia Haze is a rare heavily sativa dominant hybrid (90% sativa/10% indica) strain created through back crossing Brazilian Sativa strains. This tasty little bud took home 1st Place for Best Sativa in the 2008 High Times’ Cannabis Cup and for good reason – with its potent 18-22% average THC level and long lasting cerebral effects, Utopia Haze is one powerhouse smoke. The Utopia Haze high comes on soon after you finish your first toke, hitting you with a strong cerebral lift that infuses you with a sense of hazy relaxation.
Type: Feminised/Photoperiod
Cultivation: Indoor/Outdoor
Flowering Time (days): 70-75
Indoor Yield (g): Up to 650
Feminised Outdoor Harvest Month: October
Feminised Outdoor Harvest Month Week: 3rd-4th week
Aroma: Citrus, Woody, Pungent, Mint
Effect: Cerebral Lift, Hazy Relaxation, Sleepy
Welcome Everyone to the Final Entry of my Utopia Haze Grow !
There is so much to discuss ! I have been extremely busy as of late trying to get this Harvest together, but i am happy to have it here for you now !
I Seriously under estimated the amount of time, help from others, and my own necessary skills to pull this off.. and i still kind of screwed it up lol !
But its worth noting i have never actually done this before and trying to document it during....was extremely hard.
It is next to impossible to work an iPhone with rubber gloves on !
First I want to discuss everything step by step so before you jump straight into the comments on how the end product is so small in "quantity"
Rest assured i am happy with its"quality"...and thats all that matters to me because Life is a journey not a destination! and i have learned so much from this grow that I couldn't be any happy even if i messed some things up :)
But at the very least I hope you read through this entry in its entirety with an open mind and focus more on the process, rather than just the outcome!
I ran out of Ice & i was only able to wash three times..(normally I've heard you should go sometimes 5-6 washes)
Preparation is Key & things will be much better next round :)
Photos 1-22
These are pretty self explanatory but for those of you just tuning in now.. this is what happens to a very happy plant when you don't have the necessary tools to monitor key components of growing cannabis.. Ph, as well as EC levels play a very key role in the outcome of your grow lol that being said I was just able to save this plant by purchasing both tools but that doesn't mean the plant didn't suffer because of the prior events.. This was a Huge reason behind me choosing to turn this harvest into what i would consider
"Solventless Hash Rosin" from "Ice water extracted Bubble hash".
Pictures 23
The idea here is the process of using "fresh Frozen Cannabis" this has been discussed many a time online on such sites as instagram and here on grow diaries as well.. I personally have Never tried the process so i decided to try it out and make a judgement for myself..
Video 24
The Cannabis has now been in the freezer for 72 hours making it very well frozen.. as you can tell i struggled getting it all into the 25u Screen Wash Bag. One thing of note i would do differently is i will de-stem my next batch as i also believe this played a part in the amount of plant matter that escaped through the sieves.
Photo/Video's 25-28
The idea here is "ice water Seiving" & especially with the bags that I am using here that are only have screen material on the bottom portion of the bag it is very important to have spaces in-between the screens to allow the water to pass directly through the screens into the bottom bucket with the least amount of resistance.. because the hash is so extremely temperature dependant if it gets warm on the side of the bag.. it will stick there and not make it to the bottom to become use able product..
29
You do not need to use as much Ice as i used here lol... the idea is to keep everything very cold..i certainly achieved that but at the sacrifice of using so much that i ended up grinding product and producing "contaminants" but in the end they are just plant matter that i would be smoking when i rolled up my joint either way so.. I'm not super disappointed..
But it should be noted that what you want to achieve here is a Layering effect where you have the wash bag between two small layers of ice while the "water current" washes the Trichomes away allowing them to be separated by the screens setup below :)
Before Starting the machine you should allow some time (i.e.;10-12minutes pre soak to allow the product to become saturated) before the first cycle.
By video 32 I have just ran out of ice lol..
Video 33-34
Here I have a tip for you.. to separate the screens that you sieve through.. cut 5 gallon buckets to stretch them across nice and tight.. it'll make scooping your Bubble that much easier ! i learned this from the many "Frenchy" videos I have watched :)
Picture 35
Here in lays the problem for most people.. drying your hash without loosing vast amounts of "Terpenes" whilst also stay ever vigilant against mold !
Thanks to all those videos I've watched on youtube.. id like to think this was one of my most successful parts of this process..
Things to Note; Terpenes start to seriously evaporate at temperatures 68F or 20C
you need to stay as cold as possible whilst bringing the Relative Humidity in the space down into the 40-30% to stay away from that nasty mold !
I used my cold storage room in the basement.. with a dehumidifier running to keep the space at 45% RH & staying at a constant 15c.
All while spreading the hash as thin as possible across parchment paper, on top of the white screens with a fan moving air across both sides of the paper.
Pictures 36-38
These are some macros i took in the middle of my drying session I fell in love with the colour.
Yes i know the black spots are plant material but they will get caught when i bag the hash & squish the oil out.
Thing to Note; at this stage it is important to ensure you 'micro plane" the hash down as fine as you can whilst staying weary of the temperature... any "chunks" will hold pockets of moisture.. that lead to potential problems..ie; mold ...
Picture/Video 39-41
Successfully planed bubble hash ready to be bagged and Squished !
Picture 42
Ive decided to follow Pedro.. from Pedros Grow Room and double bag to be on the safe side so i don't have any blow outs.
So thats One 25u bag inside one 160u bag ! :)
Pictures 43
This is almost 3 grams of the bubble hash from above, already melting in the bag.. this is where i ran into trouble again lol things started getting to warm in the house and i was only able to get one of the three squish's i did on video :( things started getting sticky.
Picture 44
This is basically just a photo of the equipment I'm using; 3x5 LowTemp Cage in the frame I built myself, with a 20Ton bottle jack.
Something to note here is this is an older Lowtemp model with only a single heating zone which is which i have it closed here heating Both sides of the press :)
As well as the importance of having adequate pressure on your plates.. my rig is very overkill for the size of hash bags..lol
Video 45
Here is the lovely press video.. its didn't quite work the way i wanted either lol my directional folding wasn't quite tight enough for a big "drip" :)
&the Press was set to 65°c
Photo's 46-50 are pretty self explanatory :) I had a blow out.. but still managed to pull an 80% return from the hash once squished...& yes it tasted amazing :)
Was it worth it in the end... that could be debated.. for some..i understand..its not your thing, but for those of us that are interested in making our own concentrates.. free from Solvents...
I wouldn't make it any other way :)
If even ONE of you reading this diary finds it helpful to reference for ANYTHING.....even if its "what not to do" ill consider it a success !
Thanks again for tagging along on this garden adventure.. its been one heck of a journey !
Much Love from B.C. Canada,
Until Next time,
Cariboo

Likes
15
Share


@HeavyHead
Follow
Last week for these ladies. Kept the soil moisture levels very low leading up and did a final heavy de leaf of pretty much anything that doesn’t have trichomes growing on it and will be shutting the lights and turning the heat off for the last 48 hours.
Keeping a lot of the sweet leaf on to keep the moisture throughout drying and will do a dry trim.
Will be aiming to have a long slow drying period (12-15 days hanging) before I jar them up for curing.
Won’t be adding many quality pictures this week since half the time they’re in the dark but will post harvest pictures as they come down :)
Likes
12
Share


@Roberts
Follow
I am starting a Ze Chem Bang. I scuffed the seed ends and dropped it in water. Grow diaries is not working right. I will inventory the pictures, and hopefully get them updated when fixed. Thank you Terpyz Mutant Genetics, and Medic Grow. 🤜🏻🤛🏻🌱🌱🌱
Update: the sprout dampened off. I started the other seed yesterday. It is day 8 since I started.
Thank you grow diaries community for the 👇likes👇, follows, comments, and subscriptions on my YouTube channel👇.
❄️🌱🍻 Happy Growing 🌱🌱🌱
https://youtube.com/channel/UCAhN7yRzWLpcaRHhMIQ7X4g

Processing
Likes
22
Share


@Yiyis_Grow
Follow
Buenas noticias para esta semana.
1. La semana pasada comenté que tenía una planta desordenada, pues no me había percatado que la karpa tenía un orificio abierto en el techo y estaba entrando contaminación lumínica cuando dormía y por eso estaba débil.
2. Un loco que sabe más que yo, me dijo que las puntas amarillas es algo bueno en mis plantas y no algo malo, por lo que están saludables.
3. Las flores tuvieron un gran avance y ya se notan de mejor tamaño y un excelente aroma.
4. El calor y la humedad hacen que cada planta consuma 2 lts de líquido al día.
5. Voy a iniciar Pk1314 esta semana que sigue.
Malas noticias
1. Ya no tengo mota seca jajaj
Buenos humos


Likes
38
Share


@CANNASIM
Follow
—SETUP—
.BOSSLED LED 1800W full spectrum, real power consumption is +-250W.
.Grow space 60X100X200(a simple shower box.
.AN nutes and other simple additives.
.Grow medium is 60% peat, 30% perlite, 10% organic correction(worm castings), 5 gallon fabric pots(18l).
—BRIEF—
Hi there, I have tried already done this genetic outdoors, in poor lighting and a general purpose nute from Neudorff, yielded 25g dry, in 3gallon pots same medium.
So this is a good experiment, lets see indoors how she will compare.
—GERMINATION—
My germination process always start by scarifying the seeds, i created a little tool for that. I just a little container with sandpaper walls. Shake gently for about 60 secs+, this allows for the water to penetrate better in the seed shell, once you soak. Then i soak overnight from 12 to 20 hours max.
From there i either plant straight or use the paper towel method to see the tap root before. If you are a bit on the impatient side seen the tap root is advisable so you see some movement before planting. Lol!
—ROYAL QUEEN SEEDS . QUICK ONE . INFO —
Chose this strain because is basic and I have to travel for a month soon, and someone else is going to take care for this time. :)
Most of our autoflowering feminized strains are easy to grow. This one, however, is so easy to grow that we had to call it Easy Bud. Easy Bud is very similar to the autoflowering strain White Dwarf.
THC: 12%
CBD: Low
Yield Indoor : 275 - 325 gr/m2
Yield Outdoor: 30 - 80 gr/plant
Height Indoor: 50 - 60 cm
Height Outdoor: 60 - 110 cm
Flowering: 5 - 7 weeks
Harvest month: 8-9 weeks after sprouting
Genetic Background: White Indica x Ruderalis
Type: Sa 15% In 55% Ru 30%
Effect: Physical
Climate: Mild
—RQS EASY BUD GERMINATION UPDATE—
My mood said to me to plant straight, so scarify > soak 18 hours +- > plant straight.
Seedlings look a bit odd, this one with a purple center, let's give her some days in and see what happens next.

Processing
Likes
26
Share


@GrowGuy97
Follow
Day 35, start of week 2 in flower, everything is going great so far✌️🏼🌱
Day 37 - All the ladies are looking great✌️🏼🌱
Day 38 - ladies got watered today, looking good & starting to put off a nice smell😍
Day 40 - Still have a lot of yellowing leaves towards the bottom of almost all the plants can’t figure out exactly what’s wrong😅😅


Likes
3
Share


@bigsmoke42069
Follow
Week 5 of flower 9/6/24
After neglecting to check runoff EC, the reading was 3 and PH 4.7, it's crazy that the plant did not show any signs of damage besides one branch.
After flushing the growing medium with RO water + FloraKleen + H2O2 (PH 6.5), the runoff PH was still to high.
The problem persisted after watering with 50% dilution nutrient solution and still getting low PH readings and high EC.
The solution was to put something underneath the fabric pot, to create a gap for the runoff water to drain freely from the bottom part.
Before, the fabric pot was sitting on the plate and the runoff was draining from 2 little holes in the middle to the drain compartment.
Right after creating the gap and watering, all the readings were corrected.
Fortunately, all salt build up got washed away, and the plant showed no more problems. :)
On day 26 days of flower, the nutrient schedule was changed to fit the fifth week of flower.
Note to self: check PH and EC every 3 waterings.
Likes
13
Share


@m0use
Follow
Plants are chilling, added in some bokashi and dry amendments, not expecting much more from this plant, just needs to finish growing and we can be done.

Likes
35
Share


@Rap_a_cap
Follow
Hey Growmies, some of you had asked to me if I prepare concentrates.......Yes I do!
I don't like modern rosin extraction but instead very rarely I like to smoke some oil.
The following is the recipe of cannabis oil made by ancient Mustapha's process.
It needs:
pharmaceutical grade ethyl alcohol (96.5% by vol.) or 95% for liquors
Weed
A jar with rounded bottom
A lot of time
This oil is 5 months aged, from 20 grams of weed I've obtained 3.5 grams of product.
Trim previously dried weed (20 grams) and put into a 500 ml jar. Cover with 200 ml of alcohol and leave it partially covered with cap. Let alcohol to evaporate on itself and shake the mixture 2 times a day. The most of the solution will evaporate within 10-15 days. When the solution is evaporated by 2/3 it needs to be filtered between 90 and 120 microns. Now is the time to finish and decarboxylate the solution by heating the jar by bain-marie until the green cream sticks to glass. The jar needs to be refrigerated before you remove the cream with a spatula to transfer it into a smaller jar. Store it in a dark place and open twice in a week for few seconds.
You'll obtain a petroleum green/dark amber cream (the green tone will turn into dark brown by time). If the job is well done the surface will crystallize and will shine like a mirror.
This cream is insanely sticky.
Smoke one drop a time. The collapse is around the corner.
Tips:
Best results, in terms of flavour/aroma, with single strain
Let alcohol to evaporate very slowly, take away some macerated weed (after at least 48 hours infusion) and add new weed/hash pieces little by little. Act as if it were a piggy bank.
The final product is a very strong shit, really narcotic.
Likes
22
Share


@valiotoro
Follow
Sooooo impressed with the size & quality of the buds😳
Super dense & sticky✂️
The smell is sweet fruity mix berries🤤🍓
Processing
Likes
32
Share


@Ganjagrandaddy
Follow
Day 50: Wow these girls are loving their repot. I moved them up to their final 50L pots now so no more disturbing those roots. They were starting to circle just as I re-potted so I think i hit it perfectly . They have been so easy to work with so far and took to their training so well. I am going to begin tying down for their final setting now I have the growth tips and choices of where they go. I am going to strip out a little leaf too and also make sure I take out any potential popcorn larf.
FFT1 is certainly the smaller of the group but her squat nature gives her a nice thick stem to hold weight. No issues with her at all.
FFT5 sits in the middle for her growth size. She is also looking very healthy and her Mega crop start has given her a beautiful colour on her leaves. She looks sativa in her structure for node distance so I think a stern tie down will be needed to keep her in check.
FFT7 is by far the biggest of the group and also has the most actual growth within her. The many heads will need some serious thought as to who goes on to be a champion and who becomes the mulch sacrifice. She has some big fans developing and will need some space to bloom I reckon. Well done on these Fast buds.
Until next week Growmies.


Likes
Comments
Share
@EchoEcho77
Follow
Day 21, looks like I may have 1 different pheno on the end, time will tell. Everyone looks healthy so it's time to srart training the canopy. I bench each plant over and tied it to the bag. Next watering will include a top dress.
Likes
3
Share


@JuanPablo5280
Follow
Shes Starting to smell reallllly good! I shouldn't have too much larf if i had more room to spread her out in early flower she would be producing alot more.
Likes
Comments
Share


@MrStarOn3
Follow
At the end of week 3 I topped one of the strawberry cough they are all looking good and starting to veg I’m all caught up with the grow diary’s and will add at the end of every week. I’m in Australia and did start a little late into the season but hope to get a decent grow in they will be at my brothers once transplanted and he has a few aswel that I will add into the grow log nothing but sun and water only use a little thrive that’s from Bunnings that I get from my pops shed. They will be in a nicer cleaner soil when transplanted into veggie beds and will have chicken poo as a nutrient source first time ever using chicken poo so see how it goes. Will keep the grow log updated and hopefully everything goes all well for the travel and transplant for the plants in the next few days
Likes
37
Share


@GODSGIFT_2005_JM
Follow
For LIQUIDS & NUTES ******GREEN BUZZ NUTRIENTS***** organic.
Also i’m using their LIVING SOIL CULTURE in powder form!
MARSHYDRO ⛺️ has large openings on the sides which is useful for mid section groom room work. 🤩
☀️ MARSHYDRO FC 3000 LED 300W
💨MARSHYDRO 6” in-line EXTRACTOR with speed-variation knob, comes complete with ducting and carbon filter.