
Likes
Comments
Share


@bioaccessory
Follow
Не знаю как вы, а я очень люблю этот день - день сбора урожая. И это даже несмотря на то, что в этот день приходится маникюрить срезанные кусты(я предпочитаю делать это до сушки). В этот раз триммить было особенно сложно, много мелких сативных листочков росло прямо из шишек. А что там шишки? Да супер, твердые как камень, всё как я хотел🌿!
В день харвеста(вовремя, спасибо Джа!) не выдержала моя техника - отключилась половина лампы(на 1видео 19с.), видимо действительно пришло время.
🗓️Друзья мои, всех приглашаю в мой дневник через 10 дней сушки, буду взвешивать и пробовать урожай, подводить итоги👆
Спасибо, что заглянули, и будьте здоровы! 🙏
Продолжение следует ...😶

Likes
17
Share

@El-Ecko
Follow
3 Weeks into Flowering
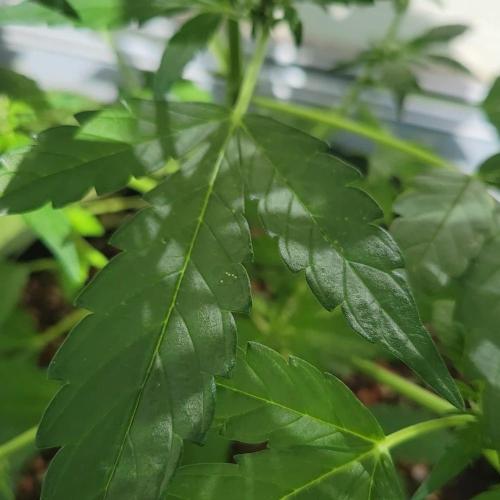
Little Pearl is growing nicely and steadily, and it seems she’s long since put her somewhat hesitant start behind her. 🌱⚪️
Her airy growth structure is absolutely perfect for the often humid climate in the Sauerland region. The flowers are developing beautifully. 🌸👌
And in the middle of the week, I gave her another dose of Azet tomato fertilizer from Neudorff. 🍅🌱
Thank you so much for stopping by. ✌️

Likes
158
Share


@Ezzjaybruh
Follow
Put some extra puppy pics of duke there at the end i found. Glad I took like 20 pics a day of him since we got him in February 2020..
Couple cool videos of Dukie.. one of him jumping as a puppy in slow mo. One playing with a ball

Likes
39
Share


@HydroHerb420
Follow
Smelling great and getting frostier by the day. Trichs still mostly clear with a few going cloudy. Dropped temps a few degrees. Buds are lovely and dense. One more week of feed then flush.


Likes
10
Share


@Azazel420
Follow
I fiori crescono a vista d'occhio. Incomincio a sentire un leggero odore. I fiori si stanno gonfiando molto velocemente. Bevono molta acqua e sono affamate di fertilizzanti

Likes
4
Share

@Ninjabuds
Follow
It's been two weeks since i started using the UAP 1500 light, and the results are definitely showing! The 'Peyton' papaya seems to love it. The leaves have this amazing vibrant green, and the whole plant looks so healthy and strong.
Lemon Cherry Runtz is looking fantastic! The buds are dense and frosty, with those beautiful purple hues peeking through. You can tell it's a high-quality grow. The aroma must be incredible – that sweet, citrusy smell with a hint of cherry. It's definitely living up to its name!
The plant seems super healthy, and the trichome coverage is impressive. It looks like it's getting close to harvest time.

Likes
9
Share


@Chubbs
Follow
420Fastbuds
FBT2308/Week5
What up grow fam. Sorry for the late weekly update but was having some technical difficulties. This week has been eventful to say the least. My heater went out letting my Temps drop to high 40'f for a night or two and wow did the plants tell me they're angry. Definitely starting to bounce back but just goes to show the reselants of Fastbuds genetics. I lollipoped and did one more defoliation this week so hopefully flower stage will be smooth sailing. All in all Happy Growing
Likes
74
Share


@Ferenc
Follow
Hi! 3rd edition is on the way! Thanks for RQS /James/, Spliff Seeds, Emerald Triangle Seeds for these beans and support.
Thank you ViparSpectra providing me this outstanding quality XS2000 light.
16/09/2021:
Seeds are placed in the water and now I will leave them in it for approx 18 hours.
17/9/2021:
Hiiiiii!
They had been in the water for almost 18 hours. Tested them after several hours just a little push if they sink. They did so they supposed to be viable. Spliffs Strawberry was a bit more nasty the seed didn't want to submerge easy but it did.
Northen Light is crazy tap root is already out of it was a race she would have already won it lol.... less the 18 hours tap root out in the water nice...
Rest of them are normal nothing much to say!
So I placed them between damp paper towel and we waitin'
Let's gooooo
19/9/21:
The winner of the race is Northen Light tao root was out even the day when I placed in the water.
Cookies Gelato is the second and then Mastodon Kush and the Spliff kids.
Well, 2 of them coud not make it they submerged in the water but then that's all not sprouting at all. This 2 Afghani Gold and Spliffs Strawberry have been replaced with another try /seeds/.
So hopefully those will be alright.
Anyways, rest of them are planted with today.


Likes
1
Share


@drrrt
Follow
They all got very heavy and big buds, the plant/stems do not have just a chance to support the weight of the flowers on their own.
Since I'm in lack of flower/smoke material currently, I chopped on D51 already one tree. Going to take care of the remaining in the upcoming days and will post next update once everything is dried.
Smells lemony with a taste lavender flavor, a bit like a very masculine after shave. And it's very very stinky, leave it open in the basement and you are going to smell it also on the 3rd floor of the house. Grew the clone now the second time and nailed it this time much better.
She's for sure a keeper. High yielding, fast flowering sativa like growing terp monster 🔥

Likes
55
Share


@w33dhawk
Follow
10.05.21 Anfang der 7. Woche alles läuft ganz gut hab heute wieder gegossen für jede Lady 4,5 l wasser mit Zusätzen bis auf lady #2 die hat nur green sensation bekommen da sie den anderen voraus rennt mal schauen was diese Woche so bringt......
11.05.21..................................................
12.05.21 hab es gestern leider nicht geschafft den Bericht zu aktualisieren hab aber auch gestern nix an den Pflänzchen gemacht hab heute mal ein paar buds fotografiert und das erste mal geprüft wie fest die buds sind also gelato 41#2 ist wie ein Felsen die anderen 3 Ladys sind eher fleischig aber dennoch fest (fast wie ein Hüft steak Medium rare) sieht auf jeden fall viel Versprechend aus und der Duft an den fingern nach dem prüfen, ein hauch von zitrone trifft auf leichte Minze mit cremiger Dunst note schon ziemlich geil muss ich sagen freue mich schon drauf wie ein kleiner junge auf sein Eis......
13.05.21..................................................
14.05.21 hab mich dazu entschieden nur noch alle 2 Tage was zu posten ab jetzt passiert nicht mehr viel sie wird nach und nach fetter und die trichome sind zum größten Teil milchig werde Sonntag die Spülung beginnen das währe dann Tag 57 nach flip und somit tag 49 der blüte, demnach sollte ich an Tag 63 fertig sein plus 1 bis 2 Tage dann hat sie 9 Wochen blüte hinter sich und 10 Wochen 12/12 der breeder selbst gibt an 7 bis 9 Wochen flower sollte also hin hauen die Angabe bin gespannt wie sie am Ende aus sieht. Werde Sonntag mal versuchen die trichome zu fotografieren aber mein kleines Taschen mikroskop zu fotografieren während ich es an die Blüten halte is etwas kompliziert für mich hab einen ruhe tremor fehler sprich ich zitter sobald ich etwas mache was mit fein Arbeit zu tuen hat, nicht stark,aber ein Bild machen is da schon schwer, werde es Sonntag versuchen an meine Kamera vom Handy zu kleben mit Maler crepp und dann mal schauen ob es einiger maßen klappt.....
15.05.21.................................................
16.05.21 so liebe growmies und canna begeisterte heute war der Tag der Spülung hab jeder Pflanze 22,5 Liter Wasser verpasst so das eigendlich fast alles an Dünger und Zusätzen raus sein sollte die Suppe die am Ende unten raus kam war fast komplett klar wie wasser sein sollte. bitte schimpft jetzt nicht mit mir das ich so hart flushe, ich hab mir gefühlt 1000 blogs durch gelesen von Zamnesia bis royal queen über Humboldt usw. Zum Thema flush und da gibt es ja echt viele Möglichkeiten wie man das ganze angeht der eine giesst normal weiter halt nur mit Wasser der nächste spült mit doppelter Menge von gewohntem giessen und wiederum andere stellen die Pflanzen in die Dusche und spülen da eine ganze Badewannen durch die Erde. War mir da einfach nicht mehr sicher wie ich das am besten an gehe und bin halt am ende auf die idee gekommen wenn das wasser gut klar ist Dann Sollte doch gut gespült sein hoffe ich zumindest in ca 14 tagen hack ich die Ladys Dann ab ihr könnt euch gar nicht vorstellen wie ich mich auf den Tag freue wenn ich schneiden darf ist wie Geburtstag und Weihnachten auf einem Tag........

Likes
5
Share


@HighOhioAn
Follow
Buds are stacking nicely on every plant starting to get smells now. Cannot wait until they Start fading. It is one of my favorite parts of growing cannabis and fast bugs. Really knows how to steal the show when it comes to fade.🔥💯
Likes
23
Share

@therealgrowmie
Follow
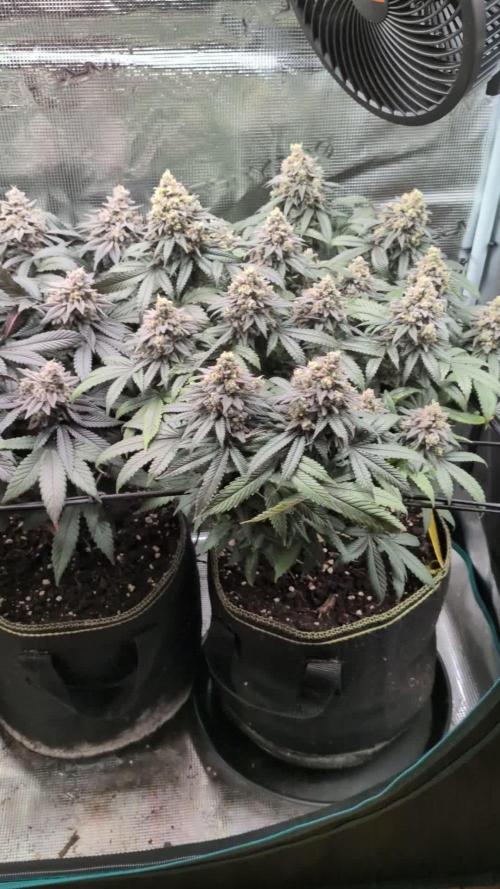
Looking at the canopy now, it really feels like everything came together at the right time. The two Northern Lights are stacking thick, frosty colas with that classic dense structure, while the Critical is entering her final phase, fading from green into those lime-yellow tones as she pulls the last energy from her leaves.
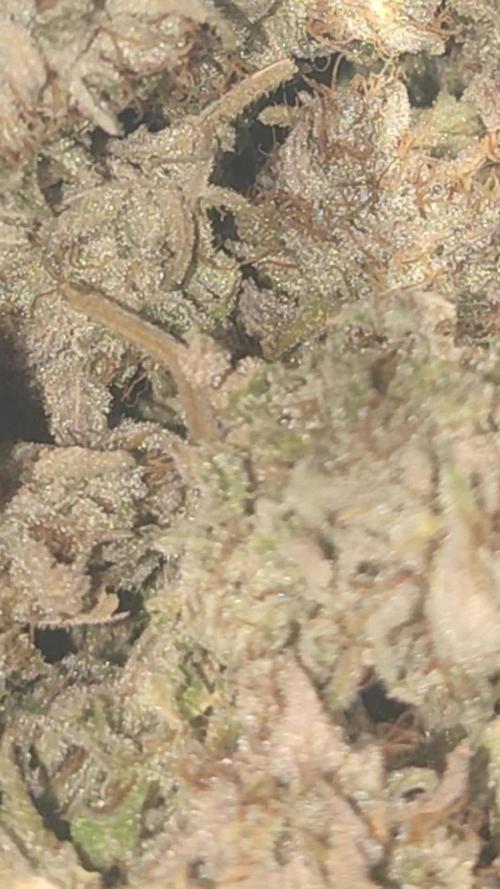
The buds are fully formed and swelling hard. Everywhere you look, it’s just resin, a proper blanket of trichomes covering the flowers and sugar leaves. Under closer inspection, most trichomes are cloudy now, with the first ambers starting to show, especially on the edges. Pistils are turning orange and curling inward, another clear sign that the finish line is close.
The differences between the strains really stand out at this point. The Northern Lights plants are darker, more compact, and absolutely dripping in frost, while the Critical leans lighter in color with a more pronounced fade and slightly airier, but still chunky buds. Together, they fill the tent with a balanced, even canopy — every top sitting right in the sweet spot under the light.
We’re officially inside the harvest window now. From what I’m seeing, I’d estimate about 7–12 days left. It’s one of those moments where patience really matters. Chopping earlier would keep things a bit more uplifting, but giving them a few more days will push more amber trichomes and deepen the effect.
Right now, they’re close — but not quite at their absolute peak. I’m letting them ride just a little longer to fully mature and finish strong.
Overall, this run has been alright. The environment stayed dialed in, the plants responded well, and now they’re rewarding that with proper, high-quality flowers.
Stats so far:
💧 Watering: Every third day
🌡️ Temp: 26–28°C
💦 Humidity: 65% RH
📈 VPD: ~1.18 kPa
💡 Light: ~700 PPFD
Likes
36
Share


@Kushsmoker516
Follow
Almost there probably another 20-30 days for blueberry and white widow im guessing while peyote zkittles is taking her time

Likes
21
Share


@LovelyT
Follow
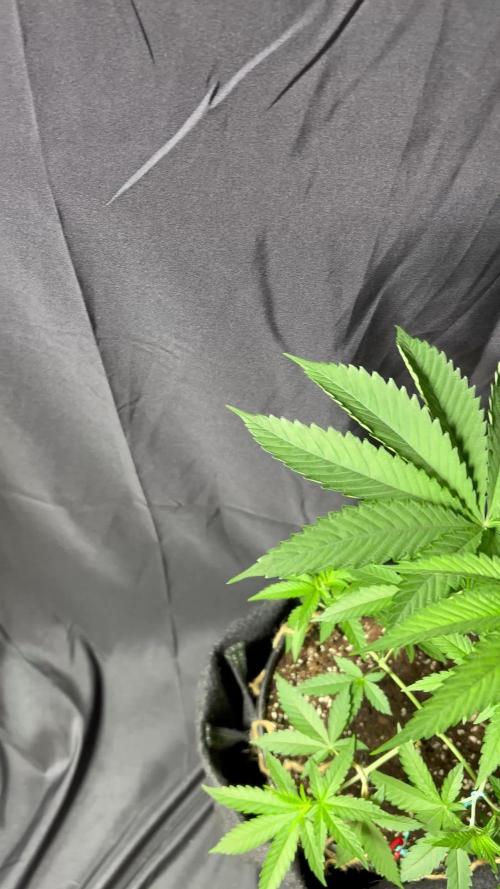
Critical is definetly a sativa strain, as she just wants to grow straight up. I wanted to take pictures before i defoliated but, i forgot. Sorry guys but next week i will definetly post before trimming. No smell yet, but she is comming along nicely. Was thinking of trying the Supercropping method with this strain let me know what yall think, as critical does respond very well to any training. Feel free to post some opinions.I would Love the feedback, AS ALWAYS........ HAPPY GROWING😉!!
Likes
3
Share


@GorkedOut
Follow
2 of the cherry cookies are ready to be chopped very soon. The other has a bit of time to go.
They're looking good and smelling good. Happy with them

Likes
149
Share


@CBD_Sweden
Follow
Hi all the happy people here in GrowDiaries.
This is my second cultivation ever and it will be fun to try a bigger space than my closet grow.
First, I'm just going to say I'm done with the construction of my new growroom.
I put some pictures on the construction here in week one.
The room is 2.14 meters by 1.7 meters and has a ceiling height of 2 meters.
It provides a floor area of 3.6 square meters.
I use a 54 Watt Lightwawe T5 for germination and 2 Pcs 400 Watt HPS lamps.
I have a channel fan that replaces the room air about 40 times an hour to get a comfortable theme in the room, the air enters a fresh air intake from the outside.
The air is purified through a carbon filter to then leave the room to the rest of the basement.
Then I use that heat to heat the rest of the basement.
I will use 8 pcs 15 liter Autopots to grow with and a 100 liter water tank that supplies the pots of water and nutrition.
I will grow completely organically in soil and will watercure my buds to get the best possible medicine for me.
But there are no cultivation rooms to be displayed here, so I continue with what is most important.
Today I have put my seeds in my moisture dome and hope the seeds have germinated within a few days.
I am very excited to see how the new growroom will work and how this Blue cheese Auto from Royal queen seeds will turn out.
Blue Cheese automatic cannabis seeds are a cross of Blueberry Automatic and Cheese Automatic that has been perfected over five years of breeding and careful selection. The result is a feminized, autoflowering strain with superior yield, flavor, and effects to either of its distinguished parent strains.
THC: 16%
CBD: Low
Yield Indoor : 325 - 375 gr/m2
Yield Outdoor: 60 - 110 gr/plant
Height Indoor: 40 - 70 cm
Height Outdoor: 60 - 110 cm
Flowering: 7 - 8 weeks
Harvest month: 9-10 weeks after planting
Genetic Background: Blueberry x Cheese x Ruderalis
Type: Sa 35% In 40% Ru 25%
Effect: Cerebral and uplifting
Climate: Mild
..............................................................................................................................................................................................................................................................................................................................................
2017-09-11. Kl 12.00. Week 4 starts. I have cleaned the whole room for the new week and gave the girls water and nutes. Added videos and pics. Girl nr 1 is 27 cm high and girl nr 2 is 50 cm high and nr 3 is 15 cm high.
-------------------------------------------------------------------------------
2017-09-12. Kl 10.00. New pics and video. Nr 2 has grown 5 cm in 23 h, its incredible.
---------------------------------------------------------------------------------------------
2017-09-13. Kl 22.00. Everything is great in the garden right now. Updated with new video.
----------------------------------------------------------------------------------------------------------------------------
2017-09-15. KL 10.00. New pics and videos. Girl Nr 1 is 33 cm high, Nr2 is 70 cm and girl Nr is 22 cm. Nr 2 has grown 20 cm the last 3 days. Look at the stem of girl Nr 2 😍
The girls are starting to smell a lot now. Its a intense smell in the grow room.
-----------------------------------------------------------------------------------------------------------------------------------------
2017-09-16. Kl 10.00. The girls grow like crazy, i have to defoliate about 20 leafs a day. Nr 2 is 76 cm tall now, i wonder when she slows down?. Added 2 liters of water and nutes this morning and 2 new videos.
------------------------------------------------------------------------------------------------------------------------------------------------------------------
2017-09-17. Made a time laps of the girls first 28 days.
Likes
5
Share

@Chrisandweed
Follow
Bueno, cortada 😁. Sin duda esta era la mayor candidata a ser la primera en cortar, y además a ser de una gran cosecha.
De momento está puesta a secar dentro del armario encima de las luces, a ver si llegamos a los 10/15 dias que me viene operación y así puedo disfrutarla en el periodo de recuperación ❤️

Likes
4
Share


@frenchylovegrow
Follow
Premier test de one bud sur cette variété et au top pour ce mode de culture de bon bourgeons bien remplit et bien coloré .
Pour un poids final de 75gr
j'ai bouturé a nouveaux mon pied mère et je vous ferait un nouveau journal avec celle ci et des la croissance cette fois si ;)
Bon grow à tous😉

Likes
3
Share


@Farmerbry71
Follow
This outside AK Auto is doing extremely well in the eastern Canada climate gotten a little rain but lots of hight heat and humidity. Very healthy girl no stress
Likes
4
Share


@Canadian_Bud
Follow
31-08-2019
Purple Kush started today after 12 weeks of low H5 light cycle is is good to get her into the new system
Nutrition will be doubled on the next Nutrition Change out in 7 days. So far! All variables are under control. I like the fact I can turn the tap and check accurately and adjust if needed unlike soil unless you are using a soil kit all the time.
😎 Pump work 15 min intervals pumping Nutritional spray. 2 different Air flows 1) in solution with air stone and 2) open wand spray inside directed at the roots to provide additional oxygen.

Likes
14
Share


@Thckaos
Follow
09-11-20 Se cambia la solución y se realiza un lavado de raíces. Para bajar la conductividad de las raíces de 2.25 a 0.2 ms para que la solución nueva sea más efectiva. Se corrige el PH de 6.1 a 5.6. La solución tiene 2.1 ms y 5.6 PH. Se añade una pastilla de CO2.
10-11-20 Se corrige el PH 6.00 a 5.6 Conductividad 1.75 ms.
13-11-20 Se corrige el PH 6.00 a 5.6 Conductividad 1.72 ms.