
Likes
Comments
Share


@Growin_it
Follow
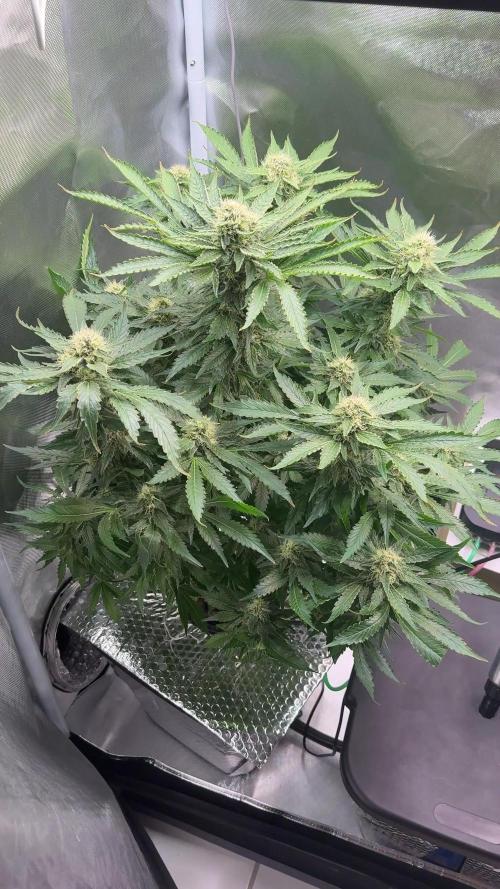
Starting to let the plant speak to me more as it goes into scenesence. Don't want to chop too early.

Likes
13
Share

@Enki_Weed
Follow
Das Letzte Abendmahl (mit Nährstoffen) 🌱
Titel: Schluss mit der Diät-Vorbereitung! – Nächste Woche gibt’s nur Wasser.
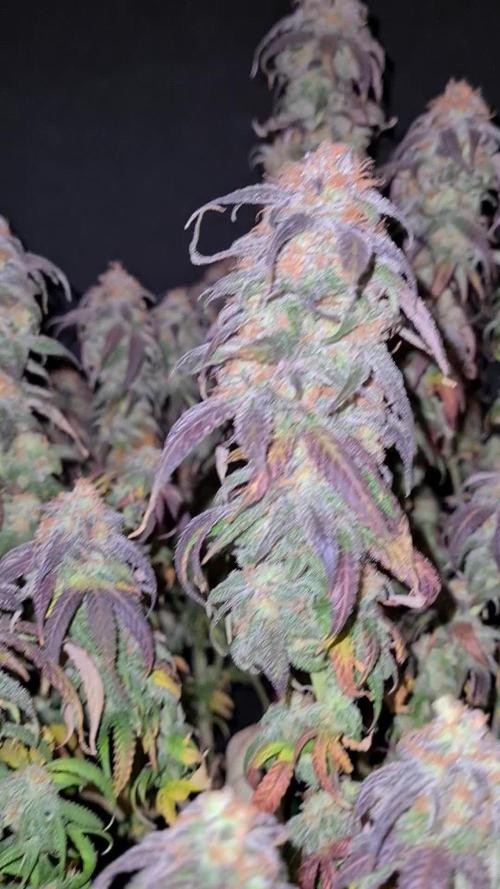
"Tag 77 der Blüte: Die Pflanze hat ihren Frieden mit mir gemacht, nachdem ich sie aus der CalMag-Überdüngungs-Hölle befreit habe. Endlich sind die Werte so vorbildlich, dass ich sie als Desktop-Hintergrund verwenden könnte: EC 1.85 und pH 5.9. Die Wassertemperatur (21.1C) ist so perfekt, dass ich mir ein Bad darin wünsche.
Diese Woche wird nochmal richtig aufgetankt! Volle Dröhnung Hesi, damit die letzten Blütenzellen auch ja explodieren. Ab nächster Woche, also in Woche 12, beginnt dann die große 'Nur-Wasser-Diät' (das Spülen), um den Geschmack zu perfektionieren.
Die Schere ist schon gewetzt. Jetzt heißt es: genießen und warten!"

Likes
9
Share


@THCReich
Follow
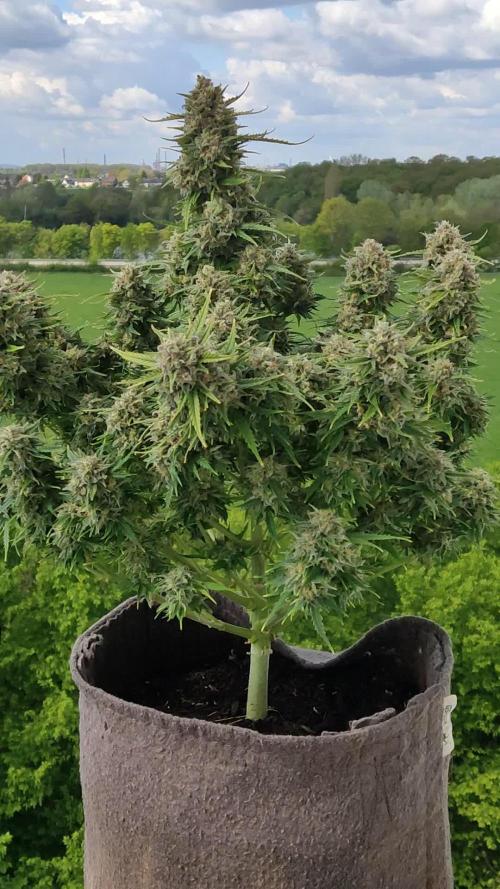
I realised that the roots were too cold and put Styrofoam under the pots. In addition, a plant has a positive mutation. A branch has become 2.


Likes
12
Share


@GirlGoneWeed
Follow
Its been very hot these past days in Ontario and the outdoor grow loves it!
Plants have been growing nice and tall, growing some fatty leaves, I wanna see how they grow without any human interference so I will leave them without training for now. The soil is still providing nutes for the looks of it, I have started spraying some natural homemade pesticide you can find the recipes on my Instagram @girlgoneweed (under the highlights) I have been spraying 2x a week to keep rodents, aphids, mites, and mildew away.
*The video is a dark angel as well but this one I have it on my roof garden.*
Thanks for following along, see y'all next xoxo

Likes
12
Share


@farah4weed
Follow
Hello guys 😍👽
This week is the most exciting time of my cultivation.
After we grew 10 og creams, today in the third week of flowering, all the seeds showed that they are feminized😍😍
My project has given the right result
But more important than this is the final product, which we compare with the father (og kush) and the mother (cake n cream) and the traits it inherited😍😍
Thanks for your comment🙏😍👽
"farah4weed"


Likes
17
Share


@Naujas
Follow
She is much prettier than she was a week ago :) I remembered that I have my first grow light, which is more compact and it will give me more space, so I changed my light, now the girl's side branches get light too:) I add a lot of video memes, because I really want to win Iphone16 pro ;) and those who don't take risks don't drink champagne:) good luck to everyone.
Likes
36
Share


@Roberts
Follow
Gorilla glue has been growing really well. She is doing good under the G300W Spider Farmer light. Just did some training today. Waiting for her to spread out good, and reach maturity before I flower. So a few more weeks for sure in vegging. Nothing else to report. Thank you Spider Farmer, and Amsterdam Marijuana Seeds. 💪❄️🌱🤜🤛
Www.amsterdammarijuanaseeds.com
Thank you grow diaries community for the 👇likes👇, follows, comments, and subscriptions on my YouTube channel👇. ❄️🌱🍻
Happy Growing 🌱🌱🌱
https://youtube.com/channel/UCAhN7yRzWLpcaRHhMIQ7X4g
Spider Farmer G300w: https://amzn.to/3S2zvsd
Spider Farmer 10X20 Heat Mat Kit - https://amz.fun/lsa0J
Spider Farmer Amazon Store: https://www.amazon.com/spiderfarmer
Spider Farmer Official Site: https://spider-farmer.com
Discount code: saveurcash

Likes
2
Share


@Yiyis_Grow
Follow
Lámpara: Bestva Quantum Board LED LM301B
Sustrato: 2 Jiffy fino : 1 Floragard
Especies: Charlotte Dream CBD - Auto Dark Purple - Purple Kush - Triping 25 - Gelato Ice
Acontecimientos:
1. Dos Dark Purple al parecer empezaron a florar y eso no está bien, si siguen así van a ser enanas. Puede ser por ser semillas de regalía.
2. Luz 20 h/día + nutrientes + viento
Buenos humos


Likes
34
Share


@ScotlandHaze
Follow
Not a good week unfortunately. Fed them too much and burnt them slightly. Fixed my mistake so back on the mend. One week or so left I think so only plain water

Likes
10
Share


@SAKARABU
Follow
Performed a final defoliation along with the usual LST. Tried watering with only 1L to bring the watering down to every 2 days, but they started drooping a bit, so decided to stick with 2L every 3 days. Seems to work best.
Not much else to report, growing steadily and buds starting to form.

Likes
1
Share


@Mr_Motalovah
Follow
Sidecar
Strain description from breeder:
Genetic Background: Strawberry#13 x Mimosa
Type: Feminized
Sativa 60% Indica 40%
THC:
CBD:
Yield Indoor : gr/m2
Height Indoor: 0 - 0 cm
Flowering time: 8 - 9 weeks ( 58 - 65 days)
Aroma:
Effect:
Expectations and training method:
I know these genetics are a bit delicate so I’ll be taking things very easy.
The breeder suggests topping and training the branches because she can grow fast and tall.
By what I’ve seen from the local growers, she can produce some savory chunky buds which is what I’m aiming for. I’ll follow the breeder’s suggestion and Top/LST which is what I’ll be doing to almost all my other strains as well on this run.
As for the yields I’m not expecting much given the numbers I got from local growers. No more than 40 grams per plant but always aiming for more.
I’ve already smoked this strain grown by the breeder and other local breeders, which is what made me want to grow it myself. I expect nothing but trichomes and terps from these ladies.
Equipment used in this cycle:
Tent: Dutch Masters 120x240x220cm
Lights:
1 x EasyGrow S800v2
1 x Mars Hydro TSW2000
1 x Mars Hydro FC3000
Ventilation:
Garden HighPro - ProFan TT Extractor Fan - 150mm
Garden Highpro - ProActiv Carbon Filter - 150mm
Garden Highpro - ProFan Oscilating Clip Fans - 25cm
Blauburg - Inline Fan - 125mm
Humidifier:
Garden Highpro - Humipro Digital Humidifier - 4 liters
Pots: Garden Highpro 11L Fabric pots
Medium: Biobizz Light Mix
Nutrients:
Grotek - Mycrorizo
Plagron- Alga grow, Alga Bloom, green sensation and royal sugar.
PH down
Calmag
Measuring instruments:
Hygrometer/Thermometer - Govee:
EC Meter - HM Digital: COM-80S Hydrotester
PH Meter - Vanguard Hydroponics
Happy Growing! 😃
Likes
23
Share


@adam_pawloski87
Follow
This grow was pretty simple ! They went a total of 103 days from seed! Very trichomy dense buds with the smell of Berries vanilla and skunk ! This is a must try for you all Fastbuds has the greats!!!
Likes
33
Share


@Smokwiri
Follow
Plant recovered pretty good after ph problem, too much enhancer i think
Light is doing its job good as you can see.
Nutes at low levels...


Likes
3
Share

@BLAZED
Follow
Week 22 (11-11 to 17-11)
11-11
Temps: 19.1 to 26.5 degrees
Humidity: 43% to 62%
Watering: Both 500 ml.
12-11
Temps: 18.8 to 25.8 degrees
Humidity: 42% to 62%
13-11
Temps: 18.1 to 25.8 degrees
Humidity: 46% to 62%
Watering #1: 500 ml. #2: 700 ml.
Dry Weight #1: 3.5 kg. #2: 3.3 kg.
14-11
Temps: 19 to 25.5 degrees
Humidity: 46% to 64%
Today i checked the plants under a microscope.
I see a lot of milky and some amber trichomes, at the end of the week she is ready to be dried!
Dry Weight #1: 3.6 kg. #2: 3.7 kg.
15-11
Temps: 19.2 to 25.8 degrees
Humidity: 44% to 60%
Watering: Both 500 ml.
Today i removed mostly all of the dead and yellow leaves.
Dry Weight: Both 3.8 kg.
16-11
Temps: 19.6 to 25.5 degrees
Humidity: 42% to 55%
Watering: Both 500 ml.
17-11
Temps: 18.9 to 25.1 degrees
Humidity: 48% to 61%
Watering #1: 400 ml. #2: 500 ml.
Dry Weight #1: 3.7 kg. #2: 3.5 kg.
Likes
18
Share


@Cockneycultivar
Follow
This strain impressed me from the get go. Although I suffered her with some light stress and some issues with high run off and and build up she still managed to finish off perfectly. Lovely dense buds and she’s covered trichomes. She was harvested on 31 jan and is now curing off in glass mason jars and I’m burping x4/5 a day. I’ve tasted her today and although she’s not fully mature she tastes a bit berry with a hint of diesel.
I would say for defo a day time smoke. Perfect wake and bake strain. I would like to try this again outdoors next time in a greenhouse.
Likes
13
Share


@HeavyHead
Follow
Great strain. Will post more pictures as it cures and update the smoke report :)
Going to aim for a 30 day cure and I’ll post how it looks