
Likes
Comments
Share


Likes
34
Share

@Hempface86
Follow
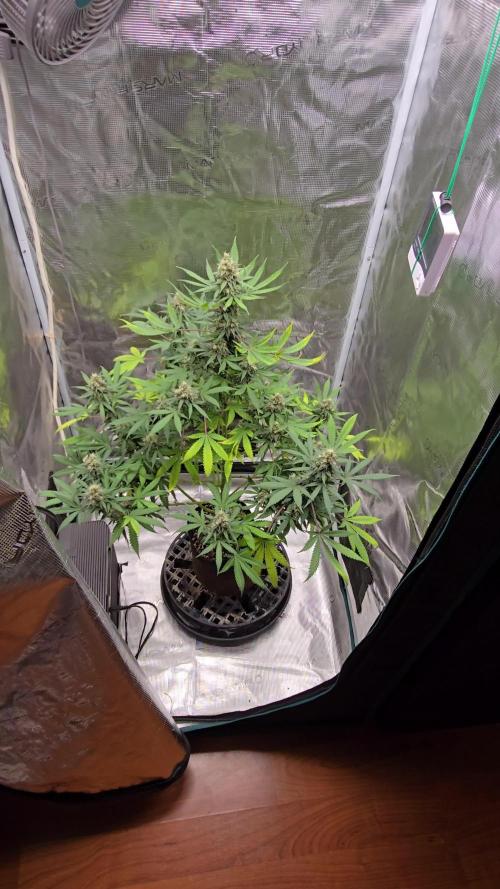
Another week passes and it's official.I will never ever know what strain this is smh .. i feel like she has a few weeks at minimum left so I gave her some green sensation in hopes of helping her bulk up .. hope everyone is doing well.God bless and happy growing ✌️
Likes
44
Share


@TheMachinist
Follow
Feb 14, 2018:
Seems my fears were unfounded, I'm not seeing any spots of mildew and I think in 4 days I would see something if it was there. Water with plain water, just ph'd nothing else added. staked up a couple of the buds, all the other palnts are managing to hold each other up, the fan leaves seem to grow into each other so the canopy is a solid moving mass. When the oscillating fan hits the colas the whole canopy sways slightly. For future grow I plan to have more space between plants, and will need a screen/net to hold everything up.
Feb 12,13 2018:
Watered with 10ml/Gal Tiger Bloom, 10ml/Gal Big Bloom, 2tsp blackstrap molasses, 1ml Cal-Mag per gallon. Ph'd to 6.5 ish. Lost my SD card so didn't get any photos 2/12, but took some with my phone on day 73, and then found my SD card. High quality photos are back tomorrow mourning.
Feb 11, 2018:
Had a bit of a freak out, thought i had spotted a couple PM spots forming, think it was just the leaves resinous sticky. After the scare decided to do some major cleanup of old leaves and ALL dead leaves, i know it wont help fight PM, but added a small 6" fan circulating air below canopy. Humidity has been constant due to running a dehumidifier so it stays between 45-50 lights on and off.
Processing
Likes
42
Share


@Teamdirtbag3
Follow
Done..... 19 plants
Tangerine Skunk I love this pheno 🤩
🍊🔥🍊🔥🍊🔥🍊🔥🍊🔥🍊🔥🍊🔥
😈
Likes
34
Share

@Crazy_Doofus
Follow
1st plant, Wet, 20gr on the top. Trichomes were getting brown. Will leave the rest for a couple of days. 2nd part, 53gr, very little!
1st plant dry, total of 16 gr, very little
2nd plant, wet, 99gr, lost 3 tops to budrot... 😑
2nd plant dry, total of 19 gr, very little
The sun screen imo was very affective, even using it in my tent. Smokin review will come in 2 weeks, really excited!

Likes
114
Share


@Natrona
Follow
This week, my Titans are sleeping in a cooler dark room until harvest.
So for your viewing pleasure, I've loaded some videos made of the Titans during there time with me.
I'm wondering what to serve at my Queens Tea Party... I made some butterscotch pistachio bars and modified the recipe for less sugar. 😋 We experimented with topping the bars with black cherry spread, orange marmalade and a mango jelly. All are very tasty as the bit of sour/tart enhances the butterscotch sweet.
A few solar eclipse pics.

Likes
17
Share


@scharpmeister
Follow
Not much to do at this point but sit and wait. Rocking and average ppfd of like 1000 at the moment and plants haven’t shown any signs of stress, even though some of the higher cola are only like 4 inches from the 300w led panel
Likes
34
Share


@Basementganja
Follow
Plucked a few leaves that were looking at me funny ;) Not much to do!
Very strong lemony smell!!
Watered with 2.5 gallons of the above listed nutrients, every 5-6 days. (when the soil becomes 95% dry)
10% of the solution watered runs out the bottom of the pot, and is removed with a wet-vacuum.

Likes
Comments
Share

@XanHalen
Follow
Weekly update: August 6th
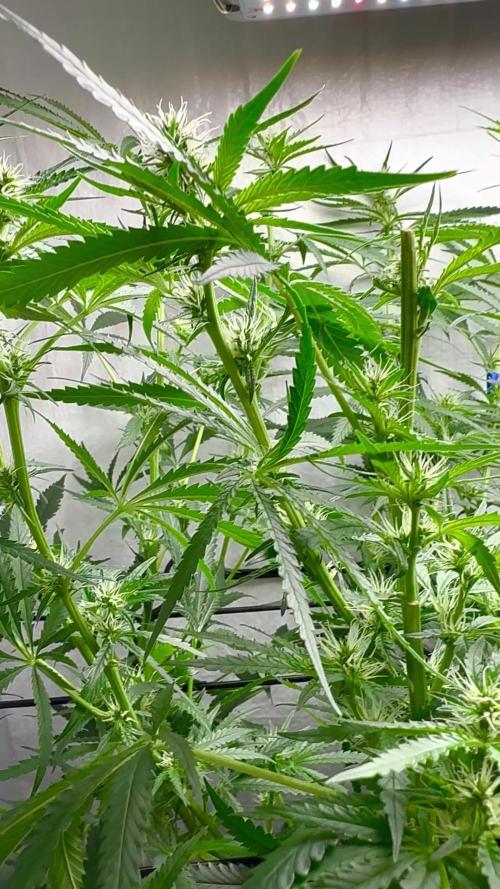
Looking great, major spurt of growth on both girls, #1 (sativa leaning girl) had major final stretch to end off stretch in 3 days (hopefully). And #2 (stockier indica leaning pheno) has had a big increase in flower size in 3 days which is promising, and is also producing a very sweet and tropical fruity gas smell, this is TCP after all!
Oh yea and I’m running about 1700 center 500 outer ppfd and tapering down if I see anything but nothing so far all good nice genetics, may drop in the next week even if no signs or symptoms, to prevent and not be too greedy.
Now for the not so good… been getting 10% runoff almost every feed, but my runoff of #1 was 3500ppm and pH 4.5 and #2 at 5000ppm and pH 4.5. Been giving around 850 ppm input at pH 6.0, never went over 1000ppm input. So I have to correct with 25% increase in feed volume, 300-400ppm input at pH 7.0 for what I infer to be 2-3 feeds until runoff ppm is significantly lower, and pH is at least 5.5.
UPDATE Aug 8:
To address the toxic/locked-out root-zone I did a regular feed with runoff (1.5 gal total volume per pot @ 820ppm bloom focus), runoff consisted of pH 4.2-4.5 and 4000-6000ppm... OUCH. I then fertigated with 0.5 gal plain pH 6.5-7 dechlorinated tap water each. I repeated this a total of 3 times, to which the last flush had 3 ml/gal cal-mag. final runoff ppm @ 1000-2000, pH 5.3-5.5. To conclude, I more than likely wasn't achieving enough runoff per scheduled feed, and did not cycle a few plain pH adjusted waterings. I had almost the same thing happen last run with autos, except they were showing signs of lockout, these photo girls are not. I must do a regular watering every 3 feeds, achieve 20% runoff with high ppm feeds, and 15% runoff at least with mild to moderate ppm's. Lesson learned, I hope I get a full run in the future without hiccups like this.
UPDATE Aug 9:
Big thanks to @00110001001001111O for suggesting i omit the light hanger and hang from the carabiner, I thought I was out of vertical space until this was pointed out. Check him out, he always has well informed answers to grow questions: https://growdiaries.com/grower/00110001001001111o


Likes
51
Share


@I_and_I
Follow
Blue gelato 41 took a little work to figure out her likes and dislikes but it was definitely worth the wait , the smoke is smooth and potent as hell,
She seems to need a lot of light, the tops by far and away blow the lower growth out the water, I won't make the mistake of having her in a corner of the tent again knowing her potency and flavour 😎👌💪👍
Enjoy this girl if you give her a try growmies 😎

Likes
30
Share


@Grower_Of_Persia
Follow
at last we are in harvest week. im happy at all it was a good experience.
my dry and cure style is this:
4 days of hanging upside down to get water activity lower to around 0.6 in 50% humidity and 26 C temp (i know its a little high but we are in a hot summer right now and i cant get it lower even with air conditioner) and then after 4 days of drying i remove leaves and stalks, trim buds and move them to jar for the rest of their life :D . and in the first 4 days of curing i open the jar door and let hem get some fresh air in the jar for about 5 minutes and close the jar door again, after 4 days of curing like that buds are smokable but they will get better as they getting cured about 1 month.
buds are dense and frosty but very little in size!
i had some mistakes and problems with this grow so i admit i wasted them .
lesson from this grow :
grow autos far from fems and always give them 20 hours or more light per day to get good weight in little time.
Likes
12
Share


@EmeraldLakeCannabis
Follow
Great week. Plants grew like crazy, much faster than expected. This week sometime I'll be transplanting the ladies up to 5 gallon pots, then a few weeks of recovery before the flip I think.
Having never run clones before, I'm frankly shocked at how fast the turnaround time is.
Timelapse for the week is out. Updates will come if needed.
Likes
22
Share


@m0use
Follow
***Sponsored Grow*** = Medic || https://medicgrow.com || Grow = ***Sponsored Grow***
Not a whole lot is happening this week, still having some PH issues in the medium, I believe this is from the microbial mass I added a while back. A microbe product, PH going into the medium is around 6.5-6.8 and coming out is between 5.5-5.8, so something is acidifying it up. Also noticed the runoff last week was a bit higher at times. So lowered the feed down quite a bit, going in at 1.4EC vs 1.8 will bump it up to 1.5 and 1.6 in the next few weeks. I also added in a bit of a PK booster. nothing to crazy only 60ppm worth on a total allowance of 700PPM
Lights now running at 100% with V1 spectrum, decided to go with 100% now vs after stretch, will see how it works out.
Till next week.
***Sponsored Grow***
Official Website:
https://medicgrow.com/
+
https://www.kannabia.com/en
Facebook:
https://www.facebook.com/medicgrowled
+
https://www.facebook.com/kannabiaseed/
Twitter:
https://twitter.com/medicgrow
+
https://twitter.com/kannabiaseeds
Instagram:
https://www.instagram.com/medicgrow420/
+
https://www.instagram.com/kannabiaseedsint
YouTube:
https://www.youtube.com/channel/UCNmiY4F9z94u-8eGj7R1CSQ
+
https://www.youtube.com/c/KannabiaSeedCompany
Growdiaries:
https://growdiaries.com/grower/medicgrowled
https://growdiaries.com/grow-lights/medic-grow
+
https://growdiaries.com/grower/kannabia
https://growdiaries.com/seedbank/kannabia

Likes
2
Share

@Spanish_dre_Grows
Follow
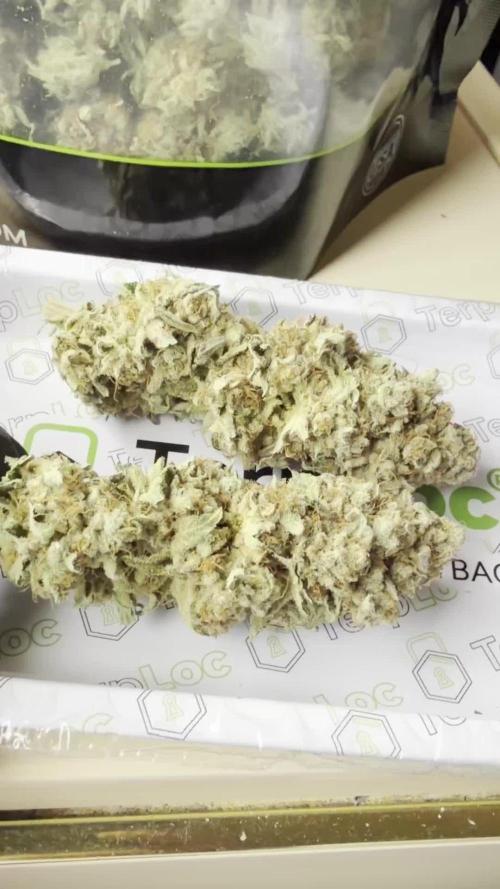
So I got 4 ounces off this plant which is not bad for a 3 gallon pot grown indoor !! Very frosty and dense nugs. Also terps are very pungent and almost cherry flavored cough drops and funky smell to it ! Definitely packs a punch I give it 7 stars out of 10 ! Could been a little taller and wider but I don’t have a lot of space so it did the job for the space I have !
Likes
47
Share


@StarLorr
Follow
Helloing 👋🏻 visitors.
The clone stretched out fast.
And little pistils started to come out
😁 it's a GIRL!!!!!

Likes
2
Share


@eldruida_lamota
Follow
Que pasa familia, vamos con la sexta y última semana de crecimiento de estas Gorilla Melon feminizadas de fastbuds.
Vamos al lío, de las 3 plantas, me quede con 2 por espacio, siempre pongo alguna semilla de más por si no abriese alguna por no perder ese hueco del indoor.
Y ya superaron el shock provocado por el mismo trasplante.
El ph se controla en 6.2 , la temperatura la tenemos entre 20/22 grados y la humedad ronda el 50%.
Hasta aquí todo, Buenos humos 💨💨💨
Processing
Likes
1
Share


@DocChronic420
Follow
5 more males removed from the garden, and finishing up the second month of veg with one more to go before choosing what 4 coco açaí will remain in the grow.
Likes
39
Share


@blackhatcompany
Follow
hello from UK. How are you? Im allright.
Another beautiful week is goon. The weather is nice. Spring is here.
The conditions in my house and grow room are perfect for the plants.
Evrething is good.
See you next week . Thank you and good bye. 👌 💪 👊
Likes
10
Share


@Prop207
Follow
15ml Sb
15ml CalMag
45ml PBPG
Clones weren't ready, held off on flipping 12s till I have viable clones ready.