
Likes
Comments
Share


@JesusPapers
Follow
Not a heavy yielding lady. Which is not a surprise due to the cookie genetics. She is super frosty and stick. Her colors are constantly changing for the better.
I pollinated her with “Purple Punch x Cuvee “
And will soon have my own Cookies strain........ Purple GasFace Cookies......


Likes
21
Share


@NSABND
Follow
Today start of week 10 (Day 70) 😎😵😏 with Trailer Park Mod 😂😂😂😂
i had old fans around here and a ice box, so i startet to build the 7 watts Trailer Park Fans Mod 😁😁😁
It´s Monday Day 71 and "Hilde" got another fertilizer shot today
from Day 72 to Day 75 i was on a Road Trip... 😳😎😳
Back from Road Trip and "Hilde" got another fertilizer shot today 😎👍😏

Likes
2
Share


@LittleBigTrees
Follow
Easy to grow , no real problems .
Was ready in 8 weeks but could have gone another at least .
Next time I will flower for longer to see if there's much difference in that last week to ten days.
You can find these beans at :
Zamnesia.com
20%off code : ZAMMIGD2023
Likes
6
Share


@Weedman268
Follow
Going ok so far, I made this living soil so am eager to see the results 👍🏾


Likes
4
Share


@SaFiyaFarms
Follow
Planted directly in soil came out of the dirt in 2 days, The picture is week 1 out the dirt

Likes
9
Share


@Roberts
Follow
Fast version B is doing good. She had a solution change today. She us just vegging along. No issues at the moment. Thank you Medic Grow, Dutch Passion, SSSC, and Athena nutrition. 🤜🏻🤛🏻🌱🌱🌱
Thank you grow diaries community for the 👇likes👇, follows, comments, and subscriptions on my YouTube channel👇.
❄️🌱🍻 Happy Growing 🌱🌱🌱
https://youtube.com/channel/UCAhN7yRzWLpcaRHhMIQ7X4g.
Likes
12
Share


@CANNASIM
Follow
We are at week 3 now. A lot of development, i have not used liquid nutes this week, it is raining a lot so no water needed, thus no liquid nutrients.
I have top feed of dry nutrients mix, basically a mixture of a super soil recipe that usually is used within to make a hot soil:
I mix all tue ingredients together and use it gradually about 40g as a powder, in the top of the soil.
- Azomite 500g
- Natural fosfate 500g
- Biochar 1kg
- Bokashi 1kg
-Kelp meal 500g
-Mamona meal 1kg
-chicken meal 1kg
-Potassium silicate 500g
-Gypsum farm 500g
-Diatomaceous earth 500g
Mix all keep it in a soil bag, this pure mix and use it once every month.
The companion plants have emerged and will protect the soil humidity mainly.


Likes
21
Share


@BushDoctor740
Follow
Day 70 Well I think I will give them another week and harvest.Showing lots of trichomes that are mostly cloudy so I’ll let them go a bit longer.The tallest girl is at 40 inches and suffered some fox tailing I’m gonna say from when I pounded them with light for a week or so 😆.Even though she fox tailed and will not have the most dense buds she smells super strong and loaded with trichomes.Of the 5 Runtz the shortest has the chunkiest most dense buds.The other 3 were very big producers and took the LST great branching out forming tons of colas.Ill try to let them dry out this week and place in the dark for a day or so before chopping.Unfortunately in my area we have heavy rains all week humidity may become a problem so I will add a dehumidifier soon.
Likes
24
Share


@MadeInGermany
Follow
Hey everyone 🤗.
This week they both continued to develop very well.
Flowering day 42
Today the tent was cleaned, the humidifier refilled and the plants sprayed with Canna Cure :-).
Flowering day 43
The plant was watered today with 1.2 L 🙂.
They were also checked for their health and pests 👍.
Everything looks great 🙏🏻.
Flowering day 44
Again the tent was cleaned and fresh osmosis water was filled into canisters.
Flowering day 45
Today 1.5 l per pot was poured so that some drainage comes out again.
therefor two days are not poured 😋.
Flowering day 46
The tent was cleaned, the humidifier was filled, the plant was checked for vitality and the entire electronics were checked for functionality.
Flowering day 47
Today she was sprayed again with Canna Cure and checked.
Flowering day 48
We got to the last day of this week and 1.2 L were poured again and the tent was cleaned 👍.
I hope you have a lot of fun with the new update, and let it grow 🍀🙏🏻
You can buy this Strain at
https://www.amsterdamgenetics.com/product/kosher-tangie-kush/
You can buy this Nutrients at
https://greenbuzzliquids.com/
Type:
Kosher Tangie Kush
☝️🏼
Genetics:
Kosher Kush
X
Tangie
👍
Vega lamp:
2 x Todogrow Led
Quantum Board 100 W
💡
Bloom Lamp :
2 x Todogrow Led
Cxb 3590 COB 3500 K 205W
💡💡☝️🏼
Soil :
Canna Coco Professional +
☝️🏼
Fertilizer:
Green Buzz Liquids :
Organic Grow Liquid
Organic Bloom Liquid
Organic more PK
More Roots
Fast Buds
Humic Acid Plus
Growzyme Big Fruits
Clean Fruits
Cal / Mag
Organic Ph - Pulver
☝️🏼🌱
Water:
Osmosis water mixed with normal water (24 hours stale that the chlorine evaporates) to 0.2 - 0.4 EC. Add Cal / Mag 2 ml per l water every 2 waterings . Ph with Organic Ph - Pulver to 5.8 .

Likes
4
Share


@Cannabeast40
Follow
Week 3 and a repot is done and now in day 3. Finally it’s settling down after the repot, which was not pretty at all😂
Hope to get some massive plants this run 🌱
________________________________________________________________________________________
Light from @MedicGrowLED 😎
NEO 780 LED🔥
780 Watt⚡️💥
PPF of 2184 μmol/s & 2.8 μmol/J🔥
Full Spectrum V1/F1 🌈
WiFi smart connection & Smart Aura Control 😱

Likes
3
Share


@iluMiGrower
Follow
Hello fellow growers and welcome to Week 5
Not much to say besides enjoying the view while they grow 😍
Defoliated one of the oldest leafs at the bottom and flushed her with 5.5L of ph water at 6.2 - 6.4.
The buds are fattening up each day and the trichomes are starting to show up 😍
Stay tuned for more 👋

Likes
116
Share


@bioaccessory
Follow
Вот и подходит к концу наше увлекательное путешествие. С понедельника, 18/05 начал Pre-harvest Flush, всё идёт по плану. Я очень требовательно отношусь ко вкусу конечного продукта, поэтому стараюсь тщательно промывать растение (≈10 дней).
Шишки стали упругими, при прикосновении похожи на резиновый мяч, жду не дождусь, когда можно будет попробовать😋.
p.s. На последней картинке иллюстрация соответствия стрейна описанию из каталога - браво RQS!👍
Спасибо, что заглянули, и будьте здоровы! 🙏
Продолжение следует ...😶
Likes
Comments
Share

@GoodTimesOrganics
Follow
Nun wurde meine Eigenkreation dem Netz unterbunden und sie entwickelt sich prächtig.
Nach einer weiteren Woche des Wachstums wird es Zeit die Damen in die Blüte zu schicken.
Das Wachstum ist außerordentlich homogen und die Interniodenabstände relativ Kurz.
Eine schöne Hybridform mit aktuell überwiegenden Indica Einschlag. 💚🌲🥦
Likes
9
Share


@Wiebechillin
Follow
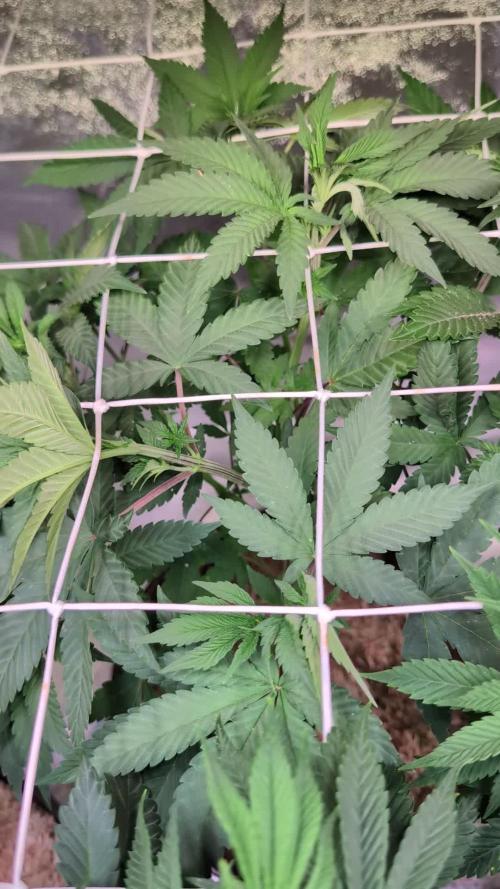
- Worried about overcrowding of leaves and not enough light getting through. Based on research it is not good to trim Autos but i found later in this grow that my plants were strong enough to trim and actually seemed to benefit from more light being able to get through to lower branches
- Lots of growth still even though flowering has begun and due to it being an Autoflowering strain it will keep growing
- Had a bent stem this week on one plant, splinted it and seemed to have regenerated
-


Likes
7
Share


Likes
102
Share


@MiyaguiOkPolilla
Follow
Hola amigos! Hemos llegado al final de esta hermosa aventura, una planta perfecta desde su siembra, ni un daño por plagas, calor o exceso de nutrientes la afectó.
Tengo que ser honesto y es que realmente me costó cortar la planta al final, olía a maravilla y con toques de alegría.
Su estructura súper robusta me indica que debería cultivar una más y dejarla crecer libremente por más tiempo. Es increíble el tiempo de floración de esta genética, ya que en solo 7 semanas de floración está perfecta para cosechar 💐😍
Tricomas de gran tamaño cubren cada rincón de los cogollos y destellan bajo la luz.
No hay mucho más que decir, disfrutemos todos de la magia del auto cultivo y seamos felices!
IRIE

Likes
4
Share


@OutForReal
Follow
🍎🍑🍋🍐🍏Fruity Jack Part.2 🍌🍍🍒🍊🍇
Song of the week : Konshens - Bassline
----------
She is now heavily feed like you can see the EC is reaching 2.2 but I have some difficulties to adjust the PH ( no PH down or up at home ) but 6.1 will be ok , next time it will be higher let's just hope that she will not suffer from the PH variations
