
Likes
Comments
Share


@Brickie74
Follow
Pretty basic week. I transplanted the Green Tea plant from a Jiffy Pot to a 1 gallon fabric pot. The plant probably could have stayed in the Jiffy Pot for another week or so but some of my plants that were a little bigger when I transplanted them were packed with roots. I just figured I'd transplant a bit earlier to give my roots more space sooner.


Likes
13
Share


@Silverback_Guerilla
Follow
THURSDAY 12/20:
Delilah isn't recovering much at all...guess she'll end up in the trim bag for e-liquid...so sad.
Dominique is a crispy critter too, but her trichromes are about half cloudy now, so she'll at least finish. I'll give her nutes at least once more with Cha Ching, then start flushing her.
FRIDAY:
The new evaporative cooler is working pretty well in the tent. High temp was 84f with it running on medium and with ice in the reservoir. That's a win. I suspect that when I need to run the other two 85w bar lights it will be pushing 90f again unless I run it on high. RH is is staying between 38% and 45%, which is another win!
SATURDAY:
I fed both DD's about a gallon of full-strength bloom nutes. Not sure how Delilah will like it..but it would be nice to see a little yield from her, too...
SUNDAY:
Photo session...Dominique is actually starting to "pink" a little bit..not the deep dark I had hoped for, but sexy just the same. Delilah didn't freak out on the nutes yesterday..I'll watch for the leaf production to diminish and the calyx production to intensify...🙏

Likes
7
Share


@Athos_GD
Follow
D22. Defoliated, gave plain RO water and dimmed the light. Next is auto irrigation.
D23. Finally received all of the Athena nutrients and fed for the first time.
D25. Removed the small runt plant with the twisted stem. The plant started growing pollen sacks.
D26. Raised light as much as I could without using zip ties. PPFD now 650-790. EC tonight 2.4.


Likes
13
Share


@DeepRootsGrowTrees
Follow
DIVINE OG KUSH / DIVINE SEEDS
WEEK #20 OVERALL
WEEK #7 FLOWER
This week she's stacking and getting some frosty dense buds that smell amazing. She's got a sweet gas smell to her. Stay Growing!!!
Thank you for stopping by and taking a look it's much appreciated!!
THANK YOU DIVINE SEEDS!!!
DIVINE SEEDS / DIVINE OG KUSH

Likes
15
Share


@Waveform
Follow
Instead of pictures showing a dying lady: A timelapse video of their whole life.
Had lady #2 run under continuous light for the last days. Probably went one day too far, which caused her buds to become somewhat fluffy too, but full of resin as well.
Likes
10
Share


@Green_Dream
Follow
It has been a good week. The NTs are fattening and getting covered in ice! They are also loosing most of the lower leaves, I'm a bit afraid that they lose too many, I hope not!
Now after two weeks of stretch it seems like they stopped ascending.
I can't wait to see how this coming week will go!

Likes
132
Share


@Crashoverite
Follow
Hi all👨🌾👋
Welcome to my another week update
Hope everyone keeping well 🧑🌾
Week 6
Mar 8 - Mar 14
It was another easy and exciting week. Everything going absolutely great. Both girls stretched nicely despite selective defoliation on Mar 9. They bounced back almost immediately. Started adjusting mixtures towards removing fish mix completely and replacing with Bio grow. In coming week will adding bio bloom and top max to mixture. There was 2 waterings of 3ltr on Mar 9 + last foliar feeding and second on Mar 13 and it was first large feeding 6 ltr beetwen both. Surprisingly only a few drops of runoff. Watering in stages of approx. 500ml every 20-30min. Decided to not install a scrog this time as want to have opportunity to apply more old school methods of training and to be able to remove/rotate girls easily. Let's see if this will pay me off. So far girls enjoying my care very much 😁🧑🌾
Thank you very much for all your likes, follows and comments. 🙏💚❤️💜
Wishing you all amazing rest of the week✨🍀
Peace and love brothers and sisters 👨🌾✌️💚
Stay tuned for new week update soon
Links
https://2fast4buds.com/seeds/TROPICANA-COOKIES-AUTO
https://www.biobizz.com/
https://fishheadfarms.com/
Processing
Likes
23
Share


@eldruida_lamota
Follow
Como estamos familia, a día de hoy, viernes, llevamos exactamente 7 días en la fase de floración y todas ellas están marcadas por su sexo.
Todo va sobre ruedas, tenemos mínimas de 20,5 y maximas de 28,5 grados. la humedad no supera nunca el 60%.
Altura mínima lemon kush 25cm.
Altura maxima northern light xl 42cm.
•las power plant xl Han pegado un estirón serio, están empezando a ensanchar bastante.
•una marea verde desde semilla, con tan solo 5 semanas de crecimiento y un solo trasplante desde que se germinó, para controlar un mal crecimiento.


Likes
18
Share

@eldruida_lamota
Follow
Que pasa familia, vamos con la cosecha de estas Tropicana Cookies Fast Flowering, de FastBuds.
Por dónde empezar, las flores son bien compactas , y van repletas de resina, tienen tonos rosados por dentro muy bonitos, y tiene un aroma súper dulce aunque engañar engaña porque saber sabe más tropical y cítrica.
Es muy sencilla de cultivar, es de ciclo bastante corto aunque también si le dais una semana más no pasa nada agradecer se agradece al final.
Mars hydro:
Code discount: EL420
https://www.mars-hydro.com/
Agrobeta:
https://www.agrobeta.com/agrobetatiendaonline/36-abonos-canamo
Hasta aquí todo, Buenos humos 💨💨💨


Likes
16
Share

@DeepRootsGrowTrees
Follow
GORILLA KING AUTO / KANNABIA
WEEK #13 OVERALL
WEEK #8 FLOWER
This week no issues she's just about done she's covered in trichomes her buds are nice and dense they also have a purple hue to them and she smells great sweet aroma just punches you in the face when you open the tent. Stoked for this strain!! Stay Growing!!
Thank you for stopping by and taking a look it's much appreciated!!
Thank you KANNABIA!!
KANNABIA.COM GORILLA KING AUTO

Likes
6
Share

@JeyGanesha
Follow
3° settimana di fioritura sta sviluppando dei grandi fiori profumati,e compatti come poche
Likes
78
Share


@deFharo
Follow
Bienvenidos cultivadores de marihuana clandestinos, y también, a los que tienen la fortuna de no serlo! 🖐️👨🌾... todo por la causa!
137 días de cultivo, 70 días de floración, la gitana andaluza ha cumplido con creces, después de dos días de luz sin descanso y una vez agotada la humedad de la maceta he cortado la planta!
Ha sido un cultivo fácil y provechoso, la planta tardó en arrancar, pero después se ha comportado con gran vigor, creciendo con alegría, mucha comida, luz y riegos para dar unos hermosos y densos cogollos que ahora cuelgan boca abajo... en unas semanas completaré mis comentarios sobre la cepa.
Ahora su hermana pequeña 3M ▼ La gitanilla, con seis semanas menos de vida!, promete superar a su hermana mayor, con espacio liberado en mi carpa de cultivo, he preparado un escenario de luz digno de una Reina... a jugar!
Feliz verano cultivadores!!
Hasta la cosecha...
SALUDOS A TODOS!!
=================================
Info de la cepa GYPSY KUSH: https://en.seedfinder.eu/strain-info/Gypsy_Kush/Kannabia_Seeds/
"una variedad única con un duende flamenco que no se puede aguantar y que solo puede venir del sur..." Kannabia Seeds
- Genética: Black Domina x Afghan x Ginger Ale
- Hibrido: Sativa 50% Indica 50%
- Tiempo de Floración: 58-62 días
- Rendimiento: 500 gr/m
- THC - Hasta 16%
==============
Likes
40
Share


@GYOweed
Follow
Keeping this just for maybe flowering it later.
It doesnt like small containers


Likes
1
Share


@I_Identify_As_A_Dan
Follow
Week 4 for Strawberry Gorilla by Fastbuds
She's clearly enjoyed her FPJ feeding that she got, look at the size of her compared to last week....
She may end up larger than Moby dick but i think that would be asking for too much😂
I will be moving her outdoors today most likely maybe tomorrow if i dont have time to do it.
If you see in the video shes actually got some fasciation going on where one of my side branches was almost like doubled and ended up topping itself & splitting into 2 😂
Happy with her progress 😁
Likes
14
Share


@Snickelfritters
Follow
10/21- Flower has begun!! I've been gradually removing growth from under the canopy that I dont anticipate will become sizeable buds. Now we wait for the stretch. Took a few clones to try my hand at that.
Air is drying out big time lately. I'm probably going to have to give in and buy a humidifier because it's going to be essential to keep my buds from drying out too fast and keeping these plants in healthy rh range.
Despite humidity swings, plants seem to be doing well across the board so I already have a leg up on my last grow. I sprayed for bugs as a precaution. Neem and peppermint Castille soap diluted in water was the choice. Left a residue on my plants though so live been keeping my light between 30-40% and gradually turning up the intensity each day until I reach where I was(70) I dont want to burn my leaves because I have treating for bugs before.
I will add pictures this weekend. This is posted on Day one so there's really not too much change to show in the plants. Really excited to see how they develop over the next 2 weeks.
10/24
Added pics of two plants. I accidently deleted my shoot of GZ 2 and I don't feel like taking them out of the tent again because it's a bit of a pain with the net. It's much taller than it's sister and maybe the healthier plant at this point. Moby dick is a bush, very healthy even still.
No real signs of flower yet. They do seem to be stretching a bit but when you look everyday it's hard to tell. I'm hoping to have a really nice canopy in a week.


Processing
Likes
8
Share


@taylordarling
Follow
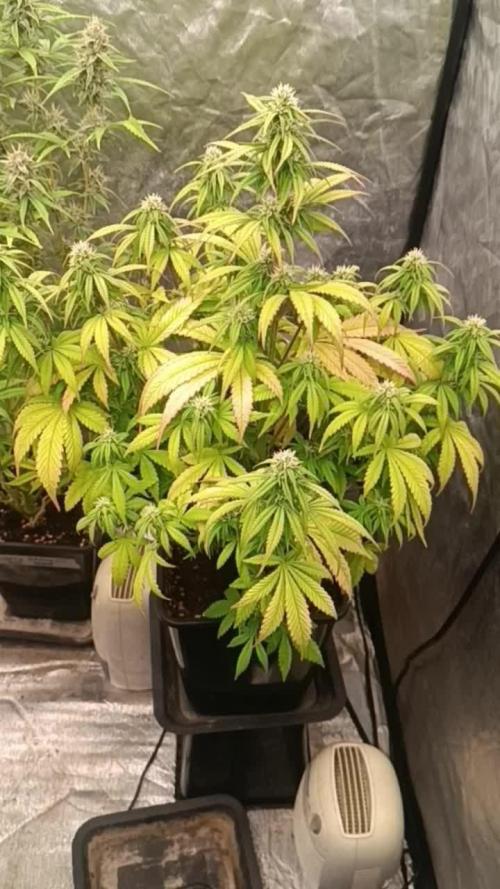
I am so glad I decided to do some low stress training!! After that one feeding at the end of last week the plant truly bounced back and showed no more signs of deficiency problems.. 😅 Because I started some early LST I began to see the much smaller nodes develop over this week and it started to give me hope lmao. There was not only a difference in the vibrancy of the green leaves but there was also a difference in the texture of the leaves as well! The ones that were damaged were thicker and more rough, while the new healthy leaves were much softer! For now I will leave some of the damaged leaves on because I don't want to strip her too early but periodically over the next couple of weeks I am going to start pruning and training her more (especially since she's a keeper).
I also went ahead and started giving my girl a foliar spray feeding of diluted garlic & onion peel water which I plan on continuing with while in veg.
