
Likes
Comments
Share


@Divs_darkroom
Follow
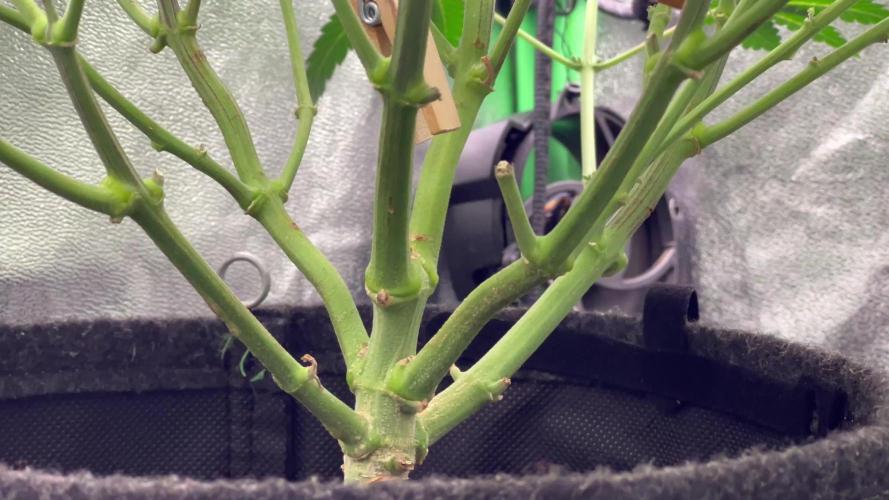
Sorry I havnt updated this diary in a couple weeks. I recently had a son and have been so busy. Anyways, this girl has really taken off. When I open my grow room it makes my whole house stink. Right now it's a very sweet skunky scent. She has filled out greatly and for a cbd strain I'm very excited about her resin production. Lately she has been getting a lot of water, slf100, em1, urb, fpj and a little bit of herculean harvest to supplement phosphorus. I havnt made any teas just in case, I didn't want to mess anything up late into flower. Make sure to follow me on Instagram to see more updates.


Likes
2
Share


@EyeMKing
Follow
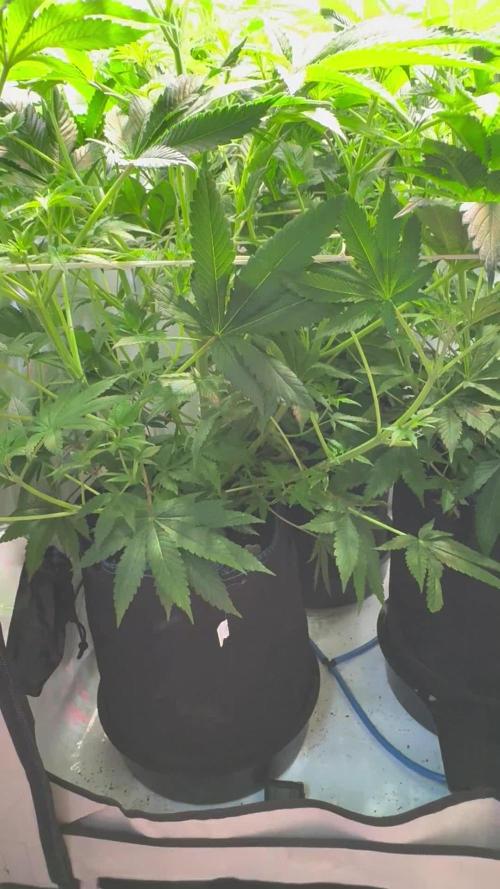
As week 2 comes to an end 4 of the 5 have shown great growth 1 is behind (#5) but it also has a mutation and has a few 4 leafers on it. #3 is shorter and has wider leaves.

Processing
Likes
21
Share


@Dunk_Junk
Follow
Almost doubled her height this week since transplant!
Lets see how she goes over the next few weeks.

Likes
9
Share


@Staffedition
Follow
Привет друзья.
Наше знакомства продолжается с новым сортом автоцветущих растений от Smail_Seeds сорт ORIGINAL AUTO CHEMZKITTLEZ F1 reg.
Сегодня растению 97 дня.
Шишки налились очень хорошо😀
Вы всё сами видите.
Скоро будут феминизированные
Сорт выводим сами.
Смотри мой профиль, у нас всегда есть что то интересное.
Не забудь поставить лайк❤️, если понравилась как прошла неделя
И читайте наш TELEGRAM: https://t.me/smail_seeds
#Smail_Seeds 😀
Likes
12
Share

@ohcibi
Follow
Approaching the finish line. Fertilizer is now at its final dose. Both plants stopped growing now and started to build thick buds. Ken in fact is way ahead in terms of buds but it might be because he Hase a little bit less in number. It’s possible that I trained Ryu too much for his pot size 😆😆. But let’s see. Both looking very good and a lot more powerful than in my first grow.
Water intake is still massive. The top soil is rock solid while draining water super fast which must mean the pots are filled with massive roots. The erected teeth came down a bit but they were never that severe in the first place so I’m still not worried about that. I skipped one day of watering to account for possible slight overfeeding but I mean, today’s watering then was with the increased dose of fert 😆😆. I know I’m pushing it a little bit but that’s deliberate. I have high demands both in mass and quality so my approach is riding the edge as good as possible from the beginning 😆

Likes
1
Share


@MembersOnlyBud214
Follow
Transplanted into finale 7 gallon gonna veg 3 more weeks
BTW my HPS is a 1000 watts and set and 75% right now

Likes
114
Share


@Drgreen13
Follow
Hello everyone, well, she seams like she wants to flower and it shouldn't be long now before she transitions. I've strapped her main branches down and defo'd a little, all in all, no problems as of yet and very easy to grow. Very fast also.
If you would like to order this strain or many more, then head on over to www.doctorschoice.farm and enter promo code drgreen13 to receive 15% off your order. (CODE VALID UNTIL 31.07.22)
I HAVE A COMPETITION RUNNING, ALL YOU HAVE TO DO TO ENTER IS FOLLOW ME AND LIKE THIS DIARY, ENDS 31.07.22
GOOD LUCK TO EVERYONE.
stay high, stay fly. #420everyday.

Likes
8
Share


@eldruida_lamota
Follow
Bueno familia ya finalizamos con el proyecto de las Blue Spider, son una cepa bestial, me sorprendieron para bien
La verdad que el secado muy bien 7 días en Malla y a los botes, 50% humedad y 23 grados es la temperatura ambiental que han tenido en el secado.
En resumen la cepa es muy fácil de cultivar,
Por lo demás de miedo os la recomiendo.
Gracias a Agrobeta y Mars hydro , sin ellos este proyecto no sería igual 🙏.
Agrobeta:
https://www.agrobeta.com/agrobetatiendaonline/36-abonos-canamo
Mars hydro:
Code discount: EL420
https://www.mars-hydro.com/
Buenos humos 💨

Likes
11
Share


@Sawyer_grow
Follow
Hello guys,
Hope you are doing well. you will find into the video a review of plant before the flowering stage
That's it ! it was the last week of veg stage, i'm switching now into flowering !
The box is full at 40% and this is what we want before the flowering stretch.
she is very healthy and easy to grow.
Hope you enjoy
Take care guys and see you next week !

Likes
2
Share

@Kokothegrower
Follow
Es ist wieder eine Woche vergangen und alle Pflanzen funktionieren sehr gut mit dem Dope Soil in Kombination mit Autopot. Einzig die Papayana will sich noch nicht so richtig strecken, kommt hoffentlich noch. Entspannter könnte es nicht gehen, Osmosewasser mit Calmag in den Behälter, fertig. In den nächsten Tagen werde ich entlauben und anschließend prophylaktisch Raubmilben und Nematoden rein.
Edit: Entlauben erledigt, Raubmilben prophylaktisch auch drin. Bilder zeigen vorher und nachher.

Likes
10
Share


@420_Vamp
Follow
Steady as she goes 🎶
Looking very hairy now day 17 of flower.
Don't know what to say really first grow. But looks good so far.
Pheno B and C get 4 litres of water each to fill em up for the week.
Pheno A gets 1 litre.
No bud smell as of yet.
Some sparkly crystal forming. Early days yet
420V


Likes
8
Share


@GreenWalker
Follow
This Week i start topping at early week and add some bloom nutrient. This week is last week of veg stage my ppm was 700-900 depend on how big they are. Next will be Veg stage hope u guys enjoy this see you next week. Happy grow everyone!!!

Likes
20
Share


@dataTwiiix
Follow
08/18: première semaine de veg. J'ai rééquilibrer le ratio substrat amendement. J'espère que a part Canna calmag (conseiller quand on utilise des systèmes led comme mars hydro et spider Farmer je ne pourrais dire pourquoi) et un peu de Biobizz fish mix en foliaire je ne devrais pas ajouter d'engrais avant la 3ème semaine de floraisons. Pour dire attaquer au pk 13-14/ canna boost accelerator qui ensemble font des miracles selon le site canna.fr.
Pour ce qui est de la technique de culture après avoir examiné de près comment ce développait un plant. Je vais et comme en plus ce coup ci j'ai pas oublié de planter dans un coin du pot appliqué un LST et défoliation seront au menu. Et cette fois je ne changerai pas d'avis mille fois 😜😜🌱🌞🎉
08/19: ça pousse!
08/20: encore! petite arrosage/canna start+biobizz root-juice #3
08/22: elle s'est fort étirée. Je vais ajouter du substrat pour rattraper ce là. +/- 140ml #5
08/24: +/-200ml/ engraisser #7


Likes
4
Share


@Coopmc
Follow
Just wish she had got more purpose but everyting elses is Perfeckt!!
Samples A bit she did not show purple but she tastes of it and tickles your nose like a purple plant!!

Likes
10
Share


@StickyFingah420
Follow
Extrema producción de tricomas de esta variedad! Gran parte de los frutos lo usaré para extraer rosin, su resina se ve ideal para este propósito.
Fragancia exquisita a ponche de fruta dulce, con notas ácidas y un fondo de especias.
Como mencioné anteriormente dejaré la parte de la reseña de efectos, sabores y sensaciones para cuando los cogollos estén secos y curados, por ahora solo puedo apreciar lo que mi vista y olfato me permiten captar.
Totalmente conforme por la calidad de estas flores y agradecido de los amigos de Sweet Seeds por la confianza.
Será hasta la cata entonces, buenos humos!


Likes
29
Share


@CannbellFarms
Follow
Was such a pleasant harvest from start to finish, no issues at all. A tip for next time would be to have the SCRoG lower as I couldn’t really tuck any node sights this time round, smells absofuckinglutely amazing from 3RD week bloom onwards!