
Likes
Comments
Share


@BelgianBudtender
Follow
Heyo bud,
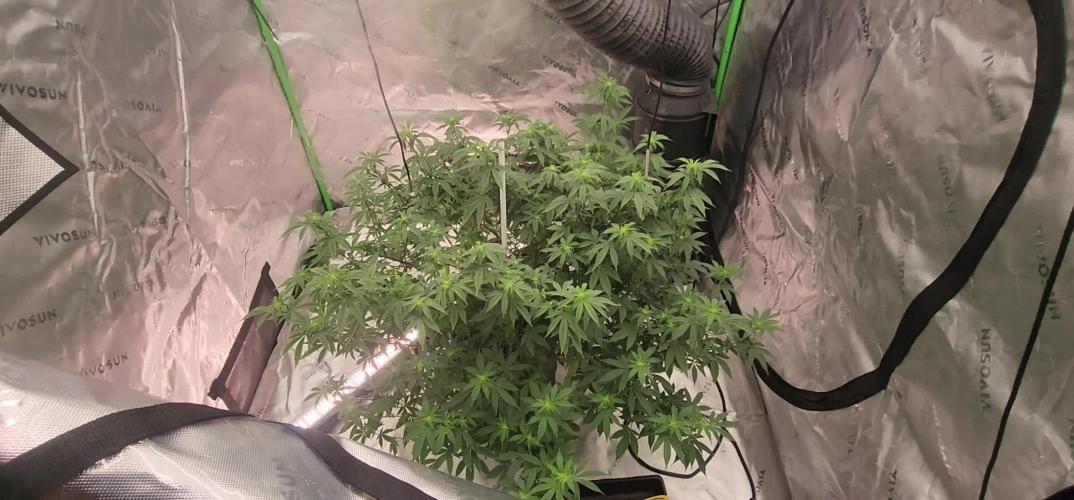
Did some serious training this week, all lower growth was removed, kind of like a lazy main-line. She's as good as recovered and bushier than before defoliating it all! You can see her bounce back in the time lapse, its pretty cool!
Still chasing the gunk around the roots, worried it might be rot, treated her with some h202 whilst I shop around for some bennies here in Europe, if you have any advice hit me up!
Rot or not, the root growth this week was great, despite the absurd amount of stress I put her under, Maybe this little girl isn't so weak and behind after all, the genetics seem hardy.
going to let my little plant recover as I keep adjusting ties, I want to find a solution to my root issue and have a bit more green growth before I flip to flower, I'll reconsider my flip date next week, I don't want to veg too long, I do need weed in my Jars.
Thanks for checking out my Diary, keep safe and keep growing!

Likes
5
Share


@Tony_Montana84
Follow
So seit 2 Tage gebe ich kein Dünger mehr dazu. Die Dame wird in ca. 14-16 Tage geerntet. ;)

Likes
12
Share


@cookingwithninja
Follow
day 42 images are in last week, I can not count XD. bridal is stacking a lot of weight and is constantly shifting/leaning every morning, good things. I would chop any day but I will wait it out. water, tiny bit of humic and folvic to reduce chloromine, chlorine- air stones
day 45 took a few nugs off on day 42, dried for 3 days. Tried bridal and blackberry. As a heavy recreational, thc is up there! bridal felt like having a blindfold over your eyes somewhat sativa uplift but heavy weight feelings. Very good. Lasted as good as 30%'s. Dr. Thunder was also very nice, nug was smaller so mixed with blackberry to have a small j. Also feels very good indica. Both trials were chopped on week 6 day 1. Very pleased with the results. I was worried bridal was more sativa; which charasteristica I am not looking for. So I believe this is a very good heavy hitter run with 4 plants. I can chop any day, but I am waiting for pink paradise to finish seeds.
day45 took top nugs from bridal party, blackberry oreo bigstuff and dr. thunder. No touching pink paradise!!
day 46 can chop anytime just waiting on pink paradise seeds to finish, bridal party leaning more
day 47 bridal leaning hard from weight.
day 48 stacking, day 48 video


Likes
4
Share


@Dankgrowz786
Follow
Growing OG AUTO in a small 6X4 tent in my spare room, I did a little defoliation on the plant a few weeks ago and im thinking I overdid it? what are you opinions? also, ill attach some pictures but the pistels on the side are taking ages to open and expand.. is this normal? It’s been couple weeks and they are looking unchanged?
Thanks All

Likes
39
Share


@Hashy
Follow
This is the 2nd MSNL strain I have tried and the genetics are great. She got the longest time in the tent as she is a standard photoperiod and the rest of the grow where fast flowering photoperiods.
I trimmed her after 16 days of drying and got 35g of decent buds and 9g of ok buds.
Power used for whole grow in 114 days.
Lights=201.7Kw (201.7×0.25)(=£50.42)
Rad=212.23kw (212.23×0.25)(=£53.05)
201.7÷114=1.769kw per day light average.
Average 100w for veg
Average 150w for flower.
Light average for grow 125w.
Stats for the grow.
FFNA2410=42g
FFNA2411=45g
FFNA2412=43g
Acapulco Gold=44g
Expected hash from trim 28g
Total=174g
174÷125=1.39g/W

Likes
17
Share


@CanabisLoverHobbyGrower
Follow
Just focusing on the zkittles now,.. she is focusing on fattening up, not gone any taller this week, I noticed a bit of yellowing around some edges of the leaves, I've added a bit of calmag to this week's feed, and last week I did a somewhat diluted version of biobizzes feed chart,.. any advice on how you guys think she's looking would be appreciated,.. roll on next week 👌 ** update ** 28th, I've started flushing now after abit of advice planning on a 2 week flush that takes her to 77 days which is what fast buds say on there site is top end for this zkittles auto,... ** update update ** after speaking with fastbuds they think there is 3-4 weeks left here so I've added bloom, topmax, heaven and acti Vera back to the feed 🤦♂️

Likes
129
Share


@StarLorr
Follow
Welcome to my Cherry Cola🍒diary.
In this Diary:
Seeds: [420 Fast Buds]from my growmie Tropicannibis_Todd 👊🏻😎
Media: Pro~Mix HP Open Top Grow Bag, Connect.
Nutrients: Green Planet Nutrients,
2 Part Dual Fuel starter kit.
RealGrowers: Recharge.
Diablo nutrients: Ripping.
Advanced Nutrients: Flawless Finish.
___________________________
Feeding :
Mon 01Apr: 3L Monster K pH'd 6.5
Fri 05Apr: 2L Flawless Finish pH'd 6.5
___________________________
Today Monday 08-Apr-24 is 83 Days from seed or 79 Days from Sprout🌱and
the trichomes are just about right.
Tomorrow morning the chopping will happen.😁
___________________________
Thanks for stopping by, likes and comments are appreciated.👊🏻😎
Keep on growin!
Keep on tokin!!!
😙💨💨💨💨💨
Likes
22
Share


@Strega
Follow
This is the last week 😍💚💚 I really want to say thxs to Sweet seeds for the wonderfull seeds. I love my mandarine and now, when this grow is at the end, I just have to wait

Likes
20
Share

@Brotanical
Follow
Nach ein paar Schwierigkeiten am Haus die nun beseitigt sind geht es nun nahtlos weiter 👍
Diesmal in Blütewoche 3 zum Start gleich mit dem Infrarotmatten Upgrade von Calorique 100x50cm (110w) in Verbindung mit Thermostat das nach Feintuning nun gut eingestellt ist was man auch direkt am Durst der Damen merkt 😁🤚
Es geht mit Blühkomplex von hesi weiter und teilweise auch mit Alfa Boost bei Bedarf natürlich pH angepasst
Und der kleinen Reihe an Plagron zusätzen wie zum Beispiel CalMag
Es wird bald radikal entlaubt(für meine Verhältnisse 😄)und auch kleine Triebe werden weichen müssen da ich es versuchen werde flach zu halten und das Scrognetz als Stütze nutzen werde/möchte 🌝 die Mutti wurde aussortiert aber ihr geht's gut in ihrem eigenen "space"
Die infrarotmatte steht mit einem von mir angefertigtem Lattenrost🤫😄 in dem 120er Zelt naturbelassen Fichte unkompliziert aber für die Wärmeverteilung und erhalt super 👍 ( der Geruch erinnert etwas an die alte NDL Zeit/Hitze im guten Sinne haha. Die LEDs laufen mit etwa 500ppfd gleichmäßig auf beiden Seiten und werden die nächsten Wochen langsam nach oben geschraubt 💫.
Es geht entspannt weiter bis dahin 🌱👍?
Liebe Grüße 🌿

Likes
11
Share


@BangoSkank
Follow
Weiter alles im Plan. Wächst und gedeiht. Sie hat sich nun etwas nach oben gestreckt. Topping hat sie gut vertragen. Demnächst werde ich noch einige Blätter entfernen.

Likes
12
Share


@PedroAndHisPlants
Follow
Day 79: Second Grow
We've decided against using additional nutrients and have completely stopped fertilizing. The light cycle has been reduced to 11 hours, and we're already starting to give them cooler water. Starting Monday, I will be watering with ice water to stress the plants further, aiming for higher yield, more terpenes, and increased frost. The adjustment to the light cycle should also help the plants ripen evenly.
The lights are hanging about 20 cm above the buds, which are getting thicker every day, soaking up the light intensely. In about a week, most of the plants should be ready for harvest. We plan to stop watering them for about 100 hours before harvest. During this period, I'll place ice cubes on the soil to shock the roots one last time.
48 hours before harvest, I will turn off the lights, giving the plants two days of darkness. After this period, the plants will be cut and hung to dry.
Likes
25
Share


@KivzBudz
Follow
Am Samstag hat die 5te Blütewoche begonnen. Hab bisher immer noch überhaupt nichts zu beklagen. Der Geruch wird immer intensiver im Zelt und langsam kommt auch die Fülle in die Budz😬 macht echt Bock!
Bilder werden geupdatet
Likes
143
Share


@Tropicannibis_Todd
Follow
👉Alrighty Then👈
We are back this week and they are killing it 👏 😎 🙏 zero issues 😀
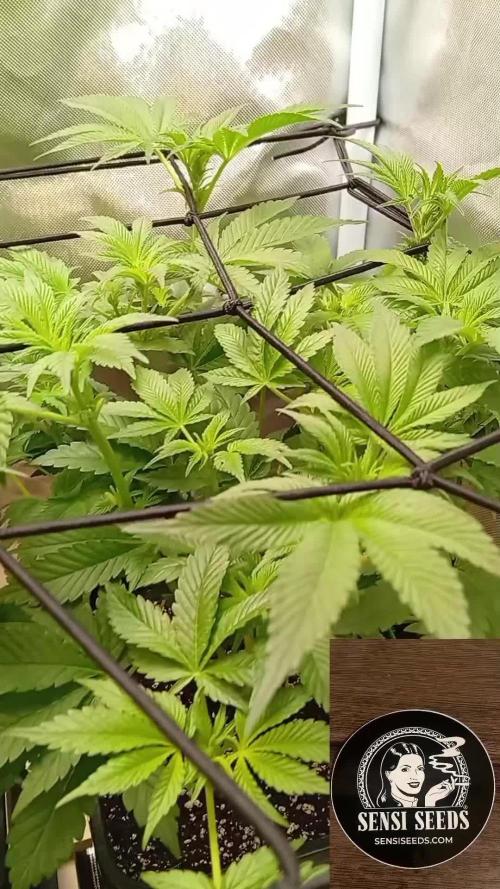
👉So we are now starting our third week of Flowering and the stretch is on , and the buds are pumping 🤪
👉I did a slight defolation and I've continue to emend my nutrients plan for full Flower ..... 👈
😳So I will be showcasing just 3 this round even thoe I am growing 7 plants 😳
👉Black Domina From Weedseedsexpress 👍
👉Permanent Marker From Weedseedsexpress 👍
👉Sleepy Joe OG From Weedseedsexpress 👍
The other 2 are repeats cause they are pure fire 👈 You can view these 2 in the 👉Summer Classic Diary 💪 Had issues with the Banana Biscotti germination, so it's way behind and also the extra seed I popped
👉Purple Oreoz From Seedsman 👍
👉Persian Pie From Greenhouseseeds 👍
👉Banana Biscotti From Seedsman 👍
👉Gorilla Cookies From FastBuds
Soil by Promix
Nutrients by Cronks
Lights by MarsHydro & Vivosun
Well this should be fun 🙃
Thanks to all my growmies out there for stopping by its much appreciated 👈
👉Happy Growing👈


Likes
9
Share


@MrPipi
Follow
Mr Pipi loves seeing Frost. Starts to get shiny in the building. Smell was always like a fruity Whick Vaporub, but now the Menthol/Minty is not the most present and it gets more floral (kind of).
Likes
6
Share


@rvabudman
Follow
Started my first round of topping this week. The Gold Leaf is looking healthy.
