
Likes
Comments
Share


Likes
Comments
Share

@smoking_hills9
Follow
Half of CC plants are very small, compare to other. Let's wait and c. These 2 out of the list. Food size, still stretching

Likes
10
Share


@barlobruz
Follow
8/22/2021
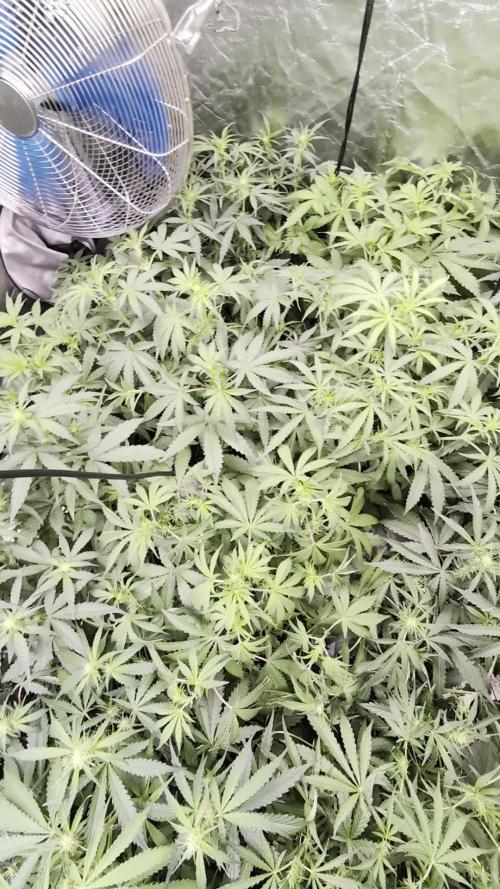
- Did some mid-flower defoliation to increase airflow and to prevent mold and mildew.
- Split the top right main from trying to train her down and spread out the canopy, supporting with tape and twist ties.
8/23/2021
- Top right main is still vigorous after split.


Likes
100
Share


@AsNoriu
Follow
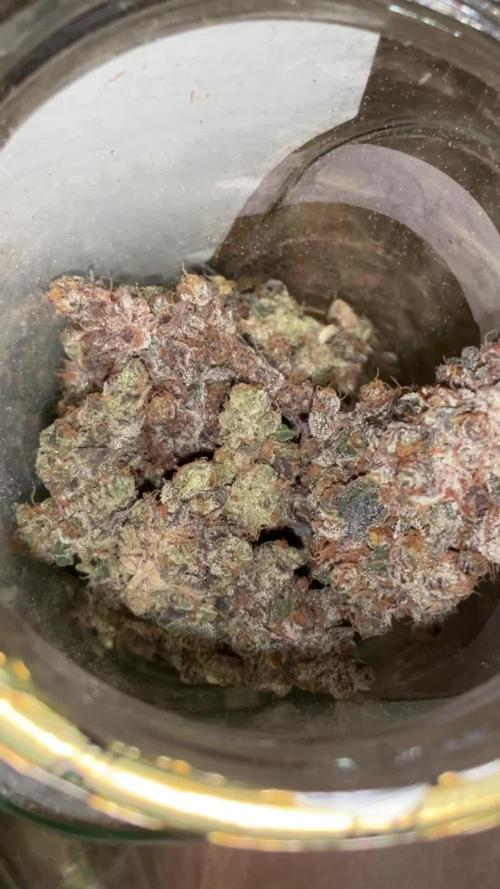
Day 92. Few more days for last Alaskan Diesel , amazing strain ! While chopping first two I ripped small bud and yesterday I tried it - piney, eucalyptus sweet diesel flavour ! Loved it !
Green Cracks getting frosty and calaxies start to form and fattening up ! So I think 2-3 weeks from now.
Northern Lights are way behind, but smallest plant becomes a frosty tower !
Day 93. Last Alaskan Diesel is down. All info on strain harvest week .
Rest keep going, think two weeks is max for Green Cracks.
Happy Growing !!!

Likes
5
Share


@Mattyice
Follow
Buds are definitely getting bigger the smell is so stab you in the nose potent it almost makes me sick up close. I really can't believe this is an autoflower that I barley trained. Definitely will be producing anywhere from 80-100g+ by the time its done I think is a good estimate. What I failed to mention in the first update is every branch has outgrown the main cola. It is buried but still growing strong apparently. It's impressive actually it grew like that without training. All those branches will be thicker than the main cola by far they already are. It's got me so excited this plant is frigging huge although short it is wide. It's so big the base of the main stem is probably the size of two fingers and it has roots growing out of all sides and a mess of roots underneath the cloth pot


Likes
30
Share


@RakonGrow
Follow
Note :
+ jegliches Zubehör wird in der GermniationsWoche aufgelistet .
Ich hab keine Ahnung was es wiegt , da ich keine Zugwage hatte. Warten wir also ab was es an trockengewicht wirklich wird. Aber da ist viel Drann , bei 116cm größe ist selbst der kleinste Bud noch groß :))
Es sind nach 5 Tagen Trocknung bei 22°C und 55%rH genau 204g

Likes
18
Share


@TheGreenLeopard
Follow
Thai chocolate the champion of this diary. Really amazing structure. Love the fan leaves - real classy. Has great hues through the bud. It’s has looked like a super model from seed all the way to here. A modern version of a classic. Give it a go


Likes
16
Share


@artems
Follow
Don't have many things to say, flowering going ok and plant started to smell a little. The color is amazing!

Likes
9
Share

@Aircoholic
Follow
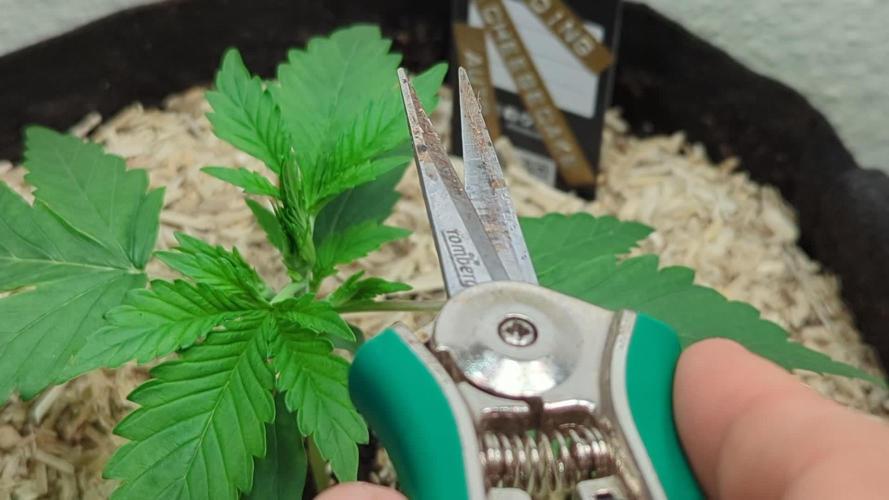
So far so good. She seems to have survived the short drought and is standing up straight again. She hasn't really grown in size, so I'm still a bit worried the tap root might've suffered some drought stress or even got damaged. But other than that, she looks good - healthy and vital.
I've added some mulch (finally!!) which, besides benefitting the microbes in the soil, should also slow down the evaporation process and help with moisture control.
Topping her on Day 15 is a bit of a gamble, maybe it was a little early - removing the sun-sail fan leafs is quite a risk as well, so I'll have to observe her even more cautiously than I do anyways. Hope she bounces back alright!
Likes
28
Share


@GodZilla_Owner
Follow
The hermaphroditic of the two S.A.D.s has stopped, in total it remained at 4x 🍌
Since 5 days no more were added and I could already observe via my timelapse recordings how the flowers continue to grow.
The Bruce Banner also shows no further deterioration in terms of potassium deficiency, the flowers continue to grow steadily.
Although the S.A.D.'s were fertilized identically, neither of them show any major deficiency.
Also interesting how S.A.D. #4 has overtaken her sister and her smell is not "grassy" at all. Something between floral with a sweet citrus/orange note.
What also surprised me was that the Bruce Banner is already very far along in the development of its trichomes, many are already milky!
Likes
5
Share


@Ninjabuds
Follow
I'm really happy with the gas tax x obama runtz plant is doing. It started out so small, I wasn't sure if it was gonna make it. But lately it's taken off. The leaves are a lot bigger and the colors are so vibrant. I can tell it's happy and healthy now.
Well, it's Christmas again. This year feels a little different, though. Maybe it's the snow blanketing everything, or the way the tree lights up the whole living room. Either way, it's cozy and warm, even when it's freezing outside. I'm really looking forward to seeing what Santa brings. I hope I get that new video game I've been wanting. But most of all, I can't wait to spend time with my family. We always have so much fun
This past week was a good one for the plants. They started the first week of their stretch, and they've already grown a decent amount. I can really see them filling out. It's cool to watch them grow so fast. I can't wait to see how big they get by the end
I always get a little worried at this stage, like they're not gonna get as big as I want them to. But then I remember how they always end up surprising me. By the end, they're always perfect.
Likes
6
Share


@Canna_GuyGro
Follow
Whoa we made it to week 3!! Today is the first day of week 3 growing three Froot by the foot strains , one gummi bear and one cheetah the hut(photo period) by Atlas seeds and I’m staring to LST 🤔 please leave feed back .
Also will be introducing liquid nutrients this week, soil has been amended with 4-4-4 and 2-8-4 Gia green (3 tbsp)

Likes
12
Share


@Crimm
Follow
This week was a bit bumpy, I found that I am dealing with a two main issues. First being that the plants are much too dense and close together. Makes it near impossible for me to remove the dead leaves that are falling on the Coco which eventually attract fungus. So far I have cleared the top of the medium the best I can without being able to see it. Second issue is that my timer for the irrigation is not functioning properly. I left for a weekend and my plant sitter did not realize the plants weren't being fertigated. Came back to my whole grow smelling of hay. After manually getting the feeding back on track they have fully recovered. Issues aside it's starting to look like chop day is 1 or 2 weeks away. Just in time for Christmas

Likes
14
Share


@MG2009
Follow
02/02/2021
Looking nice lots of water this week.
Day # 4 started low stress training twisting two tops till cracking and bend over at 90° angle to make stronger side branching, and more tops switching to flower in 4 days!
Processing
Likes
5
Share


@Bossman
Follow
A few days late with the update but the pics and recording is from day 42 of flower


