


Likes
Comments
Share


@Belverde
Follow
Welcome guys
We are at the final conclusion with this famous strain, the STRAWBERRY COUGH 🍓🍓🗣️
After more than two months of treatment I was able to test it in the best conditions
But first I quickly pick up on what I did after the cut 👇
The whole plant is placed in a cupboard upside down, with the leaves still attached..
After about seven / ten days, when the leaves were pretty dry, the flowers crunchy, but before the branches break cleanly ... I cleaned all the buds thoroughly, I cut them off the branches and put them back inside of a brown bag..for about a day / two
Later I placed everything in a classic glass jar
For 24h I left it closed ⏳
Later I started opening it several times a day
More or less, after about three weeks, I usually close the jar permanently and wait a few more weeks to start using the flowers 🔥
Back to the strain 👇
The inflorescences are slightly airy in Sativa style, but very thick and with a good amount of trichomes
Aroma is delicate but present, as is the flavor..
It is a type of weed that can appeal to more or less everyone 👌
The high is also very pleasant, a soft sativa that keeps the mind quite clear and one feels motivated..
The test was done by smoking it (no tobacco), and the taste is good if everything is done correctly, but I find many more "strawberry" notes using vaporizers
In all cases it is a genetics that I can recommend to everyone 💯
For more info on the cycle, I refer you to the past weeks, where I tried to report everything that happened, in the best possible way.
Thanks to @supersiberia for the seeds 👍👍
And like as always thanks to @growdiaries for this virtual dream garden 🙏
Good crops to all 😎
FC ✌️
🇮🇹

Likes
5
Share


@pzwags420
Follow
I sowed cantaloupe bag seeds directly to flower box drip irrigation.I transplanted my white widow seedling to flower box. So the new line up this run is cantaloupe, blueberry, Girl Scout cookies and white widow. Cantaloupe seeds sprouted and i will keep the most vigorous grower.bb is throwing pistils.GSC is producing first set of true leaves. At the end of week 2 cantaloupe has first leaves so does white widow. My Gsc has first set of true leaves and my blueberry is putting out pistils and trichs.Things are going well


Likes
18
Share

@eldruida_lamota
Follow
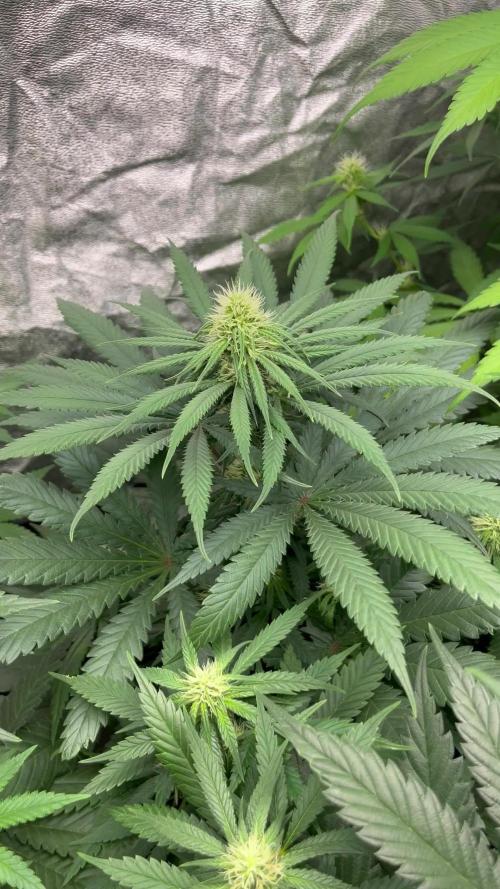
Actualizamos familia, con la tercera semana de floración de estas Sherbet Jedi Joint de HighBreed.
Gracias al LST arrancaron a crecer bien los satélites y va pareciéndose a un arbusto, tienen un color bien verde sin carencias por el momento y se ve que están sanas, las plantas están en macetas de 7 Litros definitivamente, con tierra top crop, con una altura similar a 55/65cms.
Como los anteriores cultivos tuve visitantes(trips) estoy rociando aceite de neem y jabón potásico 1 vez a la semana, añadí también tiras de color azul / amarillo para prevenir y controlar mejor el tema plagas.
El riego que aplicamos son 700ml de agua cada 48 horas y el ph se controla en 6.5, la temperatura la tenemos entre 22/25 grados y la humedad ronda el 55% gracias al humidificador.
El mismo día que escribo esto el foco está al 100% de potencia. Me gusta subirlo muy progresivamente, las manías.
- os dejo por aquí un CÓDIGO: Eldruida
Descuento para la tienda de MARS HYDRO.
https://www.mars-hydro.com
- los nutrientes directamente desde https://agrobeta.com/agrobetatiendaonline/36-abonos-canamo
Hasta aquí todo, Buenos humos 💨💨💨
Likes
3
Share


@Diy_autoflowers
Follow
Put too much medium in the pots. Gonna have to bottom feed till flower.

Likes
34
Share


@Basementganja
Follow
Looks to me that the flowering transition has begun! I did some light defoliation, and LST.
1 Gallon dosage of the above listed nutrients lasts for about 3 days, before drying out, and ready for the next dosage!

Processing
Likes
3
Share


Likes
Comments
Share


@colla69
Follow
At this point I am not sure I will keep this plant.
I am starting a new seed on the side

Likes
1
Share


@sunshinegroww
Follow
What cani say its doing her things and looking rather happy has a big 🍁 and smells stinky and potent short plant im expecting big yield but see how it goes

Likes
7
Share


@Pjm70
Follow
8/19. I notice some fading on the older leaves. Looking back at what I been feeding. Looks like I been getting ready for bud, but she hasn't. So tomorrow I'm giving her a solid nitrogen feed. She is growing like crazy. Only makes sense
8/20 Gave her a solid feeding of N. Foxfarm Grow Big. 30 mls in 2 gallons of water. She is getting to be voluptuous, so hopefully I made the right move.
8/22 gallon and a half of tea. This time cow poop and worm castings.
She is showing definite signs of flowers. Next watering I'm going to feed her nuits for flowering. Few days ago she was fed a good amount of Foxfarm Grow Big. She is a good size plant, so I'm sure I can get away with another feeding. Just going to make sure there is not a lot of nitrogen.
She is forming her colas. Think I'm just starting to see how big she really is.
8/24 and have not had to water for 2 days. Rain and not that hot, however the heat is back. So she is going to be thirsty.
Likes
22
Share


@HighlyEduc8ed
Follow
She's been drinking a lot of water recently about a gallon a day with very little run off and the buds are starting to fatten up as a result.
I'm gonna need to find a way to prop them up. So i don't get my heart broken again. Still producing frost. Each day im amazed every time I open the tent.
The trichomes are about 5% amber so we still have 2 or 3 weeks to go. The struggle is real
Although we've decided to use Gaia Green the next run Emerald Harvest has been great and definitely has a place in our garden.

Likes
12
Share


@OGbros
Follow
some apicals of Strawberry Lemonade became albinos maybe for too much light, they're however covered wit trichomes. I think thr Tropicana banana is a little bit late with the flowering compared to strawberry, I think about 2 weeks.
Let's keep pushing!!👽

Processing
Likes
5
Share


@Ensign420
Follow
Week 02 Introduction
This week has been a bit of a struggle. Had my first experience dealing with slime and brown algae. But I think adding enzymes and increasing the beneficial bacteria helped to fix the issue. Also experienced nutrient burn for the first time. My nutrient solution strength got as high as 671 PPMs. So backed it down to about 430 PPMs during the end-of-week reservoir change. Also cut Hydroguard (expired?), CaliMagic, and Superthrive from this grow. Now she's still stunted, but is starting to recover. Hopefully...
[START OF WEEK 02]
Day 01 - Monday - 08/10/20 - Total Days: 008
-----------------------------------
- [0830]: Still looks a bit yellow. But getting larger!
--- Solution strength was at 248 PPMs.
--- Just topped off with a bit of distilled water
--- PH went up to 6.1 so PH'd down to 5.8
--- Ran the top feed for a bit to wet the hydroton.
- [2130]: She's looking even more yellow now.
--- Even the new leaves are really yellow.
--- Decided to add more base nutes.
--- Added 4ml of Sensi A
--- Added 4ml of Sensi B
--- Now at about
--- Solution Strength went up to 304 PPM.
--- PH was at 6,
--- Also raised the water level a bit more.
--- I really hope it's a nutrient deficiency and not an over-watering issue.
--- Please live!
Day 02 - Tuesday - 08/11/20 - Total Days: 009
-----------------------------------
- [0830]: Looking less droopy. But still yellow.
--- Decided to do a reservoir change.
--- 4.5gal of distilled water
--- 8ml of Sensi Grow A
--- 8ml of Sensi Grow B
--- 8ml of Voodoo Juice
--- 4ml of B-52
--- 4ml of CaliMagic
--- 4ml of Hydroguard
--- 4 drops of Superthrive
--- PH'd down to 5.8
--- Solution strength: 302 PPM
--- Since I didn't want to risk over-watering the rockwool, I did not to do a top feed, may do one tonight after the sleep cycle (lights are still set to go off at 10am and back on at 4pm).
--- As I was doing a reservoir change, I noticed that the tubes and bucket were a bit slimy. Didn't really stink or anything. Is this normal? Maybe due to the Hydroguard and Voodoo Juice?
--- I hope she gets better soon!
- [2215]: Getting larger! But still yellow.
--- Also can see a root growing through the net pot! Tiny little thing but it's there! Will have to start dropping water once more appear.
--- After looking over a few DWC diaries using AN nutes, seems like my solution strength is still too low. Most around this stage average around 500 PPMs with about 4ml per gallon.
--- Top fed for a minute to wet the top of the hydroton.
--- Solution strength went down to 263 PPM.
--- Added 8ml more of Sensi A
--- Added 8ml more of Sensi B
--- Now base nutes are at 16ml for 4.5 gal of water.
--- PPMs went up to 411.
--- Still lower than 500 PPMs, but that's okay.
--- PH was at 6. Not sure if I should adjust PH using AN nutes. So going to not ajdust unless PH goes above 6.1.
Day 03 - Wednesday - 08/12/20 - Total Days: 010
-----------------------------------
- [0830]: Looks like more root growth!
--- She still looks yellow. But leaves are perky.
--- PH was at 6.2 so lowered down to 5.8.
--- Solution strength was at 394 PPMs
--- Since roots are still growing, I decide to lower the water level a bit. Now water level is a bit below the net pot.
- [2200]: Root is getting longer!
--- Slime is returning. Not sure why.
--- Solution strength: 357 PPMs
--- PH: 6.1
--- Decided to add an enzyme along with more beneficial bacteria to hopefully cure the slime.
--- Added 16ml of Sensizym
--- Added 5ml of Hydroguard
--- Added 8ml of Voodoo Juice
--- New solution strength: 430 PPMs
--- New PH: 6.1
--- Top fed for a minute.
--- This slimy residue is really freaking me out! I hope the added enzymes will help eliminate the slime.
--- Going to do a full reservoir sterilization/nutrient change over the weekend. Please survive until then girl!
Day 04 - Thursday - 08/13/20 - Total Days: 011
-----------------------------------
- [0930]: I think the enzymes worked! There is little to no slime now!
--- Although I think the root was also dissolved in the process. It's now just a little stub sticking just below the net pot. The enzyme is also suppose to dissolved dead roots too but guess that root was too weak? Not sure what happened there. But I think the slime is cured!
--- Solution strength went down to 395 PPMs. Decided to add more base nutrients.
--- Added 8ml of Sensi A
--- Added 8ml of Sensi B
--- Added 4ml of B-52
--- Solution strength went up to 598 PPMs.
--- PH was at 6.1
--- As long as the PH is between 5.5 and 6.3, I'm not going to use PH Up or Down. But still will monitor PH levels.
- [1715]: Checked up on her after her nap and shes looking alive but stunted. But no slime!
--- Decided to add some sugars to help maintain the enzymes and beneficial bacteria.
--- Solution strength was at 587 PPMs.
--- PH was at 6.2
--- Added 8ml of Bud Candy
--- Solution strength went up to 671 PPMs.
--- PH also went up to 6.3
--- Lowered water level a bit to hopefully promote more root growth.
--- Top fed for a minute.
--- She is getting bigger, but still looks yellow.
Day 05 - Friday - 08/14/20 - Total Days: 012
-----------------------------------
- [0915]: Leaves look a little burnt on the tips. Still no slime.
--- Going to back off on the PPMs to hopefully fix the nutrient toxicity.
--- Solution strength was at 632 PPMs
--- PH was at 6.3
--- Added/Removed water until PPMs were at 536.
--- PH was still at 6.3
--- Raised water up a bit, then top fed for a minute.
- [2200]: Looking better. Still yellow though.
--- Solution strength: 514 PPMs
--- PH: 6.5
--- Added PH down.
--- New solution strength: 518 PPMs
--- New PH: 5.2
--- PH was kind of high. So decided to PH down. Had to use quite a bit to bring it down. But eventually got it to drop down to 5.3. A little low, but so far, the PH has always gone up so wanted to start it really low.
--- Ran the top feed for a minute to re-saturate the top of the hydroton.
Day 06 - Saturday - 08/15/20 - Total Days: 013
-----------------------------------
- [0830]: She looks stunted. leaves are still yellow.
--- Solution strength: 514 PPMs
--- PH: 5.6
--- Top fed for a minute.
--- Not sure what to do at this point. Going to do another reservoir change soon. Hoping she lives until then.
- [2145]: Looking pretty much the same.
--- A bit of slime has returned. Since I've been diluting the nutrient solution, the enzyme ratio has dropped. So I guess this is expected.
--- Also noticed that slime build up was on the air-stones. Never really checked the stones so not sure how long that has been there. Looks brown too, which can't be good.
--- Going to do an H202 sterilization of the system (minus the net pot) tomorrow so did not add anything.
--- Lowered the water level to below the net pot.
--- Then top fed for a minute.
Day 07 - Sunday - 08/16/20 - Total Days: 014
-----------------------------------
- [0900]: STERILIZATION DAY!
--- Decided to skip today's night cycle for a deep clean.
--- I'm hoping that skipping a night cycle won't be too stressful.
--- Temporarily moved her to a new bucket.
--- Used about a half of gallon of straight distilled water to flush out the net pot.
--- Drained the system and wiped up all the brown sludge. Also removed the air stones and cleaned up all the goo.
--- Filled the system with 2 gallons of distilled water and at least 30ml of food grade hydrogen peroxide (35% strength).
--- Yea its a lot, but since I'm not going to sterilize the system overnight, I went with a really high doseage. Basically I kept adding until I started to see little bubbles start to form.
--- Then I ran the water pump.
- [0915]: Boiled the air stones in tap water for about 10 min. Then reconnected them to the airlines.
--- I let the air stones and hose soak in the sterilization solution for about 5 minutes so the peroxide can absorb into the stones. Then ran the air stone to help mix and agitate the solution.
--- Occasionally, I'd repeat the process of turning the air pump off for a few minutes to let the stones soak.
- [1000]: Covered the top two row of holes of the net pot with some aluminum tape. Hopefully this solves the light leaking in through the hydroton.
- [1200]: Used an old toothbrush and scrubbed the pump clean. Then drained the system.
--- Refilled with more distilled water and peroxide. Again added a lot.
--- Ran system again to sterilize even more.
- [1530]: Drained the system and refilled with distilled water to rinse.
--- Ran the system for a few minutes, then drained and rinsed again.
--- Did this a few more times over about an hour.
- [1630]: Added 4 gallons of fresh distilled water.
--- Added 15ml Sensi Grow A
--- Added 15ml Sensi Grow B
--- Added 12ml of B-52
--- Added 16ml of Voodoo Juice
--- Added 16ml Sensizym
--- Solution strength was at 430 PPMs
--- PH was at 5.6
--- I was going to add Hydroguard, but I think the bottle is expired. Since 2017 or 2018!? I think Hydroguard is good for up to 2 years from the date on the bottle or 6 months after opening. So not going to use from now on. I wonder if this could have contributed to the slime build up.
--- Also removed the CaliMagic and Superthrive too. Going to only use AN products to eliminate the chance of incompatible nutrients.
--- Placed her back in the bucket and top fed for a minute.
--- Here's hoping for the best. Going to let it ride until morning! Please feel better!
[END OF WEEK 02]

Likes
140
Share


@MrJones
Follow
mrjones - Slurricane #7 S1
🌱Slurricane #7 S1
@inhousegenetics_official
👨🌾🏽GD Grower: MrJones
🔹🔹🔹🔹🔹🔹GOALS🔹🔹🔹🔹🔹🔹
🌞Environment - 75/80℉ and 55% Humidity
💧 Feeding - Advanced Nutrients Organic
⚗️Soil - 50% Ocean Forest / 20% Tupur Royal Gold / 10% Earth Worm castings / 10% lobster Compost / 10% Additional Perlite
🍃Training / HST, Will be topping, Cloning, and creating larger plants, and placing to flower under a trellis
🕷️ IPM - Will be using Green Cleaner" 1 OZ per Gallon, and CannControl from Mammoth alternating between products each month for Integrated Pest Management.
💡Using 480 Watts of LED Lights.
🔹🔹🔹🔹🔹🔹🔹🔹🔹🔹🔹🔹🔹🔹🔹
📜 Rambling - Week 21 / These girls have about another 1.5 weeks of flower time, will be tapering back the PPM on the feed this week and prepare the ladies for the flush, I really hate that term, but basically the last 2 weeks will be just PH H20, the buds are all pretty much Golf Ball Size, hard as rocks, heavy and smelling just amazing!, Going to have to try and tie up a few stems for support when lights on!
🔹🔹🔹🔹🔹🔹🔹🔹🔹🔹🔹🔹🔹🔹🔹
▶️ Sunday - 06.27.21 / Fed 1/2 gallon today, will start reducing the watering and just keeping the soil moist.
▶️ Monday - 06.28.21 / No watering today
▶️ Tuesday - 06.29.21 / No Watering today.
▶️ Wednesday - 06.30.21 / Fed 1/2 gallon today, will start reducing the watering and just keeping the soil moist. Saturday will start the flush for a few weeks.
▶️ Thursday - 07.01.21 / Only feeding H20
▶️ Friday - 07.02.21 / Only feeding H20
▶️ Saturday - 07.03.21 / Only feeding H20
🔹🔹🔹🔹🔹🔹🔹🔹🔹🔹🔹🔹🔹🔹🔹

Likes
37
Share


@The_Bearded_Grower
Follow
Welcome to Day 57 2/12/21 it's 35 days into flower and she is looking good. I have seen lots of growth and she looks healthy.
I have just realized that I have been doing the rez wrong all along but I think I can fix the mistake without dumping the rez.
I should have been mixing a new rez every week but instead I was just adding 18 L . I put 2 18L bottles in the rez when it should only be 1 that way I have less waste and keep the nutes fresh
that's all for this week's update so as always Happy growing and keep your stick on the ice 🙏

Likes
Comments
Share

@SubliminalSociety
Follow
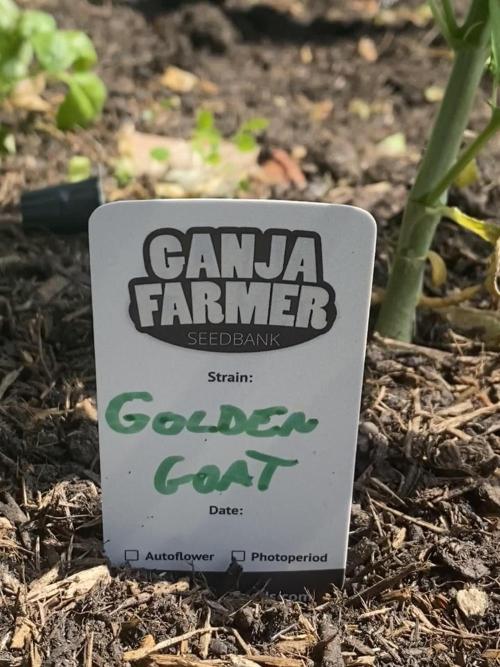
Okay, fimming didnt work at all. In fact, I stunted her a little. No growth since last week. Learning: learn safe topping.
We also had a lot less sun due to clouds but it was very light and windy.
She's starting to smell, I'm excited to see how she does.
Likes
74
Share


@PapaBlob
Follow
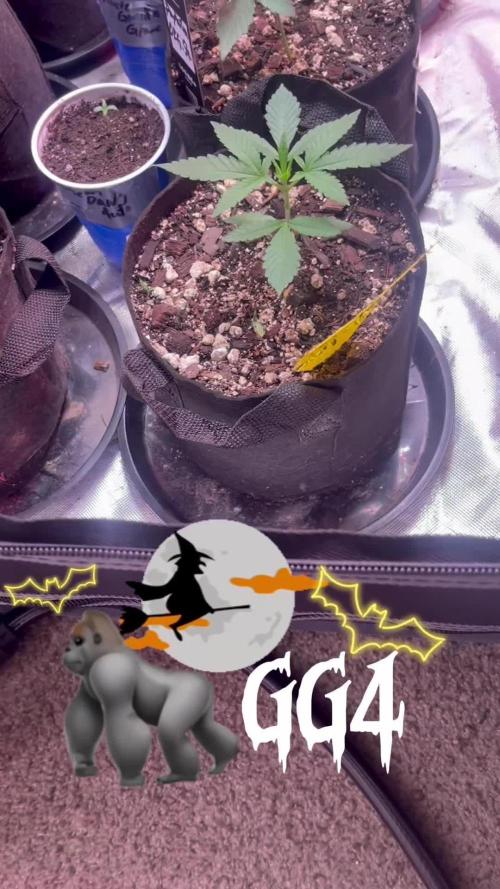
22/12 Youpi! demain c'est la récolte😍👍. (Elle est belle, elle est mignonne,🎵 c'est une bien jolie personne..🎵.) Je suis pas mécontent du résultat. 🖖🙏


Likes
62
Share


@nonick123
Follow
Día 57 (16/12) CBD Auto 20:1 #1 ha empezado a bajar el consumo de agua... pero sigue creciendo! ¿Tendrá fin el stretch de esta planta?
CBD Auto 20:1 #2 empieza a perder hojas por senescencia. Está a punto de cosecha!?!?!?!
LSD-25 Auto está increiblemente dura y brillante. Un color morado oscuro casi negro
OG Kush Auto ha bajado un poco el consumo de agua, pero empieza a formar unos cogollos monstruosos, completamente cubiertos de resina+
Día 58 (17/12) CBD Auto 20:1 #1 empieza a tocar la lampara! Vuelvo a subir la lampara....
Además presenta una ligera coloración morada en las puntas de las hojas... ¿Coloración natural o deficiencia de P?
CBD Auto 20:1 #2 tiene un montón de hojas con senescencia acelerada de un dia para otro! Ha llegado el día de la cosecha! 😍💥
LSD-25 Auto sigue acercandose al final... todos los cogollos son duros como pelotas de golf 💥
OG Kush Auto estaba practicamente seca! Vuelvo a darle 1250 ml de H2O RO. Va a hacer unos cogollos brutales
Día 59 (18/12) CBD Auto 20:1 #1 - empieza a mostrar coloración morada en las puntas de las hojas ¿Genetica o deficiencia? Aprovecho el riego con BIO PK 5-8 10 ml/L y darle un booster!
LSD-25 Auto - se acerca la cosecha! 😍💥 Cogollos duros como piedras en todas partes y bajando el consumo de agua...
OG Kush Auto - muestra más avanzada a deficiencia de hace unos dias, de modo riego con BIO PK 5-8 10 ml/L. A ver como le sienta!
Día 60 (19/12) CBD Auto 20:1 #1 - sigue mostrando más deficiencia de P con alguna mancha en las hojas superiores. Menos mal que ayer la regué con el BIO PK 5-8!
LSD-25 Auto - Le miro los tricomas y aún no está lista. 50% trasparentes + 50% nublados. Pero solo faltan días!
OG Kush Auto - Está empezando a apilar cogollos de forma brutal, y el olor es una maravilla! Además se muestra sedienta! Eso es buena señal
Día 61 (20/12) Busy time
Día 62 (21/12) LSD-25 Auto - muy cerca de la cosecha. Apenas consume agua....
Día 63 (22/12) LSD-25 Auto - harvest day! Tricomas mayoría nublado y alguno ambar. Perfecta!
💦Nutrients by Bio Tabs - www.biotabs.nl/en/
🌱Substrate PRO-MIX HP BACILLUS + MYCORRHIZAE - www.pthorticulture.com/en-us/products/pro-mix-hp-biofungicide-plus-mycorrhizae
"GDBT420" 15% DISCOUNT code for the BIOTABS Webshop https://biotabs.nl/en/shop/
Likes
18
Share


@BABS_Babies
Follow
Things are really starting to smell strong and getting fun. Seeing some frosty Trichomes. Excited!


Likes
2
Share


@obvireal
Follow
Humidity was 25-35% so the buds were smaller than they could have been but that’s winter for ya. Other than that the plants is amazing. Grew very fast in veg and the buds smell fruity/ oranges. Great sativa high that feels relaxing and stoney. Pretty powerful.

