
Likes
Comments
Share


@handsammich
Follow
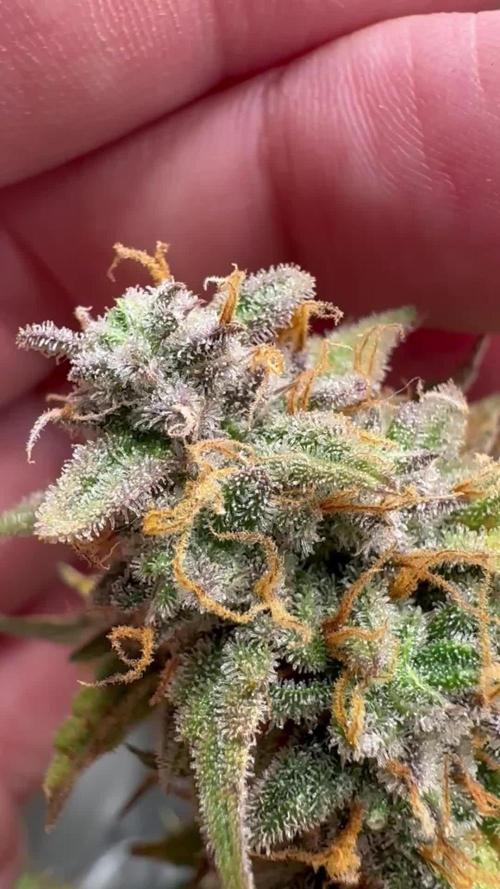
Definitely would’ve been better had I not moved but nonetheless it was a great run overall, super frosty and sticky with not very dense buds which made for a difficult trim but I didn’t mind.

Likes
19
Share


@MiyaguiOkPolilla
Follow
Ha ido bien. Hace 5 días que esta afuera y recibe la luz y el clima de invierno,11° a 23° Celsius y una humedad relativa del 35 al 40 %. 11 horas de luz de las cuales 5 son directas y el resto indirectas. Lo que ha hecho que los tricomas no se degraden tanto tal como los terpenos. Huele DEMASIADO en comparación cuando estaba dentro del armario de cultivo.
En breves actualización con el corte final y su peso. Me gusta mucho esta genética y se ha convertido en una de mis favoritas.

Likes
6
Share

@Skynets_Growing
Follow
The bud‘s smell like lemon and they are small but this was my fail i think. Elsa was doing a Great Job and I will take every product again in Grows in the Future. Thx

Likes
22
Share


@Maryjane23
Follow
Girate in fioritura 12 ore di luce tolto l’umidificatore dopo qualche giorno il box si vedeva già pieno!
Una chiede particolarmente acqua ma molto belle!

Likes
13
Share


@SmokeableHobby
Follow
6/28 - 7/4
No major changes this week. Been consistently watering, usually about a half gallon to a gallon every couple days. No more feedings.
My girl is really fading hard at this point. I would have expected that she would have been putting off a lot more smell at this point. Given that there were a number of hot days where temps inside the tent were flirting with 90 degrees late in flower, I am resigned to the fact that it caused some terps to evaporate. Hoping I'll be able to salvage what's there during dry and cure.

Likes
66
Share


@Earthling37
Follow
58 Days have passed in flower.
Cheese left, Gorilla Girl right.
The "Just water no pH" experiment has failed me around week 5 of flower.
I have not done anything to keep the soil biology alive so thats probably the issue.
Its all good though, it was fun while it lasted and definitely worth a try.
I have let the soil dry as much as possible and then i watered in a tablespoon molasses per gallon water.
pH'd to 6.6.
I just need atleast 3-7 more days of flower and hopefuly the buds will mature a little more.
I took a snip of the bottom leafs to check for trichomes maturity, those are the weakest of trichomes on the plants.
---1st time growing with FLO - Florian Living Organics.---
They claim that there is no need to pH when watering and that their living fertilizer is the only thing that i will need throughout the whole grow so i only need to mix with soil and just water with plain water.
If this stuff works then it can simplify my future grows ALOT!
Happy growing. 😎

Likes
34
Share


@The_Bearded_Grower
Follow
Day 17 sorry for the late update today is Wednesday and as you can see she has come along quite nicely since the previous week leaves are fat which is a good sign and there's no sign of deficiency or any pests


Likes
1
Share

@Manball
Follow
This adoptee has been growing nicely, although she suffered from stress because she wasn’t taken care off very well (she & other had a to find new
Homes).
But after having it for 4 weeks, now entering the 5th week (of flowering, I Guess)
We are getting closer and closer to harvest.
Today’s pictures are from Sunday, we are maturing well :3 there will be only 3 more feeds with nutrients, then flush, an wait for the ideal time to harvest.
Likes
14
Share


@BlueDream123
Follow
We are actually around week 20........ Canuck Seeds seems to have sensored the review i left about the seeds not autoflowerings, as did TrueNorthSeed


Likes
46
Share

@The_Bearded_Grower
Follow
Welcome to week 3 📅 Day 15 6/21/2021 She is now feeding from the reservoir and things are going great. The micro top has almost fully recovered and the undergrowth is growing nicely.
I would like to say a few words about Mars Hydro. the TS 1000 is a great light and I love the fact that the power supply is capable of being separated from the light and located outside of the tent to keep the heat down. I also like the fact that you can control the light intensity and daisy chain with another light witch is what I plan on doing.
Update Day 18 6/24/2021 she is growing fast and drinking lots as I have had to top up the res. I have also put the TS 1000 at 100% and the plants love it


Likes
119
Share


@Natrona
Follow
****DIVINE SEEDS *****
*****OPIUM*****
Sponsored grow
***DIVINE SEEDS *****
Week 11 6/16-23 Opium Loves the outside. She is tall and lanky, towering over the other outside girls: Fractal, Lemon Cake and Drizzle. All are showing yellowing leaves so everyone is now getting nutrients with feedings.
I saw a Japanese beetle on my Lemon Cake and some small holes in the leaves so I added 1/2 tsp neem to the feed solution 6/12. Also started using fish & kelp. I'm still watering 1 gal per plant when I feed 2x/week. With the heat and humidity, I water daily but do not feed daily.
Nutrients:
TPS1 15ml/gal @4 gal =60ml
Signal
1.5 ml
Cal mag 10ml @4 gal
Recharge ½ tsp/gal =10ml
Kelp & fish GS plant foods 1/4c /gal @ 4 gal =1c
Neem ½ tsp (for Japanses beetles)
Ph5.7
PPM 1414
Solution Temp 85
Outside temp 92f
6/19 Opium had a Spa day. Hair cut. All large umbrella fans were removed. Since she is in flower, she didnt need excess vegetation. This defoliation reveals true sativa form. There are 6-8inch stretches between nodes. I added a 6 ft support pole since we've had thunderstorms with high winds. I didn't want her majestic crown to snap off. I water daily and feed 2x per week now.
*****OPIUM*****
Likes
4
Share

@Bear_Grows_Green
Follow
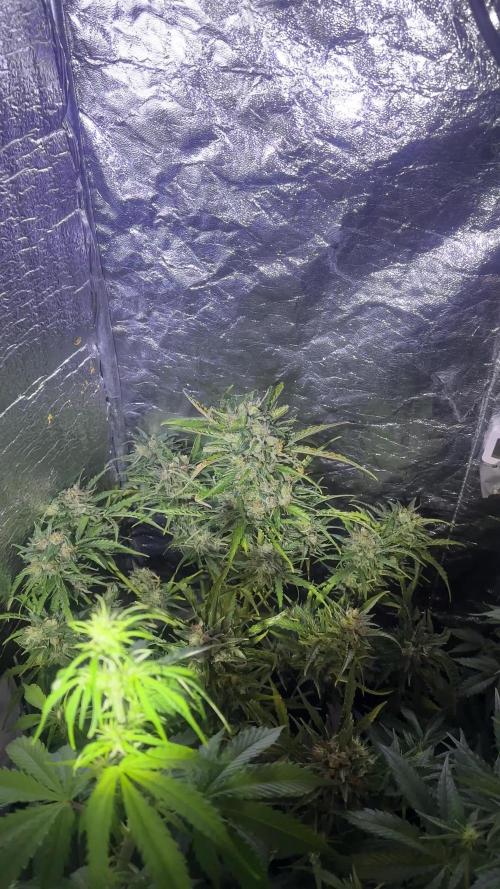
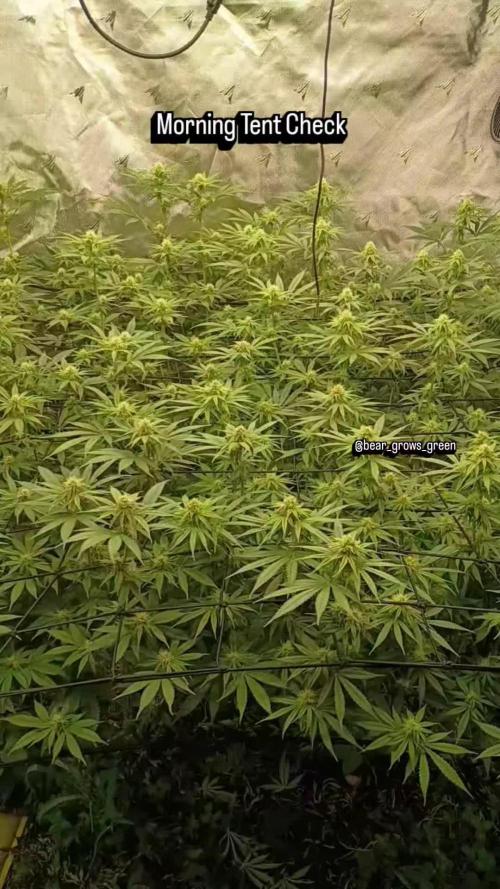
01/22 day 15 start of week 3. Everything going great. Tomorrow is a feed day. This week is a team week also.
01/23 supplemental feed day gave 10.5 gallons total
01/24 heavy defoliation should be done til harvest
01/27 got 7 gallons water 4 gallons compost tea tea instructions in videos
Likes
1
Share


@FrostyLeafs
Follow
"The 3rd day in flowering. I give 2.2 liters of water every 2 days. I'm still experimenting with how long the timer needs to run to give enough water.
😎✌️
BT6
The stretch is strong and i have no space left 👀
5weeks Vegi was to long

Likes
9
Share


@Siriuz
Follow
Alright guys a lot of things happened to our lady,
We accidentally broke the main trunk causing some main lining but with al ittle bit of duct tape and some good caring we have her back and with other colas in return!
Also we have been feeding her 2 to 3 times a week with nutes and molasses
Plus the fact that she started flowering even faster after adding molasses to soil!
We also are doing defoliation often since it gets really bushy and we def want her to redirect its energy to the main colas!
Hopefully we achieve what we are looking for!
Any suggestion or any tips we should to to make her yield even more?
We have her under SoG next to sweet gelato and grapefruit!
Also we are reducing the ppm on the veggie nutes and gradually have been increasing the ppm in floranova bloom stuff!
Likes
142
Share


@MadeInGermany
Follow
Hi everyone 🤗.
Everything is going great 👍.
There are no defects or anything unusual :-).
Today the Blue Cheese Pheno 1 became the first time rinsed, and now only gets 0.4 Ec water for the next 10 days ca :-).
Everyone else needs a while.
otherwise there is not much to report this week.
I wish you all a nice week, stay healthy 🙏🏻 and let it grow 🌱


Likes
24
Share


@el_cultivito
Follow
Set up Scrog in the start of the week.
Foliar fed with CalMag + Iron 3 times this week.
Defoliated lower shoots and fan leaves mid week.
Raised ph in reservoir to 6.1 because the runoff was coming out at 5.2 ph. Now the runoff is at a steady 5.6 ph.

Likes
2
Share


@Chi_K24
Follow
Hey folks. Into week 4.
Just some regular maint. Topped some branches that were ready. Some selective defoiliation and a mix of hst and lst.
Water as the plants need it running pH down to 6.1 this week.
Plants seen a bit of rain so I was surprised how thirst the bigger plants are getting.
See ya on the next update