







Likes
9
Share


@CrazyRussian
Follow
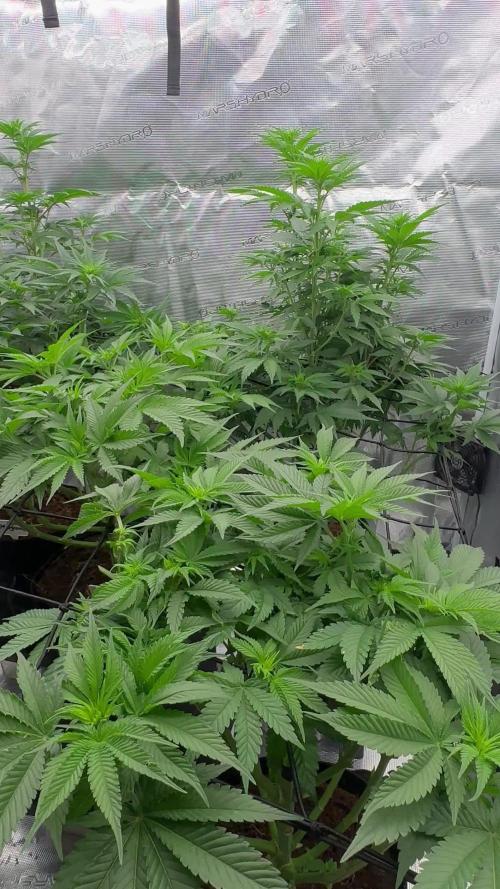
This is just a normal week, they grow as fast as mushrooms, I gave them blooming nutes for the first time, they will start producing buds from now. :)


Likes
6
Share

@Weed_Wizard
Follow
Welcome to week 8 🌱✨
The Girl Scout Cookies ladies are doing good so far. I did some more defoliation and lollipopping. I guess the stretch will be done soon. Unfortunately Salem and Morgana are still standing tall in the back. I still have no idea how to get those main stems out of the hotspot.
Edit: I installed an automatic watering system today. Indicidual treatment for every lady. Let’s see how they’ll like it. 🧙♂️
Likes
24
Share


@nonick123
Follow
Día 37 (08/07) Ajustes de LST en todas las plantas! 🚀
Día 38 (09/07) Ajustes de LST en todas las plantas. Las ramas inferiores están creciendo como un cohete! 🚀😍
Riego con 250 ml H2O pH 6,5
Día 39 (10/07) Las plantas se muestran sedientas! Creo que el cepellón está lleno de raíces y piden el trasplante!
El crecimiento no se ha visto afectado de momento
Riego con 500 ml H20 pH 6,5
Día 40 (11/07) Paso a regar con 500 ml / día, ya que hace mucho calor (30 ºC) y efectivamente las plantas ya han copado la maceta de raíces
OnionOG y KS1: Las ramas de nodo inferior se han quedado enanas tras el entrenamiento, de modo que las elimino y aplico canela en polvo en los cortes
Riego con 500 ml H20 pH 6,5
Día 41 (12/07) Riego con 500 ml H20 pH 6,5
Clones! Mi experimento vuelve a demostrar que NO necesitas complejos productos de clonación ni sistemas para obtener clones!
Hace 15 días puse 2 clones con el tallo sumergido en miel durante 5 minutos en una maceta de 400 ml con PRO-MIX HP BACILLUS + MYCORRHIZAE
He mantenido la humedad alta con una cúpula de humedad casera hecha con una botella de agua PET de 5 litros cortada por la mitad y pulverizando a diario.
Han estado los 15 días en mi terraza con luz indirecta, y temperaturas que rondan los 30 - 32ºC durante las horas centrales del día
Hoy los he trasplantado a una maceta de 1 litro porque ya habían formado raíces y empezaban a formar nuevas hojas!
🐥🐥🚀🐥🐥
Día 42 (13/07) Riego con 500 ml H20 pH 6,5
Día 43 (14/07) Trasplante a maceta definitiva de 21 litros de ROOTPLUS Pot de GSKOREA GLOBAL!
Estas macetas son una maravilla!
Proceso de trasplante:
Se prepara con 17,85 Litros (85%) de sustrato PRO-MIX HP BACILLUS+MYCORRHIZAE + 1,05 Litros de Humus de Lombriz (5%) + 2,01 Litros de Insect Frass (10%) + 210 gramos de Earth Vibes Super Soil (10 g/L substrato)
Se llena la maceta de sustrato con las manos (limpias) y rompiendo los trozos más gruesos, para que el sustrato esté aireado y esponjoso, sin presionar
Se coloca una maceta vacía de 6,5L para que quede la forma perfecta de la maceta donde están actualmente
Se espolvorea la parte proporcional de la probeta de microorganismos sobre el agujero de trasplante
Se saca la planta de su maceta actual (bonitas raíces 😍) y se coloca en la maceta final
Se riega muy lentamente hasta percolación profunda con H2O EC 0,5 pH 6,5
Una vez asentada, complemento con un riego de 500 ml con 25 ml/L de Humus de Lombriz Liquido
Se coloca mulch (acolchado) de paja para evitar traspiración excesiva y cuidar a los microorganismos del suelo
A ver como reacciona al trasplante!
Aplicación foliar Kelp hidrolizado de Lurpe Solutions a 0.25 ml/l
Realizo ajustes de LST aprovechando el trasplante a la nueva maceta. De momento tienen una canopia muy bien formada!
💦Nutrients by Lurpe Solutions - www.lurpenaturalsolutions.com
🌱Substrate PRO-MIX HP BACILLUS + MYCORRHIZAE - www.pthorticulture.com/en/products/pro-mix-hp-biostimulant-plus-mycorrhizae

Likes
22
Share


@Limez
Follow
Hey guys, did some defoliation yesterday because it was Flower day 21. I got rid off the lower branches and flowers with little to no chance of receiving enough light. I snapped off the leaves which were looking a bit old. I’m pretty happy with the result, since it is my first grow I didn’t know how or how well it will go. After defoliating her I gave 5L with around 20ml of Hesi root complex to help her get fit after the operation. I feed her once a week with bloom nutrients 50ml / 10L. I also attached new wires to the twigs to continue with the LST and to improve light penetration. So far no problems and I’m pretty happy. Also I haven’t smoked weed for 3 Weeks now and I am excited to wait till harvest with my break. If I trust sensi seeds she needs around 50-60 days to complete flower, so let’s say we have 1/3.
My SanLight evo 4-120 is running on 80% power which is 212W and I have 30-35cm distance to the canopy, depends on which buds you measure.
Thanks for reading.
Have a nice day

Processing
Likes
8
Share


@eldruida_lamota
Follow
Que hay familia os traemos la 3 semana de nuestras green ak xL, y es que están bastante sanas, tuve que atar las puntas a las esquinas por que la altura se nos fue de las manos.
Tienen muchos brazos laterales, que espero que en unas semanas sean largas colas de flores.
Ph controlado y humedad dentro de los parámetros aconsejables, regamos cada 2 días, y todos los riegos llevan nutrientes.
Esta variedad me tiene personalmente desconcertado, es bastante sensible a los cambios así que procuramos tenerla en una rutina alimentaria y lumínica sin nada de cambios, veremos cómo apremia en unos meses.

Likes
38
Share


@Gabroxxx
Follow
C’è un’odore davvero forte!! Le piante vedo che stanno bene a livello di salute e nutrimento, inizio a calare le dosi per iniziare a lavare un po la pianta dai fertilizzanti accumulati, non ci dovrei mettere molto visto che ultimamente ho annaffiato sempre con EC abbastanza al minimo ovvero 1 .
Per il resto molto bene, per fortuna non si stanno piegando molto i rami, un po per il training che gli ho fatto e anche perchè non sono cime enormi da far spezzare in due il ramo quindi in definitiva non va ne bene e ne male hahaha😂.
Buona coltivazione a tutti!!

Likes
5
Share


@Hawkbo
Follow
They are all putting on weight quickly and taking shape very impressed with all of them and they prob have another week or so before flush/harvest.
REMEMBER , IF YOUR SHOPPING FOR GEAR YOU CAN USE THE CODE “BANGDANG” FOR 10% OFF YOUR ENTIRE PURCHASE FROM ANY OF THE FOLLOWING COMPANIES.
@greenbuzzliquids
@rainscience_growbags
@gorilla_grow_tent
@growlightscience.led
NEW* @Rocbudinc Seeds on his website *
*****Gorilla grow tent discounts extend to all companies affiliated with grow strong industries which include..*****
@super.closet
Lotus Nutrients
Kind LED grow lights

Likes
36
Share


@MadeInGermany
Follow
Flowering day 35
since time change
to 12/12 h.
Hey everyone 😀.
Both phenotypes continue to develop very nicely :-).
The buds are getting bigger and bigger and the sweet smell starts to waft through the tent 😍.
It's very much in the Skunk direction 👍.
It was watered twice this week with 1.2 l per watering per plant.
The tent was cleaned and everything checked for health 👍.
We'll see you again next week :-)
Until then, I wish you and your families a Merry Christmas 👍😀🙏🏻.
Stay healthy and let it grow 🍀
You can buy this Strain at :
https://sweetseeds.es/de/sweet-skunk-f1-fast-version/
Type:
Sweet Skunk F1 Fast Version
☝️🏼
Genetics:
Sweet Skunk Auto (SWS34)
X
Early Skunk
👍
Vega lamp:
2 x Todogrow Led
Quantum Board 100 W
💡
Bloom Lamp :
2 x Todogrow Led
Cxb 3590 COB 3500 K 205W
💡💡☝️🏼
Soil :
Canna Coco Professional +
☝️🏼
Fertilizer:
Green House Powder Feeding
☝️🏼🌱
Water:
Osmosis water mixed with normal water (24 hours stale that the chlorine evaporates) to 0.2 EC. Add Cal / Mag to 0.4 Ec Ph with Organic Ph - to 5.5 - 5.8 .
Likes
15
Share


@Naujas
Follow
70 days have passed from the seed very quickly :) a week later I think one girl will have to cross it :) now I only water them with fresh water :) from the photo it seems nothing is real they are small :)

Likes
145
Share


@Kynareth
Follow
Another week and no signs of flower or pre flower, definitely not the quickest one.
Plants keep looking really great, the topped one too but it is smaller than the others yet.
Two of them have insane leaves, i think that i'm going to defoliate it later if it becomes neccesary
i have moved the lamp to mantain it at 35cm, i don't have so many margin to move it upper. according to gb strains the hegight should be between 0,7 and 1.2, let's see

Processing
Likes
24
Share

@MadeInGermany
Follow
Hey everyone ☺️.
This week the food was increased to 4 ml per liter of water, as they can still tolerate a little more.
I'm curious how it will develop this week.
Otherwise there is not really anything to tell this week ☺️.
Stay healthy 🙏🏻 and let it grow 🌱
You can buy this Strain at
https://www.amsterdamgenetics.com/product/kosher-tangie-kush/
You can buy this Nutrients at
https://greenbuzzliquids.com/
Type:
Kosher Tangie Kush
☝️🏼
Genetics:
Kosher Kush
X
Tangie
👍
Vega lamp:
2 x Todogrow Led
Quantum Board 100 W
💡
Bloom Lamp :
2 x Todogrow Led
Cxb 3590 COB 3500 K 205W
💡💡☝️🏼
Soil :
Canna Coco Professional +
☝️🏼
Fertilizer:
Green Buzz Liquids :
Organic Grow Liquid
Organic Bloom Liquid
Organic more PK
More Roots
Fast Buds
Humic Acid Plus
Growzyme Big Fruits
Clean Fruits
Cal / Mag
Organic Ph - Pulver
☝️🏼🌱
Water:
Osmosis water mixed with normal water (24 hours stale that the chlorine evaporates) to 0.2 - 0.4 EC. Add Cal / Mag 2 ml per l water every 2 waterings . Ph with Organic Ph - Pulver to 5.8 .

Likes
27
Share


@m0use
Follow
SPONSORED DIARY===SPONSORED DIARY===SPONSORED DIARY
Seeds finally popped up and out of the medium, this plant is a bit behind its Granddaddy Purps sibling but it should catch up in no time. giving them 24hr lighting till week 3 then will reduce it down to 18/6. Added in a few pics this week of the tent and light. nothing much else to report.
SPONSORED DIARY===SPONSORED DIARY===SPONSORED DIARY
Big shout out to @SpiderFarmer for supplying the 2x2x5 Grow tent and The SF1000 100w LED light.
I will be uploading all relevant photos of the products in the next week when they arrive, maybe do a little unboxing video. Who knows.
A 2nd big shout out to Dr.Seeds for supplying the 3x5pac of seeds I will only be featuring two of the three strains in two separate diaries.
You the users will get to decide what ones I grow. I have setup a Grow Question on each diary to vote for your strain of choice for that diary.
https://growdiaries.com/grow-questions/47600-drseeds-1-vote-what-i-grow "Diary #1"
https://growdiaries.com/grow-questions/47600-drseeds-1-vote-what-i-grow "Diary #2"
Cast your vote for each diary.
Thought I would add in the relevant links if you wanted to read up on any of the products that will be officially featured in this grow.
https://www.spider-farmer.com/
https://growdiaries.com/grow-lights/spider-farmer (+) https://www.spider-farmer.com/products/sf-1000-led-grow-light/
https://growdiaries.com/grow-tents/spider-farmer (+) https://www.spider-farmer.com/products/sf-2-x2-indoor-grow-tent-hydroponic-home-plant-reflective-aluminum-oxford-cloth/
https://drseeds.net/
https://growdiaries.com/seedbank/dr-seeds
(+)
https://drseeds.net/product/cherry-pie-autoflowering-cannabis-seeds/ (+) [No relevant GD affiliated link]
https://drseeds.net/product/granddaddy-purple-autoflowering-cannabis-seeds/ (+) https://growdiaries.com/seedbank/dr-seeds/granddaddy-purple [Photoperiod not Autoflowering]
https://drseeds.net/product/60-day-wonder-autoflowering-cannabis-seeds/ (+) https://growdiaries.com/seedbank/dr-seeds/60-day-wonder-autoflowering

Likes
3
Share


@Ryno1990
Follow
Now this is the biggest girl in the garden the Grapes an Cream from Atlas seeds she has been the biggest from the begining even after being topped 4 or 5 times she's still been out performing the others the other one from Atlas the Snow Panda is the next one closest to her in size this girl has deff been loving life with everything her medic grow fold 6 led light she's praying to and her cultured biologix nutrients she's been feeding on all of witch she has been loving an thriving to


Likes
23
Share


@Joni2017
Follow
Day 59, she continues the very healthy flowering 🙌 size 78 cm👏🏻👏🏻 temperature 24º C ☀️, humidity 60% 💧 watering 750 ml alternating one day with nutrients and another without nutrients with osmotized water 💦💦 Session 45 min. of binaural sounds for growth and healing 🎼 and music 😉👍
Likes
11
Share


@CityFarmer
Follow
Hello everyone,
These girls are doing good, only 3 left the others where boys so they had to go, but these are starting flowering, getting tall not so bushy, lets see how they go...
See you guys next week🤘🤘👊👊👊
