


@Miss_Greenthumbs_Garden
Follow
No training for this girls she is going all natural lol she's grown loads in 7 days mega impressed with @greenbuzzliquids 💚
Last week of veg for this girl 🌱😊
please feel free to use my 15% discount code at greenbuzzliquids littlemissgreenthumb at checkout 💚


@Mr_nugs_lover_David
Follow
Beautiful as her sisters! The 3 phenos I have smell just exactly the same and the color is darker in one of the 3. Beautiful autoflowering strain to grow if you want citric terps very lemony and also if you wanna add some color to your garden 💜✌️🌱💚


@BrMarijuana
Follow
Plantas saudáveis, ótima qualidade, estão reagindo muito bem a alimentação, regas todos os dias e alimentação todos os dias,.cheiro doce

shorts_status_processing


@growsmoke420
Follow
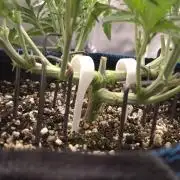
After Input from the Community I've Decided on NO Nutrients for a few Days to let Her Recover from Her Suspected Nitrogen Toxicity. If She Recovers like I Hope She'll get One more Feeding of Beastie Bloomz only before a Final Flush as I Suspect only a Few Weeks before She's ready to Harvest.



@ShinWeed
Follow
.
🌱 Tag 21 – Eine Woche voller Experimente
Drei Wochen alt. Eigentlich der Zeitpunkt, an dem junge Pflanzen einfach gemütlich wachsen, Wurzeln bilden und jeden Tag ein bisschen größer werden. In unserem Fall wurde daraus allerdings eine kleine Wissenschaftsshow mit mehreren unerwarteten Wendungen.
Die Woche begann mit unserer ersten Düngung. Für uns war das Neuland und für unseren Gärtner offenbar auch. Nach vielen Jahren mit organischem Dünger musste er erst lernen, dass mineralische Nährstoffe nicht erst gemütlich auf ihre Freigabe warten, sondern sofort verfügbar sind. Das führte dazu, dass wir etwas früher gefüttert wurden, als es eigentlich nötig gewesen wäre.
Zusätzlich gab es noch ein paar weitere Überraschungen:
Der pH-Wert lief zeitweise nicht ganz wie geplant.
📦 Statt pH- wurde versehentlich pH+ geliefert.
🔄 Bei der ersten Nährstoffmischung wurden Grow A und Bloom A vertauscht.
🌱 Die Düngung begann etwas früher als optimal.
Man könnte sagen, unser Gärtner hat diese Woche sehr viel gelernt. Wir Pflanzen nennen das lieber „praktische Feldforschung“.
Zum Glück blieb es bei kleineren Problemen. Zwar waren wir zwischenzeitlich nicht immer ganz begeistert von den Mischungen im Tank, aber insgesamt konnten wir weiter wachsen und neue Blätter bilden. Wirklich dramatisch wurde es nie.
Unser Wassertank lief die ganze Woche durchgehend. Da er allerdings mehrfach neu angesetzt wurde, weiß inzwischen niemand mehr so genau, wie viel Wasser wir tatsächlich verbraucht haben. Die Buchhaltung wurde wohl von einer Zimmerpflanze geführt.
Folgende Nährstoffe kamen diese Woche zum Einsatz:
Bittersalz: 0,5 g/L
🌿 Grow A + B
? Silica
⚡ Multi Total
Für die nächste Mischung wird das Bittersalz bereits auf 0,3 g/L reduziert. Wieder etwas dazugelernt.
Nicht ganz ohne Zwischenfälle verlief die Woche für Pflanze #2. Bei einer kleinen Pflegeaktion wurde einer ihrer Triebe versehentlich angeknackst. Für einen kurzen Moment sah es so aus, als hätte sie beschlossen, den Dienst zu quittieren.
Zum Glück stellte sich der Schaden als weniger schlimm heraus als zunächst befürchtet. Der Trieb blieb erhalten und kämpft sich weiter durch. Pflanzen sind manchmal erstaunlich widerstandsfähig. Während Menschen bei kleinen Verletzungen häufig erst einmal das Internet nach ihren Symptomen durchsuchen, reparieren wir einfach unser Gewebe und wachsen weiter.
Trotz aller kleinen Stolpersteine wachsen wir weiterhin ordentlich weiter. Unsere Blätter werden größer, unsere Stämme kräftiger und unter der Erde arbeiten die Wurzeln vermutlich längst an ihrem eigenen Ausbauprojekt.
Im Vergleich zur letzten Woche sehen wir inzwischen deutlich erwachsener aus. Noch sind wir jung, aber langsam entwickeln wir uns zu richtigen Pflanzen und nicht mehr nur zu besonders ehrgeizigen Keimlingen.
Nächste Woche hoffen wir auf etwas weniger Experimente im Nährstofftank und etwas mehr Routine. Andererseits wäre das Leben als Pflanze vielleicht auch langweilig, wenn immer alles perfekt laufen würde. 🌿
👨🌾 Gärtner:
Diese Woche lief nicht alles nach Plan, aber dafür habe ich wahrscheinlich mehr gelernt als in den ersten beiden Wochen zusammen. Der größte Unterschied zu meinen bisherigen Grows war der Wechsel von organischem auf mineralischen Dünger. Beim nächsten Durchgang werde ich deutlich später mit der Düngung beginnen, vermutlich erst Ende Woche 3.
Die größte Erkenntnis war, wie schnell mineralische Nährstoffe wirken und wie wichtig ein sauber eingestellter pH-Wert ist. Mit organischem Dünger hatte ich viele dieser Effekte nie direkt bemerkt, weil die Nährstoffe deutlich langsamer verfügbar werden.
Zusätzlich sorgte eine falsche Lieferung für etwas Chaos. Statt pH- kam zunächst pH+ an, wodurch die Wasseraufbereitung deutlich komplizierter wurde als geplant. Inzwischen ist das Problem aber gelöst und zukünftige Mischungen sollten deutlich entspannter verlaufen.
Fehler gehören dazu, besonders wenn man neue Methoden ausprobiert. Wichtig ist am Ende, daraus zu lernen und die Pflanzen genau zu beobachten.
Bisher haben sie mir zum Glück alle Fehler teils verziehen. 🌱
p.s. neue LST Haken!


@AcidBurn_40
Follow
19.04.24 BT#19
Servus ✌️ liebe Gemeinde
Die Ladys entwickeln sich sehr gut 👍🏻
Die Lichtquelle ist jetzt ne Evo 4-80 1.5 mit BT Dimmer Entfernung zur Lampe 50cm eine Temperatur von 26° und ner RLF von 50%.
Die White Widow hat sich richtig gestreckt ca. 200% und ihre Triebe sind fast alle auf einer höher bin irgendwann nicht mehr mit gekommen denke sie wird schöne Buds tagen.
Die Bubblegum XL ihr Strecken hat sich in Grenzen gehalten aber wir auch was abwerfen🤩
Nährstoffe bekommen Sie wie gehabt alle 3 Tage immer im Wechsel = Wasser, 3 Tage nix dann Nährstoffe ,3 Tage nix ,Wasser und so weiter Dosierung Hesi Blüh Complex 6ml/L , Hesi Booster 2ml/L, Hesi Phosphor Plus steigenden von 0,2ml/L auf 3ml/L , Hesi SuperVit.
Danke euch fürs vorbeischauen mögen all eure Lady's Gesund und brächtig Wachsen und euch mit schmackhaften Stuff versorgen 😋


@SuperGluedGrow
Follow
Completely forgot to update like an idiot, but these videos were taken two days ago. Pheno 1&2 are both male, so I'm just hoping this last one is female. I might flower when I get back from vacation to just speed this process up but I guess well see.


@ChiTaN
Follow
I am very proud of this girl ! Despite the fact that she is younger than the rest by two weeks, she caught up with her friends in height and even surpassed them :) The giant fan leaves are surprising 😃


@TheGanjaGrower
Follow
It's time to harvest them but this I wasn't there for last 2 weeks had humidity issues causing bud rot


@Huckleberry39
Follow
She is 4 weeks into flower and doing awesome!!! I started seeing some discoloration on her tips so I cut the nutes by 25%. She is smelling great 👍!!! Buds are stacking and fattening up nicely!! So far this has been a great grow!


@Mrs_Larimar
Follow
Saturday, Feb.20th
After final training, and recovering,
Girls went into a larger Growspace called "big Floweringtent"
its a 4x4 Growtent, and soon some Companions will be added.
Girls are sitting into final Pots ( 11l), filled with My Soilmix
amended with "Living Organics" and EASY BOOST ORGANIC NUTRITION
waterings with Benefical stuff from Green Buzz Liquids
So we had a busy Day Yesterday in setting up the Tent
that means lots of cleaning transplanting and so on
Thank you A.R. for Setting up the Tent 😘


@BeHappyNtoke
Follow
Noticed some yellowing on sour kush a on Monday I do check ph and ppm overall smells nice critical purple finally taking off sticky buds on b and c


@love_2_grow
Follow
D1
Both girls germinated, but the first has stretched more than the other, although they both look healthy and vibrant.
I moved them from the heat mat into the tent and a temporary SANSI light since the other light is still in my photo tent for another couple of days.
I will not bother with up-potting and instead transplant them into their final pots tomorrow.
------------------------------
D2.
Transplanted and watered each with 0.5 liters of water @ pH 6.4, with a half teaspoon of myco/kelp mixed in.
I switched the lights and set DLI to 12
------------------------------
D4.
The girls are happy little campers in their new homes.
The first is the taller one but only by a centimeter.
I bumped DLI to 14.
------------------------------
D7.
End of the first week, and the girls are loving life. Unfortunately, it seems that fungus gnats do as well. I knew this could happen by using fresh worm castings as a top dressing. It's not a huge deal, as I already have nematodes ready to go, but I want the soil to dry out before watering again. It's silly to risk over-watering just to get rid of a few gnats. It can wait a few days.
I increased DLI to 16.
------------------------------


@HIAZ_urbanbudfarmer
Follow
Hello fellow growers, were at the end of week 8 & everything has gone fine apart from recently discovering a bit of bud rot on 2 seperate buds on #5 ( she has big thick very solid buds) humidity has been quite high as we are going into our 3rd straight week of terential rain. Otherwise everything is good, most of these girls look ready 💯% milky trichomes, amber/brownish pistils all curled in. Have been flushing these girls, will give them a little longer


@Ensign420
Follow
Introduction - Week 14|07 Summary -
Ensign's log, stardate 9437.65,
Great week of growing! Wow what a good week!
Growth in the main tent has all around been incredible!
Submitted my first submission to the Global Grow Cup! Filmed a video of the solo cup container (marked with the ticket/order number) that will be used for the competition. Also had to fill and prove the solo cup holds 2 cups of soil. Now I need to root a clone (for the first time), transplant her into this cup, and submit my 2nd entry before the 30th of this month.
As far as my first attempt at cloning, have already begun the rooting process! Managed to take cuttings from 3 out of the 6 phenos in the main tent (the first cutting was also my first time topping). Soaked the cuttings for two days before planting them into Coco Coins. So far everything has gone surprisingly well! The clones are now rooting under the propagation dome with the vents fully closed. Will check for roots soon!
At the end of the week, growth was just raging! Was planning on flipping to flower in a week, but decided to begin the first week of flower next week! Thus this is the last week of veg. Plan to flip to 12/12 next Monday!
Onwards to next week!
[START OF WEEK 14|07]
==========================================================
Garlic Budder #1 - WEEK 14|07 - Full Veg Wk5
Garlic Budder #2 - WEEK 14|07 - Full Veg Wk2
Garlic Budder #3 - WEEK 07 - Full Veg Wk5
Garlic Budder #4 - WEEK 06 - Full Veg Wk4
06/03/24 → 06/09/24
This Week's Estimated Goals
----------------------------------------------------------------------------------------------
DLI: ~26 mol/m²/d
PPFD: ~400 μmol/m²/s
VPD: ~1.0 kPa
This Week's Meter Readings & Averages [Lights On: 16:00 - 10:00]
----------------------------------------------------------------------------------------------
DLI: 24.56 mol/m²/d
PPFD: 379 μmol/m²/s
VPD: 0.91 kPa
Soil %: [32.7, 37.6, 37.9, 34.1]
==========================================================
Day 01 - Monday - 06/03/24 - Total Days: 098
-----------------------------------
Daily Averages [~23:00]
- Temps: 80.7°F [27.1°C]
- Humidity: 74.4%
- VPD: 0.90 kPa
- Soil %: [31, 34, 39, 35]
-----------------------------------
- [09:57]: Quick morning check!
--- #1 is looking a bit droopy, but almost lights off (at 10:00) so not concerned.
--- Nice! Mainly wanted to check on #4 and she is looking great! She’s perked back up and looking good!
- [23:08]: Evening check.
--- Wow! It’s a jungle in here!
--- #1 has gotten too big? Nah!? Keep on growing girl!
--- #2 is growing and definitely getting bigger! Growth just looking really weird.
--- #3 has continued to get larger and is looking quite uniform in growth!
--- #4 is growing and looking perky again!
--- Even the original #1 and #2 phenos (in the back) are looking good!
--- Wow! #4 is really getting close to the light.
- [23:14]: Checked down both fill tubes.
--- Both reservoirs were completely dry!
- [23:27]: Checked the Ecowitt soil moisture sensor data:
--- 30% - [CH01 EB1 - Garlic Budder #1]
--- 34% - [CH02 EB2 - Garlic Budder #2]
--- 39% - [CH03 GFP - Garlic Budder #3]
--- 32% - [CH04 FPT - Garlic Budder #4]
- [23:32]: Poured 4 cups of distilled water down EB1’s fill tube.
--- Poured 2 cups of distilled water down EB2’s fill tube.
- [23:38]: Checked the humidifiers.
--- Refilled the 4X4’s humidifier with distilled water.
--- Tomorrow, plan to defoliate and start cloning for the first time!
--- Going to take multiple cuttings from both #1 and #4 for sure, but still deciding on the rest.
--- Getting hyped!
Day 02 - Tuesday - 06/04/24 - Total Days: 099
-----------------------------------
Daily Averages [~23:00]
- Temps: 81.4°F [27.4°C]
- Humidity: 74.3%
- VPD: 0.93 kPa
- Soil %: [29, 35, 38, 32]
-----------------------------------
- [11:59]: Time to film the first entry for the Global Grow Cup!
--- Going to be using BuildASoil 3.0 potting soil.
--- Filming the video using a stand and my phone.
--- This video is mainly to establish the container that the plant will be grown in. Also to prove that the container is a 16oz container and that it can hold 2 cups of soil.
--- The ticket (order) number also had to be written on the cup.
- [12:36]: Done!
--- The video had to be done in one continuous shot with no edits (my original submission does not have the logo).
--- There was also a photo that needed to be shot which shows the cup filled with 2 cups of soil (just like the video, the original image submission did not have the logo).
--- I think I did everything correctly, but also sent an email for verification of submission and validation.
--- Getting hyped!
--- [*smokes a bowl]
--- Going to defoliate today along with for the first-time, going to take cuttings for clones!
--- After a bit of online research, decided to split the cloning process into two days.
--- Today going to take cuttings and will soak them in a solution of aloe for 24hrs. Afterwards will change the water out and use straight distilled water.
--- Then in a couple days, plan to transplant into coco plugs (Coco Coins) for rooting.
--- For optimal results, also be using a rooting hormone (Clonex).
--- Well.. Here goes nothing!
- [17:01]: Evening check.
--- Wow! #1 is looking huge! Her main top is stretching above the lower canopy which is continuing to bush out.
--- #2 is growing along. Growth is gnarly and a bit droopy, but she’s getting taller!
--- #3 is looking great! Still a bit small, but she is continuing to get larger.
--- #4 looks like she needs a watering.
--- Both plants in the back are also looking surprisingly great as well!
- [17:05]: Checked down both fill tubes.
--- Both reservoirs were completely dry!
--- As far as today's defoliation, going to leave #2 and #3 alone and will focus my defoliation and cloning on the rest of the plants.
--- This will be my first attempt at cloning, also going to try topping for the first time today.
--- No pressure Ensign. What can possibly go wrong right?
- [17:27]: Time to start the cloning and defoliation process!
--- Filled a measuring cup with 3 cups of distilled water.
------ Added 3/4tsp of Horticultural Aloe
------ Added 1 more cup of distilled water
--- Mixed the solution and poured an even amount into three separate solo cups.
--- Made sure to mark two of the cups (#1 and #4). The unmarked one will be for any other clones from amongst the 6 phenos (if any at all).
- [17:43]: Time to top and defoliate #1!
--- Using a pair of brand new trimmers (AC Infinity),
--- Gently cut the main stalk to even out the canopy.
--- Then trimmed and cleaned most of the nodes leaving the top node or two.
--- Also trimmed the leaf fingers a bit before placing the top cutting into the cup of aloe solution.
--- Now for the rest of the cuttings!
--- [~45 minutes later]
- [18:32]: Managed to finish defoliating and cutting the rest of the clones.
--- Took two more lower cuttings from #1 (3 clones total).
--- Took 3 lower cuttings from #4
--- While defoliating, decided to try and clone the original #2 pheno as well. Took 4 small cuttings.
--- Similar to the top cutting, trimmed and cleaned each lower node for each cutting before placing them into the cups.
--- Before finishing up the 2nd cutting, I noticed the first cutting (the top cut that was also trimmed) was drooping.
--- So I did not trim and the leaf fingers for the other cuttings.
--- In total there were 10 cuttings taken for potential clones.
--- My main focus was to take cuttings and to clean up all the lower growth from both #1 and #4.
--- Defoliated and cleaned up the back original phenos as well (also trimmed back the cover crop).
- [18:35]: Temporarily placed the cuttings onto the floor of the 4x4 tent.
--- Took the trimmings (about 3 cups) and spread them onto the top mulch of #1 and #2.
--- Time to set the environmental controls for the 3x3 veg tent.
- [18:43]: Within the AC Infinity App,
--- For the Veg Tent [3x3] controller,
--- Adjusted the 'Vegetative [18/6]' Schedule for the grow light.
------ Set the Mode to ‘On Mode’
------ Set the START/END times to 04:00PM/10:00AM
------ Set the MAX to 1
--- The IonBoard S33 is now utilizing around 60.8W (at intensity 1 out of 10).
--- Adjusted the 'Vegetative [18/6]' Schedule for the exhaust fan.
------ Increased the Humidity’s HIGH trigger value from 81% to 87%
--- Adjusted the 'Vegetative [18/6]' Schedule for the humidifier.
------ Decreased the VPD target value from 1.5kPa to 0.8kPa
- [18:52]: Moved the cuttings into the 3x3 veg tent.
--- It begins! I think.
--- Going to let these cutting drink some aloe for a day before switching to straight distilled water.
--- Hmm. Could be the white floor of the 3x3 veg tent, but have noticed the S33 has a whiter spectrum whereas the FC-6500 seems to be warmer in color.
--- Anyways,
- [18:58]: Poured 4 cups of distilled water down EB1’s fill tube.
--- Poured 2 cups of distilled water down EB2’s fill tube.
- [19:06]: Filled a pump sprayer with 5 cups of distilled water.
--- Focused mainly on the straw mulch of #4.
--- But also misted the straw mulch for the rest of the plants a bit.
- [19:12]: Checked the humidifiers.
--- Refilled the humidifiers with distilled water.
- [19:44]: Going to be using Clonex rooting gel before planting the cuttings into Coco Coins (pre-soaked with microbes and aloe). But before that begins, going to transfer the Clonex gel into a squeeze bottle.
--- Gently peeled back the seal on the original Clonex bottle. Just enough make a tiny opening,
--- Then slowly and carefully poured the gel into an empty squeeze bottle.
--- Also removed the sticker from the original bottle and placed it onto the new one.
- [19:54]: Perfect!
--- Instead of applying the gel to the cutting, going to be applying the gel to the Coco Coin.
--- This squeeze bottle will make applying the gel a lot easier.
--- Will take PPFD readings tomorrow.
--- Also will change out the aloe solution to distilled water.
--- I really hope I didn’t screw things up before they could even begin.
--- Don’t die on me ladies!
--- Please.
Day 03 - Wednesday - 06/05/24 - Total Days: 100
-----------------------------------
Daily Averages [~23:00]
- Temps: 81.9°F [27.7°C]
- Humidity: 75.5%
- VPD: 0.90 kPa
- Soil %: [29, 36, 38, 36]
-----------------------------------
- [09:40]: Quick morning check!
--- #1 is looking a bit droopy, but looking okay. Topping is a high stress technique so going to take some time to recover. Don’t plan on flipping the main 4x4 tent to flower for a good week or so which should be enough time.
--- #4 looks great! The defoliation seems to have no effect on growth. Nice!
- [09:41]: Also quickly checked on the 3x3 veg tent,
--- Nice! The cuttings are looking great!
--- No yellowing and they all seemed to have turned up towards the light.
--- So far so good!
- [22:53]: Evening check.
--- #1 is continuing to dominate this grow! She has spread wide and looking incredible!
--- #2 is looking gnarly, but getting there.
--- #3 is getting larger! But still a runt. By far, her leaves are the darkest of the bunch, but she is still growing!
--- #4 looks happy and growing along beautifully! Wow!
- [22:55]: Checked down both fill tubes.
--- Both reservoirs were completely dry!
- [22:59]: Poured 5 cups of distilled water down EB1’s fill tube.
--- Poured 2 cups of distilled water down EB2’s fill tube.
- [23:05]: Checked on the 3x3 veg tent.
--- Ooo yea! The cuttings are still green! Nice!
- [23:07]: Took PPFD readings.
--- The cuttings were around 121 μmol/m²/s which gives a DLI of 7.84 mol/m²/d
--- Nice! These levels are on the lower range for seedlings (~100-300), perfect! I think.
- [23:14]: Swapped the aloe water out to straight distilled water.
--- Going to let these cuttings soak for one more day before planting.
--- Please don’t die girls!
- [23:15]: Checked the humidifiers.
--- Refilled the humidifiers with distilled water.
--- Ooo yea!
--- Tomorrow is the big rooting day!
Day 04 - Thursday - 06/06/24 - Total Days: 101
-----------------------------------
Daily Averages [~23:00]
- Temps: 81.9°F [27.7°C]
- Humidity: 75.2%
- VPD: 0.91 kPa
- Soil %: [32, 38, 38, 34]
-----------------------------------
- [16:20]: Evening check.
--- #1 is a bit droopy, but growth is looking green and healthy.
--- #2 is looking bigger! She’s also looking sort of droopy.
--- #3 is growing along nicely! Looking good girl!
--- #4 is looking great! A bit droopy but plan to water today.
- [16:23]: Checked down both fill tubes.
--- EB1's reservoir still has some water.
--- EB2's reservoir was completely dry!
- [16:23]: Checked the Ecowitt soil moisture sensor data:
--- 28% - [CH01 EB1 - Garlic Budder #1]
--- 36% - [CH02 EB2 - Garlic Budder #2]
--- 37% - [CH03 GFP - Garlic Budder #3]
--- 30% - [CH04 FPT - Garlic Budder #4]
- [16:30]: Using a pump sprayer,
--- Misted the straw mulch of #4 with 6 cups of distilled water.
--- Focused mainly on the straw mulch.
--- Also misted the straw mulch of #3 (in the grassroots fabric pot) a bit.
- [16:43]: Poured 5 cups of distilled water down EB1’s fill tube.
--- Poured 3 cups of distilled water down EB2’s fill tube.
- [16:52]: Checked the Ecowitt soil moisture sensor data:
--- 56% - [CH01 EB1 - Garlic Budder #1]
--- 44% - [CH02 EB2 - Garlic Budder #2]
--- 40% - [CH03 GFP - Garlic Budder #3]
--- 45% - [CH04 FPT - Garlic Budder #4]
- [17:01]: Took general PPFD readings.
--- #1 was around 379 μmol/m²/s which gives a DLI of 24.56 mol/m²/d
--- #2 was around 333 μmol/m²/s which gives a DLI of 21.58 mol/m²/d
--- #3 was around 293 μmol/m²/s which gives a DLI of 18.99 mol/m²/d
--- #4 was around 378 μmol/m²/s which gives a DLI of 24.49 mol/m²/d
- [17:09]: Took the weekly height and light distance measurements.
--- #1 was about 21" tall.
--- #2 was about 13.5" tall.
--- #3 was about 9.5" tall.
--- #4 was about 19.25" tall.
--- Hmm..
- [17:19]: Adjusted the right oscillating fan a bit.
--- Re-angled the CloudRay S6 oscillating fan upwards. Been noticing that the air has been hitting the tops of the plants so easing off a bit (#1 is still getting hit, but she’s huge so not too worried).
- [17:23]: Back to the measurements!
--- #1 was about 9.5" away from the grow light.
--- #2 was about 17" away from the grow light.
--- #3 was about 17.5" away from the grow light.
--- #4 was about 11.5" away from the grow light.
- [17:46]: Checked on the 3x3 veg tent.
--- Cuttings are still green! They do look a bit droopy but no signs of yellowing.
--- Okay!
- [17:55]: Time to begin the rooting process!
--- For my first attempt at rooting, going to be using Coco Coins pre-soaked in saponins, microbes and aloe.
--- To further help with rooting, going to also be using Clonex rooting gel.
--- Filled a measuring cup with 4 cups of distilled water.
------ Added half of 1/64tsp of Quillaja Saponaria Extract [60]
------ Added 1/16tsp of Horticultural Aloe
------ Added 1/8tsp of Mycrobe Complete
--- Mixed the solution thoroughly.
--- Time for the Coco Coins!
--- 10 cuttings means 10 Coco Coins.
- [18:09]: Dropped 10 Coco Coins into the measuring cup.
--- The coins immediately started to expand.
--- A bit too much.. Oops!
--- Poured the solution and Coco Coins into a pitcher.
--- Added 2 cups of distilled water to the solution (now at 6 cups).
--- Great! The coins are pretty much fully expanded, but going to wait a bit longer to fully saturate each coin.
--- [~20-30 minutes later]
- [18:42]: Great!
--- Took the seedling and flood tray from the AC Infinity propagation dome and placed all 10 Coco Coins into the slots.
--- Gave each Coco Coin a quick shake to remove excess solution. The coins were not dripping with solution but still pretty saturated.
--- Arranged them into 3 groups with the cuttings in mind.
--- Also tried to keep the pre-made holes intact.
--- Time to inoculate the Coco Coins!
- [18:54]: Using a squeeze bottle,
--- While keeping the nozzle from making contact with the coco, gently filled each pre-made hole with Clonex rooting gel. Just enough gel to fully cover the hole of each coco coin.
- [19:00]: Time to plant the cuttings!
--- Gave each cup a misting of distilled water. Focused on wetting the top growth with water.
--- Okay!
--- To avoid mixing cuttings up.
- [19:01]: Starting with the original #2 pheno cup,
--- For each cutting,
--- Using a pair of clean trimmers, made a final 45° cut about 1/2" from a bottom node.
--- Then stripped away and scared the protective membrane below the node before planting.
--- Made sure the node was about 1/2" below the surface of the coco.
--- To help with planting, while inserting each cutting, gave the Coco Coin a gentle squeeze to loosen the coco. This also helped to ensure the coco and gel was in good contact with the cutting.
--- Once the cutting was planted into the Coco Coin, made sure to place back in the same spot (made sure to keep the cuttings in their groupings).
--- Once a cup was complete, made sure to keep the label with the group.
--- Re-misted the top growth as needed to keep it wet.
--- Also wiped the trimmers with isopropyl alcohol in between cuttings (plan to use 10% bleach solution for next time).
--- Repeated this process until all 10 cuttings were cut, planted, and in the tray.
--- The coco coins fit perfectly into the tray and don’t reach the bottom. Nice!
--- The bottom air gap is important.
--- Poured a bit of distilled water through one of the empty slots into the bottom of the tray. Just enough to fill the bottom of the tray, but not enough to reach any of the Coco Coins (~1/4cup).
- [19:35]: Placed the propagation tray with cuttings into the 3x3 veg tent.
--- Placed the first layer of the propagation dome on before giving the sides a misting of distilled water.
--- Also sprayed the top of the propagation dome before covering the cuttings.
--- Vents are all fully closed.
- [19:40]: Placed the bar lights onto the top of the dome before configuring the controller.
------ Set the START/END times to 04:00PM/10:00AM
------ Set the bar light’s intensity to 2 (out of 10).
--- Also made sure the propagation light controller’s time was in sync with the Controller 69 Pro.
- [19:47]: Took PPFD readings.
--- The cuttings were around 136 μmol/m²/s which gives a DLI of 8.81 mol/m²/d
--- The PPFD levels are similar to the floor.
--- Perfect!
--- Going leave the IonBoard S33 on during this rooting process.
--- Will check back tomorrow to cycle the air under the dome.
- [19:56]: Checked the humidifiers.
--- Refilled the humidifiers with distilled water.
- [20:17]: Quick night check!
--- Ooo yea! Growth is raging and looking perky!
--- Mainly checked on #1 and #4 which were looking incredible!
--- Keep on growing ladies!
Day 05 - Friday - 06/07/24 - Total Days: 102
-----------------------------------
Daily Averages [~23:00]
- Temps: 82.7°F [28.2°C]
- Humidity: 76.2%
- VPD: 0.89 kPa
- Soil %: [37, 40, 38, 35]
-----------------------------------
- [10:03]: Decided to increase the ambient temp in the 3x3 veg tent.
--- Within the AC Infinity App,
--- For the Veg Tent [3x3] controller,
--- Adjusted the 'Vegetative [18/6]' Schedule for the heater.
------ Increased the Temp target value from 78°F to 82°F
--- Hopefully this will help to keep the veg tent at a more consistent temp.
- [22:26]: Evening check.
--- Ooo yea! The garden is looking incredible!
--- #1 is looking perky and just bushing out! Wow!
--- #2 is getting big! Growth is weird and leaf fingers are huge! Just going to let her grow.
--- #4 is looking happy and growing along like a champ! Nodes are starting branch out and she is turning into a bush!
- [10:28]: Checked down both fill tubes.
--- Both reservoirs were completely dry!
- [22:33]: Poured 5 cups of distilled water down EB1’s fill tube.
--- Poured 3 cups of distilled water down EB2’s fill tube.
- [22:40]: Checked on the propagation dome (inside the 3x3).
--- Ah yea! Looking great ladies!
--- Lifted the top of the dome to let some fresh air in for a bit.
--- Wow!
--- Leaves still look nice and green!
--- So far everything looks great!
--- Just going to continue on!
- [22:53]: Checked the humidifiers.
--- Refilled the humidifiers with distilled water.
- [11:01]: Decided to adjust the humidifier for the 3x3.
--- Within the AC Infinity App,
--- For the Veg Tent [3x3] controller,
--- Adjusted the 'Vegetative [18/6]' Schedule for the humidifier.
------ Increased the VPD target value from 0.8kPa to 1.5kPa
--- The higher VPD level will essentially turn the humidifier off.
--- I won’t be needing the humidifier for a good week so might as well save the water.
Day 06 - Saturday - 06/08/24 - Total Days: 103
-----------------------------------
Daily Averages [~23:00]
- Temps: 81.6°F [27.6°C]
- Humidity: 74.9%
- VPD: 0.91 kPa
- Soil %: [35, 40, 37, 31]
-----------------------------------
- [07:40]: Quick morning check!
--- #1 and #4 are looking perky and happy!
--- Also checked on the propagation dome,
--- All cutting still look green! Hyped!
- [20:02]: Evening check.
--- Wow the garden is raging with growth!
--- #1 has blown up! She has clearly recovered and growth is ramping up again!
--- #2 is stretching upwards!
--- #3 is now the smallest of the 4, but still getting larger!
--- #4 is looking incredible! Wow! Growth looks perky and happy!
- [20:05]: Checked down both fill tubes.
--- Both reservoirs were completely dry!
- [20:10]: Poured 6 cups of distilled water down EB1’s fill tube.
--- Poured 2 cups of distilled water down EB2’s fill tube.
- [20:16]: Checked the Ecowitt soil moisture sensor data:
--- 35% - [CH01 EB1 - Garlic Budder #1]
--- 40% - [CH02 EB2 - Garlic Budder #2]
--- 36% - [CH03 GFP - Garlic Budder #3]
--- 27% - [CH04 FPT - Garlic Budder #4]
- [20:19]: Using a pump sprayer,
--- Misted the straw mulch of #4 with 5 cups of distilled water.
--- Focused mainly on the straw mulch.
--- Also misted the mulch of #3 a bit (in the fabric pot).
- [20:27]: Checked propagation dome (in the 3x3),
--- To cycle the air under the dome, lifted the top off for a bit.
--- Ooo yea! Everything is still green and looking great!
--- Keep on rooting ladies!
--- Oops!
- [21:45]: Checked the humidifiers.
--- Refilled the humidifiers with distilled water.
Day 07 - Sunday - 06/09/24 - Total Days: 104
-----------------------------------
Daily Averages [~23:00]
- Temps: 81.5°F [27.5°C]
- Humidity: 74.8%
- VPD: 0.91 kPa
- Soil %: [36, 40, 37, 36]
-----------------------------------
- [08:18]: Quick morning check!
--- Nice! The main tent is looking great! #1 and #4 are both raging with growth!
--- Checked on the propagation dome (inside the 3x3) and the clones are still looking green!
--- Wow! Everything is going almost too well! Just keep on growing!
- [19:08]: Evening check.
--- Garden is just exploding with growth! Seems everyone has fully recovered from the defoliation and topping!
--- Wow #1 is bushed out and looking incredible!
--- #2 is growing really starting to get large! Growth still is funky, but stoked none-the-less.
--- #3 is starting to fill in the pot! Getting larger!
--- Wow! #4 is getting taller and looks healthy and green!
- [19:12]: Checked down both fill tubes.
--- Both reservoirs were completely dry!
--- Wow the canopy is really starting to get taller and closer to the light. May need to raise it up soon.
--- Absolutely surprised how low the light levels have been throughout this entire cycle. Barely moved the light and have not increased the intensity past 2 (out of 10). Less is really more.
--- Anyways!
- [19:18]: Checked the Ecowitt soil moisture sensor data:
--- 36% - [CH01 EB1 - Garlic Budder #1]
--- 41% - [CH02 EB2 - Garlic Budder #2]
--- 37% - [CH03 GFP - Garlic Budder #3]
--- 34% - [CH04 FPT - Garlic Budder #4]
- [19:19]: Poured 6 cups of distilled water down EB1’s fill tube.
--- Poured 3 cups of distilled water down EB2’s fill tube.
- [19:24]: Checked propagation dome (in the 3x3),
--- To refresh the air, lifted the top off for a bit.
--- Sweet! Still green! Wow!
--- Using a spray bottle, misted the top growth with distilled water.
- [20:35]: Checked the humidifiers.
--- Refilled the humidifiers with distilled water.
--- Wow what a week!
--- Growth has been just insane in the 4x4 tent! All plants have fully recovered and have just exploded with growth.
--- I think it’s time to flip to flower!
--- Also, I’m absolutely baffled about how well the cloning process has been going.
--- So far no issues!
--- Not complaining, but just surprised. Keep on growing ladies!
--- If all goes well, should have fully rooted clones soon ready for transplanting (into solo cups of course).
--- Absolutely hyped for next week!
--- Maximum warp Ensign, Engage!
[END OF WEEK 14|07]



@ykscotttyk25
Follow
Afghan Original was developed by crossing several Afghani Indica landraces, so there’s only 100% Afghani cannabis genetics behind it. Potent, sturdy and perfect for novice growers as well as more experienced enthusiasts with bigger demands. A resin production champion it can be conveniently used for hasheesh making! Afghan Original has been probated by hundreds of growers and proven a sturdy, fast growing Indica that yields heavily and can sustain minor mishaps. Afghan Original can be regarded as “the very Afghani cannabis” that any devoted stoner feels obliged to try at least once!
Mostly grown out of doors, but Afghan Original works for indoor growing just as brilliantly. Perfect choice for hydroponic/aeroponic setups, green houses and even balconies! Provide at least 18-20 litres for a full-size root system if using soil or substrate. Feel free to make Afghan Original cannabis bushier by using any training techniques such as LST, FIM or topping, ScroG or SoG, mainlining or supercropping. About 35-50% increase in yielding can be expected after training! Resistant to molds. Insect pests are guarded away with aggressive hashy stench – another superpower of Afghan Original! Sometimes plants need supports further into flowering to stay vertical (weighy colas). Outdoor harvesting time is late September – early October.



@420DeepGrow
Follow
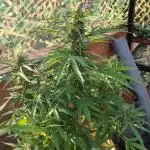
!Volvemos a la carga con la Titan F1 de Royal Queen Seeds!
Después de una primera experiencia muy positiva, me he animado a repetir con esta genética que ya demostró su potencial. 💪
Para asegurar un buen arranque, estoy utilizando de nuevo el Seed Booster de RQS, garantizando un enraizamiento fuerte y saludable desde el inicio. 🚀
La iluminación corre a cargo de la ya bien conocida TS1000 de Mars Hydro, que en la primera vuelta se portó de lujo, ofreciendo una luz intensa y homogénea. 💡
Con ganas de ver si esta vez consigo aún mejor rendimiento y resina
Seguimos creciendo fuerte! 💪


@RandA
Follow
Hi there! I'm so satisfied of results until now. Third Generation SPEED AUTO has a growth fast and vigorous, thanks to Rhizotonic support also, what gives them necessary boost to the increase.😎



@Stacy_smokez
Follow
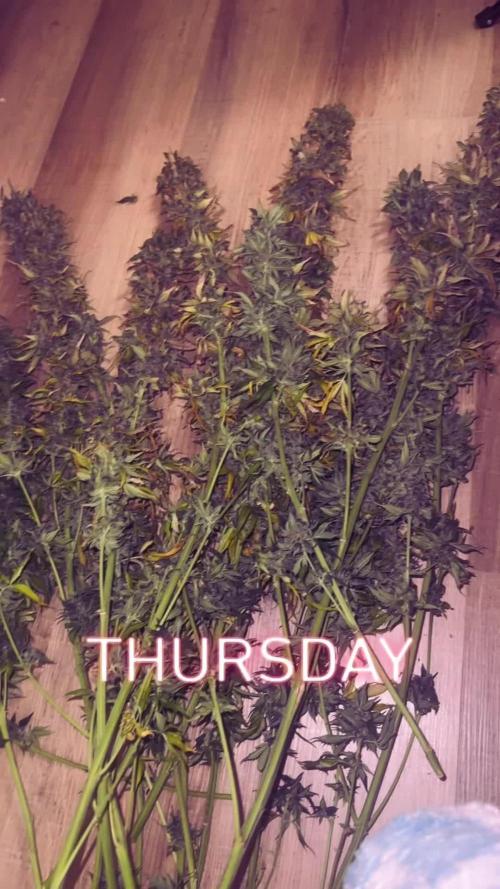
Overall, this week was good harvested her based off Tricom’s looking cloudy a little amber to my liking overall it looks pretty well. I’m gonna go through the drying process and see how much she weighs and then I’ll update the journal with the grams based off my findings.
