
Likes
Comments
Share


@AAAAFarms
Follow
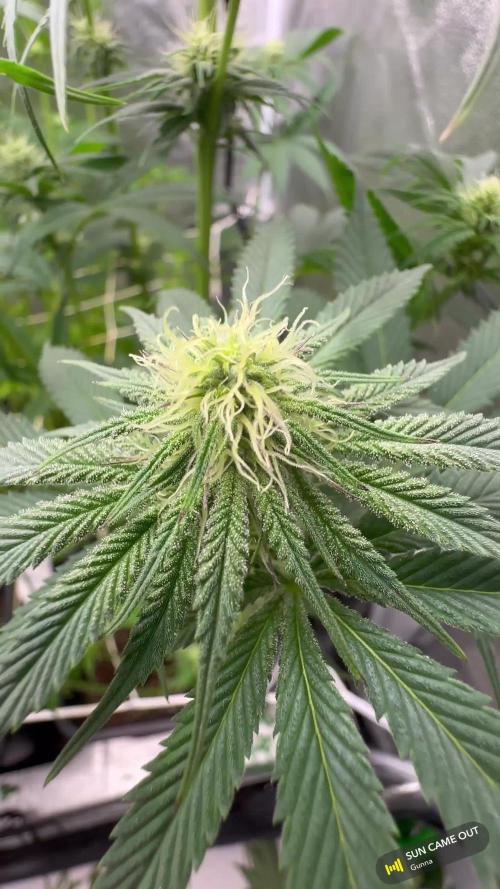
Thought id take pictures as video isnt the best
Removed a blue sherbert out as it had some issues, low yielder, top randomly died. Also on one of sundae punch the top died as i was moving
Found out my double Ds plant was a male moved her out for a week in a 24hr tent to slow its growth, back in 12 12 soon. End of week 5 photos. Harvest time expected to finish september 13th


Likes
38
Share


@Rap_a_cap
Follow
Skunky is in flowering, first stigma is appeared. Sweet Seed kept the promise of early flowering. All my three girls share the same grow profile with an exceptionally early flowering.
Today exactly 14.41 hours of light.
Average week temperatures 80°F
High humidity, some stormy days. New heat wave is coming.
All is going well but this plant has absolutely no smell, until now. Starting to defoliate the bottom canopy.
No issues, no pests, no need 4 feed.


Processing
Likes
29
Share


@Canadian_Bud
Follow
4-11-2018
WHITE WIDOW ARE DOING GREAT AND GORILLA GLUE'S ARE COMING CLOSE TO HARVESTING
7-11-2018
GG are slowly getting their leaves clipped off, soon I'll be ready to move tie some more Widows down once the GG are gone. New pics and Video. Enjoy!


Likes
3
Share


@Xabii
Follow
Topped the plant and it is showing more trouble, next week will reveal what it was.
Values are average of the day.
DATE - EC(us/cm)
20250416 1517
20250417 1535
20250418 1541
20250419 1638
20250420 1874
20250421 1891
20250422 1868
DATE - PH
20250416 5.66
20250417 5.65
20250418 5.64
20250419 5.81
20250420 6.34
20250421 6.21
20250422 6.11
DATE - ORP (mV)
20250416 -14
20250417 -37
20250418 23
20250419 93
20250420 -1
20250421 64
20250422 199
DATE - °C - RH% (Tent Temp/RH)
20250416 23.7 52
20250417 23.6 51
20250418 23.6 51
20250419 23.9 48
20250420 25.1 53
20250421 24.0 53
20250422 22.9 58
DATE - °C (Reservoir)
20250416 20.3
20250417 20.1
20250418 19.6
20250419 19.1
20250420 20.1
20250421 20.3
20250422 20.5
DATE - CF
20250416 15.17
20250417 15.35
20250418 15.41
20250419 16.38
20250420 18.74
20250421 18.91
20250422 18.68


Likes
3
Share


@CaliJ
Follow
Récolte de 70 grammes sec pour une plante en pot de 7 litres, magnifique. Royal Critical auto à refaire

Likes
1
Share


@nonick123
Follow
🚀 4 clones de Blueberry Pie F1 Fast seleccionados por @stacksfarmsltd - https://www.instagram.com/stacksfarmsltd
🚀 Breeding by @seedsmangenetics - https://www.seedsman.com/eu-en/blueberry-pie-f1-fast-feminised-seeds-sman-blpi-fast-fem
💦 BioTabs 15% DISCOUNT code "GDBT420" biotabs.nl/en/shop/ @biotabs_official
🌱Substrate PRO-MIX HP BACILLUS + MYCORRHIZAE @promixmitch @promixgrowers_unfiltered
💡2 x Mars Hydro FC1500 EVO Led Grow Light (2024 NEW FC 1500-EVO Samsung LM301H 150W LED) - https://marshydro.eu/products/fc1500-evo-led-grow-lights/ - https://www.amazon.de/dp/B0CSSGN5D8?ref=myi_title_dp


Likes
Comments
Share


@Cannibalgardens
Follow
Dam I am in love with this plant she took to bending and training so well, then the change in environment from indoors to outdoors should have been rough but it wasn't at all.. she is a trooper and looking to be a producer as well ..

Likes
37
Share


@rhodes68
Follow
12/2 Week Ten Blondie comes of age 😏
She has twice the light now and plenty of room, color it girl
12/5
To help you with perspective on Blondie she is about at week two of full flower just past the stretch.
Seemed to go into hibernation when sick so clock does not seem affected as she had a good veg run after recovering.
Just about a 2 week pause in her so looking at 3-4 weeks for her harvest.
So about week 7 growth
Increasing Koolbloom to 2.5ml/g she is in the fast building phase give her all she wants
12/6
We are adjusting all the diaries to end weeks on Sunday, this is for our convenience as really this grow with Blondie being behind somewhat doesn't really matter.
Thanks
Likes
5
Share

@EllysGrow
Follow
Mega am Stretchen meine Lady's. Haben heute noch Seitenlicht hinzubekommen, da die Blüte nun langsam losgeht. Etwas Duft kommt beim Öffnen des Zeltes heraus, verzieht sich aber sehr schnell.
Likes
2
Share

@NoProbation4Weed
Follow
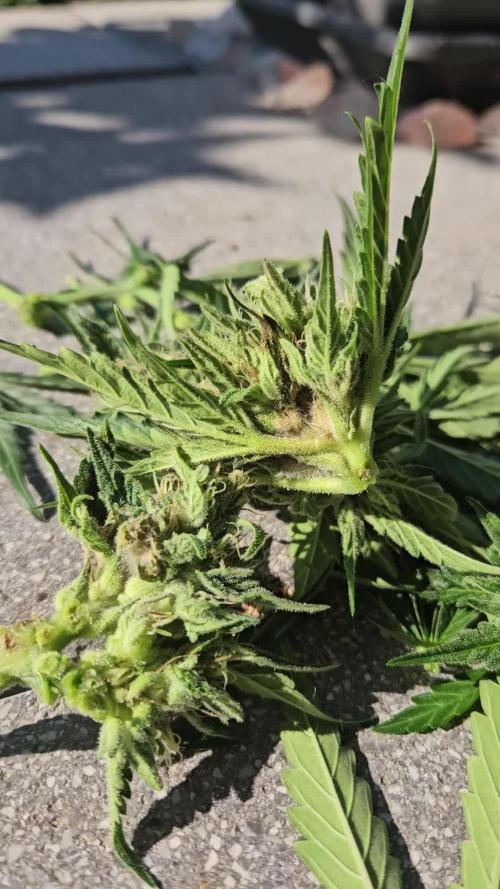
A brown leaf revealed the moldy core of the bud. Based on this sign, I harvested most of the plant.
otherwise the Plant did grow well and has some terps leaning to the sour, limone side.
had to throw away about 8G modly stuff from main colar. Seems to be about 30-40g left without mold.
Processing
Likes
3
Share


@Ogbangbang2981
Follow
last week only feeding water trichomes level is low but plant looks healthy and strong loving the smell coming off her waiting to harvest

Likes
9
Share


Likes
16
Share


@EaRtH
Follow
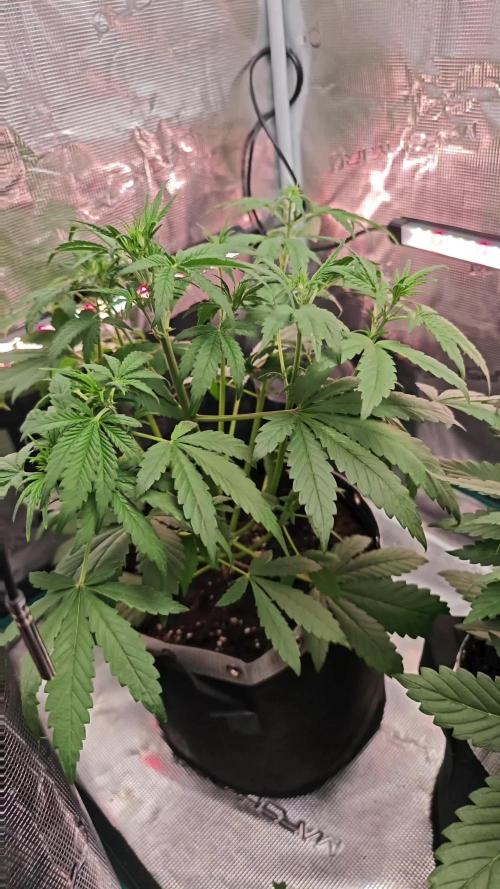
29.12. - Plants are doing well. All of them have developed second pair of leaves. 🌿
30.12. - I could not believe my eyes when I looked into growbox this morning. The Apple Fritter seed that I thought was dead sprouted next to it's replacement 🌱 So I carefully transplanted the Green Gelato into the new pot, now I have 7 plants ❤️
4.1. - Just wow. First week of the veg went really well, plants gained on height, got thicker and developed first true leaves, so I'm starting with nutrients from next week 😎
29.12. - 4.1.2024
Processing
Likes
3
Share


@XxBILLZAxX
Follow
Curling is still a problem still :(
A rainy week so high humidity all around... looking tasty though! Buds are getting bigger and sticker!
Likes
2
Share


@Stankmeister
Follow
I harvested Whiskey Zulu at 75 days, it smells amazing and isn't building anymore.
It's a really light and airy structure but smells like a super funky sour grandaddy purple.
I quick dried and smoked some lowers and the flavor reminds me of GDP x Amherst Sour Diesel × an earthy og (with a slight note of northern lights.) Fantastic flavor and potency. It's like I'm smoking multiple buds at the same time—it's so complex.
Makes me want to find and breed this pheno to get this flavor on a bigger plant with a decently dense bud structure.
The flavor profile is nothing like anybody online said about it that I could find. Serious stuff for a freebie

Likes
56
Share


@Cannabeast40
Follow
Welcome back once again 🤗
I started to add more bloom and PK booster to the mix, alongside a bit more light😎 And it seems to do the trick, week by week🙂
Hope to see you next week again 💯
---------------------------------------------------------------------------
SpectrumX LED🔥 @medicgrow
880 Watt⚡️
2x UV/IR LED panels 💥
2.7 μmol/J🔥
Full Spectrum V1,F1,VS,FS🌈
Display with PPFD & Live spectrum
Light measurement: Apogee MQ-610 & Apogee DLI-600.
Fertiliser:
Organics Nutrients
https://www.organicsnutrients.com/en/
Green Buzz Nutrients
Discount Code: GD42025
Grants 25% with a minimum Order value at 75 Euro.
https://greenbuzzliquids.com/en/shop/
Likes
9
Share


@matzouf
Follow
07/10:
Starting to flowering little by litte, both seems to be slower than the no name cheese seed.
No problem of mites in those one, starting to have a slight smell of citrus, yum !