
Likes
Comments
Share


@roberto420
Follow
Plants seem to have recovered from the stress of topping and transplant and are starting to take off.
Lamp is turned all the way up now.
I stupidly brought in some non-cannabis plants to chill with them, and they brought in some fungus gnats :(
Not an insane infestation, I noticed it quickly, but trying to be proactive. Added a fan for more airflow, mosquito bits, neem spray, etc. GAME ON GNATS :)
Upped nutrients from 1/8 tsp/gal to 1/4. Will back off if needed but its still a small amount. Trying to test how they take it.
Had to raise the lamp a few inches. The plants are growing and so far 16" distance at 100% has been fine. It is currently 15" but I will raise it again another day to fix it.
Rotated the bagseed indica to point in the middle of the net. I "f-ed up" the topping of this bush, it was really a FIM. As if it was not bushy enough!!!!!
Added a net, not really for elaborate scrog, just "basic" control of which direction things are growing, especially now that they are growing into each other.
Rotated the bagseed up front for better positioning. Clearly I sloppily "F- I missed" topping this one, so i really FIM'd it, kind of at least. 4 growths coming out. Just in case this wasn't already hellaciously bushy!!!!

Likes
40
Share


@valiotoro
Follow
Helloooo everyone👋
This is the last week all the girls are ready for harvest🤩✂️
Im very happy with the result for my first outdoor photoperiod session!
It was challenging but i had a lot of chance with the weather,this year was exceptionnal😎☀️
Absolutely different to grow outdoor
If you want to skip the rain & the cold weather you can force the plants to flower,it works but you have to remove the plants every day at the same hours⏰
If you have the time to make your Homemade nutrient 100% bio its really easy you can find everything in nature feel free to ask me👌
In love with the beautiful purple color of the Biscotti from zamnesia😈


Likes
2
Share

@I_T_C_R_W___GROW
Follow
Started to Harvest most of the Plant.
I leave the small second row Buds a week longer and a few big ones to develop further to see how that looks.
Start of plant
9.8
End of plant 12.11


Likes
3
Share

@CheeRz
Follow
We are nearing the finish line! Both ladies look great, and the delicious aroma wafting from the tent brings a smile to my face every time. I think we should finish the run in about two weeks. 🍋🍋🍋

Likes
4
Share


@Purpleaves
Follow
Plant packing on the weight, trichomes starting to form. Some fan leaves have dried up and fallen off, bringing new light to the bud sites!
Little splash of big bud added, to try keep the weight on.


Likes
15
Share


@Professor_Daank
Follow
Cruise control baby!
Nothing wrong. No issues. All growing extremely well. Keeping to my EC and my pH and all is well. Let's see what the next week is going to give us.


Likes
24
Share


@Spliffi
Follow
Germination 27 September 2023
Heya 🤙👍🤙🌱🌱🌱
Winter has come and gone. The sun is out after a heavy stormy weekend it's finally time to start Germination. I have been extremely lucky, privilege and blessed to be here right now in my life. Start of a new season have been itching deep in my bones since a week after my first harvest. Let's see what the hype on Fastbuds420 delivers.
In the heart of a humble garden, a miraculous journey is about to unfold. Beneath the soil's dark, nurturing embrace, a seed lies dormant, awaiting the precise moment to burst forth into life. It is a marvel of nature, a tiny capsule of potential, encoded with the blueprints of the plant it aspires to become.
As the heavens open, raindrops penetrate the earth, quenching the thirst of the soil and signaling to the seed that its time has come. The seed absorbs this life-giving moisture, swelling as it takes in water. It's as if the seed is awakening from a long slumber, stretching its embryonic limbs for the very first time.
Within this subterranean realm, the seed's outer coat softens, and a tiny rootlet begins to emerge. This is the radicle, the seed's first root, and it instinctively knows to journey downward, anchoring itself into the soil. It is the plant's lifeline, seeking out water and nutrients essential for growth.
Simultaneously, a delicate shoot, known as the plumule, makes its way upwards, drawn by an invisible force towards the sky. It is a daring expedition, fraught with obstacles, as it navigates through the soil. Yet, guided by an innate sense of direction, it perseveres.
Finally, breaking through the soil's surface, the shoot unfurls its first leaves, miniature versions of what they will one day become. These are the cotyledons, a pair of leaves that have been stored within the seed, packed with nutrients to sustain the young plant in its earliest days.
As the sun's rays touch these fledgling leaves, photosynthesis begins. It's a momentous occasion, the plant's first breath, as it converts sunlight into energy. The seedling, still fragile yet full of promise, has successfully embarked on the first chapter of its life. From here, it will face countless challenges and opportunities, but for now, it stands as a testament to the remarkable resilience and complexity of nature.
Thanks for reading!!🤙👍🤙🌱

Likes
1
Share

@Garys_Mod_Green
Follow
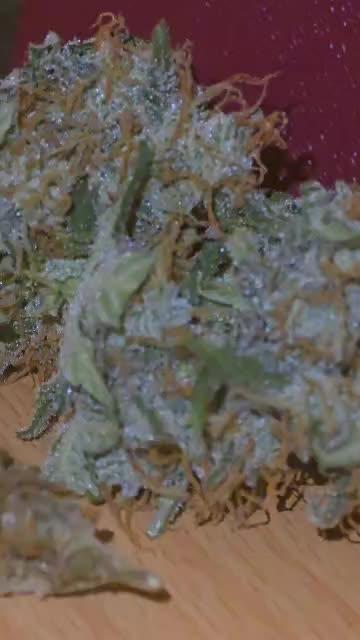
6/17/2026, WEEK 11 renaming my little growery to Verdant Fool! I am going to be making video diaries from now on I hope you follow along my account if you enjoy this format ! It's a much more personal view of my garden. Please leave comments on what you like and any suggestions you have . LOOK AT THOSE MACRO SHOTS AREN'T THEY COOL !
Likes
2
Share


@Mr_nugs_lover_David
Follow
She looks super beautiful,just like her 2 sisters I have another 2 somango auto by gea seeds as purple as her, msame aroma,just very stable Strain,the smell it's just pure authentic mango,plus she has a very gorgeous purple color on her flowers,definitely need to grow her many more times. 💚🌱💎🔝

Likes
12
Share


@PEAKYPLANTERS
Follow
OMFKG!!!!!!
I've been vía for a few weeks and this doll has exploded! 💣💣💣💣 I've never seen such a big growth in all this time! "My preparation with hydroponic cultivation is paying off the hours of study." ...unfortunately his mastodons have given him some small burns... but I'll know how to get it back.
Processing
Likes
29
Share


@CanadianFillmore
Follow
Week 4 begins for LSD, the good trip continues! Lots of nice bud sites developing and she has a somewhat sweet aroma. Removed some larger leaves and some yellowing one's. Overall plant looks great. I also increased feeding to 5 liters.
Thanks for looking 👽🔥🌳

Likes
97
Share


@DudeGrowsWeed
Follow
January 16, 2019
Everything is moving along nicely now. The last Blackberry is just about done. This week I fed some some Espoma Organic Bloom (available at most big box stores). I’ve had it kicking around since last season and figured I should use it up before it goes bad.
I’m looking into more organic nutrient options for the future. I’m not sure I’m ready to start making my own organic compost teas yet. But BioBizz seems like they will take care of what I’m looking to accomplish without needing to make my own teas (fingers crossed).
I removed the house plant that brought in the bugs and everything is back to normal now, no new bug damage.
I finally received and read “True Living Organics” by The Rev. Its a good book, but growing the “TLO” way is vastly different from other growing methods I’ve read. I’m going to have to read this one again before making any comments.
Thanks to all of the answers on CO2. Seems like its more valuable with larger setups than I’m running.
Likes
36
Share


@BrigadeDesTerps
Follow
Elle est extrêmement résistante 85% d’humidité tous le mois de septembre et beaucoup de jour de pluie, je ne l’ai pas protégé et elle tien le choque à merveille
Les couleurs deviennent sublime elle devient entièrement violet et givrée de trichomes
L’odeur est très fruité on peut pas rêver mieux en termes de terpènes j’ai hâte de goûter ça!
J’en suis amoureux
J’ai mis les données du mois de septembre en photo

Likes
8
Share


@MrMayhem1134
Follow
Stripped and lollipopped most of the plants this week and will finish the rest tomorrow. Ninja Smash and Strawberry Starburst #3 seem to have the biggest caps and may yield the most, but we will see. The Gaia green seems to be working great and I will give them their final top dress on the next watering in a couple days. Lights were turned up to 100% at the begging of this week and readjusted them to 18 inches above the canopy so I don't get any bleaching or burning as they stack and bulk. That's it for now.

Likes
3
Share


@ALittleDabWillDo420
Follow
Girls been doing great , sadly i have missed a few weeks so this is a update from week 3 to week 5 few pictures I have took threw the weeks ... girls are doing great and stacking really nice aswell as frosting up
Likes
Comments
Share

@GreenEldritchGardens
Follow
Her lime smell now has a bit more of sweetness to it, with a bit of skunk. I think he is gonna turn out great.
After small shock of changing lights to more intense one, she showed some yellowing on high light areas, do I rotated her and she is responding well.
This week I did not touched her much so next week she needs defoliation for sure.
Likes
39
Share


@InnerCityGardens
Follow
2nd week of Flush, then 4 days of darkness. All these shots and video is from the day before harvest and the resulting drying days. 🙌🏽💚🇬🇧


