
Likes
Comments
Share


@RussianGrower
Follow
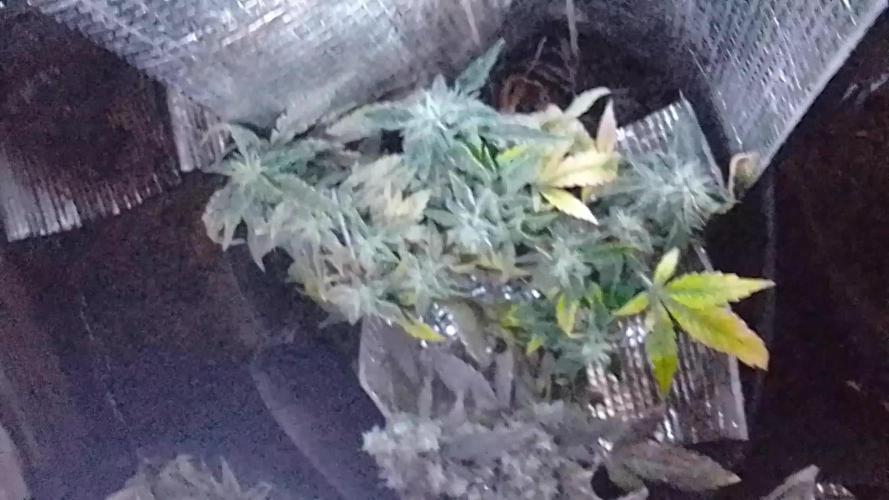
Greetings from Russia to my comrades! I was busy with work for a long time and could not deal with my diaries. Now I'm free and ready to devote every day to my plants. I have a lot of plans. My mom is coming to the end of 6 weeks. She feels great and cheerful, develops well, visible progress. While I do not train him, and give him free growth. I gave my plants the enzymes, together with the chief stimulator and the main force, Then I fed the plant folic acids under the root and on the leaves. Soon I will make my girl an intimate haircut. And in a few weeks, I'll be making the third tier of the pot.

Likes
15
Share


@Messypies
Follow
And we are done!
Both plants have now been chopped after 48hours darkness. Now currently drying.
I will post some close up harvest shots once bud is dry :)


Likes
22
Share


@Ton_Trichomen
Follow
Seeding March 16
Germination 21-25 march 🇱🇺🌱🤩
Day 65 from seeding, flower in full progress
Grow method 12/12 from seed-
Sea of green
Hey Growmy's,
everything looks more than good to me, 2-3 women are running a bit behind, but that will be fixed by itself so let it go, yesterday I increased my ec to 1.8 and my ladys liked it as you can see, think also hanging my lights in a couple of days to 30 cm above my cutys now they are on 46 .. but more from me in a few days again 😇
⚠️⚠️
Short info about my Humidity:
as you can see my humidity sensor from my CT grow system that I have is around 80% RH, but that is not right, my humidity is around 49-52% my sensor gets 24 hours fully blown by my humidifier onto the sensor no matter where I hang it because my ventilation is all around and is blown from top to bottom and a box fan lets everything circulate through the growroom so my old hygrometer is hanging in there againe and everything is fine
Amnesia by & for
@Superstrains Official
Runtz by & for
@Zamnesia Webshop came in 1 week later
Sour Diesel by & for
@Inseedious NL
Cobalt Haze by
@Sensi Seeds &
Arjans Strawberry Haze by
@Greenhouse Seeds for
@Amsterdam Seed Center
Under & for @Mars Hydro Factory
Nutes by & for @Hy-Pro Fertilizers
Soil:
Atami light mix &
5mm broken puffed clay &
16mm puffed clay on the bottem
of my 5.5L. pots
Temp: 24,56 °C
temp outside 15°C
Lights: 12/12
Humidity: 49-52 %
Vpd kpa: 1.3-1.4
Roots 17.50°C
Ph : 6.2
Tds/ec 1.8
Water: 0.8L. p.plant 23°C
CO²: No Mercy Tabs & boost bucket
Nutes by Hy-Pro Fertilizers
HyPro : Spraymix 0ml by 1L.
HyPro : Terra vegi & bloom 4.5ml by 1L.
HyPro : Rootstimulator 5ml by 1L.
HyPro : Generator 0.16ml by 1L.
HyPro : Epic Bloom 0.5ml by 1L.
HyPro : Cal-Mag 0.8ml by 1L.
Light distance:
=46cm to plant
= 42 cm to CTgrow sensor
dimmer on 100% = 1091.5umol/m²PPDF +-10
Gear all controlled by @ctgrow
1x MarsHydro TSW3000
1x MarsHydro TSL 2000
Air Van: 900m³ Prima Klima on 45%
Filter: Prima Klima 660m³ for seed& veg stage &
660m3 CanLite for bloom stage
3 l water cooling airco Diamant...
3.3l humidifier
1.8l dehumidifier
My grow room is variable in size
120cmx120cm² Custom Grow space for sog
150cmx150cm for scrog
Big THANKS to my lovely sponsors :
Super Strains, HyPro Fertilizers, Amsterdam Seed Center, Zamnesia, Inseedious, BTB Grow Supplies, Mars Hydro & CT Grow Systems


Likes
6
Share


@420DeepGrow
Follow
📆 Semana 8:
La Candy Bubatz XL entra en la fase crítica de maduración. Los cogollos se engordan visiblemente y la resina ya forma una capa pegajosa que cubre flores y hojas cercanas. El aroma se intensifica con notas dulces y afrutadas más complejas, llenando el espacio de cultivo. Los pistilos empiezan a cambiar de color y algunos tricomas ya muestran tonos lechosos, señal de que el pico de potencia se acerca. La planta mantiene una estructura sólida y sigue respondiendo perfectamente al plan de nutrición y riego, sin síntomas de carencias ni estrés.
¡Seguimos creciendo fuerte! 💪
Likes
92
Share


@SwissKush
Follow
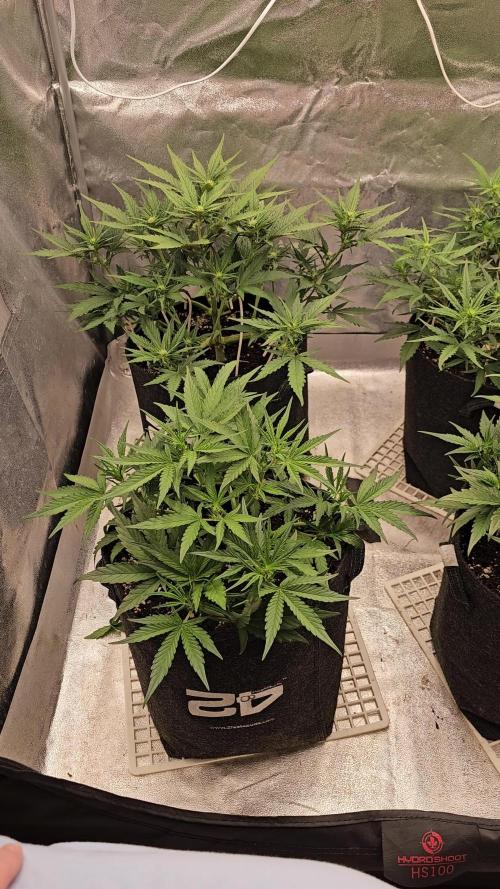
Day 29
Growth is very rapid, the plant has become a nice ball shrub from the leaf tucking and training
DWC will get changed tomorrow, she is drinking alot, maybe 2L a day
PH nailed at 6.0, ppms start at 700 and go as low as 500 when about to change the pool
I will be careful with water temperature. It is very cold here already up in the mountains
Day 30
Growth is very nice. The DWC change went very well, and the plant is still loving the above nutrient mix. Remember to mix properly! Micro first, and really stir it in, then your others, stir them in very well, followed by your powder solution, stir it in very well, usually for 2-3 minutes in the bucket or 10L bottle.
I like the shape of the plant Ive trained with basic leaf tucking and defoliation
PH is solid steady at 6.0, yellow colour on the test
Day 31
Growth is extreme in every direction. all limbs are growing upward and outward
Still determining which training methods I will use for this one
Just leaf tucking now for the shape to form
Day 32
added 3L to the DWC, she is consuming nutrients really well... going in its ~680 ppm, testing 18 hours later, 400ppm
this is a very hungry plant!
still leaf tucking the main fan leafs for the branches to grow upward, is working very well
defoliated the under side of the plant, removed all 1st and 2nd limb node leafs and branches, they will only runt out and grow larf in the long run.
Day 33
Extreme growth after defoliation, added 2.5 Litres to the DWC, the plant is drinking 2-2.5 litres a day
uploaded video of the setup and plant
Day 34
Growing very well, expanding everywhere. I added 2 litres to the DWC.
Day 35
Growing well, performed some light LST on the lower limbs to expand a bit
Added 3 Litres to the DWC, this plant eats alot of nutrients


Processing
Likes
12
Share


@Mistertemps
Follow
I gotta say these last few weeks have been pretty smooth. They just really started swelling up this week I think. I started the flush but noticed the leaves haven’t really been praying lately and some have been clawing. I’ve only been giving ph water since last week. They also don’t seem to be fading either 🤷♂️. Anyway I’m going to take them into week 9 and chop em start of week 10. By then maybe I’ll see some fading
Processing
Likes
93
Share


@Ferenc
Follow
Week 10, so from today I stopped watering the Gelato Cookie D'ohpe and on Saturday no more light as well. Sunday is harvest day finally. Not much changed, I raised up the water with 25ml so the Purple Punch gets 200ml 2 x a day. That's all, since last week I started giving 13 hours darkness and 11 hours light and from Monday will be 12/12 after I harvested the Gelato Cookie D'ohpe and I can use the tent only for her. Fertilization will happen on the same days. Sunday fun day, Gelato Cookie D'ohpe is harvested. Purple Punch left alone. From tomorrow I will switch the light schedule 12/12. End of the week Purple Punch is 43 cm.

Likes
20
Share


@DeepRootsGrowTrees
Follow
NORTHERN THUNDERFUCK AUTO / RQS
WEEK #12 OVERALL
WEEK # 7 FLOWER
This week she's looking good her buds are frosty and they continue to get dense her colors look vibrant she's had no issues so far!! Stay Growing!!
Thank you for stopping by and taking a look it's much appreciated!!
Thank you ROYAL QUEEN SEEDS!!
NORTHERN THUNDERFUCK AUTO/ RQS

Processing
Likes
6
Share


@LeylaGrowFantasy
Follow
She Is a beautiful babyyy. Growing so fast, and She love lst and topping. I think, She will give me some beautiful flowers 😍

Likes
9
Share


Likes
15
Share


@emeraldlabs
Follow
Continuously defoliating a bit at a time. Nitrogen issues seem to be resolving.
Photos/video taken 91 days after breaking soil, day 28 of flower.

Likes
16
Share

@Crazy_Doofus
Follow
Small but flowering strong
Aside the cost per seed, this pot hold 2 plants, so let's see how much per pot I can produce

Likes
8
Share


@NoProbation4Weed
Follow
Very Nice looking and good Smelling Plant. Buds after Trim are medium dense but very tasty.
Flavourwise it goes into ripe Berrys with a hint of Citrus and Soapyness in the background.
The Plant looks exactly like on the pictures High-Giraffe-Seeds shows on their website.
All in all definetly a recommendable Plant to grow.
Likes
13
Share

@Peca1973_Vv
Follow
They are completely different from the classic automatics, something between the automatics and the photo period, so I still don't know... I hope that they will strengthen a little, expand, increase the plants... and you can't expect a yield like some varieties like Gorilla cookies... But definitely... This smell so early, it's amazing, As the creators described it, it's like that. 😀🍀


Likes
2
Share


Likes
9
Share


@HIAZ_urbanbudfarmer
Follow
Hi Gromie's, all is ok, humidity levels have been better since starting drip feeds due to water now in resovoir. Temps need to come up a bit. Have upgraded to a new Mars Hydro fce 4800 bar light. Really nice light , excited to see how it performs. Have increased nutes & feeding every 2 hours as of today . Plant is compact & close between nodes. Untill next week enjoy natures greatest gift smoke up🤘👍🤪


Likes
7
Share


@Hightable420
Follow
Bloombastic putting in that work! Stinks like crazy now. Super strong sweet Lemon terps
Stopped Bloombastic & DualPart feed. Switched to Ripen for few feeds before starting flush.