Likes
Comments
Share
Nothing special this week, just watching them buds grow :)
Likes
2
Share
6/3/25 The stretch is coming in quite quickly and vigorously. Shes reached the height of the other plant in the tent and wouldve exceeded even the light and tent by now if i had added some lst clips to the tallest mains. Shes a very spindly plant with many many tops with very minimal training. prepared the soil a few days ago with dr earth bud and bloom and terp tea grow and microbe
Likes
16
Share
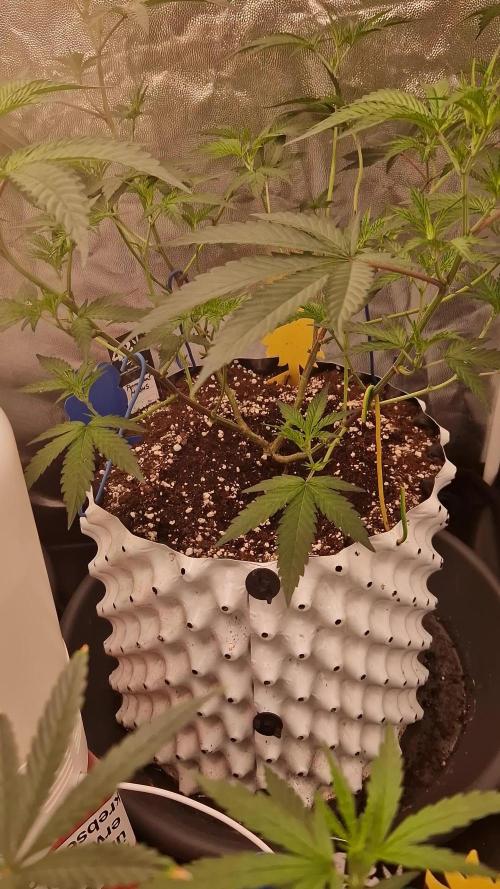
🌱 Week 7 From Seed | 12/12 From Germination Transition Phase — Early Flower (Week 1) 📌 Quick Context (For New Readers) These plants have been grown 12/12 from seed from day one. Because of this light schedule, development timelines do not match traditional veg/flower calendars. Although we are technically at Week 7 from seed, the plants are now entering what we consider Early Flower (Week 1). Pre-flower signs are present but still subtle, which is completely normal for this method, especially with training involved. Think of this as: Week 7 from seed ≈ Week 5 in overall physiological development ⸻ 🌿 Overall Plant Status All plants are healthy, vigorous, and responding extremely well to training. • Strong lateral growth • Very bushy structure • Tight internodes • No major deficiencies or stress responses The genetics are clearly expressing well under this method and environment. ⸻ 🧠 Training Update & Learning Moment This week involved low-stress training using plastic clamps and this was my first time. • Most plants responded beautifully • However, one branch was left clamped slightly too long, resulting in a partial break Recovery Action • White tape was applied immediately • The branch is stable • Early pre-flower signs are still visible on that plant 👉 Based on experience and current visuals, full recovery is expected. For comparison: • Another plant is trained using metal clamps, shown in the last photo • This plant is more delayed and not yet showing flower signs This contrast clearly shows how training intensity and timing can influence flowering onset under 12/12 from seed. ⸻ 🌡️ Room Conditions Despite very cold temperatures outside, the room has been stabilized well: • Temperature: 27.5°C • Relative Humidity: 65.4% • CO₂: ~909 ppm Humidity is slightly higher than ideal for flower, but plants are thriving and showing no negative responses. ⸻ 💧 Root Zone & Nutrition Adjustments were made this week to prepare the plants for flowering demand. • EC: Increased to 2.4 • Water Temperature: ~21°C (70°F) • pH: Raised to 6.5 🔬 Why the pH Change? This was a deliberate, science-based decision, not guesswork. As plants transition into flower, a slightly higher pH: • Improves availability of Calcium, Magnesium, and Phosphorus • Supports early flower initiation • Helps the plant shift metabolic focus From here: • pH will be cycled between 6.0 → 6.5 • Always kept above 6.0 • Adjusted based on plant feedback Until now, pH ranged around 5.8–6.0, which favored vegetative uptake. This marks the nutritional transition into flower physiology. ⸻ 💡 Lighting Update • PPFD Range: ~600–800 µmol/m²/s • Taller plants receive closer to 800–850 • Smaller plants around 600–700 • Top Lights: 100% • Under-Canopy Lighting: ~40–45% and increasing gradually The goal is to let plants adapt to photons coming from all directions, promoting: • Stronger lower growth • Better canopy balance • Reduced larf later in flower ⸻ 🔮 What to Expect Next Next 1–2 weeks: • Clear flower initiation on most plants • Stretch phase beginning • Increased nutrient demand • Continued canopy management (tucking & bending only) What NOT to expect yet: • No heavy defoliation • No aggressive stress training • No rushing the transition The harder training plant will be given more time — no forcing. ⸻ 🙏 Final Words Thanks to everyone following along — newcomers, supporters, critics, and sponsors alike. This run is about learning, transparency, and showing what 12/12 from seed really looks like when done patiently and intentionally. More updates soon 🌱 As always — observations welcome. Community Note Due to YouTube community guidelines, our educational channel was taken down. While we firmly believe the content was purely educational, we respect YouTube’s decision and are actively exploring alternative platforms to continue sharing this work. 📡 Please stay tuned. 🙏 Thank you for your patience and continued support. FOR DISCOUNT CODES AND MORE JUST FOLLOW THE LINK https://website.beacons.ai/dogdoctorofficial 📲 Don’t forget to Subscribe and follow me on Instagram and YouTube @DogDoctorOfficial for exclusive content, real-time updates, and behind-the-scenes magic. We’ve got so much more coming, including transplanting and all the amazing techniques that go along with it. You won’t want to miss it. GrowDiaries Journal: https://growdiaries.com/grower/dogdoctorofficial Instagram: https://www.instagram.com/dogdoctorofficial/ YouTube: https://www.youtube.com/@dogdoctorofficial Deleted by Youtube Vimeo : https://vimeo.com/dogdoctorofficial Under construction stay tuned ⸻ Explore the Gear that Powers My Grow If you’re curious about the tech I’m using, check out these links: 🔆 Lighting & Environmental Control • Future of Grow — Advanced LED lighting technology https://www.futureofgrow.com/ DISCOUNT CODE: DOG20 • Lumiflora — Under-canopy LED lighting https://lumiflorade.com/ • TrollMaster — Environmental controllers and automation gear (past collaboration) ⸻ Genetics • Zamnesia Seeds — Genetics used in this project https://www.zamnesia.com/ ⸻ 🌱 Soil, Substrates, Boosters & Root Support • Plagron — Substrates, bio mixes, and supportive products https://plagron.com/en/ ⸻ 🎒 Storage, Curing & Preservation • Grove Bags — Curing and storage solutions https://grovebags.com/ ⸻ 📸 Photography Equipment & Tools (Not sponsors, but part of my creative toolkit) • Sony A6700 • Sony full-frame macro lens + few more • Stacking photography workflow - learning • iPhone (for behind-the-scenes shots) We’ve got much more coming as we move through the grow cycles. Trust me, you won’t want to miss the next steps, let’s push the boundaries of indoor horticulture together! As always, this is shared for educational purposes, aiming to spread understanding and appreciation for this plant. Let’s celebrate it responsibly and continue to learn and grow together. With true love comes happiness. Always believe in yourself, and always do things expecting nothing and with an open heart. Be a giver, and the universe will give back in ways you could never imagine. 💚 Growers love to all 💚 📸 P.S. – The Eye Behind the Lens All photos in this diary (for now — except for the ones showing the camera, which I took with an iPhone) are taken with a Sony A6700 paired with a Sony full-frame macro lens and a few more. Photography is part of the story — it’s how we share the fine textures, the glow, and the quiet details that words can’t always capture. I’ve also started experimenting with photo stacking — a technique where multiple images, each taken at a slightly different focus point, are layered together to create one perfectly sharp image from front to back. It’s not digital enhancement or AI; it’s pure photography — a way to reveal the plant’s beauty in microscopic depth, from trichome to petal. You’ll even see a few shots of "ghost me" capturing the shots — camera, lens, setup — because every grow deserves not just to be cultivated, but documented like art. FOR DISCOUNT CODES AND MORE JUST FOLLOW THE LINK https://website.beacons.ai/dogdoctorofficial NEW DISCORD - Official Server Invite Link : https://discord.gg/ksjAkA5T74
Likes
10
Share
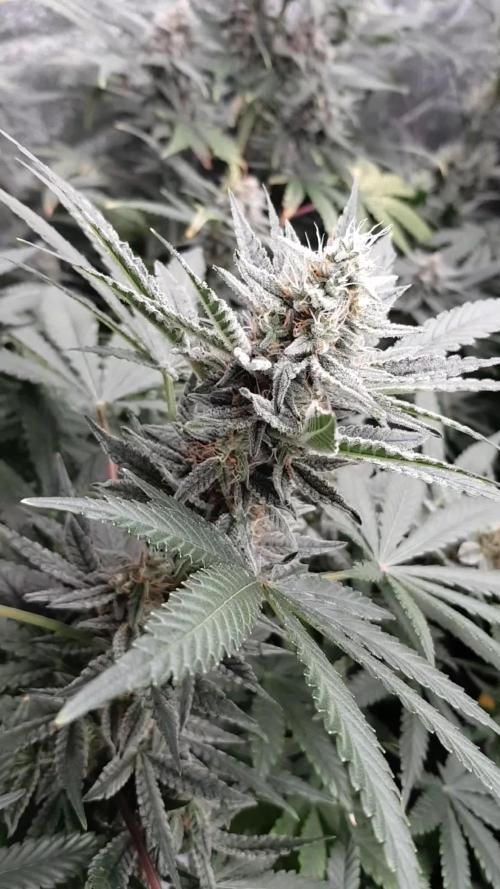
Les bourgeons sont biens lancés grossissement de jours en jours.😍
Likes
6
Share
@ProfDoty
Follow
irs Day 84 right now probably gonna chop her down on day 90. I’ve learned a lot from this grow and so far satisfied (for now) the smoke from the black cream is smooth asf it’s still curing right now but it’s sure to be a delight. Great genetics by sweet seeds would definitely recommend and run them again stay tuned for final weigh
Likes
3
Share
@Xabii
Follow
Bulking is in progress, nothing else to report, just waiting. Values are average of the day. DATE - EC(µS/cm) 20250419 1894 20250420 1894 20250421 1911 20250422 1942 20250423 1967 20250424 1979 20250425 2022 DATE - PH 20250419 6.16 20250420 6.13 20250421 6.12 20250422 6.12 20250423 6.12 20250424 6.14 20250425 6.13 DATE - ORP (mV) 20250419 74 20250420 70 20250421 66 20250422 63 20250423 65 20250424 64 20250425 59 DATE - °C - RH% (Tent Temp/RH) 20250419 23.6 49 20250420 24.2 53 20250421 23.6 52 20250422 23.9 52 20250423 23.8 52 20250424 23.1 52 20250425 22.4 53 DATE - °C (Reservoir) 20250419 20.7 20250420 21.2 20250421 21.0 20250422 21.0 20250423 20.9 20250424 20.8 20250425 20.6 DATE - CF 20250419 18.94 20250420 18.94 20250421 19.11 20250422 19.42 20250423 19.67 20250424 19.79 20250425 20.25
Likes
59
Share
Siamo all'inizio della 3° settimana di fioritura..si iniziano a vedere o primi pistilli cazzilli😂😉💪🕉️💚 forza belle mie....
Likes
12
Share
@Xpie77
Follow
Kweekverslag: 4 x Spliff Seeds Gelato Instellen Zaden: 4 x Spliff Seeds Gelato (indica-dominante hybride, Sunset Sherbet × Thin Mint GSC-lijn) Potten: 11 liter kunststof potten Medium: Standaard potgrond (geen extra perliet of wijzigingen) Tent: 120 × 120 × 200 cm (4 × 4 ft) Verlichting: Bestva Pro 4000 LED (volledig spectrum, 3000K + 5000K + 660 nm + 730 nm IR) – hangt op ±45 cm boven de luifel Lichtschema: Week 1-4 veg = 18/6, daarna flip naar 12/12 Temperatuur: 24-26 °C dag / 18-20 °C nacht Vochtigheid: 55-65% veg → 50-55% bloei Watergift: handmatig, pH 6,2-6,5, alleen water + Cal-Mag indien nodig Week 4 Vegetatief (einde groeifase) De 4 planten zijn supercompact en bossig – precies zoals je van Gelato had verwacht. Gemiddelde hoogte: 38-46 cm (plant 1 en 3 iets groter door betere hoek naar de LED). Dikke, donkergroene waaiervormige bladeren met perfecte internode-afstand (±4-5 cm). Goede vertakking vanaf de 3e knoop, al 6-8 zijtakken per plant. Geen inspanning, geen tekortkomingen, geen gele randjes – de potgrond was perfect tot nu toe. Luifel is mooi vlak, LED dekt de hele 120×120 perfect (geen hotspots). Geur: nog bijna niks, alleen een heel licht aards/zoet ondertoontje als je de bladeren kneust. Alles zag er top uit, dus ik heb op dag 28 van de groei direct geflipt naar 12/12. Geen training gedaan (geen LST/SCROG), pure bush-stijl. Overgang & Bloei in week 1 Direct na de flip begon de typische Gelato-stretch. In de eerste 7 dagen bloei zijn de planten ±10-15 % gegroeid (eindhoogte week 1: 45-55 cm). Eerste witte pistillen overal zichtbaar vanaf dag 4-5, vooral op de hoofdcola en de verhoogde zijtakken. Toppen wordt al wat dikker en begint licht te “swellen”. Bladeren blijven donkergroen en gezond, geen klauwen van branden. Geur: vanaf dag 6-7 ruik je het al duidelijk – zoet, romig, met een hint van bessen en een heel licht gasachtig/munt-achtergrondje. Typisch gelato! Waterbehoefte iets essentieel (nu ±1,5-1,8 liter per pot om de 2-3 dagen). LED nog steeds op 45 cm, lichtintensiteit perfect (geen bleken). Algemene observaties & tips voor deze opstelling 4 planten in 120×120 met 11L potten is ideaal: genoeg ruimte voor de bossige Gelato-structuur zonder dat ze elkaar verstikken. Bestva Pro 4000 presteert uitstekend in deze tent – ​​gelijkmatige dekking, geen dode hoeken. Potgrond houdt het prima tot week 3-4 bloei, daarna waarschijnlijk starten met licht PK-boost (Gelato is een zware feeder in bloei). Verwachtte bloeitijd: 8-9 weken (56-63 dagen) volgens Spliff Seeds info. De uiteindelijke hoogte wordt waarschijnlijk 80-110 cm. Opbrengstverwachting met deze opstelling: 450-650 gram droog totaal (realistisch voor 4 gezonde meisjes onder deze LED). Tot nu toe een gemakkelijke, stressvrije kweek. De planten zien er gelukkig uit en de geur begint al lekker te worden. Ik hou het verder in de gaten en update
Likes
11
Share
@GrowShock
Follow
Эта неделя пик цветения, растение пьёт очень много воды, несмотря на то что ppm 1700 выходит с дренажа, горшок полностью сухой через 24 часа. Поливаю каждый день во время рассвета ( у растения ), так же повышаю немного влажность из-за летней жары.
Likes
101
Share
@DevilsBud
Follow
10/10/21 new week for Afghani Gold Growing almost a month now did some topping last week and today started to LST the main everything going great so far plants loving the new FC-4800 so as i 🤩 absolutely no extra heat is coming of them 👌🏻 I maybe will top some more but as far it Goes for LST this will be the only thing i will do to the plants let the rest grow freely 14/10/21 Growing very nicely giving them the watering and nutrients when they need it . I am trying to understand plants better by looking at feeling soil etc instead of a regiment. And learning we do every day because bin growing in 11L pots but now in 8L pots so that means that there gone be smaller then my first grow . But hey got now 12 plants going on and not 4 so that will help lol 15/10/21 Did some small defoliation and some of them get light penetrating better visit www.marshydro.eu for your best gear and use the PROMO CODE: DEVILSBUD Fully marshydro supported Setup: Marshydro GT120x120x200 Marshydro FC-4800 LED lamp Mars Hydro tent handy info ●【Lock All Light Insid】MARS HYDRO Grow Tent Interior is made of diamond mylar. Non-toxic to the environment, no harm to plants. High-quality 1680D canvas being double stitched, (ALL OTHERS BRAND grow tent is 601D canvas) which is tear-proof for perfect light locking, No light leaks or rips at all. ●【Durability Grow Tent】Stable Metal corner adapters and poles are the trustful supporters of the tent. No rusting nor paint-falling. Quick easy tool-free installation. Carries strong heavy-duty SBS zippers, double layer lining to create a light-proof seal. ●【Easy Observation of your Plants】Special peeks window made by double layers of cloths. Observe the growing conditions of your plants without opening the tent and avoid disturbing plants. The peek window also serves to dissipate heat and ventilate air. ●【Removable Tray Keep Clean】The package includes a removable waterproof floor tray to hold soil and fallen leaves. The tray can be taken out easily to wash. Removable and water-proof makes cleaning easy. ●【Good Ventilation&Fast Assembly】 Circular double-sleeved vent holes with adjustable nylon strap for air circulation by exhaust fan, ducting, carbon filter, or reflector. Better allows proper light, heat, and airflow. Quick tool-free installation. Reinforced by a sturdy metal frame to ensure security and stability, supports up to 140lb. Perfectly safeguard your plants to thrive even in winter.
Likes
6
Share
Yeah it’s not anything like I had planned, but like I said last week, there is always next year. I’m just giving her molasses here and there. I don’t know the pH or ppm of the feed water. It’s just molasses and my 8 pH well water. Then back to just plain water if I’m not feeding. There are obviously a lot of soil amendments that I’m leaning on. I suppose the picture of her trunk isn’t that impressive because it lacks a reference of scale. But those are some big roots on the top there.
Likes
12
Share
Hello everyone, I the coming days i will harvest the 2 amnesia haze plants the amnesia fast is harvested 3 days ago and is drying at a humidity of 60% I can't wait to start my new grow as for the amnesia grow it's a big disappointment. The amnesia in the front starts to produce more bananas 🍌 and the one in the bag has another bud that is rotting. I will update videos later and the harvest video will come in about 16 days from now. Thanks for stopping by and have a nice week. Best regards, Growfather
Likes
1
Share
Great grow!! Should end up with over a half a pound off of these 2 and the little I harvested about 2 weeks ago. I got 2 oounces dry off of her. They smell amazing and are covered with trichomes
Likes
16
Share
During the middle of this week I decided to stop the outward training of the branches & the allow vertical growth for beginning bud site formation . I don’t want to miss the beginning flower stretch kinda need it 😂. Decided to break the apical dominance of the main stem by LST’ing down . I noticed it was leagues ahead of the rest of the plant because it hung over the side of the pot so since I need to start slowing it’s vertical growth I figure now Is also time to get the rest of the canopy to catch up leaving me to space things accordingly later when/if necessary . Also decided to go ahead and do my 1st & last additional feeding since these girls where planted all I’ve had to do this grow was water when dry & train her to the best of my abilities. Week 6 on the GreenSceene in the books 📚 thanks for stopping by .
Likes
17
Share
Una cepa muy fácil de cultivar, y muy agradecida de los cuidados y alimentos dados... En sus últimas 3 semanas engordaron muy bien llegando a formar muy lindos apicales centrales.
Likes
20
Share
Not particularly growing for speed or any dedicated reason this time round, just adding water and a abundande of positivity, gotta admit I do like the autoseed logo. Off we go again into the magical forest. (Arthrospira platensis) cultivated in high-alkaline, mineral-rich water in Kailua-Kona, Hawaii. It is renowned for having a higher nutrient content, including more carotenoids and essential fats, compared to other spirulina brands. It is frequently cited as a "complete food" due to its dense concentration of proteins, vitamins, minerals, and pigments. The nutritional profile of standard dried Spirulina platensis biomass. 3kg of spirulina powder has an approximate NPK ratio of 10-2-1 (or 10% Nitrogen, 2% Phosphorus, and 1% Potassium). Here is the breakdown of the nutrient content for 3kg of powder: Nitrogen (N): ~300g (10% of total mass) Phosphorus (P): ~60g (roughly 2% of total mass) Potassium (K): ~30g (roughly 1% of total mass) 3kg of spirulina powder is more than enough nitrogen for 4 cannabis plants in a 100-gallon pot—in fact, it is likely excessive and could cause severe nutrient burn or toxicity if not properly managed. Spirulina has a very high protein content (46% to 63% dry weight), which translates to a significant nitrogen source. It is often described as a 5-1-1 NPK fertilizer. 3kg (3000g) of powder in 100 gallons means 30g per gallon. General organic recommendations for potent amendments (like frass) are often around 1–3 tablespoons per gallon. 30g of powder is roughly 2-3 tablespoons, making this a very high-strength application rate if added all at once. Balance this with calcium/magnesium, and organic nutrient delivery in soil growing can lead to deficiencies in these nutrients. Not all of that 100 gallon is used, so figuring out precise measurements was ballpark, but there is about 10kg of engineered biochar in that pot. Mostly in the top half. Ideally, I'd have 25kg in a full active 100-gallon, but......... don't mess with something that is not broken. Roots do not utilize the entire 100 gallons. This has been a couple of years of trial and error, mostly error. The amount of cations you can add in grams depends entirely on the specific cation exchange capacity (CEC) of your biochar and the type of cation being added. Biochar CEC values vary widely, typically ranging from 4 to over 300cmolc/kg. Multiple Biochars in use, ranging upwards of 100cmolc/km. Different cations have different atomic weights Potassium K+ 39.1g/mol. Calcium Ca2+ 40.1g/mol. Magnesium Mg2+ 24.3g/mol. Nitrogen NH4+ 18.04g/mol. You get more nitrogen bang for your buck. It all depends on the CEC of the biochar you use, but brrrrrrrrrr roughly I'm looking at 500-600 grams worth of elemental cation exchange capacity, give or take. That's just for the biochar alone. Elemental cation exchange capacity refers to the ability of materials—such as soil, minerals, and biochar to adsorb, hold, and release positively charged ions Ca2+, Mg2+, K+, Na+, Al3+, and Zn2+. This capacity is a critical measure of nutrient availability in soil and energy density in electrochemical systems. Added calmag 2:1 to complement spirulina. Calcium (Ca): Approximately 150g - 300g of elemental calcium. Magnesium (Mg): Approximately 75g - 150g of elemental magnesium. So long as pH stays in 6.3 to 6.7 ish, the plant will unlock hydrogen. Plants will be able to cycle CEC for their own needs. Hydrogen ion pumping (proton pumping) is a fundamental mechanism used by plant roots to facilitate the cycling of nutrients within a medium's Cation Exchange Capacity (CEC), directly increasing nutrient availability. A growing medium's Cation Exchange Capacity (CEC) does not contribute directly to Electrical Conductivity (EC). CEC represents potential nutrient storage, while EC represents active nutrients in the water/soil solution. A medium with a high CEC can hold many nutrients, but if there is no water present, the EC will be low. 98% of plant nutrient uptake comes directly from the soil solution. 2% of nutrient uptake is directly from soil particles. Nutrients held on exchange sites (CEC) are not directly measured by EC until they are released into the soil solution through exchange with other ions (e.g., hydrogen ions from roots or fertilizer). Plants source the H+ ions (protons) used in cation exchange primarily by exuding carbon sugars into the rhizosphere, then microorganisms perform root respiration, which reacts with soil water to form carbonic acid H2CO3 that dissociates into H+ and bicarbonate. Roots also actively pump out H+ ions directly to acidify the rhizosphere, plants trade hydrogen produced through metabolism for essential nutrients held by the soil. In plant cells, the H+ (protons) used in proton pumping across the plasma membrane come primarily from the cytoplasm (cytosol). The protons are derived from internal cellular sources, including metabolic processes that release H+, and the regulation of intracellular pH homeostasis. Distilled water is highly useful in managing the electrical conductivity (EC) of a growing medium by allowing for precise control over nutrient concentration and assisting in the mobilization of nutrients from the cation exchange capacity (CEC) into the active, plant-available nutrient solution. Just add water & positive energy. Potential hydrogen. pH. + - , potential charge balance for hydrogen. So long as there is adequate oxygen in the soil and air and water moves at a decent interval, its practically impossible for the pH to skew in a soil that is taking in oxygen and releasing CO2 and nitrogen, I say practically, but meh, even with plenty of oxygen, the process of converting ammonium NH4+ to nitrate NO3- by bacteria releases hydrogen ions H+, which directly causes acidification (lowering pH). While water movement is necessary, consistent water moving through the soil can leach away basic cations Ca2+, Mg2+, K+, Na+, leaving behind acidic hydrogen and aluminum ions, causing pH to drop, especially in humid regions. High levels of CO2 in the soil (from intense respiration) dissolve in soil water to create carbonic acid, H2CO3, which lowers the pH. (barometric pumping removes that possibility) The pH in a cannabis cultivation environment, particularly in hydroponic or soilless setups, will often naturally drift towards acidic (lower pH) over time. Understand how to know when to lime the pH back up. Complex but critical. Once I understood this it helped ease the pain of understanding pH. Base saturation directly reflects the percentage of CEC occupied by base cations. Generally, as base saturation increases, soil pH increases because fewer acidic cations, H+ and Al3,+ are present on the soil colloid surfaces. At a pH of 7 or higher, the soil colloids are saturated with base cations, resulting in a base saturation of 90+%. While many sources include Sodium Na+ as a base cation, some calculations focused specifically on plant nutrients (like in some nutrient management contexts) may focus solely on the "Big 3": Ca2+, Mg2+, and K+. However, in soil science and CEC (Cation Exchange Capacity) measurements, sodium is usually included in the definition of total base cations, making it the "Big 4" base cations. At a pH around 5.5, soils often have a 45–55% base saturation, while a soil with a pH between 6.5 and 6.8 generally has an 80–90% base saturation. Base saturation is considered a reliable, albeit complex, indicator of soil fertility and the degree of soil weathering, acting as a crucial metric in soil classification and management. Once you take full control of the pH, so long as there is oxygen, and one keeps tabs on base saturation levels. Its near impossible for anything to go wrong. All you are essentially doing is adding water and waiting for any sign of deficiency. Not so much growing as eliminating the possibilities of things going sideways. Can't over or under water, can't skew pH, can't go anaerobic. Everything runs in optimal cycles, watering every 2 to 3 days or as required, depending on the rate of combined ET. A little warmer, a little drier, but never short on water. All the nutrients are already there in the medium, we still focus on the water, just not adding salts, but to mobilize nutrients held in the Cation Exchange Capacity (CEC) and move them into the active soil solution for plant uptake, the best supplements to add to water are fulvic acid, humic acid, or seaweed/kelp extract. Liquid solutions with high concentrations of essential trace elements. Distilled water has no alkalinity or minerals to help buffer or release nutrients. Adding these supplements turns the "empty" water into an active agent that forces nutrients off the CEC colloids into the solution for plant uptake. When to water? When Electrical Conductivity of soil gets low. No water, no conductivity.
Likes
43
Share
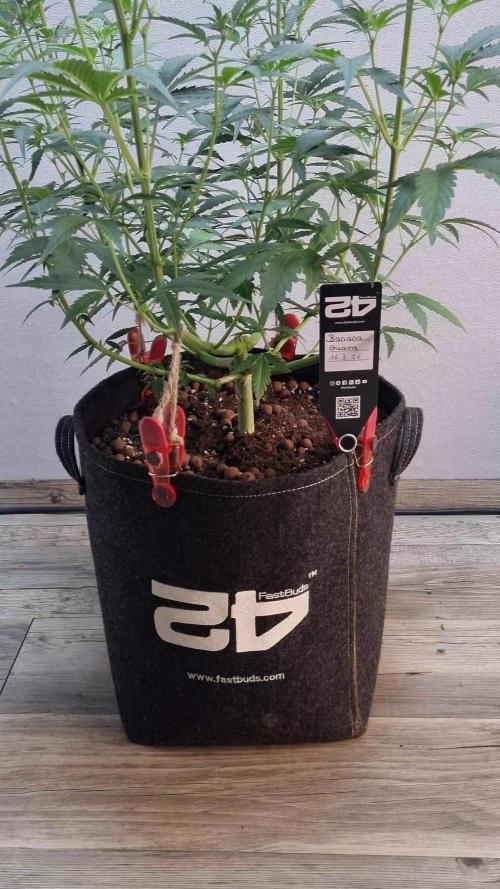
~ GG4 SHERBET FAST FLOWER by FastBuds ~ Well fam, here we go again with another epic strain from FastBuds Fast Flowering stable. After having such tremendous success growing their Gorilla Cookies Fast Flower outdoors last year, I've decided to run another of their fast flowering strains outdoors this year... GG4 Sherbet Fast Flower! The best description of this awesome cultivar comes directly from my friends at FastBuds which is as follows: "Bred from extremely potent and flavorful Gorilla Glue and Orange Sherbet genetics, GG4 Sherbet FF (Fast-Flowering) takes all the best traits to the next level, offering a high-yielding strain that can produce up to 600 g/m2 in a 7-week flowering time. This super resilient Indica-leaning hybrid thrives indoors and outdoors, and in all types of climates while producing mouth-watering sweet, fruity, spicy and earthy terps that translate into a delicious sugary hazelnut aroma. Expect an extremely relaxing and overall happy effect that’ll leave you with a huge smile from ear to ear. It’s the perfect strain for growers of all levels of experience seeking low-maintenance yet highly productive photoperiod varieties that deliver quality and quantity without extra effort. GG4 Sherbet FF grows chunky buds with long dark orange hairs and spade-shaped calyxes that get encrusted with trichomes by harvest time, giving them a gorgeous silvery-white appearance. This medium-sized photoperiod can reach up to 200 cm in height and yields up to 650 g/m2 while developing that typical hybrid structure. GG4 Sherbet FF grows with a stocky, bushy appearance, developing one sturdy main cola and fat side branches that support huge yields without much effort. This super-fast variety produces distinctive light-green buds with a high bud-to-leaf ratio, making your trimming sessions a breeze. It’s a top-notch resin producer that doesn’t need much maintenance and will thrive in almost every climate, rewarding growers of all levels with extremely flavorful resin that makes for outstanding hash end extracts." ________________________________________________________________________________________________________________________________________________________________________________________________________________________________________________________________________________________________________________________ The Setup: This is going to be an outdoor grow, but I have started the GG4 Sherbet Fast Flower indoors as our weather is still too cold to put her outside (nighttime temp's dipping regularly into the 30's℉). The plan is simple... let her grow inside under a 19/5 light schedule until the nighttime temperatures stay above the mid 40's℉, at which point she'll be moved outside and transplanted into the soil which I have already setup and inoculated with beneficial microbes, and then let the fun begin!🤪💚 ________________________________________________________________________________________________________________________________________________________________________________________________________________________________________________________________________________________________________________________ Weekly Updates: 7/1- Here we go into the FastBuds GG4 Sherbet Fast Flower's 13th week from seed and this lady is kickin ass and taking names! I am continuing to water late in the afternoon on days when we don't get any rain and she seems to like it. I will also be top dressing her in about two weeks to keep the microbial colony fat and happy! 7/3- The weather continues to be hot and humid and the daily watering of the GG4 Sherbet FF continues. I also removed a few shade leaves that were below the canopy, as well as some in the middle of the plant that were blocking a lot of light to new shoots. 🎉HAPPY 4th of JULY!🎉 7/5- Early this morning we had a thunderstorm pass through early in the day, which provided about an inch of rain in a short time. I went ahead and watered in the afternoon, but only gave the GG4 Sherbet FF approx. 3g of well water from the garden hose. 7/7- The daily watering continues, as does our blistering hot🔥weather. All is well with the FastBuds GG4 Sherbet Fast Flower and today, after watering, I got under the trellis net and removed a bunch of shade leaves that were growing straight down through the net doing absolutely nothing but sucking up nutrients better used elsewhere on the plant. Stick a fork in another week for the FastBuds GG4 Sherbet Fast Flower. This beautiful cultivar has gone through a tremendous growth spurt and I am hoping to see her begin to transition into flower over the course of the next couple of weeks... stay tuned! 😎✌️ Thank you for checking out my diary, your positive comments and support make it all worthwhile! 💚Growers Love!💚😎🙏
Likes
23
Share
Likes
13
Share
Hi Gromie's, well it's the end of another problem free week! Week 9 going into week 10 of veg! I don't usually veg for this long but I'm just trying to get the timing right for perpetual harvest. Plants in flowering tent were harvested & drying now for 5 days, so these girls will be transferred to the flowering tent in the next few days for the start of flowering, I've allready planted new seeds for the following grow, so just trying to get on top of the timing for everything related with perpetual growing. Thinking of setting up a 4x2 tent with a 4 inch extraction fan & filter for drying, so I can cut out around a week, that way as soon as I've harvested & cleaned the tent I can transfer plants from veg instead of having to dry in the flowering tent. Have developed really strong & thick structure's from the H.S.T & L.S.T training. Plants are nice & healthy. Performed 1 last defoliation before they go to flower as they get very bushy quickly.
Likes
32
Share
Info: Unfortunately, I had to find out that my account is used for fake pages in social media. I am only active here on growdiaries. I am not on facebook instagram twitter etc All accounts except this one are fake. Hey everyone ☺️. She developed very well 👍. In the next 10-14 days she will be in the bloom tent :-). 1 g Enhancer Pro l cocos was added. As always, a cuttings are cut before moving 👍. Otherwise everything was cleaned and checked. Have fun and stay healthy 🙏🏻 You can buy this Strain at : www.Zamnesia.com Type: Runtz ☝️🏼 Genetics: Zkittlez x Gelato 👍 Vega lamp: 2 x Todogrow Led Quantum Board 100 W 💡 Bloom Lamp : 2 x Todogrow Led Cxb 3590 COB 3500 K 205 W 💡💡☝️🏼 Soil : Bio Bizz Coco ☝️🏼 Nutrients : Green House Seeds Company Powder Feeding Bio ☝️🏼🌱 Water: Osmosis water mixed with normal water (24 hours stale that the chlorine evaporates) to 0.2 EC. Add Cal / Mag to 0.4 Ec Ph with Organic Ph - to 5.8