Likes
24
Share
@Stinkfox
Follow
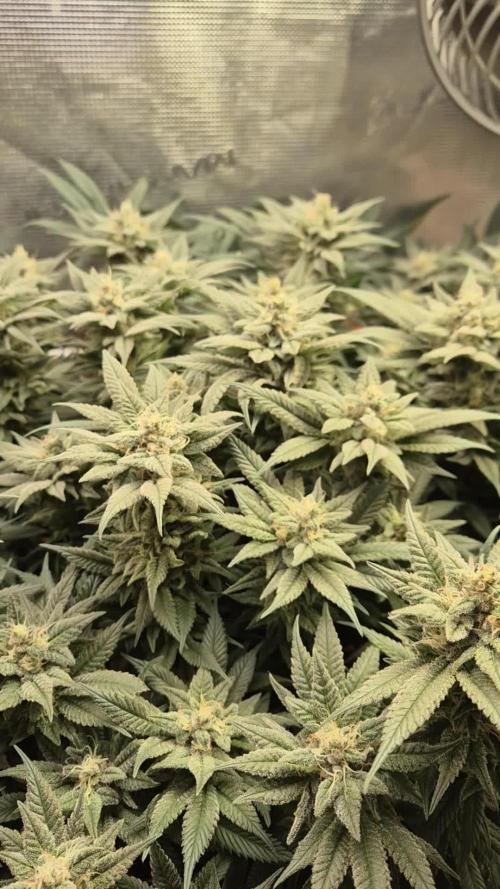
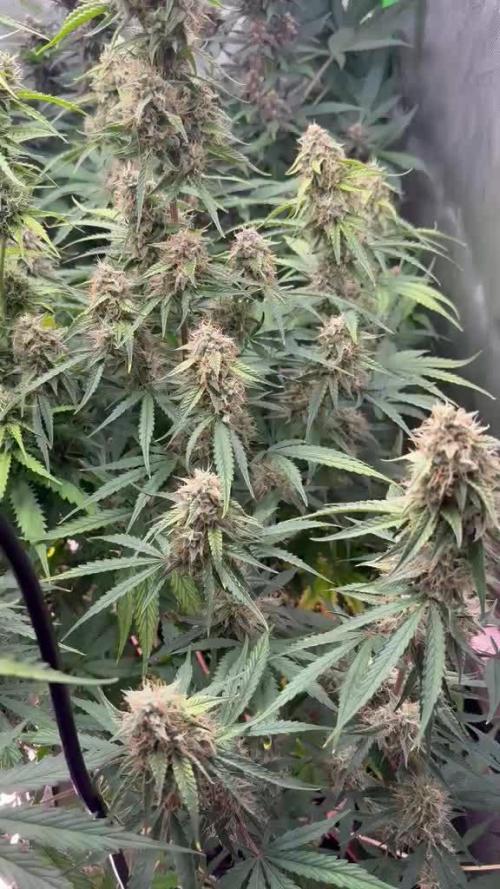
Just water this week, as it will be the last. She smells super strong. I pulled off a leaf and it smelled super skunky. I’ll be splitting the stem tomorrow, and harvesting by Wednesday.
Likes
53
Share
@wolfvb
Follow
? Harvest Day: Sticky Broccoli Micro is Down! 🥦❄️ ​The day is finally here! After weeks of swelling, frosting, and fading, the Sticky Broccoli Automatic has officially been chopped. She was an absolute pleasure to run and put on an incredible colorful show right at the finish line. ​⚖️ The Harvest Stats: ​Wet Weight: We hit the scale at exactly 162.1g wet! For a micro run in such a small pot, I am absolutely thrilled with that yield. She packed all her energy into those dense clusters. ​Bud Quality: The density and bag appeal are unreal. She's rocking beautiful deep violet and purple hues under a thick, frosty blanket of trichomes, and the terp profile in the room right now is ridiculously loud. ​🚀 Into the Dry Room: She got a quick wet trim to remove those large, faded yellow fan leaves and is now hanging upside down in the tent. You can spot the DryRocket in the background getting to work and keeping the drying environment perfectly dialed in! (Speaking of which, today is the final day for the DryRocket giveaway, so congrats for the winner 🏆! 🤞) ​Now comes the hardest part of every grow: the waiting game. I'll be monitoring the dry closely over the next week or so before trimming her up fully and moving these beautiful purple nugs into jars for the cure. ​Dry weight and smoke report coming soon! Let's grow! 🌱💨
Likes
114
Share
Week 8 Flower The last week of flush for these two. They were taken down on Day 56, after a 16 Day flush. I think Twin2 could have finished at 7 weeks, but of course I hadn't planned for this, or I would have flushed sooner. So she was taken to the originally planned 8 weeks. Twin2 has also foxtailed quite a bit, from only slightly higher temps and also because she's having a last attempt at catching any pollen in order to reproduce. Although the pots were slightly damp still when I harvested, it is best to take them down when they're dry. The only reason I didn't, was because I knew I'd be too busy the next day, and there were plants in veg that were desperate to be thrown into the flower tent! The pics do make them look wetter than they were though. Their fan leaves were taken off and they were each hung in seperate boxes, where they'll dry as slowly as possible for between 6-10 days. I dont suffer with very high humidity, so I'm able to do this without any issues. When I feel it is too humid, I simply burp the box for the first day or 2 once a day. The slower the dry the better the buds will taste/smell. Once she's dry enough she'll be trimmed and jarred for curing. It's going to be a pretty tough one for keeper pheno! They both have similar but very different smells. By that I mean, they both smell very floral and sweet, but T2 smells extra sweet (although definitely not as dense). That doesn't mean T1 doesn't smell just as nice. Hers buds are thicker and more dense, so even though I've favourited T2 in the pics, I think I'm leaning towards T1 still. But in all honesty it's still down to dry weight and the taste test! This can all be looked forward to in the harvest update! It's been a seriously fun diary with these two twins. I'm definitely glad I separated them. Do you think you'll attempt to separate them after seeing my experience? Please let me know! Thanks for following and happy growing! 🐺
Likes
56
Share
Bonjour à tous les padawans et les maîtres jedis Pour cette semaine 3 au jour 19 ma plante fais 21 centimètres et son septième noeud apparaît je décide donc de pratiquer un LST sur ma plante. Pour ce j'utilise du fil de fer galvanisé que je plante directement dans le substrat en faisant attention de ne pas endommagé les racines car n'oublions pas que ce qui pousse dessus pousse aussi dessous. Jour 17 je pulvérise du une solution composé d'une cuillère à café de savon noir mou (marque briochin) dilué dans un demi litre d'eau en prévention d'éventuels nuisibles. Pourquoi le savon noir mou ? Savon noir : quelle utilisation pour le jardin ? Le savon noir est un produit naturel dont les propriétés nettoyantes sont connues depuis l'Antiquité. Utilisé pour l'entretien de la maison et pour les soins corporels, ses vertus antibactériennes et insecticides en font un allié précieux pour le jardinier bio. Le savon noir est fabriqué à partir de potasse et d'un corps gras de type huils végétale comme l'huile d'olive, de lin ou de maïs. Produit naturel et biodégradable (s'il ne contient pas d'additifs, comme cela peut-être parfois le cas), c'est un très bon produit nettoyant, pour les sols, la cuisine, la vaisselle, le linge, etc... Très polyvalent, il est également économique, comparé aux multiples détergents classiques du commerce. Le savon noir se trouve sous forme de pâte molle et brune ou sous forme liquide, dilué avec de l'eau. C'est du savon noir liquide dont on se sert généralement au jardin, car son utilisation est plus simple. Il s'achète dans les magasins bio ainsi qu'en grandes surfaces ou jardineries. Attention : la recette du savon noir de ménage et celle du savon noir utilisé en cosmétique ne sont pas forcément les mêmes ; les savons noir de ménage (multi-usages) peuvent contenir davantage de potasse afin d'améliorer le pouvoir dégraissant (irritant ou desséchant pour la peau), voire même certains additifs chimiques. Au jardin, ce sont en priorité les propriétés antiseptiques et insecticides du savon noir qui sont utilisées. Le savon noir liquide est utilisé pour lutter contre les pucerons, les cochenilles, les araignées rouges, les aleurodes, les psylles et autres thrips. C'est un insecticide de contact ; il tue les larves et nettoie le miellat qui englue les feuilles. La recette de l'insecticide à base de savon noir (mou pour ma par marque briochin) est simple à réaliser : une ou deux cuillères à café de savon noir mou (briochin) diluées dans 1 demi litre d'eau tiède (dilution à 5 %) ; une fois la préparation refroidie, pulvérisez-la sur les plantes atteintes, en prenant soin de ne pas oublier l'envers des feuilles. À renouveler 1 à 2 fois si nécessaire, pour être totalement débarrassé des indésirables. Comme il est de mise pour la plupart des traitements, ne pulvérisez pas la solution à base de savon noir en pleine journée, sous le soleil (ni sous la pluie !) ; procédez le matin de bonne heure ou patientez jusqu'à la fin de journée, lorsque les températures sont en dessous de 20°C. Jour 18 Je corrige mon LST suivant la pousse de ma plante ... Pour ma par c'est la manière dont je procède mais petit rappel de la technique du LST Quand commencer à appliquer la technique LST ? De nombreux cultivateurs commencent la manipulation dés que les plantes possèdent entre 3 et 6 nœuds ou une paire de feuilles. Durant cette première étape de la croissance, le tronc encore flexible est pliable sans risque qu’il ne se casse, même si au fur et à mesure du développement de la plante il sera de plus en plus difficile de le plier. Nous pouvons continuer à guider la croissance des branches durant toute la culture, même durant la floraison, ce qui pour cette étape représente un grand avantage face à la taille, qui n’est pas du tout recommandé une fois que la formation des têtes commence, cela stressera en effet la plante, ce qui aura pour effet de retarder la récolte. Comment appliquer la technique de guidage LST Si nous sommes prudents, la flexibilité naturelle des fibres du cannabis permet de plier leur tronc et branches avec une relative facilitée, même durant la floraison des plantes. En utilisant une corde fine, nous pouvons accrocher la pointe de la plante à la base du pot par exemple ou à un tuteur que nous aurons planté dans le substrat. Nous plierons le tronc avec précaution et nous le fixerons avec la corde, à partir de là, nous pouvons augmenter progressivement la tension de la corde, chaque jour un peu plus, jusqu’à obtenir la position souhaitée. Soyez attentif à la réaction de la plante, essayez de ne pas appliquer trop de pression sur la corde et rappelez-vous que la flexibilité des branches peut varier d’une plante à l’autre. Pour obtenir de meilleurs résultats, il suffit de suivre quelques règles simples. Pour commencer, nous devons choisir une corde fine mais pas trop pour ne pas blesser les troncs au fur et à mesure qu’ils grandissent et qu’ils deviennent plus gros. Nous pouvons utiliser des crochets en plastique souple ou de n’importe quelle autre matière flexible pour éviter d’endommager les plantes. Spécialement en intérieur, utiliser des cordons en plastique de couleur (voir les diaries de @Silky) est très pratique pour voir facilement les accroches et faciliter le travail au milieu du réseau formés par les cordes, les tuteurs, les mailles ou les supports que nous aurons dans la culture. Bien entendu, en culture extérieure et surtout en guerilla nous ferons juste le contraire et nous utiliserons des matériaux de couleur qui n’attirent pas l’attention pour que notre jardin reste discret. Pour stresser les plantes au minimum, la mieux est de réaliser ces manipulations le soir ou juste après que les lampes en intérieur s’éteignent, ce qui leur permettra de se remettre durant la nuit. Normalement, le jour suivant nous pourrons observer comme les pointes des branches que nous avons pliées se dressent de nouveau vers le haut à la recherche d’une source de lumière. Que la force soit avec vous💪
Likes
2
Share
Looks like this might be the last week for this girl. Was hoping to see more change in tricomes but not sure if worth the wait. Give it a few more days and see what the loop says.
Likes
6
Share
Start of week 6 of flower for Space Panda Shes just so pretty even though her buds are actually on the small-medium size range hopefully this one will be a good quality over quantity pheno! Still getting fed everyday with bottom feeding, this week i did banana peel water with extra cal-mag added too. Going back to water only after she gets another feed of Bio Enhancer. Pheno 2 in week 3 now, she had a little struggle but seems to be doing nicely now? she got q heavy defoliation she really needed it. I HAVENT ABANDONED THIS DIARY! GROW DIAIRIES DOENT LET US GO PAST 21 WEEKS.... FIX THIS ISSUE.
Likes
37
Share
7/9 I armed up for my battle with earwigs. I bought and applied diatomaceous earth and added sluggo plus pellets to the medium and around the bags and cage. Then I covered the stems on petroleum jelly. I raked my hand in the same bag as yesterday and found a bunch of earwigs. This time I was prepared. I killed them with a 50/50 solution of 70% rubbing alcohol. I found a few more that I killed as well and cleaned as best I couod. Weed Wacker wouldn't work. This was after I watered. The blueberry was droopy af. It stood right back up after I watered though. It doesn't look to bad. I defoliated anything too bad. If I see ANYMORE signs of septoria I'm isolating that plant (probably should anyway) and getting a systemic to deal with septoria. I got the wrong organicide I guess. I got bee safe instead of plant doctor. Regalia is what I'd like to get but it's like $90. Anyone have any good advice dealing with pm and or septoria? I know I should defoliate a little more. 7/10 Plants looked healthy and showed no negative effects from the previous application. I have some defoliation to do and I need to go over at night to check out the earwig population. Found a moth larvae and killed it. With all these other problems and medical issues it's hard to get everything done. I believe I watered today. THIS IS WHY YOU AT LEAST WROTE THAT SHIT DOWN EVEN IF YOU FINISH. 7/11 I had a few teeth pulled this morning after a horrible appointment with my doctor. I believe I watered before I reapplied some sluggo plus and diatomaceous earth. I inspected around my structure directly after the extractions while still numb. I found and killed literally 100's of earwigs! At first I was using an alcohol spray. They are in the structure itself!!!! Where the fence attaches to the wood and a bunch of other places. I used what I had filled it again, stomped them left and right then I found a can or roach ant killer. I CAREFULLY sprayed bottom parts of the structure and they would run out and get sprayed. Damn that felt good. Especially since I've noticed some slight interior damage on a couple plants that seem consistent with earwigs. Small leaves turning yellow after munched. New growth being attacked. Ragged holes in leaves. I wanted to go back tonight but I'm hurting. Noticed some dieing leaves on my blueberry. I'm wondering if it's septoria. I'll update tomorrow. 7/12 WATERED THEN FED 3 GALLONS TO THE GARDEN. Large thunderstorm and hail possible tonight Still in pain but I defoliated all the little dead new growth that the earwigs are eating and anything blocking nodes or that looked infected. Earwigs eat the new shoots that grow the buds. People think they are harmless but they are far from it. Just wait till you have an infestation and they chew off all your budsites lol. You'll have a ten foot plant with MAYBE a six inch cola (if the left ya any) that will probably be diseased. I'd rather deal with mites. I can't believe someone said bugs don't spread plant diseases. Well....they do. I've learned more about earwigs the past few years than I would've ever cared to know. I've seen aphids ONCE this year and they were dead from the organicide spray. I did find a few earwigs on the medium dying so something must be working. I'd spray it with alcohol and it would just spasm but not try to get away. I imagine it's either the DE or the Sluggo plus. After the earwigs eat the shoots the small leaves turn yellow and die. Looking at the plants the look awesome. When you get closer though I can show you branches with no budsites and some other things. I think I'm dealing with it right though. This year pretty much everything is straight up Indica (80/20 or so). Real bushy plants. I'm thinking about whether or not to spend money on regalia or just get plant doctor. 7/13 I had a botanist that teaches marijuana horticulture look at my videos and some leaf samples. No septoria so far! I need to cut some foliage by the forest edge and dispose of it and clean the grow area and be more sanitary. A new pair of gloves each plant or wash my hands after I defoliate. I'm going to spray the shit out of the surrounding area and remove the back tarp like many have suggested. It's a calculated risk but I think it's worth it. I think p jelly is working but some earwigs are dropping on them or flying short distance from plants because I've seen damage. I was going to get the plant doctor but I don't need it if I don't have the septoria. I need to go dig at each corner of my cage and get as many earwigs as I can and dispose of them. I'll kill the ones that rise with alcohol/water or raid. 7/14 I took the back tarp down and put a barrier of DE around the cage and each bag/pot. Added a touch more around the base. I'm finding earwigs dying and I'm really thinking the population is shrinking. I shoveled around the structure and didn't find any. I need my new weed Wacker to show up so I can clean shit up. The other one broke. I've been much more sanitary and am using different gloves each plant before I just started washing my hands in between plants. I'm planning on going back and AT LEAST try using the push weed Wacker to clean stuff up and spray the shit out the treeline and around the cage. It rained hard last night and it's supposed to rain again. If I notice to much more damage I'll do an application of spinosid. 7/15 Rained and stoked hard all night. I weedwacked the treeline back this morning to cut down on vegetation that's infected or could be. I weedwacked around the cage and hunted earwigs. I defoliated what needed it and I can see damage from the earwigs. If you watch the video I made for a friend you can see. I also I sprayed a gallon of baking soda/dawn/veg oil on the plants by the treeline and all around the cage. Used a different bag each plant and washed my hands before defoliating. Things seem to be going good. Plants are stretching. They are in what I like to call the 'asparagus' stage where they REALLY stretch and drop leaves. I'll keep this updated.
Likes
1
Share
@Dendegrow
Follow
🌈 Mental Rainbow (Sweet Seeds) – Week 7 | Flowering Day 1 🌸 Here we go – the bloom begins! 🚀 Yesterday I flipped her, so today is officially Day 1 of flowering. She’s thriving in my own homemade Living Soil, and the root structure is crazy thanks to my custom booster 🌱. The smell is already phenomenal – sweet, intense and super fresh 🌿💨. Today I removed a few leaves 🍃✂️ to let the light penetrate deeper into the canopy. She also got just a light dose of Greenhouse Feeding Bloom – nothing heavy, since the Living Soil is already full of life ✨. This lady looks ready for a colorful journey – follow along to see how bright this rainbow will shine 🌈🔥. --- 🌈 Mental Rainbow (Sweet Seeds) – Woche 7 | Blütetag 1 🌸 Jetzt geht’s los – die Blüte startet! 🚀 Gestern umgestellt, heute offiziell Tag 1. Sie wächst in meiner selbstgemachten Living Soil Erde und hat durch meinen eigenen Booster eine extrem starke Wurzelstruktur entwickelt 🌱. Der Geruch ist schon jetzt phänomenal – süß, intensiv und richtig frisch 🌿💨. Heute habe ich ein paar Blätter entfernt 🍃✂️, damit das Licht besser nach unten kommt. Dazu gab’s eine kleine Portion Greenhouse Feeding Bloom – nur ganz leicht, da die Living Soil schon genug Power hat ✨. Das wird ein richtig bunter Run – bleibt dran und schaut zu, wie dieses Rainbow in voller Pracht erstrahlt 🌈🔥.
Likes
40
Share
Welcome to Bud Boutique Grow Diary - really appreciate all your love and support :) Don't forget to check out my other current grows! 🗓️ This Week: - Day 52: the end is near - faded out super strong and could handle her how I would like. - Day 53: Trichomes check - looking super good almost all cloudy, a few amber and clear. perfect point to chop - Day 54: this one is finished, let's chop them !! ✂️✂️✂️ - now its time to dry inside the tent at about 60%rh and less than 20°C/68°F trying to get it even lower for the next 10-14 days Thank you for still staying with me 💚 ___________________________________________ --- 🌱 Strain (Sponsor) --- 🏷️ Wedding CheeseCake by Fast Buds https://2fast4buds.com/seeds/wedding-cheesecake-fast-flowering --- 🥗 Nutrients and Feeding (sponsored by APTUS: APTUS Ambassador) --- 🍸 APTUS: full nutrient schedule extreme -- Regulator, N-Boost, P-Boost, CaMg-Boost, K-Boost, Allin1 Liquid, Startbooster, Topbooster, Enzym+ every feeding -- Fulvic-Blast, NutriSpray as Foliar each once a week 🔗 https://aptus-holland.com/ --- ♻️ Grow Control (Sponsor) --- TROLMASTER: TENT-X + LM14 Light Adapter to dim/sunrise/sunset lights + Temp & rH Sensor all remote on App 🔗 https://www.trolmaster.eu/ --- 🚿 PetraGrow (Sponsor) --- CannaFogger Foliar Spray 🔗 https://www.petratools.com/product/petragrow-cannafogger-atomizer-new-mini-fogger --- 🏭 Grow Setup --- 💡LUMATEK Zeus Pro 600 * 🏠🌿 Indoor: Homebox 120x120x200cm (4x4) * 📐🌀 PrimaKlima exhausting Fan 1180m3/h (running on 60-80%) * 🌀 Can Light Filter 800m3/h & 1x Fanbox 1x Dyson fan for Air circulation 🔗 https://lumatek-lighting.com/zeus-600w-pro-29/ 🔗 https://primaklima.com/de/shop/ventilatoren-de/ec-ventilatoren/pk160ec-tc/ 🔗 https://canfilters.com/products/filters/ All Likes and comments are highly appreciated!!! 👨‍🌾 don't forget to check out my Instagram for daily educational content: budboutiquee - Bud Boutique
Likes
1
Share
@Fyno_TH
Follow
The plant is now focusing 100% on bud development and trichome production
Likes
20
Share
Ok my first grow on my new rdwc system made by urban Culture very exited to move to this I have done a lot of research and I know I will make mistakes but hopefully non too big. This is a step up from my Wilma 4 pot. I can get more in the system water wise and Easyer to clean out. Any advice or tips with rdwc feel free to comment 😎😊
Likes
3
Share
@WeedM8
Follow
Hello m8 welcome to this journey with me in this diary will have very interesting strains hope u find something useful O.G. Kush Titanium - [ ] 1st week Veg: germinated in substrate lighting very close so it jets medium high humidity after the 3rd day they started sprouting - [ ] 2nd week Veg: this week my ventilator broke down and as the temperature stayed very warm nothing developed much - [ ] 3rd week Veg:fortunately this week i had fixed the ventilation and the temperature has go down a bit allowing the little plants to develop and reinforce - [ ] 4th week:very good developments in this week I already started feeding a bit two times but i didn’t have to…once was enough - [ ] 5th week Veg:this week they were very strong green i only had to water them good and keep the ventilators going no stop .They have good hight already ,but as i have to strains together. I want to transplant them when the hight of the other one have stretched… I’m thinking to transplant next week if not the next one - [ ] 6th week Veg: this week it went great fortunatly i dont have pests that eat my buds i’ve givven a fed once the substrate is very rich already the plants streached very well i will transplant today so be ready m8 i cant wait to show you the progress - [ ] 7th week Veg - [ ] 1st week Fl - [ ] 2nd week Fl - [ ] 3rd week Fl - [ ] 4th week Fl - [ ] 5th week Fl - [ ] 6th week Fl - [ ] 7th week Fl if this was useful please like and follow
Likes
8
Share
Einfach wunderschön anzusehen. Sie hat das umtopfen super vertragen. Heute habe ich sie ein wenig trainiert, damit die unteren Triebe auch Licht bekommen.
Likes
57
Share
Welcome to Bud Boutique Grow Diary - really appreciate all your love and support :) Dont forget to check out my other current grows! 🗓️ This Week: - Day 38: looking super beautiful - stacking up slowly - both Phenos #1 and #2 got amazing purple leaves - Day 41: look at this color play Thank you for still staying with me 💚 ___________________________________________ --- 🌱 Strain (Sponsor) 🌱 --- 🏷️ PEACH GIRL by Art Genetix https://www.artgenetix.world/product-page/peach-girl --- 🥗 Nutrients and Feeding (Sponsor) - (APTUS Ambassador) --- 🍸 APTUS: full nutrient schedule extreme -- Regulator, N-Boost, P-Boost, CaMg-Boost, K-Boost, Allin1 Liquid, Startbooster, Topbooster, Enzym+ every feeding -- Fulvic-Blast, NutriSpray as Foliar each once a week 🔗 https://aptus-holland.com/ --- ♻️ Grow Control (Sponsor) --- TROLMASTER: TENT-X + LM14 Light Adapter to dim/sunrise/sunset lights + Temp & rH Sensor all remote on App 🔗 https://www.trolmaster.eu/ --- 🚿 PetraGrow (Sponsor) --- CannaFogger Foliar Spray 🔗 https://www.petratools.com/product/petragrow-cannafogger-atomizer-new-mini-fogger --- 🏭 Grow Setup --- 💡LUMATEK Zeus Pro 600 * 🏠🌿 Indoor: Homebox 120x120x200cm (4x4) * 📐🌀 PrimaKlima exhausting Fan 1180m3/h (running on 60-80%) * 🌀 Can Light Filter 800m3/h & 1x Fanbox 1x Dyson fan for Air circulation 🔗 https://lumatek-lighting.com/zeus-600w-pro-29/ 🔗 https://primaklima.com/de/shop/ventilatoren-de/ec-ventilatoren/pk160ec-tc/ 🔗 https://canfilters.com/products/filters/ All Likes and comments are highly appreciated!!! 👨‍🌾 don't forget to check out my Instagram for daily educational content: budboutiquee - Bud Boutique
Likes
17
Share
9 week Smells excellent, sweetly and fruity. Begin change color from green to rose . Looks really wonderful. Starting prepare for harvest. Last nutrition at the end of this week. Then flash