


RQS Dynamite Diesel 80x80







Fan
HT-900E
Honeywell
Fan
Arctic Pro 120 12VDC
Arctic Pro 120 12VDC

Filt
ecoline

Cond
MPPHA-07CRN7, 7000 BTU 2,0kW
Comfee
Cond
Mddn-10den7 10L/24h
comfee


CO2
CO2
Flasche CO2 mit Magnetventil und Druckminderer


Mix
Wormcast / CoCo

Indoor
Room Type
ScrOG
weeks 2, 6-7, 9, 11
SoG
weeks 2
LST
weeks 2-3, 6, 11
Topping
weeks 2-3, 6
FIMing
weeks 2-3, 6
Manifolding
weeks 2, 6
Main-Lining
weeks 2-3, 6
HST
weeks 2, 6-7
Defoliation
weeks 2, 6, 9, 11
15 liters
Pot Size
3 liters
Watering
Start at 11 Week
G
Germination1y ago

Nutrients 6
Sensei CalMag
1 mll

Advanced PK
1 mll

Dutch Formula Micro
0.5 mll
rsfrosch660 Week 1: Germination and Establishment
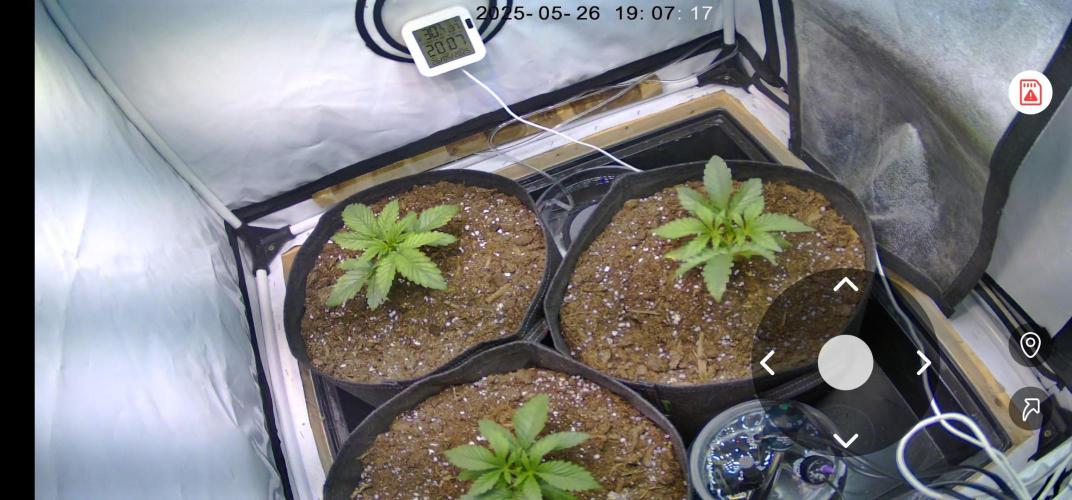
Germination was successful. Three days post-germination, the seeds were transferred into coco pellets. To maintain a consistently high relative humidity (RH), the pellets were placed inside a sealed nano cube.
After five days, root growth was visible at the bottom of the pellets, signaling the optimal time for transplanting. The target medium consists of Plagron Grow Mix, amended with 20% worm castings and 10% additional perlite to optimize substrate structure and aeration. One teaspoon of mycorrhizal inoculant was applied directly to the root ball to initiate the early establishment of a symbiotic fungal network.
The vegetative stage is now being initiated under a Greenception GC 9, positioned at an initial distance of 50 cm above the plants.
likes
comments
Share
Used method
Peat Pellet
Germination Method
2
Week 2. Vegetation1y ago

20 cm
Height
18 hrs
Light Schedule
28 °C
Day Air Temp
6.0
pH
Weak
Smell
250 PPM
TDS
60 %
Air Humidity
22 °C
Solution Temp
24 °C
Substrate Temp
24 °C
Night Air Temp
15 liters
Pot Size
0.5 liters
Watering Volume
50 cm
Lamp Distance
800 PPM
CO₂ Level
Nutrients 6
Sensei CalMag
1 mll
Advanced PK
1 mll
Dutch Formula Micro
0.5 mll
rsfrosch660 Vegetative Phase: Week 2 - Introduction of Structural Differentiation
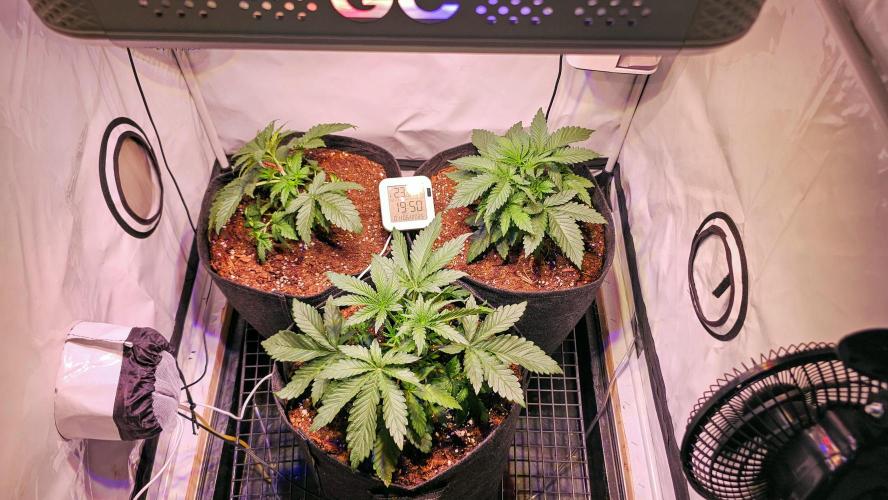
As of June 1st, the vegetative growth strategy has been initiated. After an initial phase to establish a robust root system, training of the three plants has begun. The overarching goal is to shape a homogeneous canopy despite fundamentally different high-stress training methods (HST).
Light Management:
The lighting has been adjusted to the full power of the Greenception GC 9 (all three levels active) to promote maximum vegetative growth. The distance has been adjusted to 60 cm to compensate for the increased intensity and ensure even light distribution.
Training Protocols:
Plant 1 (middle front): Being trained to a quadline/manifold. The goal is to develop four symmetrical main shoots that form a stable and even base structure.
Plant 2 (back left): Undergoing asymmetrical main-lining. This technique is combined with continuous, selective defoliation to maximize light penetration and direct energy effectively.
Plant 3 (back right): Received a single, classic topping to produce two main shoots. This intervention serves as a reference point for growth behavior with minimal HST.
The timing of the interventions and the use of LST will be crucial in the coming weeks to balance the different recovery phases and synchronize the canopy at a uniform height.
likes
comments
Share
Used techniques
LST
Technique
HST
Technique
SoG
Technique
ScrOG
Technique
Topping
Technique
FIMing
Technique
Main-Lining
Technique
Defoliation
Technique
Manifolding
Technique
3
Week 3. Vegetation1y ago

30 cm
Height
18 hrs
Light Schedule
28 °C
Day Air Temp
6.0
pH
Weak
Smell
250 PPM
TDS
60 %
Air Humidity
22 °C
Solution Temp
24 °C
Substrate Temp
24 °C
Night Air Temp
15 liters
Pot Size
0.5 liters
Watering Volume
50 cm
Lamp Distance
800 PPM
CO₂ Level
Nutrients 6
Sensei CalMag
1 mll
Advanced PK
1 mll
Dutch Formula Micro
0.5 mll
rsfrosch660 Vegetative Phase: Week 3 – Nutrient Control and Hormonal Steering
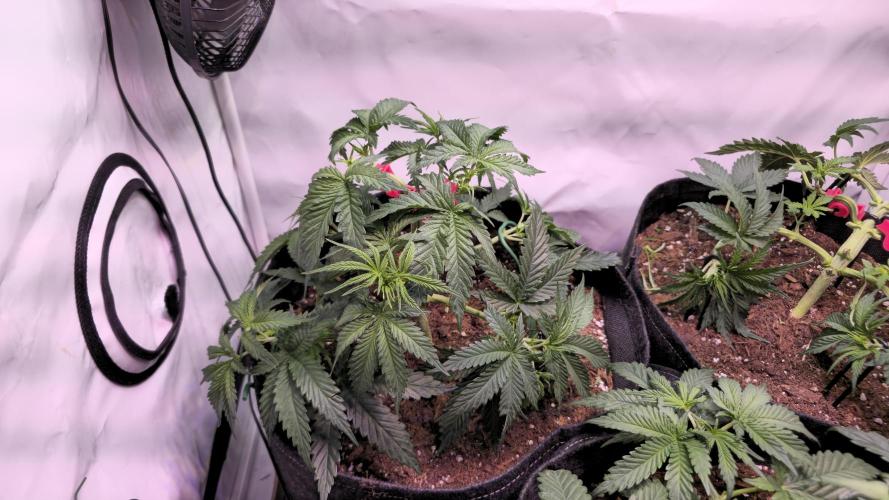
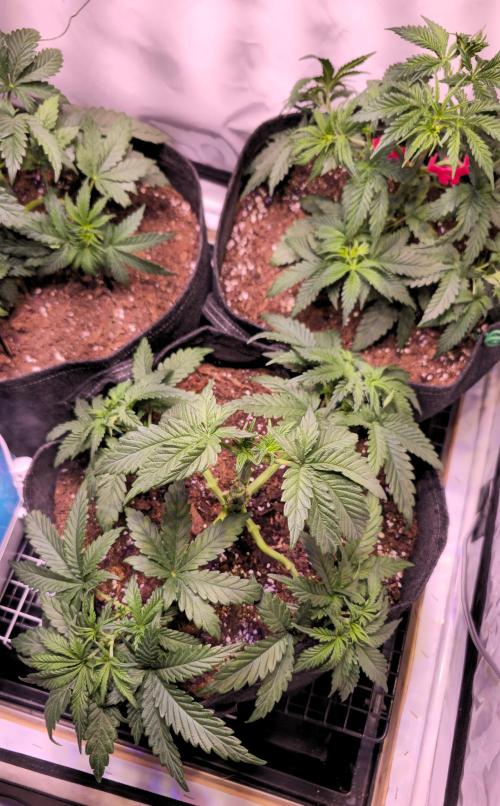
In the third vegetative week, the focus shifts to the targeted control of plant growth through a combination of nutrient management and the response to the initiated High-Stress Training (HST).
Nutrient and Watering Management:
The nutrient solution is consistently mixed to a pH of 5.8 to ensure optimal nutrient availability in the peat-based substrate. The addition of supplemental nutrients is deliberately restrictive, as the Plagron Grow Mix still contains sufficient reserves. The drain EC of 0.7 (700 µS/cm) confirms the high uptake activity of the plants and justifies the "lean-feeding" strategy. This prevents salt accumulation and allows for precise control over plant development.
Growth Response and Hormonal Steering:
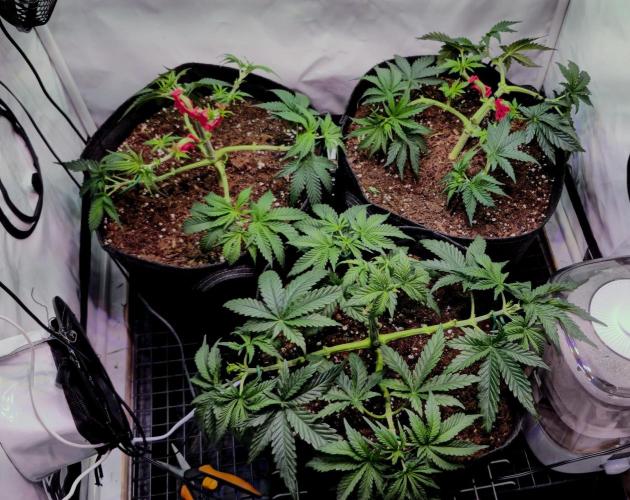
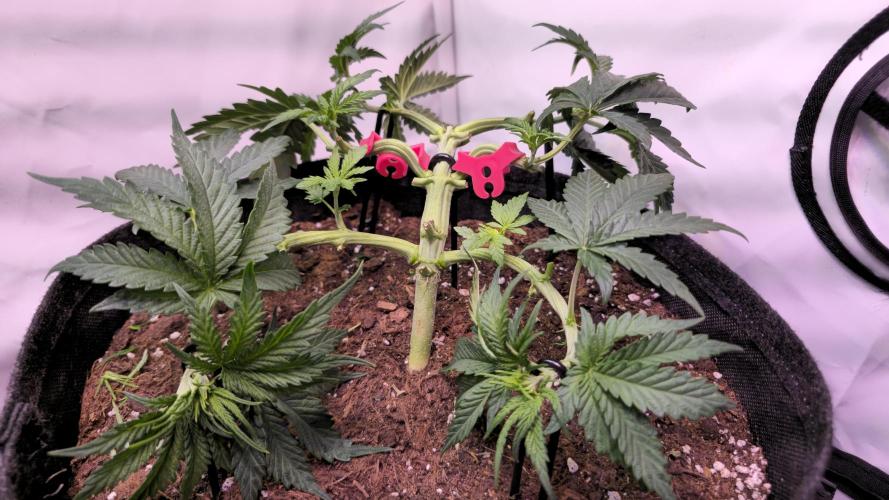
The plants are showing clear responses to the various HST methods and are actively restructuring themselves. The deliberate limitation of the nutrient supply serves as a strategic trigger: it suppresses vertical stretching and promotes the redirection of auxins and energy into the development of lateral shoots. The result is the formation of a robust, bushy foundational structure, laying the groundwork for a wide and productive canopy rather than promoting uncontrolled vertical growth.
likes
comments
Share
Used techniques
LST
Technique
Topping
Technique
FIMing
Technique
Main-Lining
Technique
6
Week 6. Vegetation1y ago
30 cm
Height
18 hrs
Light Schedule
28 °C
Day Air Temp
5.8
pH
Weak
Smell
1200 PPM
TDS
60 %
Air Humidity
22 °C
Solution Temp
24 °C
Substrate Temp
24 °C
Night Air Temp
15 liters
Pot Size
0.5 liters
Watering Volume
40 cm
Lamp Distance
800 PPM
CO₂ Level
Nutrients 6
Sensei CalMag
0.5 mll
Advanced PK
0.5 mll
Dutch Formula Micro
1 mll
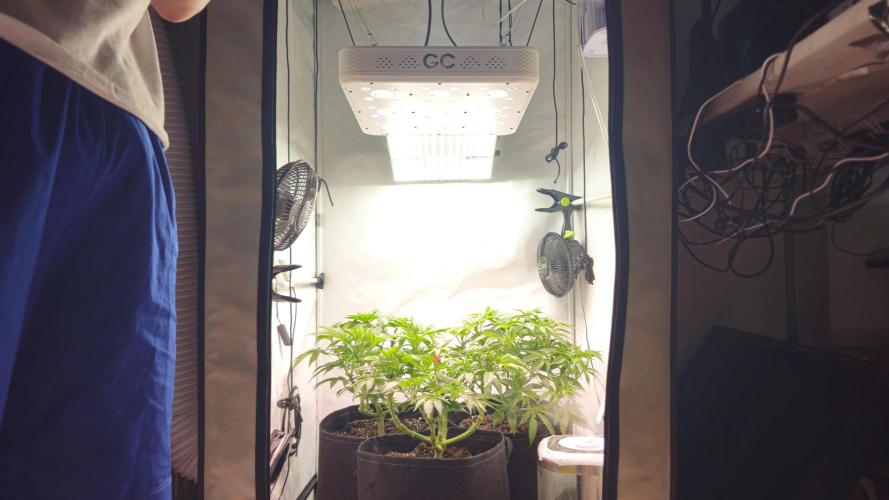
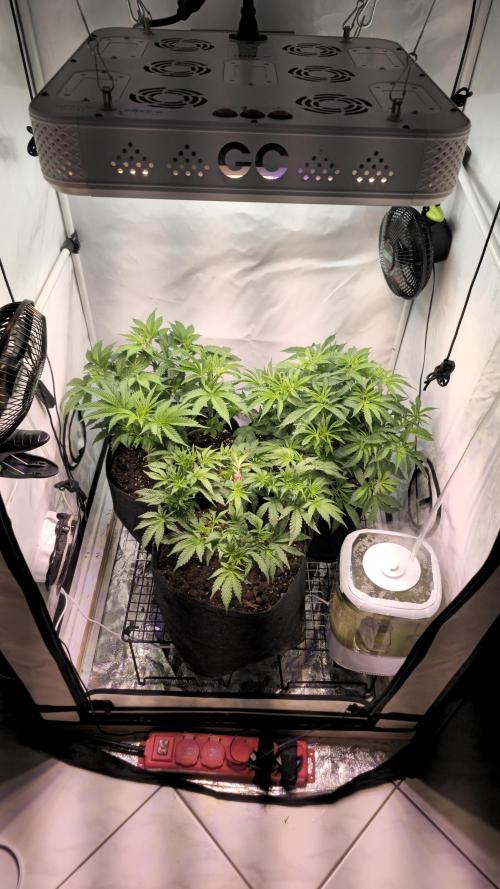
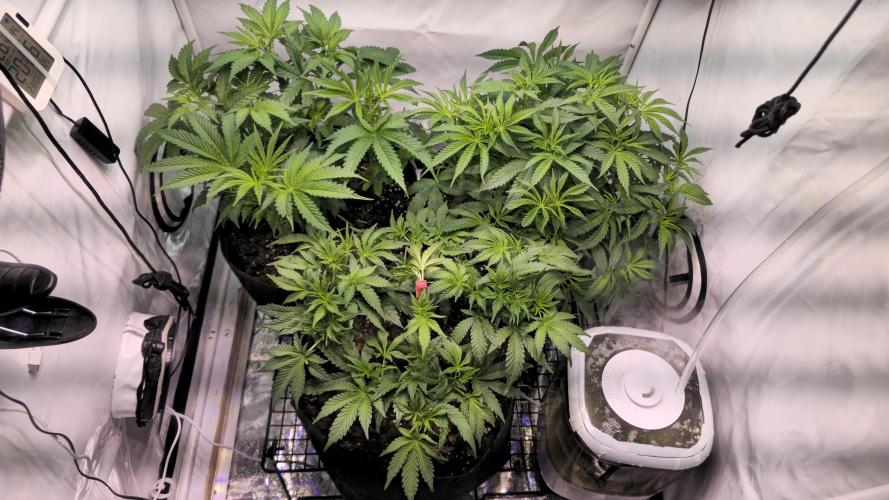
rsfrosch660 End of Week 6: Light Regime Optimization & Flowering Stimulation
To further optimize the canopy efficiency and prepare for the flowering stage, two critical adjustments have been made to the lighting setup.
1. Enhancement of Light Uniformity:
An additional ViparSpectra P1000 has been installed as a satellite lamp. Its purpose is to specifically illuminate the periphery of the tent, compensating for the natural drop-off in intensity from the primary GC 9 light at the edges. This ensures a homogeneous PPFD level across the entire canopy and maximizes the developmental potential of all shoots.
2. Implementation of an EOD-FR Treatment:
Effective immediately, the light cycle will conclude with a 15-minute phase of pure far-red light. This measure manipulates the plants' phytochrome system to accelerate the transition into the dark period. The goal is to achieve a faster induction of flowering and an increased efficiency of nocturnal metabolic processes, which is expected to positively impact flower development and the final yield.
likes
comments
Share
Used techniques
LST
Technique
HST
Technique
ScrOG
Technique
Topping
Technique
FIMing
Technique
Main-Lining
Technique
Defoliation
Technique
Manifolding
Technique
7
Week 7. Flowering1y ago




50 cm
Height
12 hrs
Light Schedule
28 °C
Day Air Temp
5.8
pH
Weak
Smell
1400 PPM
TDS
60 %
Air Humidity
22 °C
Solution Temp
24 °C
Substrate Temp
24 °C
Night Air Temp
15 liters
Pot Size
3 liters
Watering Volume
40 cm
Lamp Distance
800 PPM
CO₂ Level
Nutrients 6
Sensei CalMag
1 mll
Advanced PK
1 mll
Dutch Formula Micro
1 mll
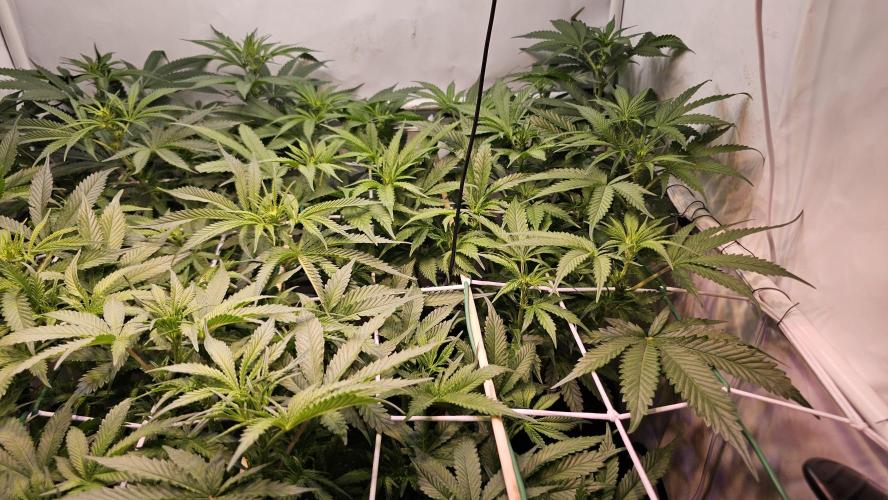
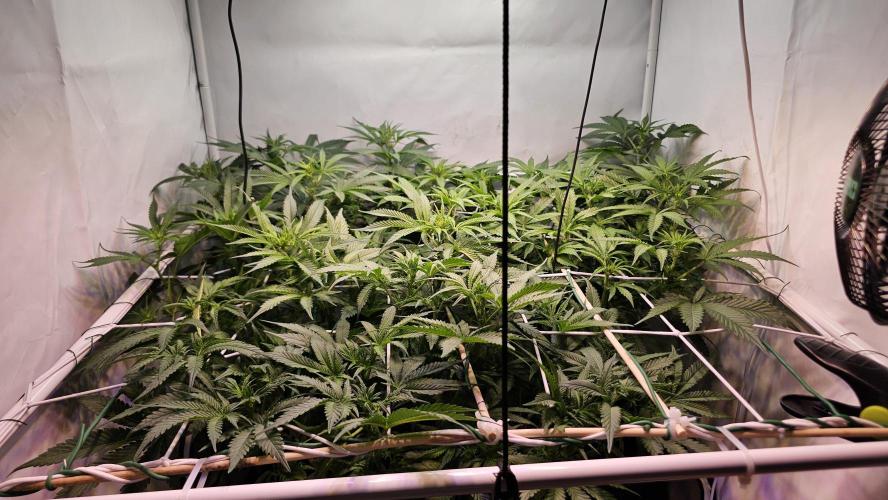
rsfrosch660 The "Flip" – Initiating Flowering in a High-Performance System
In week 7, I initiated the flowering phase by switching the light cycle to 12/12. This moment was the turning point for which the entire vegetative phase was a preparation.
I adjusted the environmental parameters to meet the new requirements: The daytime temperature was set to 28°C and the humidity to 60%. This resulted in a VPD value of about 1.4 kPa – an ideal value to drive transpiration during the upcoming "Stretch" and maximize nutrient uptake.
My light setup, consisting of the Greenception GC 9 and a ViparSpectra P1000 in the 80x80cm tent, produced an extremely high light intensity. To fully utilize this potential and avoid light stress, I enriched the air with CO₂ to 800 ppm. This synergy of light and CO₂ formed the basis for the expected explosive growth phase. I adjusted the nutrient solution to an EC value of 1.4 as a transition fertilizer to satisfy the plants' increasing appetite at the beginning of flowering. My plan for the immediate future was to manage the stretch with a SCROG net to keep the flowering canopy perfectly even.
Flowering Week 8: Start of the Ripening Phase & Harvest Preparation
In the eighth week of flowering, the grow entered the final ripening phase. I noticed that pure mass formation slowed down, and energy was redirected into resin production instead. The buds were extremely dense and covered with a thick layer of trichomes.
My focus now shifted from nutrient feeding to determining the exact harvest time. For this, a microscope with 60x magnification became my most important tool. I began to check the trichome heads on the flower calyxes daily, aiming to harvest at a ratio of about 70-80% milky to 20-30% amber trichomes to achieve a potent and balanced effect.
Based on these initial observations, I initiated the final two-week flushing phase. From this point on, I only provided pH-regulated water. At the same time, I lowered the humidity to 40-45% and slightly reduced the temperatures to ensure quality and eliminate any botrytis risk in the final phase.
likes
comments
Share
Used techniques
ScrOG
Technique
HST
Technique
9
Week 9. Flowering1y ago
50 cm
Height
12 hrs
Light Schedule
28 °C
Day Air Temp
5.8
pH
Strong
Smell
1400 PPM
TDS
50 %
Air Humidity
22 °C
Solution Temp
24 °C
Substrate Temp
24 °C
Night Air Temp
15 liters
Pot Size
3 liters
Watering Volume
60 cm
Lamp Distance
800 PPM
CO₂ Level
Nutrients 6
Sensei CalMag
1 mll
Advanced PK
1 mll
Dutch Formula Micro
1 mll
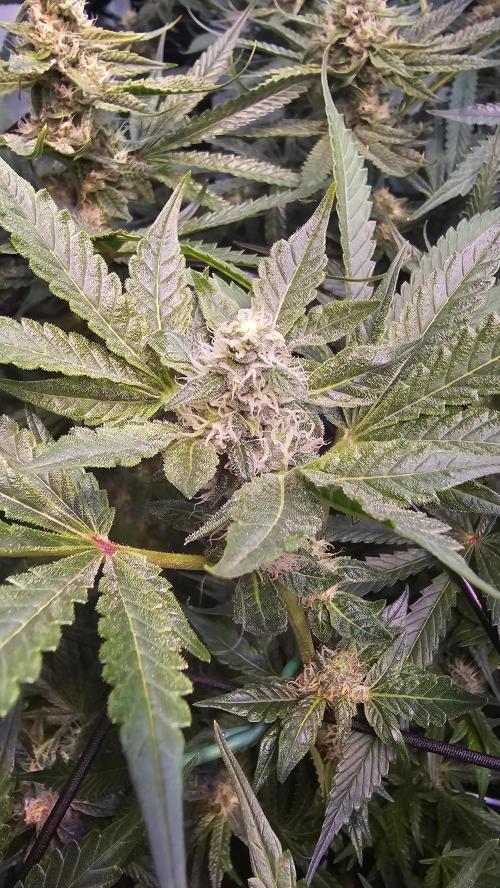
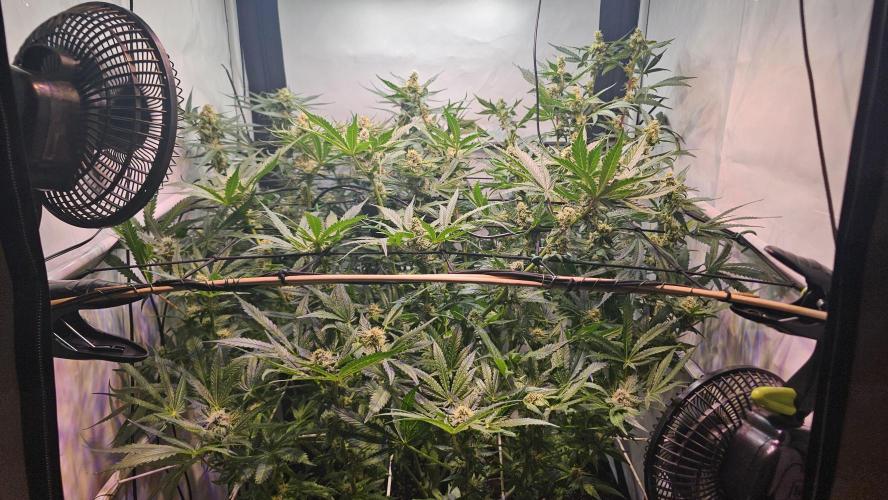
rsfrosch660 The eighth week of flowering marks the transition from pure bulking to the ripening phase. The buds are dense, compact, and show an explosive production of trichomes, indicating an intense synthesis of cannabinoids and terpenes. The canopy remains impeccably even thanks to the SCROG management. The vitality of the plants is manifested in a high water uptake of 6-7 liters every two days, proof of the optimal functioning of the entire system.
The focus has now shifted entirely to determining the optimal harvest window through microscopic analysis of the trichomes. Simultaneously, the final flushing phase has been initiated, providing only pH-adjusted water to maximize the quality of the final product.
likes
1 comment
Share
Used techniques
ScrOG
Technique
Defoliation
Technique
11
Week 11. Flowering1y ago

80 cm
Height
12 hrs
Light Schedule
26 °C
Day Air Temp
6.0
pH
Strong
Smell
250 PPM
TDS
45 %
Air Humidity
22 °C
Solution Temp
22 °C
Substrate Temp
21 °C
Night Air Temp
15 liters
Pot Size
3 liters
Watering Volume
40 cm
Lamp Distance
800 PPM
CO₂ Level
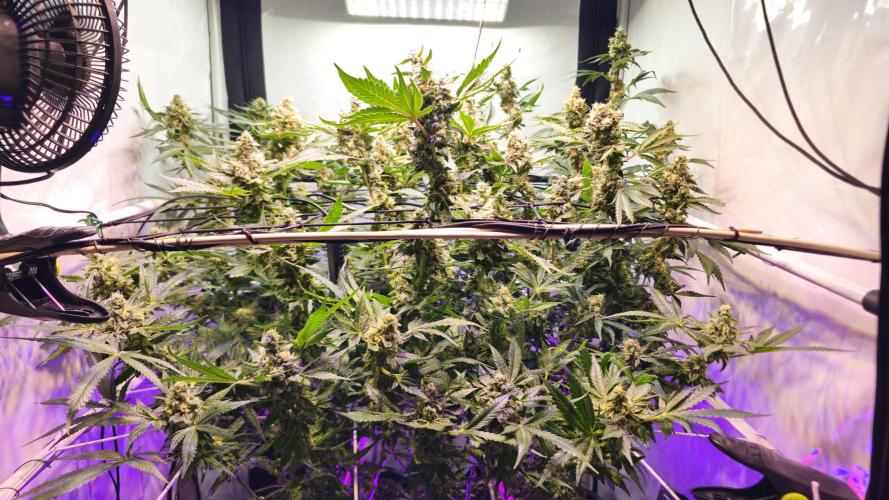
rsfrosch660 Flower Weeks 9 & 10: Final Ripening and Flush
Weeks 9 and 10 were dedicated entirely to the final maturation and the planned flushing phase. As established in the previous week, the plants received exclusively pH-adjusted water. This targeted nutrient deprivation triggered the intended senescence, the final and decisive process for maximizing quality.
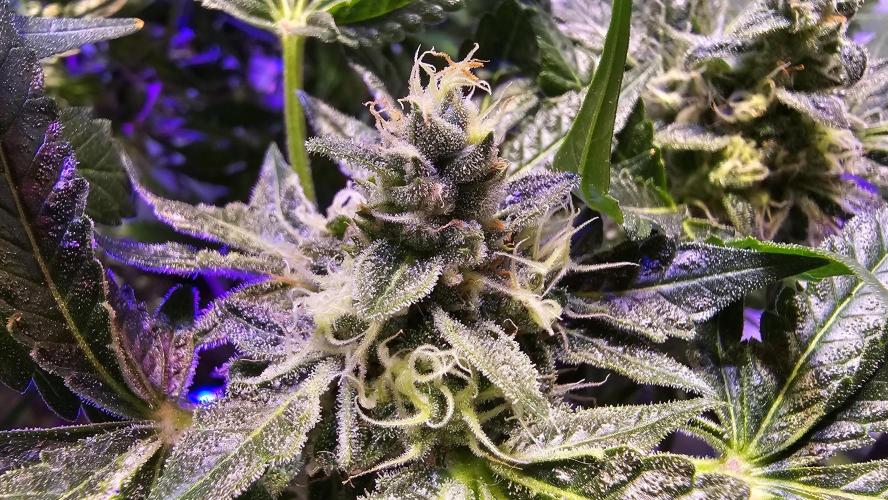
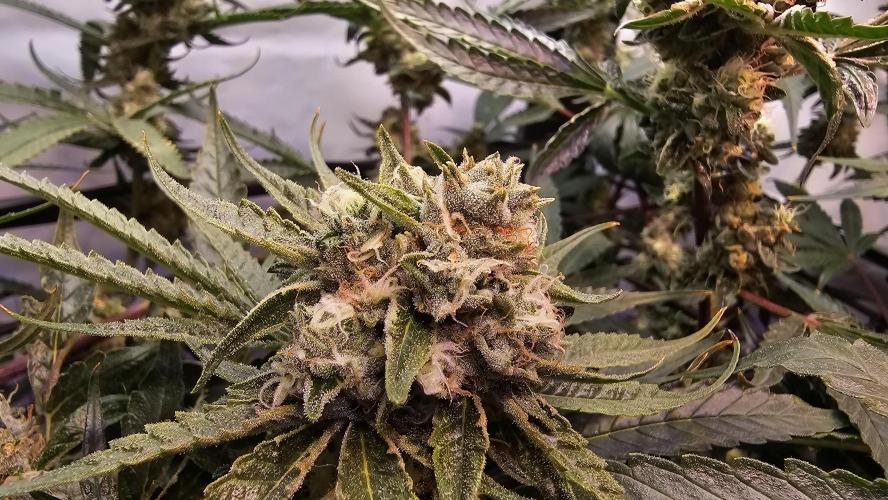
I could observe daily how the plants began to mobilize the stored, mobile nutrients from their fan leaves and transport them into the flowers. This became visible in a beautiful, autumnal coloration of the leaves, which progressed from the bottom upwards—a clear sign of a clean and effective flush.
Meanwhile, the buds continued their ripening process. They became even harder and more compact, and the resin production seemed endless. My primary task during this time was the daily, microscopic inspection of the trichomes. I meticulously tracked the slow conversion from clear to milky and finally to amber heads, in order to precisely determine the perfect harvest moment within my desired window. The entire system ran flawlessly until the end, and preparations for the upcoming harvest began.
1 like
1 comment
Share
Used techniques
LST
Technique
ScrOG
Technique
Defoliation
Technique
Enjoying this diary? Follow for more updates!

Prefer the old Diary view?
Go back to the old Diary view