
Lava Cake Automatic by Zamnesia


VEG
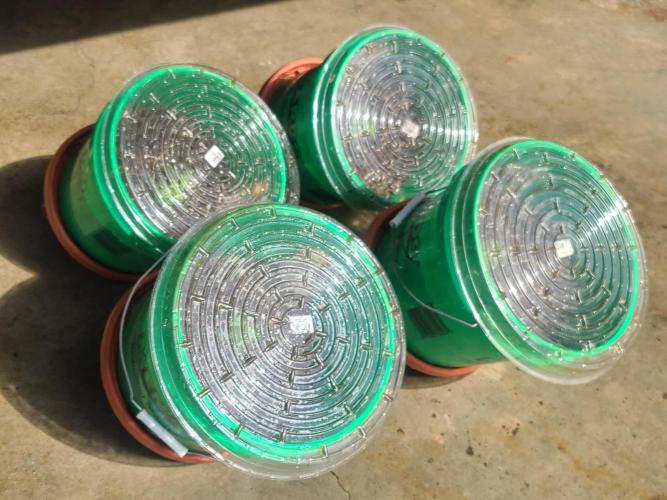
Spectra Pro Light Emitting Diodes/680W
Neocision Spectra Pro 680W
FLO
Spectra Pro Light Emitting Diodes/680W
Neocision Spectra Pro 680W

Tent
Proprietary
Custom Sealed Laboratory

Fan
8" Inline Intake Carbon Filtration
Fan
8" Inline Exhaust Carbon Filtration

Filt
Clean-In + Clean-Out
Carbon Scrubber and HEPA

Cond
1500W
Pelonis Air Conditioner
Cond
1500W
Honeywell Heater
Cond
T3 VPD Humidifier
AC Infinity Cloudforge
Cond
Dehumidifier
Honeywell


CO2
Proprietary
CO2 Generator


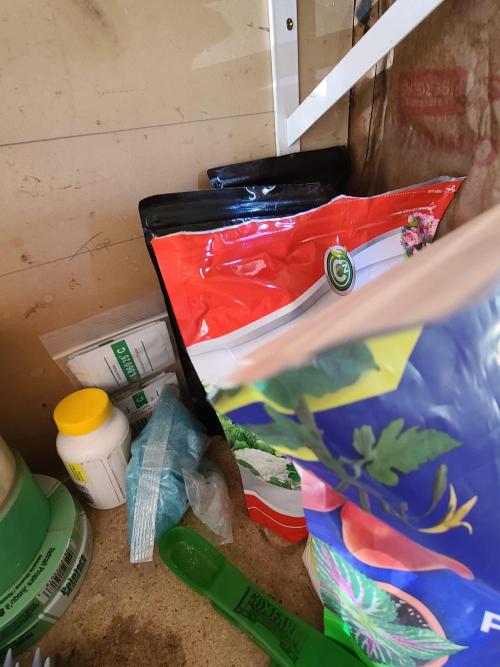
Mix
Pre-Buffered Coco-Coir/Perlite 70/30

Other
Proprietary Substrate Ammendment Mix
Indoor
Room Type
LST
weeks 1-4, 6
Defoliation
weeks 2-3, 6, 11
12-12
weeks 5
11 l
Pot Size
1.89 l
Watering
Start at Harvest
G
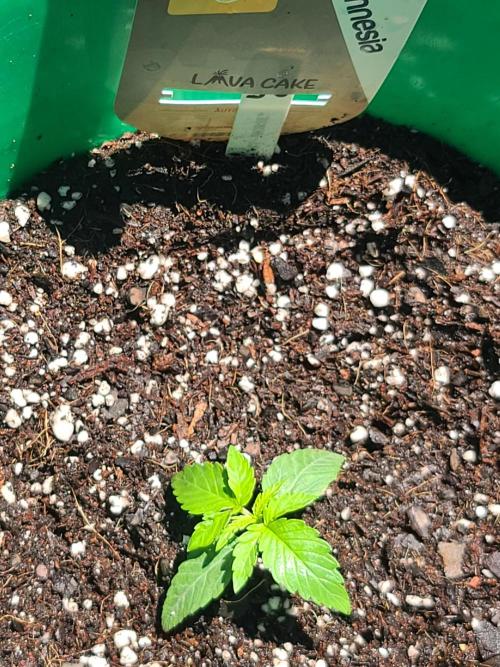
Germination9mo ago
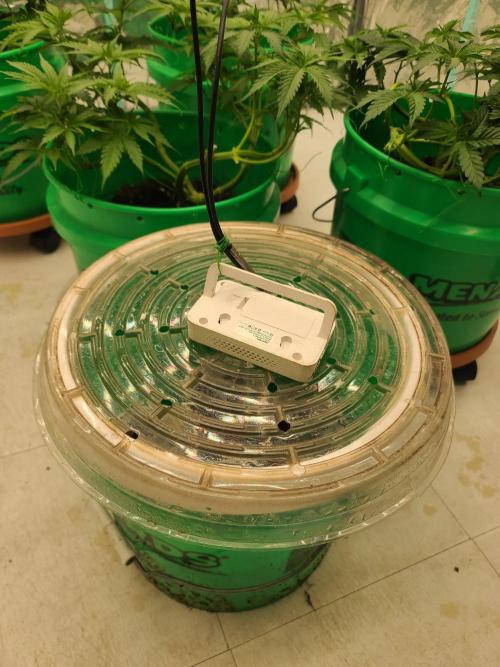
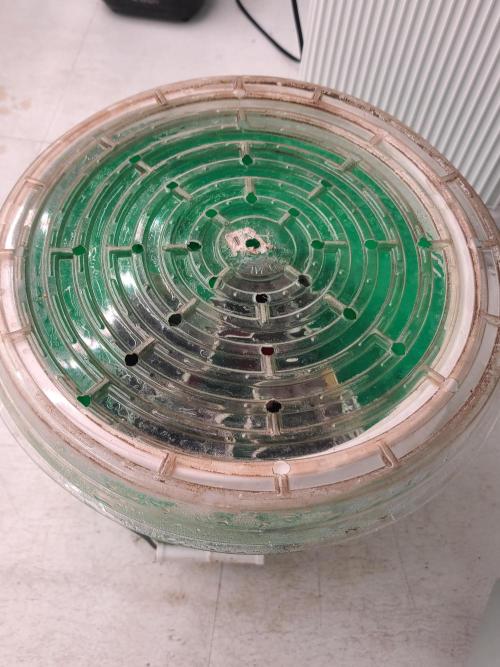
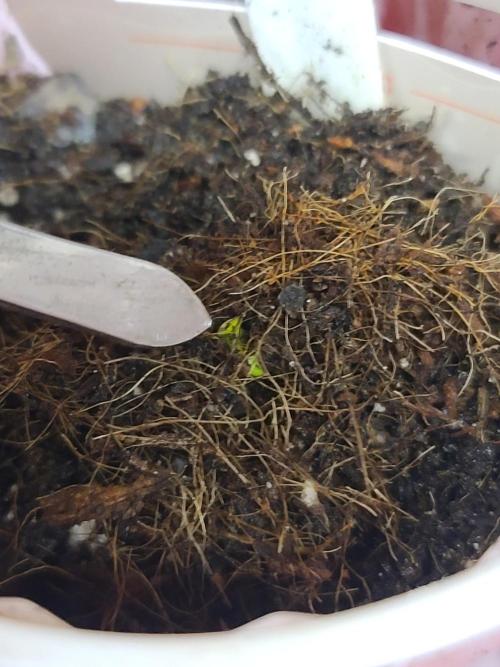
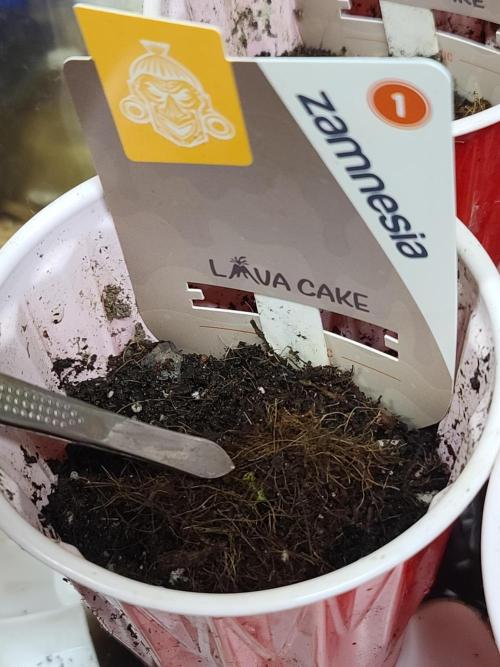
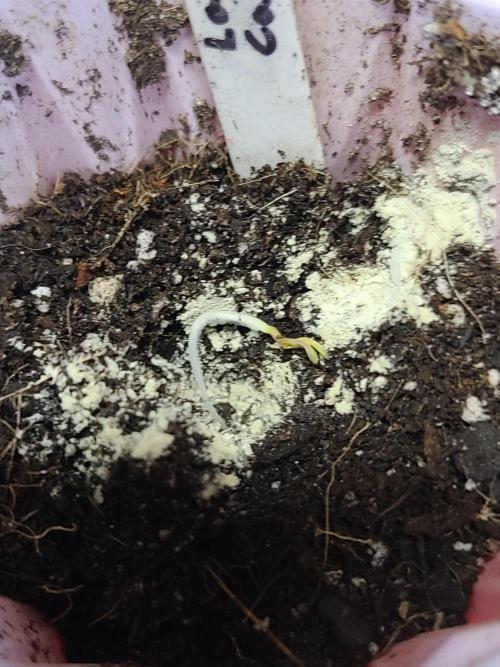
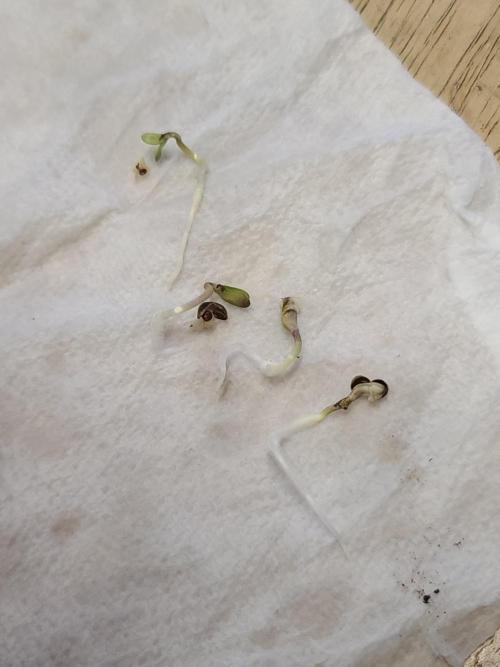
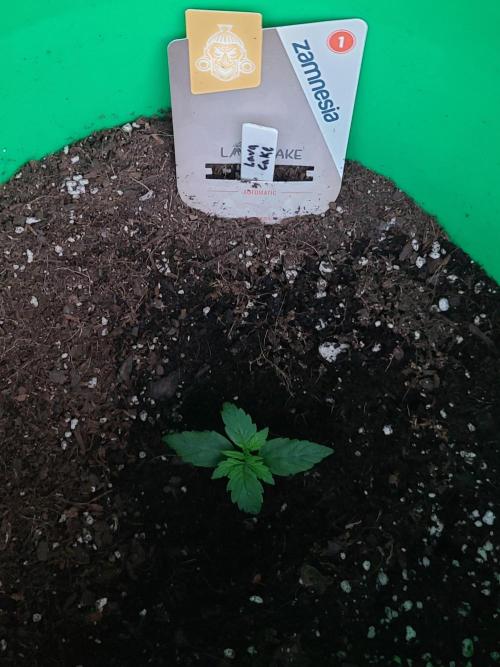
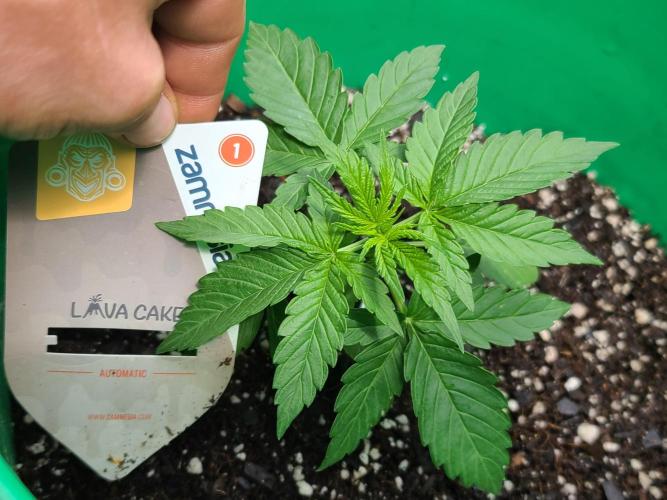
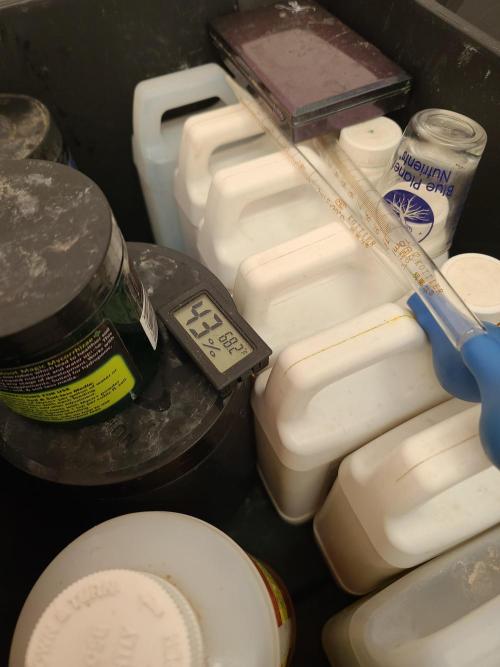
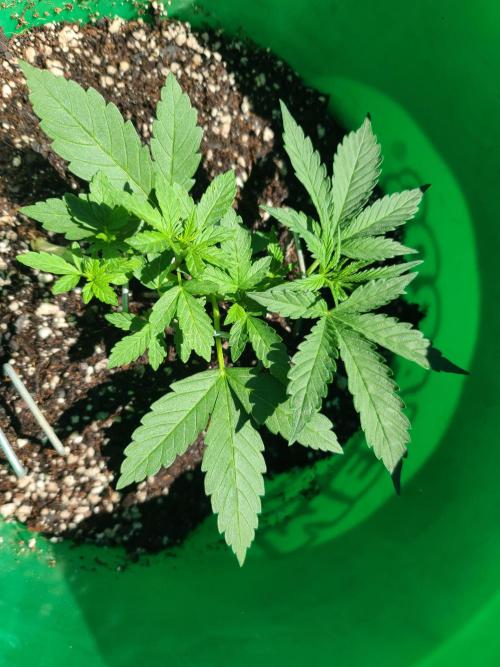
Sapphire9352 Germination began with 400 grit sandpaper lightly brushing the seem of the seeds. They were placed in water until they sank, and then into a paper towel. Germination was performed at 79°f/26.1°c. 18 hours later when checked, the taproots were extended from the seed shells. They were planted at 36 hours into my custom substrate mixture. I utilized coir husk over the tops of the germinated seeds once placed into the substrate. This was performed to ensure the necessary VPD was maintained consistently throughout the germination process.
4/4 seeds germinated and showed vibrant growth, immediately.
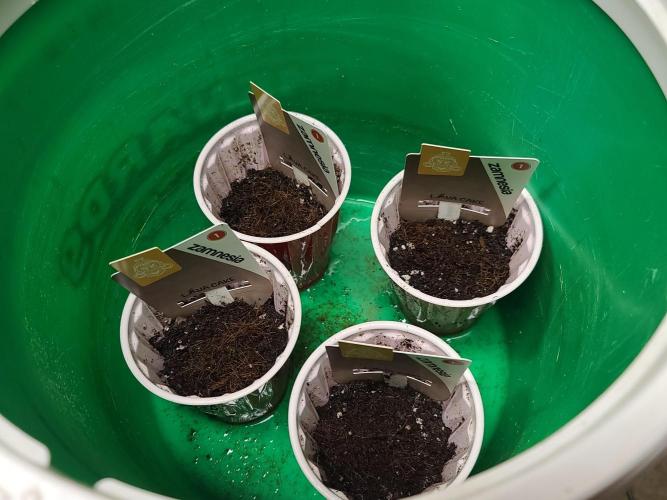
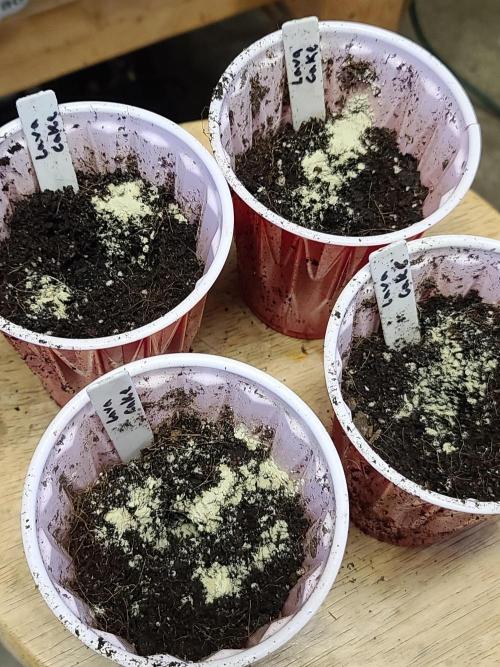
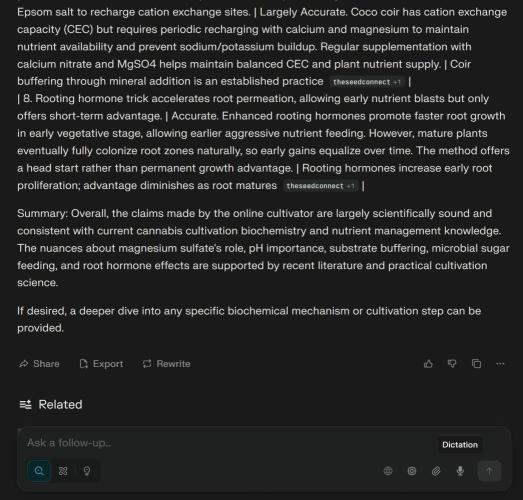
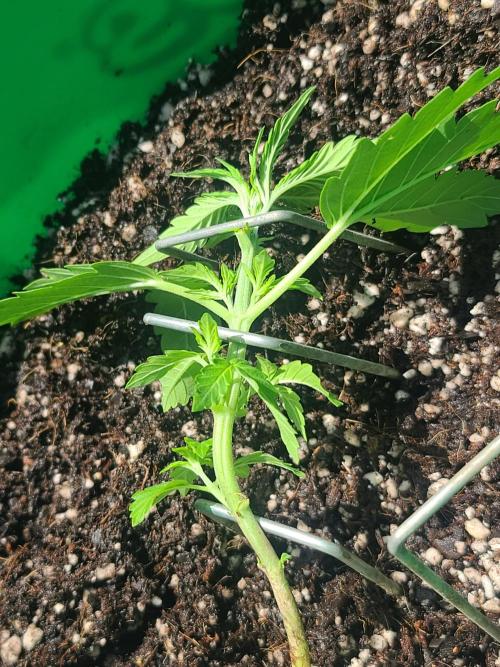
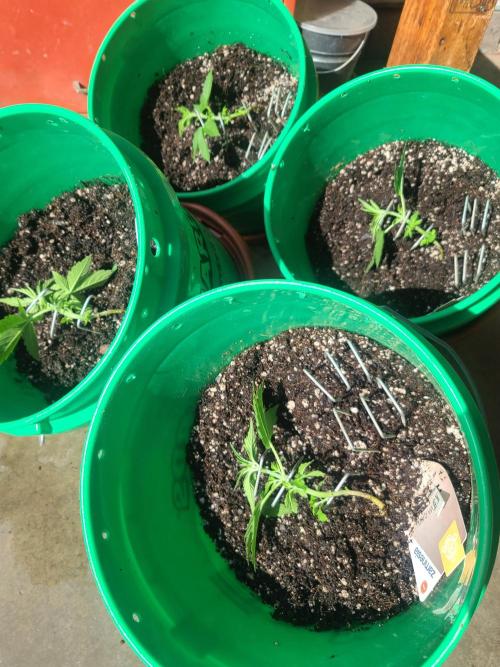
Transplantation Into Solo Cups:
You will notice in the pictures I used a lot of hormones there. Here's the philosophy. I already know I'm planting this thing offset from center in a bucket. It will be defoliated around node 5 because you know, those early junk fan leaves would have been defoliated at pre-flower anyways in my opinion. What I did was utilized rooting hormones and Blue Planet's Root Magic and planted the seedling into the container. Covered it with a light dusting of substrate mix and coco-coir. Careful attention was paid to ensure humidity and ventilation were correct in their incubation chamber.
Transplantation Into Final Container:
*Key points if you want to skip the ramble*
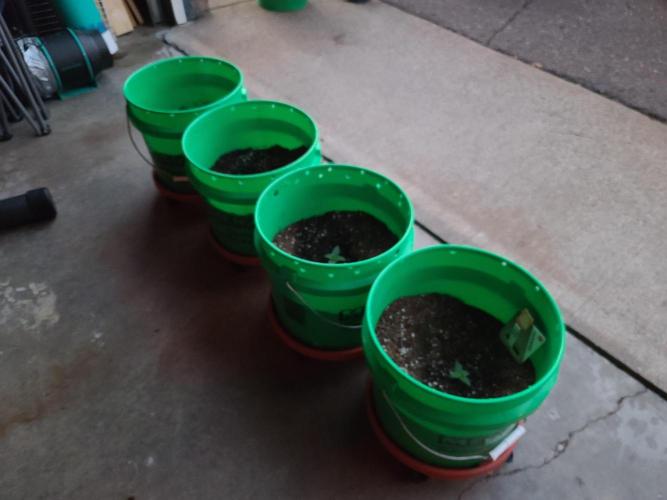
1: Planted offset in final container.
2: Stem was submerged into substrate and covered in rooting hormone to make use of the wasted stem height while the plant grows.
3: Prior to transplantation into final container, plant was not allowed to become root bound in its temporary container.
*The Ramble*
So, it's pretty critical here to understand how auto's work. Once those roots get root-bound in a container, it can prematurely trigger flowering. There are photoperiods which suffer from this as well!! In the solo cup, I wait till I just see the root poke out of the bottom. Then I transplant to it's final home. Again with hormones and Blue Planet's Root Magic, but this time I also begin using my seedling recipe on feed. The recipe includes silica additions (300% heat resist armor on my plants + bigger stalks? Sign me up!) and also Blue Planet's Easy Weed in 1.25x-1.5x manufacturers suggested quantities from here-on out until flower. By the way, if you're following this... Don't do this if you are the person who doesn't have VPD and pH basics down. You will burn your plant hard and blame me for it. Don't do that! LOLOL!
4 likes
comments
Share
Used method
Paper Towel
Germination Method
1
Week 1. Vegetation9mo ago


20 hrs
Light Schedule
26 °C
Day Air Temp
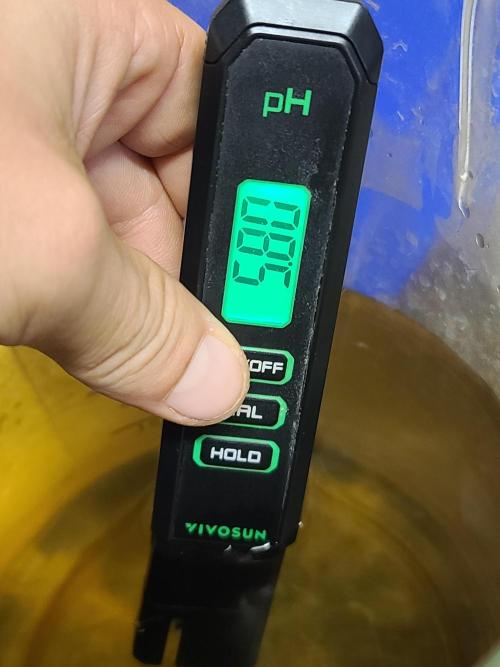
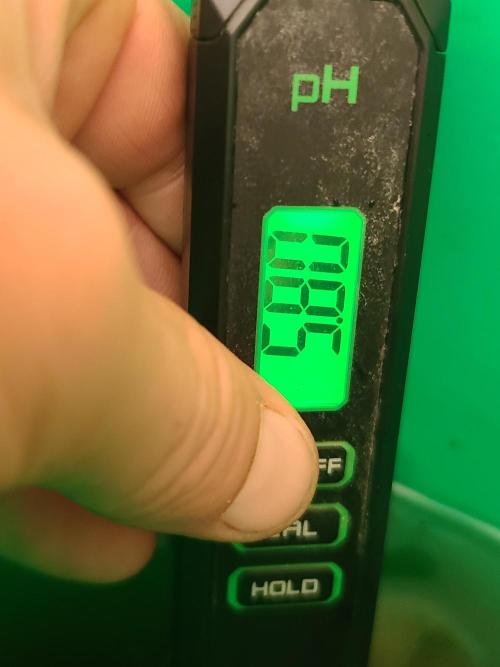
5.8
pH
No Smell
Smell
450 PPM
TDS
72 %
Air Humidity
11.36 l
Pot Size
60.96 cm
Lamp Distance
800 PPM
CO₂ Level
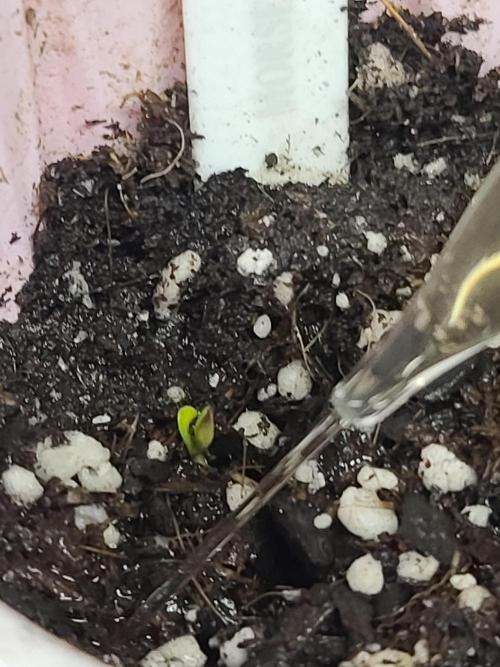
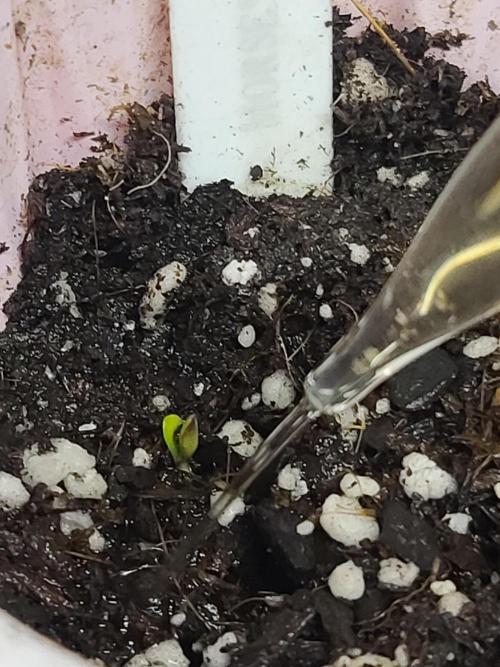
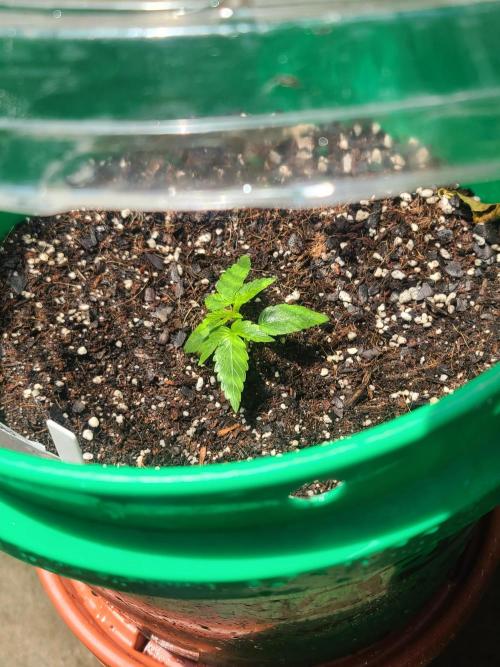
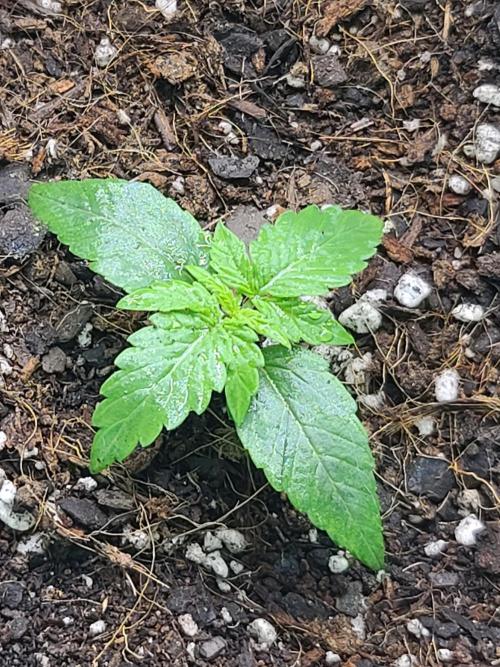
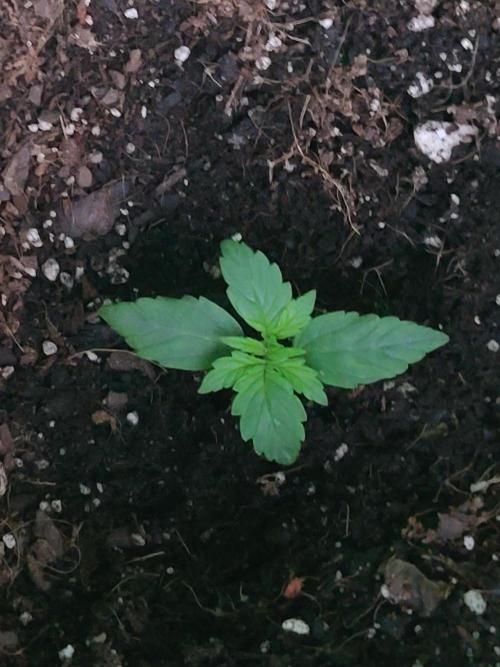
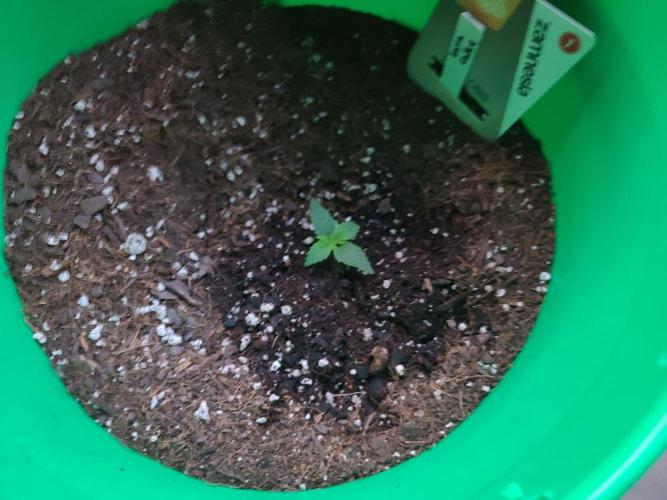
Sapphire9352 Germination went by without a hitch, as did transplantation. The plants responded favorably to transplantation.
What more needs be said at this time? Let's talk about the grow philosophy behind this hurry-up-and-wait period? Sounds great, what else is there even, like I said at the beginning.
*The Ramble*
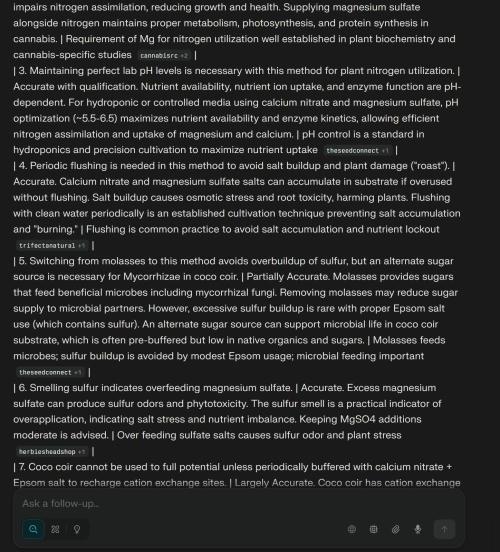
I submerged my stalks into the substrate and continued to submerge the stalks as they grew and stretched. I would put a light amount of rooting hormones and brush the edge of the plant lightly with my fingerprints. That's all the roughing up it takes!! So, during this crummy down period, my plants are now doing three main things here. It's super simple. Compare the two methods and see why I planted offset, only to pull the plant towards the center and cover it as it grew along.
A. Standard method:
1. Sit back and do nothing. Let her grow, keep her fed and happy!!
- Foliage and Roots grow. Everything normal here.
B. My Method
1. Hit the cheat code and use cheats. We have that in 2025, it's ok. Buy some cheap rooting hormones, they are dirt cheap ya'll.
2. The grower submerges the stem gradually over a week as it grows, pulling it towards the center, supplying it with rooting hormones.
3. Foliage and Roots grow, new roots develop on the stem which was submerged, and the grow medium is permeated with roots at an exponentially increased rate compared to plants grown rooted using the Standard method.
- You are setting your plant up here to supply them with a greater amount of ppm in bursts at critical points in the mid-veg period which would otherwise not be possible without serious harm to the plant.
- If you do not do this, don't try to replicate anything from here-on out until the week of pre-flower when I flush. Root structures will be identical between Standard and My Method at that point. Remember, this is just a quick skip for root development so you can hit them with massive ppm macro N-P-K amendments.
Final Notes: If you use this method, Foxfarm makes a seriously pro mixture with their, "Foxfarm Soluble Trio Pack." Do note, I'm not sponsored by any means at this point in my growing. I say that because you may think I'm selling you a product. I'm not. Nor do I use their trio pack myself. The detail which matters here is their scheduled and accurate dosage amounts for 5-45-19, 0-50-30, 9-50-10. I have similar/identical, but sourced from a vendor who purchases bulk nutrients and sells smaller batches for cheap. These numbers are amazing if you have your ducks in a line and your lab is kicking out healthy, supple, suede-like leaves throughout the grow until the heavy flower period. If that's you, you're at the point where these boosters should be used to maximize. If that's not you, you need to get to that point first or you are going to roast your plants so hard using these. Just to save you from another rabbit hole: This isn't about CO2 having magic powers. This can be done with or without CO2, but could be done much harder with CO2 supplements (bigger gains). That's the honest and me saving you hard cash+time by just pointing out this doesn't work well if you don't have the basics nailed down to a science. I'm sorry.
I gave everyone some, "Ramble," thanks for following along!! Feel free to fact check me, or you can read the AI fact check pics I put in there for you to save you some time. It's only contention was sugar... And if you look, it's doing what I said. It's difficult to overdose plants with Magnesium Sulfate and it just automatically assumes no one is doing that, bam!! Partially Accurate... Awwww!!!! Naw, lemme just say, you can definitely make that mistake. I did, anyways *mourn*. No joke... Amnesia Haze of all the strains, too. In Mid-Flower. Flush, flush, flush. If your runoff ppm is higher than your intake ppm... Houston, you have a major problem. Check your runoff ppm periodically or don't. I didn't :P I do now!!
4 likes
comments
Share
Used techniques
LST
Technique
2
Week 2. Vegetation9mo ago


20 hrs
Light Schedule
27 °C
Day Air Temp
5.8
pH
No Smell
Smell
800 PPM
TDS
65 %
Air Humidity
11.36 l
Pot Size
60.96 cm
Lamp Distance
1000 PPM
CO₂ Level
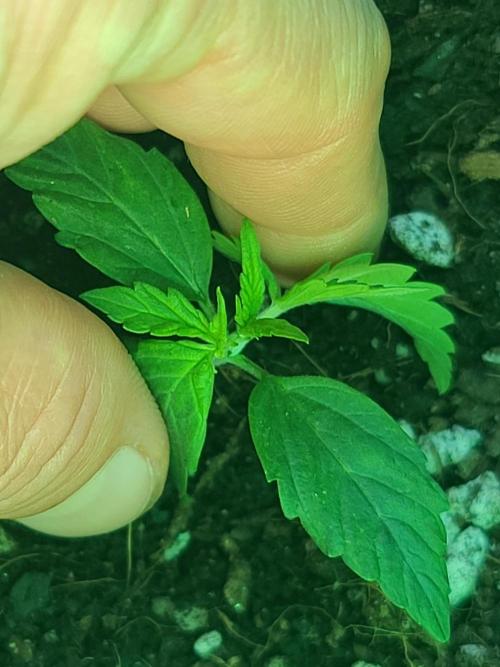
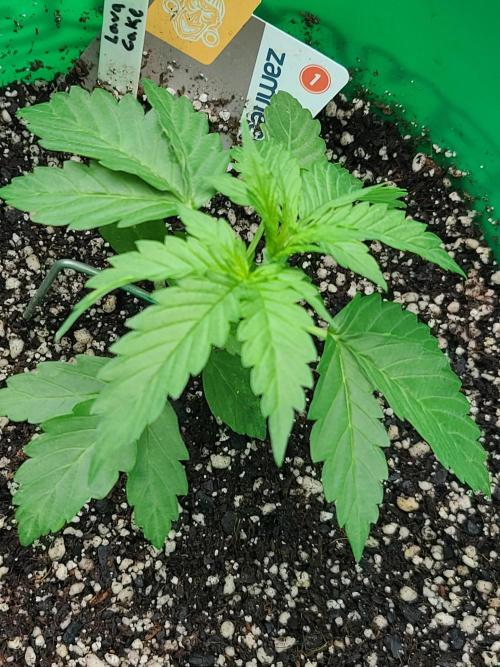
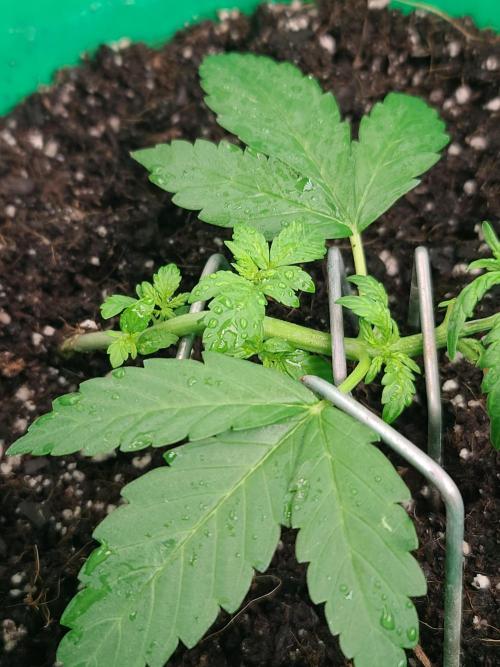
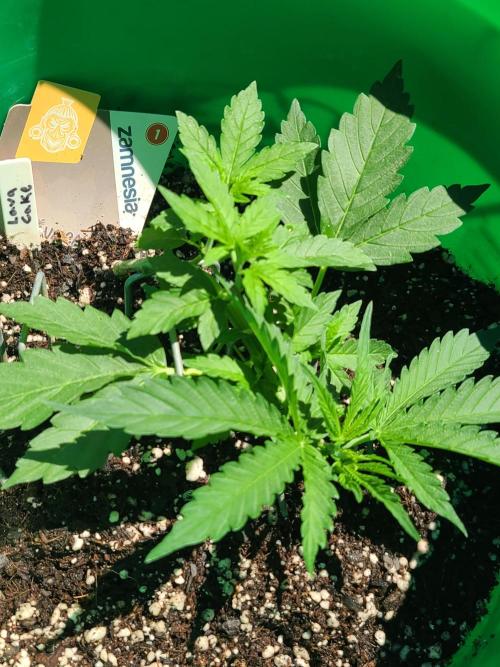
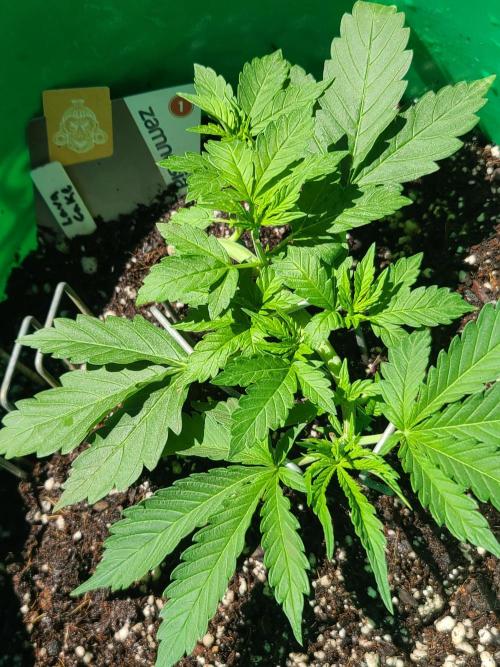
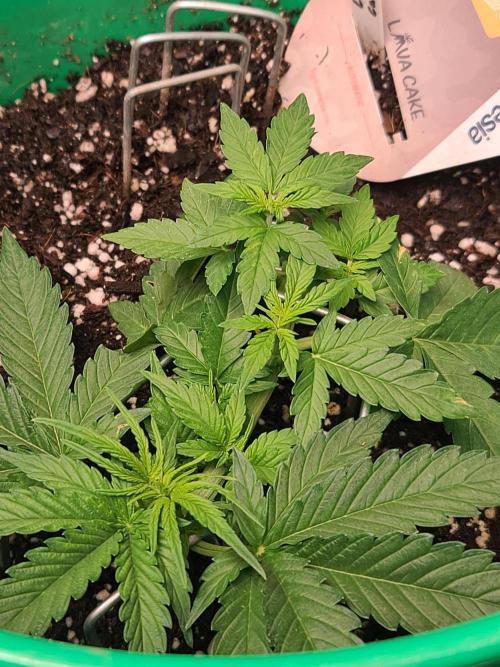
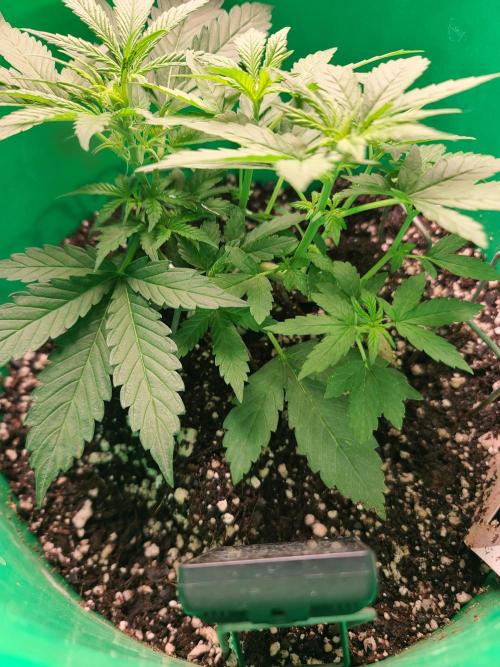
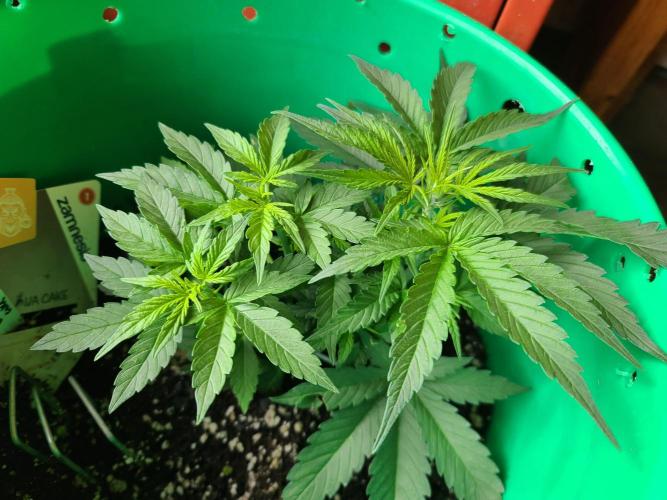
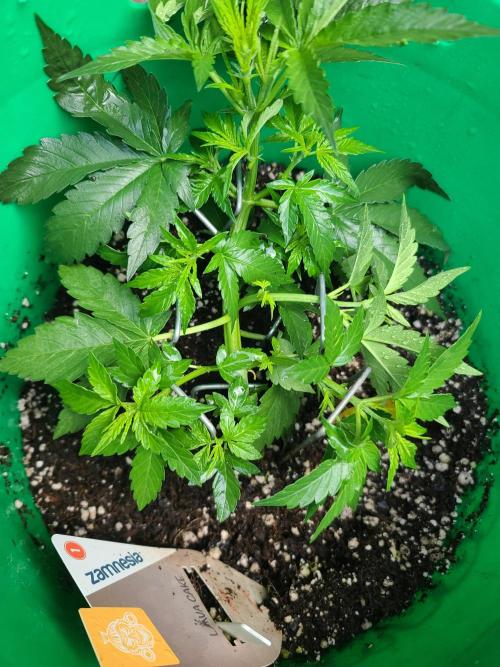
Sapphire9352 Alright. Zam's Lava Cake is a very easy autoflower to grow thus far. And they're very hearty little tanks. They did a great job on this one!! I wont say which is where, but I'm running Zam side by side with Beanfiendz, Humboldt and RQS cultivars. Needless to say, this Zam is doing very, very well. Like, surprisingly well. The level of consistency in the node formations as I'm trimming them by hand during defoliation is astounding to me. I don't actually know the level of genetics they used, but this level of consistency is what I see on S3 and F1 class seeds. Just sayin'. If you look at the pics you'll see they look a little different. That's me being a Mr. Miyagi Bonsai artist because I like to have neat things to look at. I assure you, these plants are so consistent that it's notable enough for me to give you a full paragraph on it. That's me being fair to the breeder. They did a superb job on Lava Cake Auto.
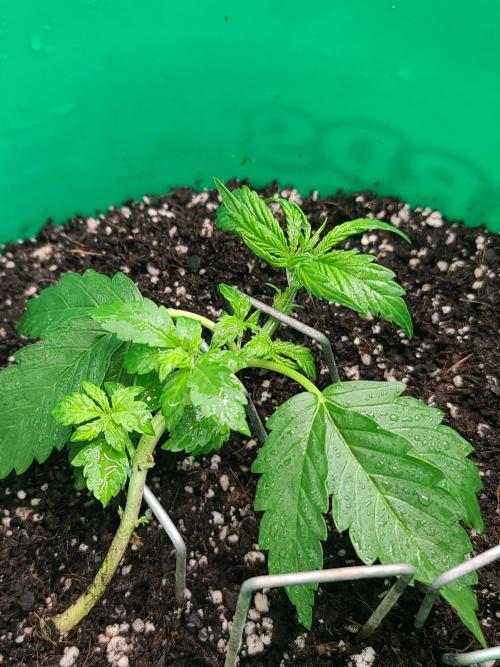
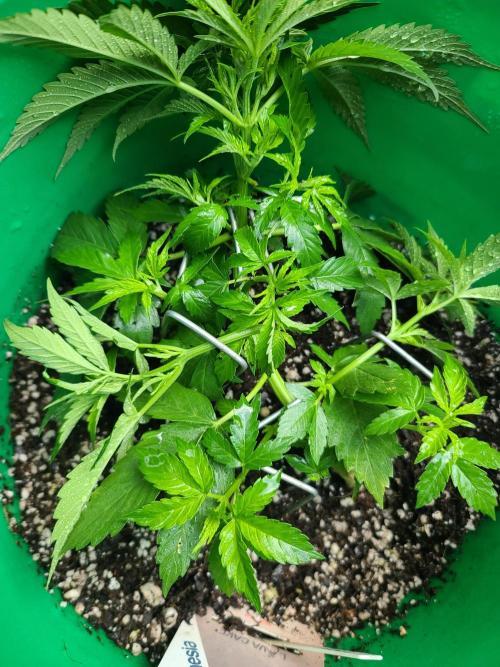
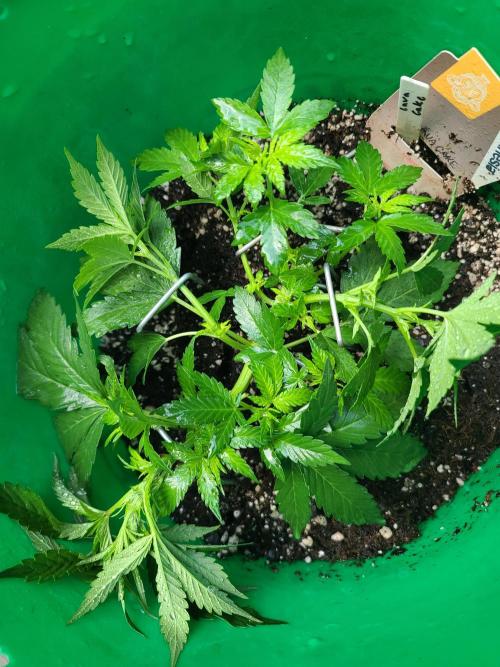
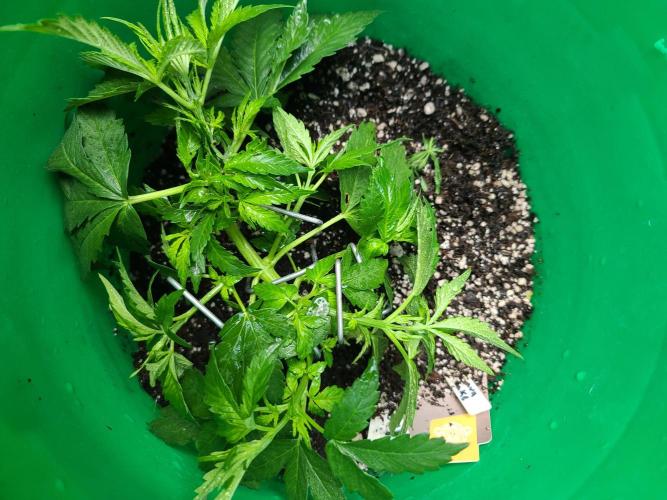
I'm not in the flowering phase, but these plants seem to respond well to everything I have thrown at them. I took them out in the sun for a haircut and they didn't seem to mind so much. In this instance, I was strategic in how I trimmed them. I used three 6" lawn stakes to suspend the plants stalk horizontally in the air across the surface of the substrate. After that, I cut away any foliage blocking light to the 5 available nodes. The idea here is to let each of these nodes grow up and receive equal amounts of light during flower.
Roots have thoroughly permeated the substrate and the plants are tanking along. I'm excited to see them take off!!
Day 19:
The plants responded well to their early defoliation. This may seem counterintuitive to some, but here is my rationale on this method. I don't have the luxury of time to truly enjoy the results of a FIMmed or Topped setup, manifold, etc... We're talking about a plant which is start to finish seedling through late vegetation in 28 or so days. HST requires a 3-7 day period of time to see growth progress, and the goal there is simply to attain more large branches/tops/even canopy. By waiting Until node 4 or 5 to use the method I used, you will end with at least 8-10 tops. I would go further and say at pre-flower, sacrifice the junk nodes you find. Either way you end up with a plant in flower with a lot of tops and zero downtime. I've done them all, they all work. This one yields huge on autos because you skip downtime. It's worth trying if you haven't before, but I wouldn't do it on a photoperiod myself. Photos are all about the luxury of time translating into the art of the grow. Autos are just blazing fast!!
Day 20 Prep-Work:
** DO NOT DO THIS - IF... **
1. You treat your coir like soil and wait for it to get dry before watering. Coco is hydro.
2. If your pH levels are not lab accurate and correct.
3. If you're a person who wants to blame me because you followed my instructions and failed. That's on you, because there's obviously a lot of moving pieces going into this on my end such as hormones and a long list of feed additives. This is my surface level communication to at least get the teaching across at a human level where everyone can understand my perspective, not a tutorial.
4. You don't have a flushing agent. If you need one that'll work, FoxFarm Sledgehammer has always done it for me. Find your fav. Water by itself is not sufficient for this level of blasting your plants with nutes.
5. You have algae issues (pH tilts up), or bacteria/root issues (pH usually tilts down). You cannot do this method if you are not a clean grower, I'm sorry. It's not a sleight against you. The pH issues will roast your plants by mid flower if you are a dirty grower doing this. Trust me, I've been a dirty grower one single time. Never again :)
6. Your not willing to supply Magnesium Sulfate to your plants. Nitrogen is great, but it needs Magnesium Sulfate to be effective. Without this, you can't effectively leverage nitrogen to have leaves which could be in an photos for an online pro article.
**
I am preparing for week 3. Specifically days 20 and 21. In my case I'll be using some (Ca(NO₃)₂) Calcium Nitrate in varying PPM feeds for the plants. Overall I will ramp this up and then cease for a week. Each week from here until flush, there will be some degree of (Ca(NO₃)₂) as a one-per-week macro amendment. For the time being I am also including MgSO4 Magnesium Sulfate. The reason being two-fold.
1. Coco-Coir possesses cation sites. Although I have a custom coir mix where I know the exact amounts, I'll just tell you I've done this with the Coir bricks, FoxFarm Coco-Loco, etc etc everything left and right you can think of. I had fun learning. Here's what I learned, take it and run. Ignore the dopes out there under-supplying their grow media. Coir needs to have its cation sites recharged (sodium and potassium knocked off) not just at the beginning... It needs to be continually happening. This solves for that. This gets used to recharge those cation sites continually on top of your feeding schedule, and I play it by ear with each run of plants to determine how often it is added to my feeds. Typically, I find a 1 week interval for this to be just right. I've never found it to be less than this unless you are playing catch-up on a deficiency. You'll see as my grow goes on. Also, I am not giving exact amounts for a reason. This is something you have to learn by experience because every strain reacts differently. Ease into it. You're just looking for angry tips at flower... Not beyond that, just maintain it once you hit that point. I start here so it's available. This auto has 2 weeks left in veg and has been a week permeated with roots.
2. If you got this far, I'll tell you the 2nd goal with using MgSO4 Magnesium Sulfate. Volatiles will pop like you've never had them pop before. If you don't know what those are, take a bit and do some research. If you're lazy and want to skip the research, this is how it's done: -Sulfur-. Practice on Diesel types to become pro ;) In this case, sulfur is a happy bi-product of a nitrogen-cal-mag nute blasting because it's attached to the magnesium in MgSO4. It's cheap, and you can find it at Anytown U.S.A. Wal-Mart's all year around in the garden and bath section under the name Epsom Salt. Enjoy the tip!! Here's another on the house. If you smell sulfur, stop. You went too far, and you need to address why you are hitting them that hard with a minor amendment for next run. This is like, feather touching it. For perspective, I'll use 1/4 teaspoon or so in English units per gallon, once a week. This is a cleaner, elemental alternative to Molasses as a source of elemental sulfur additions. Be careful though, I said sulfur. You would still need magnesium. But if you're using this method you do need to stop using molasses because they conflict. The greatest miss of all would be the molasses sugars in a coir substrate. You'll want to find an alternative source of glucose for your Mycorrhizae health. I highly recommend the switch. And hey, I'm running this on top of my Cal-Mag supplement which is ran at 1.5x manufacturers recommendation. See why pH and having everything matters, now? You can easily get salt buildup if you don't flush.
Use a flushing agent before flower and before your fade/pre-harvest. It doesn't burn up the plants. I find Saponins to be quite appropriate, cost efficient, and effective for use with Coir dominant mixes. If you find one that's better, I'm all ears!! I don't know it all, I just know what really does not work!! LOLOL Lot's of fails to figure this stuff out for me. I'm a goofball at life!!
4 likes
comments
Share
Used techniques
LST
Technique
Defoliation
Technique
3
Week 3. Vegetation9mo ago


30.48 cm
Height
20 hrs
Light Schedule
25 °C
Day Air Temp
5.8
pH
Weak
Smell
900 PPM
TDS
62 %
Air Humidity
20 °C
Night Air Temp
11.36 l
Pot Size
60.96 cm
Lamp Distance
1000 PPM
CO₂ Level
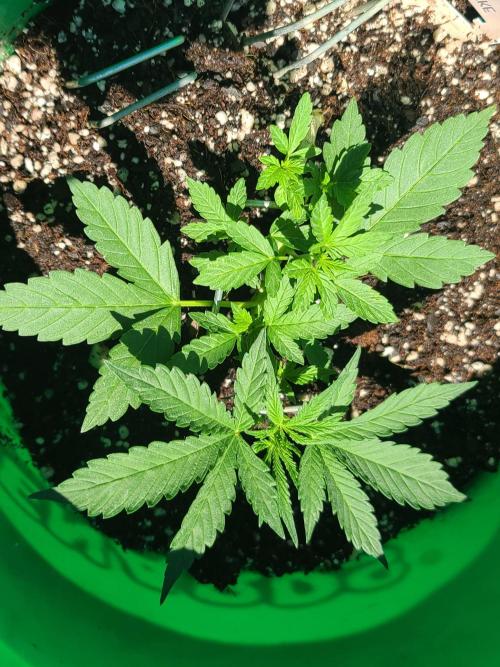
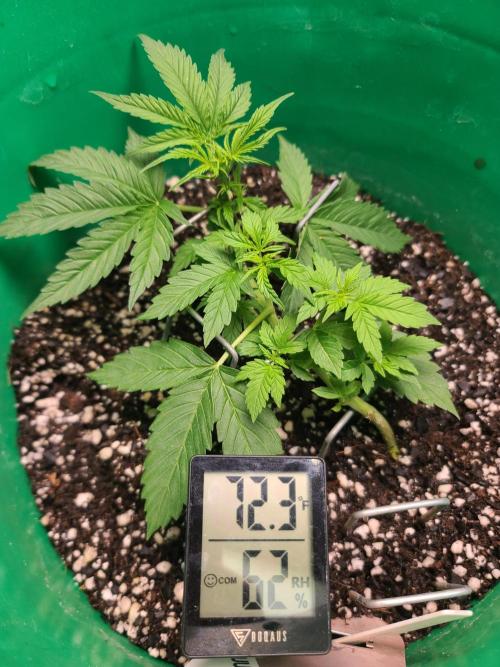
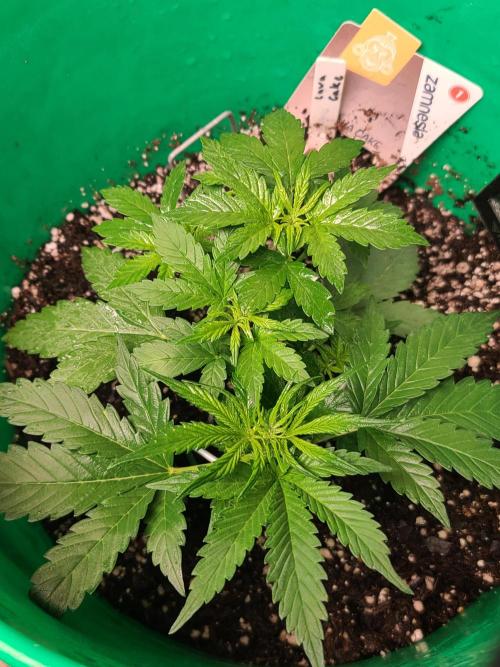
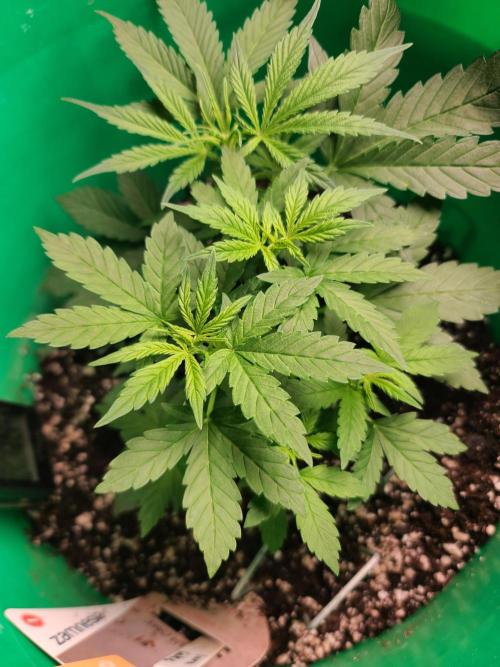
Sapphire9352 Day 21: All of my Zamnesia Lava Cake Automatic plants looks vigorous and healthy. The defoliation I performed has allowed the internodal branches to reach up and become tops as I had hoped. From here it is just a matter of ensuring consistency in following my protocol for these girls.
Days 22-26: My goal here is to ensure my root health is in tip top shape for the mid-late vegetative period. The speed of this auto is start to finish, 10-11 weeks total time. I am in week 3, which I assume is mid-late veg period based upon my experience with Ruderalis crossed cultivars. Personally, I believe this is where people fail with autos. They are too gentle on feed ppm's because they are still building root structures. Hence, my little hack with growing roots from the bottom-up, and simultaneously from the top-down through rooting hormones should be leveraged here. Because my roots have permeated the grow substrate, I can nail em' with nutes as long as I maintain proper CO2 and actually read the plant for requirements. In this case, I can say with Lava Cake Automatic, universally across my 4 plants I am seeing that these plants by week 3 are showing a preference for cooler climates. Indicative and as would be expected with such a rich Indica dominant background. In the day time I am running 77F, at night I am running 68F. I see zero signs of anthocyanin accumulation at this time, but the day is young for these gals at week 3 in the growth process. I don't expect purples, but sometimes I'm surprised when the symptoms begin to show up in the leaf stems. Hints of purples, despite providing sufficient magnesium and other trace elements (macros goes without saying here). If you see that, you MAY have a purple gurl on your hand. Again, no signs yet.
Days 22-26: Significant findings with this Lava Cake Cultivar: She's easy on P and K in N-P-K at this rate. Don't over-do it. I did indeed push mine, got my tips just a hair angry, and I would say ease into building her up. Read her well and she'll reward you with some decent stretch here in Week 3 from the looks of it.
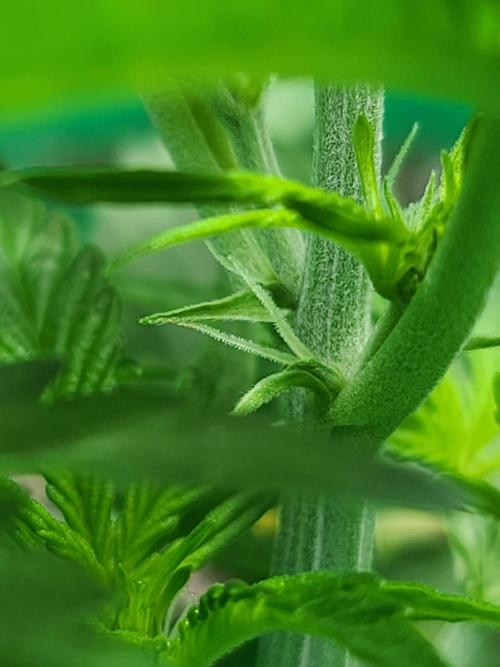
Day 27: Pre-Flower Pistils Emerged. I pinned down the plant to ensure a final training before the stretch phase I'm sure will come. The most important consideration is growing towards excellent airflow beneath the foliage during flower once I am there. Although this is a mold resistant cultivar, I'm not messing around with that at all.
"Fail to plan, plan to fail."
I already know I'm lolipopping this plant, and there will be zero popcorn buds. How can I be so certain? I'll be excising every single popcorn site as I read the plant in the future. For now, I'm making sure all these tops I went the distance to cultivate out of these plants can be uniformly exposed to light.
4 likes
comments
Share
Used techniques
LST
Technique
Defoliation
Technique
4
Week 4. Vegetation9mo ago


53.34 cm
Height
20 hrs
Light Schedule
25 °C
Day Air Temp
5.8
pH
Weak
Smell
1100 PPM
TDS
59 %
Air Humidity
20 °C
Night Air Temp
2.99 l
Pot Size
0.49 l
Watering Volume
18.01 cm
Lamp Distance
1000 PPM
CO₂ Level
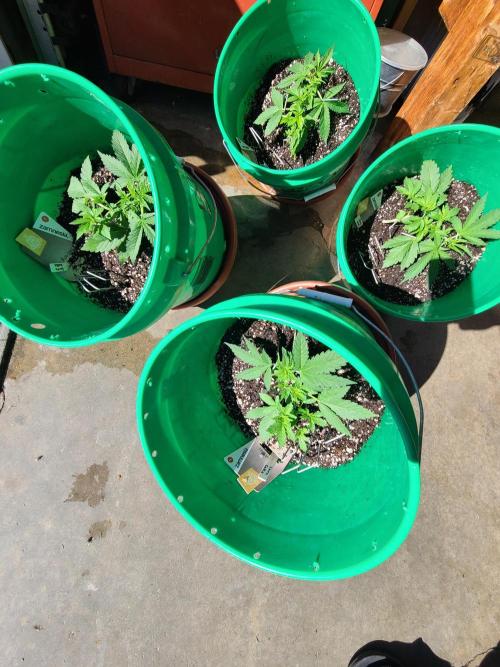
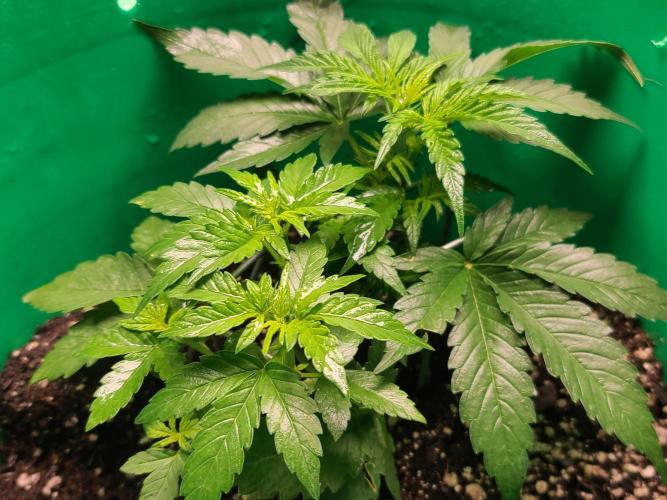
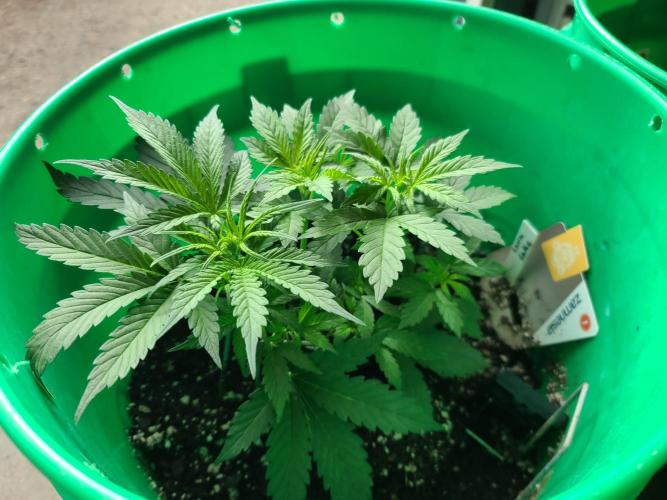
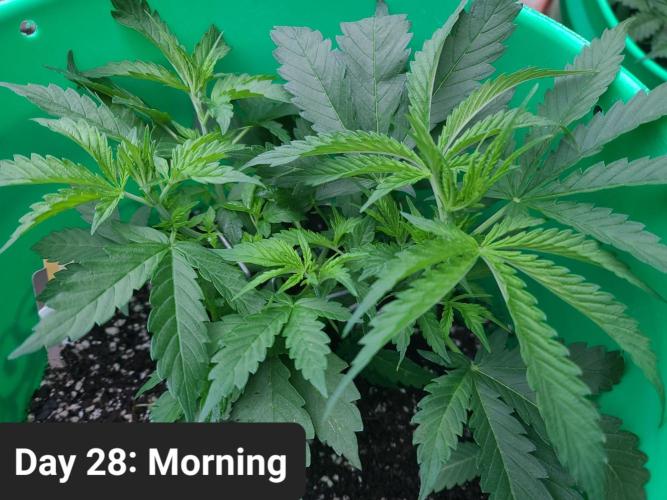
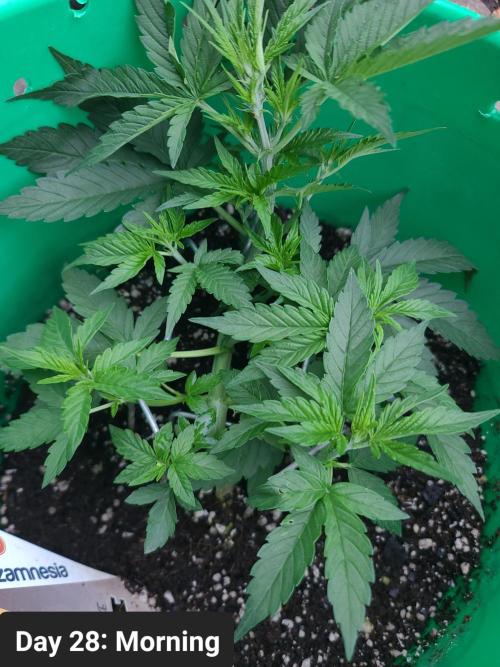
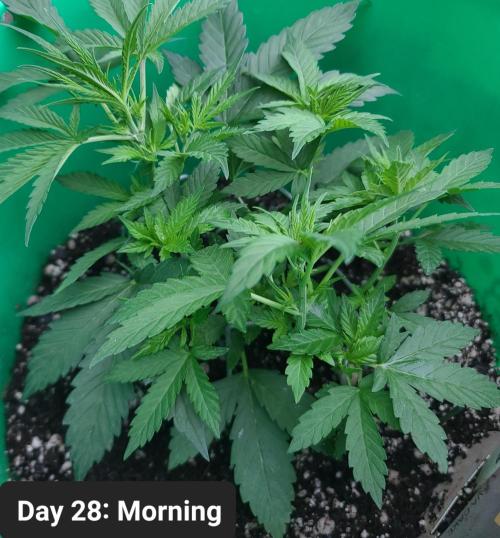
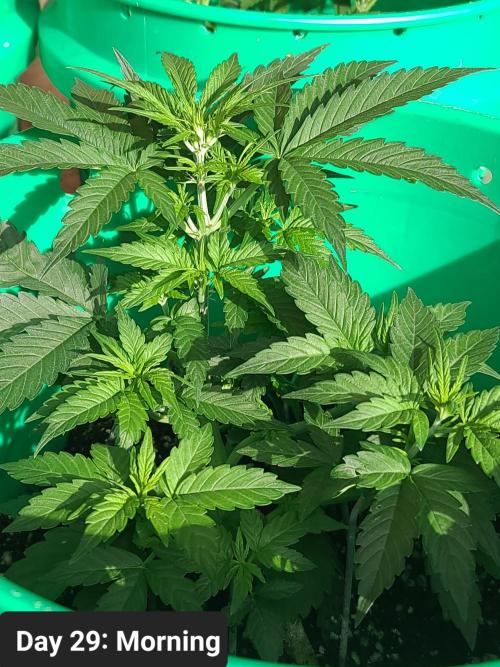
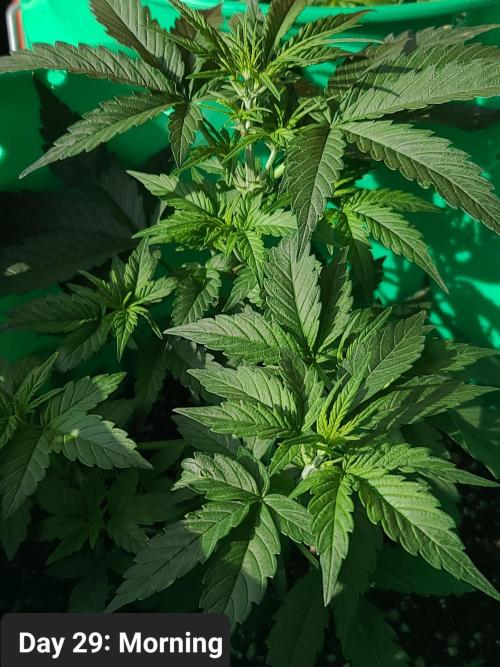
Sapphire9352 Day 28: The Lava Cake Automatic gurlz have recovered very nicely from the gentle LST pindown I performed. If you're new to this growing stuff, get yourself some lawn staples and bonsai your plants early on for some easy longterm gains. If you do this long enough you will discover some plants are cool with FIMming, some with Topping, other love the manifold, etc. This auto loves LST pindown and recovers very quickly!!
I took them outside for some pics early in the morning to get a natural feel. With the timing of my pics I intentionally missed, "The Golden Hour," so people following this diary could get an honest look at my foliage. Stem overall length, including submerged length is right around 13" at this point in the grow. Future meristem sites appear healthy and vibrant, reaching for the, "Sun(LED lights offset at 22degrees)."
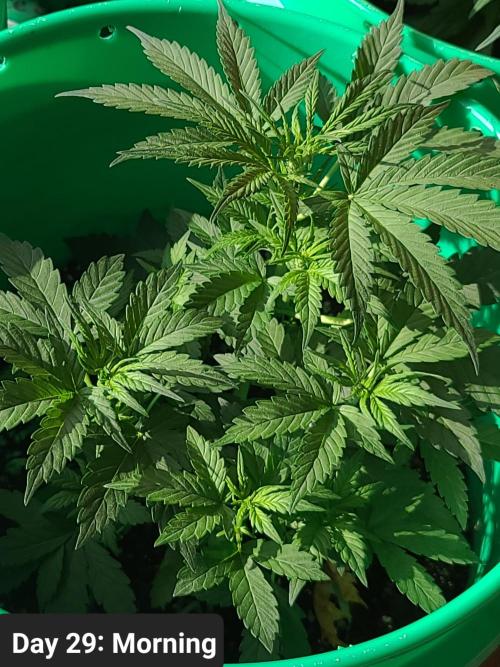
Day 29: ([Morning at time of writing] After a night under some commercial lights, these plants entered the stretch phase. How can one be sure? In the case of my Lava plants, they all on the same day grew roughly 2 inches in a 24 hour period. It's a bit humorous because this is a dwarf/stealth/low-profile type plant with a supposed 2 ft height according to Zam. Mine went from 13 inches to 15 inches overnight. That's a 15.38% size increase in a 24 hour period, wowz!! Great job on the stretch with this one, Zamnesia!! Beautiful little plants thus far.
I went ahead and did some nerd math for everyone just for some fun here, too!! So we can all join in and see if a hypothesis is correct. The goal here is really just to see how the plant progresses so future growers of this strain know what to expect. Even so, it's fun to see math work sometimes. In this case, I'm not showing my work. You go do the work. Math I'm using says in around 4.28 days this plant will hit that 24" mark, given the growth rate is LOG. Who knows, the growth rate may not actually be LOG, or the rate I accounted for may be incorrect and it's still LOG. Who knows? That's why it's fun. Either way, Zam says it's getting 24", so we'll find out!!
My hypothesis: It gets to 24" in 4.28 days. Obviously, I'll measure at the day 4 point, and the day 4.5point, and avg that to see a fairly close estimate. If I'm wrong, I hope it gets much bigger!! Either way, I'm blown away by it's current 1 day 15.38% growth rate in a 24 hour period. Bonkers, especially for an Indica!!)
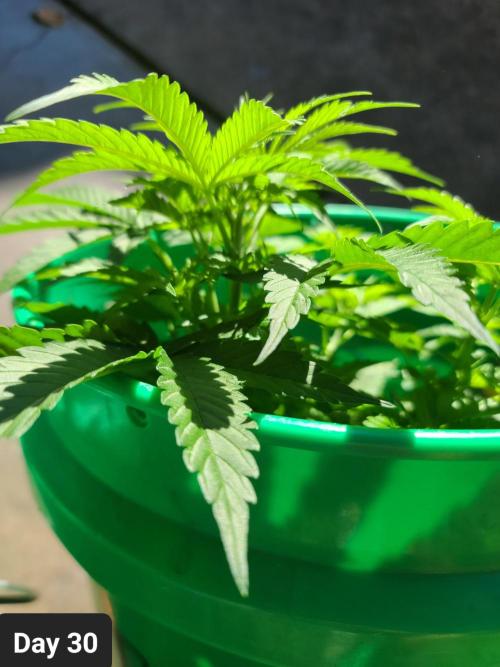
Day 30: Impressive foliage and stem stretch continues. Another day where they stretched around 2" in a 24 hr period of time. What surprised me is the difference in foliage feom day 29 to day 30. The leaves must have gotten the message, "Time to grow, we have meristem sites to build!!"
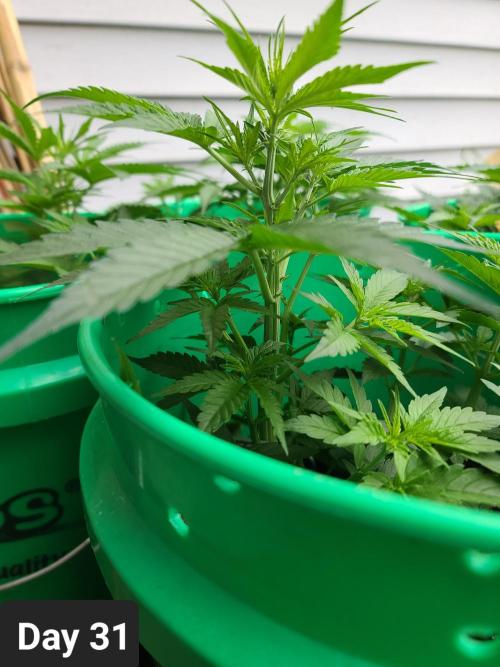
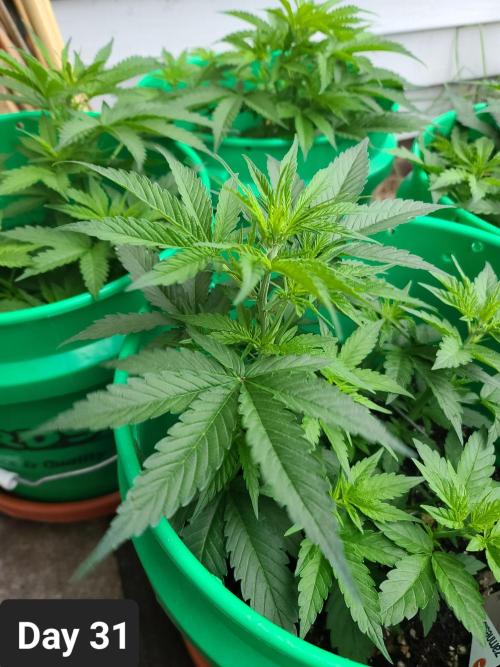
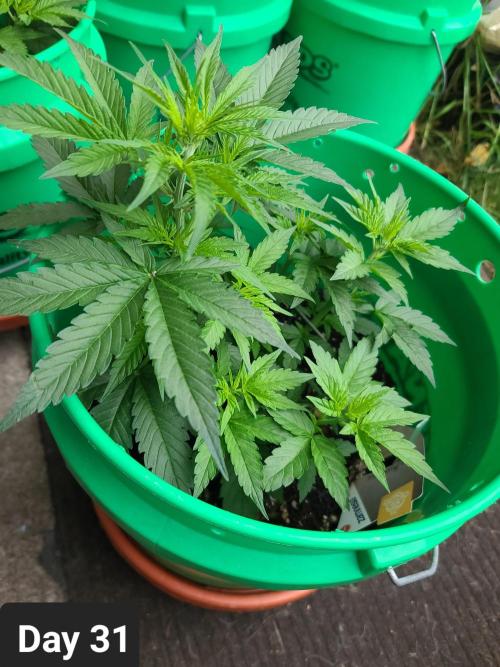
Day 31: The plants are halfway through the day and have uniformly added 2.5 inches. I'll measure again tomorrow, but as of 10 hours into a 20 hour cycle, this plant is already at 19.5".
Here's some fun math, just basic easy percentages here. From day 28 to day 31.5, these plants went from 13" to 19.5".
-Days 1-28 = 0.48"/day growth avg.
-Days 28-31 = 1.86"/day growth avg.
-1:3.5 growth ratio change from days 1-28 and days 28-31.5. That's neat to me!! Stretch mode is on for sure!!
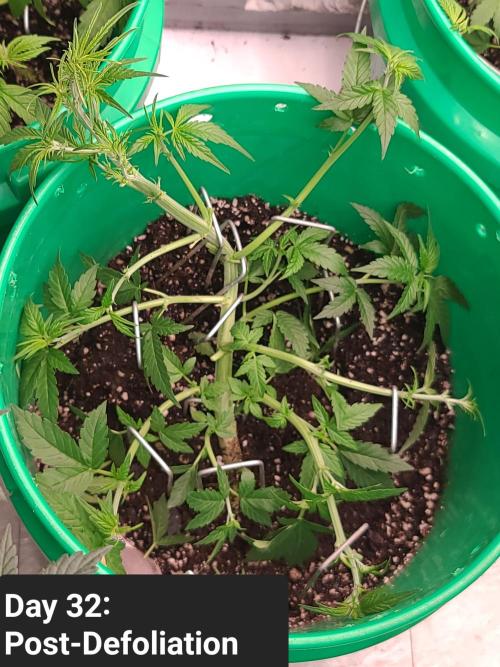
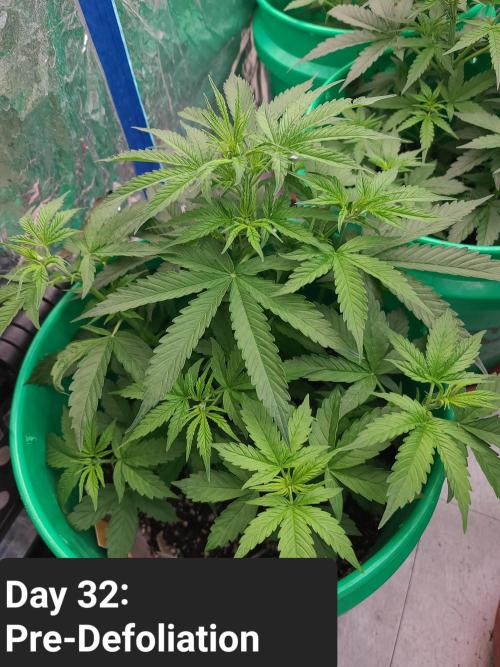
Dqy 32: Logged 2.126" (2 and an 1/8th) growth and defoliated. I went heavy on the defoliate.
4 likes
comments
Share
Used techniques
LST
Technique
5
Week 5. Flowering9mo ago

60.96 cm
Height
12 hrs
Light Schedule
24 °C
Day Air Temp
5.8
pH
Normal
Smell
1100 PPM
TDS
59 %
Air Humidity
12 °C
Night Air Temp
11.36 l
Pot Size
1.89 l
Watering Volume
45.72 cm
Lamp Distance
1000 PPM
CO₂ Level
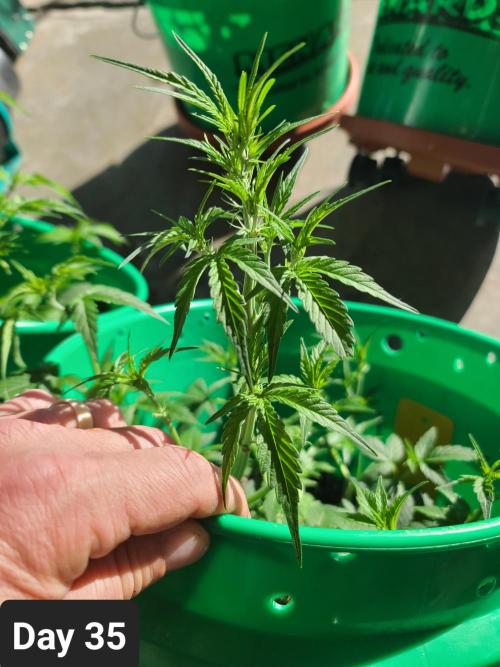
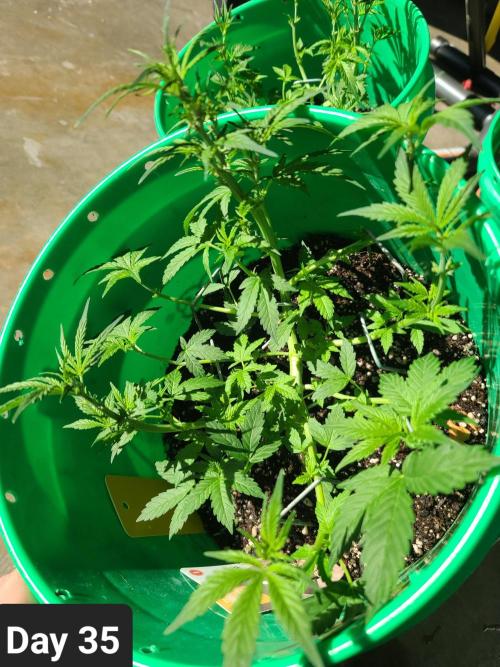
Sapphire9352 Day 35: A heavy defoliation the day before, leading into the tail end of pre-flower stretch.
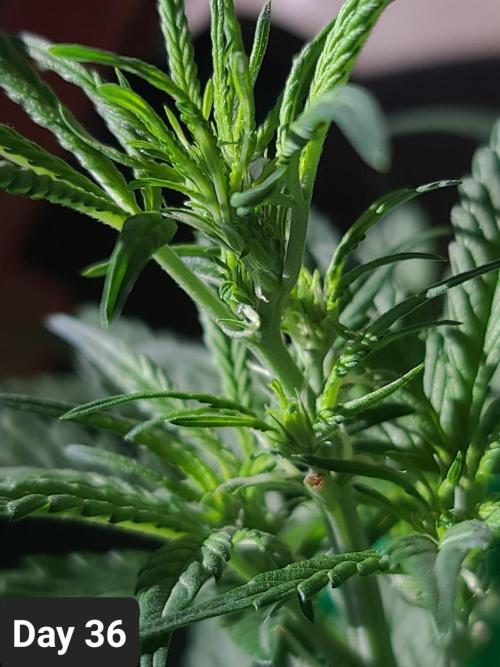
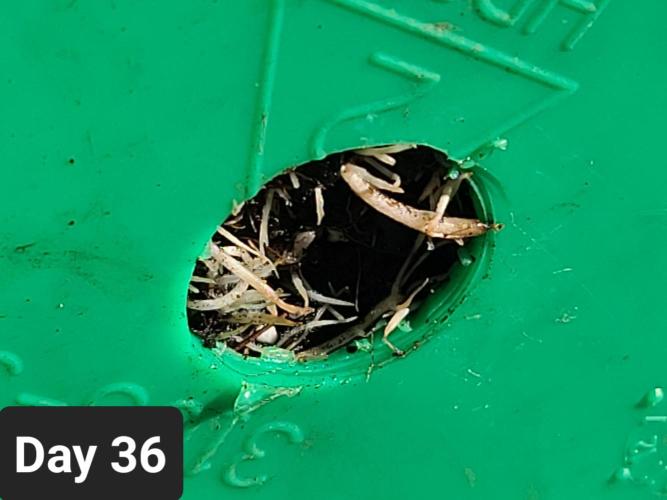
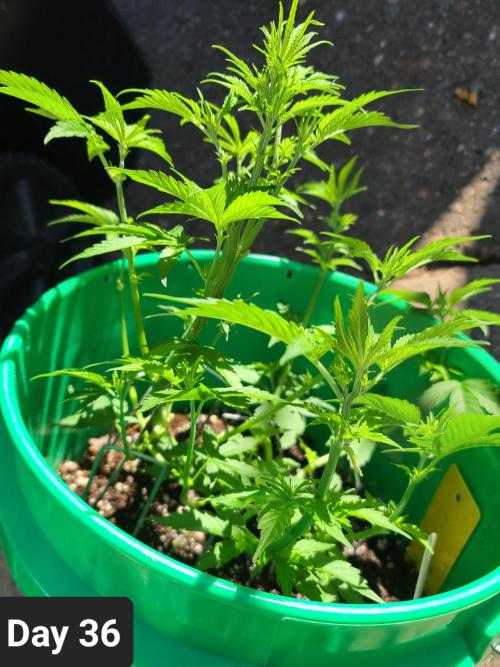
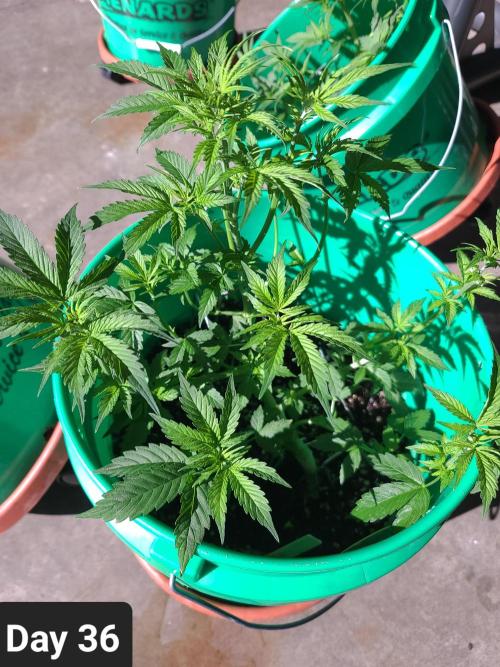
Day 36: Plants are between 21.5"-24". They may continue to stretch, but as of now it appears Zamnesia is on the money with overall height. Pistils are really beginning to show up, and the plant is beginning to look like an early flower female. My nutrients and lighting have been adjusted accordingly. Happy roots, happy plant!! I switched from 20/4 to 12/12 from here until the end. Also, i run by DLI for autoflowers. As long as you track DLI properly, its all the same whether 12/12 or 24/0 with autos. I opted for 12/12 this time around, but I've done many different lighting schedules with autos over the course of time. DLI, DLI, DLI. Nothing else matters with autos, that's one of their greatest strengths!! In this case, I'm nailing them with high DLI for a day and will give them a little break tomorrow.
Day 37: Nailed them with a high DLI for a day. In my mind, here's my thinking: In nature you get some big shifts with temps, weather, etc. The plant needs to face adversity and overcome it to be a strong plant. A few times in my grow I will simulate different settings for differing reasons. In this case High DLI from a previous day means the next day I subtract how much over my target DLI I went the day before from the current day I'm on. [Example. Theoretical target DLI is say, 25 for whatever phase. If I want to hit hit hard, I hit it 32 or something the whole day. Next day, I remember I went 7 over, and on that day I simulate a cloudy, lower VPD (higher RH%) day with a DLI of 25 - 7 = 18. Today is my 18DLI or whatever, even though that's not my actual DLI, just the example.]
Here are some adversity settings you can simulate for a short period if needed.
1. Near drought: Let the plant go longer, or even reduce water intake by 50% for a day or two. At some point, let those leaves all hit where they are close to a droop. Then take care of them and nail em with nutes one day, then normal back to how it was before simulated drought.
2. Bend those buds down at least 2 nodes if they are real tall. If you do it right and don't break your tops off, they'll want to stand up again within 24 hours. At 24 hours, do it again. Keep doing it until those lower buds get bigger. Then let those tops go. They'll stand up and become near Thai sticks before its all over.
3. Break up the media some with some bamboo stakes or long lawn staples if you are in any sort of media. Don't wreck the roots, but get oxygen to them. That's all we are trying to do here.
4. Randomly just cut off something. Just junk it out, the energy will go elsewhere.
5. Flush. And actually do it right, and take the time. It's not a flush and done. Real flush in media needs a resting period for the minerals to get dissolved with whatever flushing agent you are using. And use a flushing agent. Water alone is not doing what people say it's doing in a flush, just look at showers and see the calcium buildup if you are on a city water system. Water isn't clearing that out. After flush, that plant is starved for nutes. It'll give you some lip a day or two if you really get it clean. From then on, nail it till it looks perfect, then back to normal. They love it
6. Haircuts: Pre-flower - 21 days later - 21 days later. Plants love a haircut.
7. Let it get hot one day.
8. Let it get cold one day.
9. High wind for short periods (just enough to strengthen stems).
10. Do a soil drench with pure H20. Then, do another after an hour (simulated flood, followed by high vpd and high light, no wet foliage until media is normal again).
There are so many unique and interesting ways to introduce artificial stress to a plant that the list could continue for as long as our imaginations allow. I keep it to a minimum and limit myself to using 2-3 throughout the entire cycle at critical points. In this case, I'm on day 37 and coaxing out new buds and foliage. I do indeed want my foliage and branches tender to ensure I get all the stretch and extra bud sites possible during pre-flower. After this phase is done, I'll do what I call, "Hardening." Where I increase the VPD (lower RH%) dramatically for a bit to lock in the plant where it's at. To let it know - "Use your solar panels, it's time to become beautiful." For me, I can always tell when I hit that day where I know it's time to harden when the remaining foliage from my pre-flower defoliation has grown out to maturity. That's coming soon, almost there (Early Flower)!!
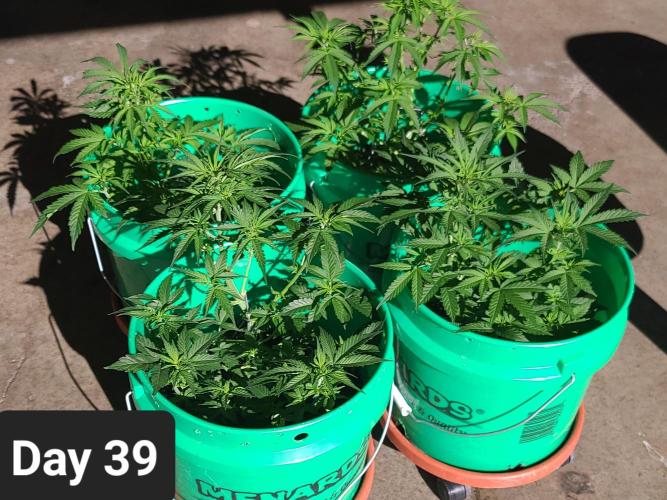
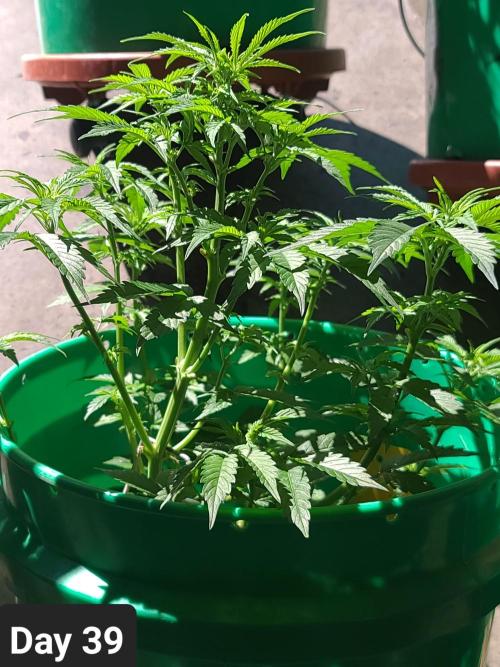
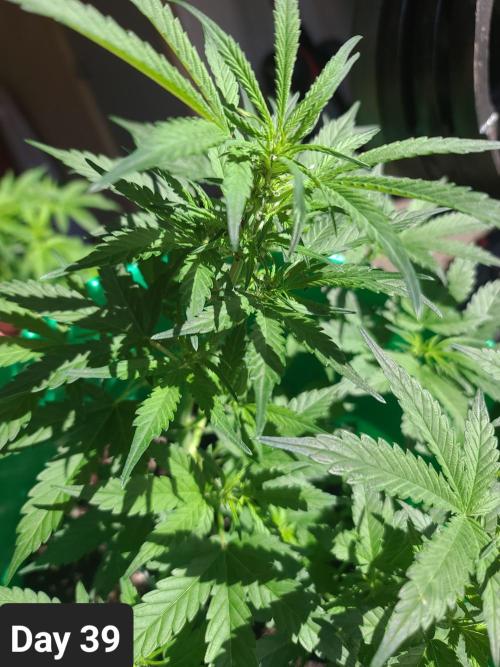
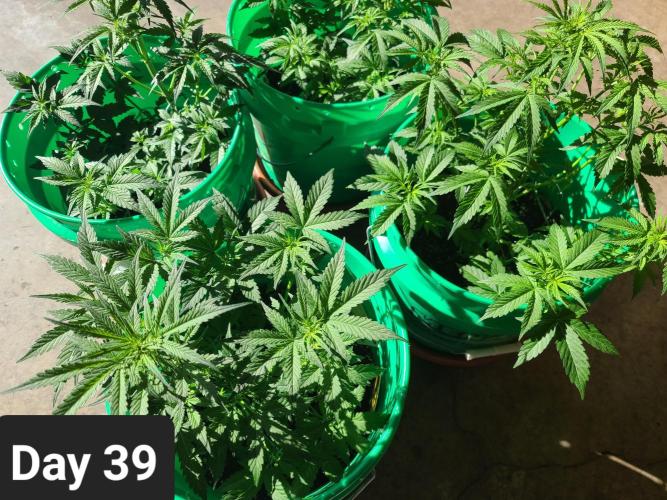
Day 39: It's morning time for these Lava Cake Auto girls and they decided to keep the stretch phase going. I'm currently seeing 22.5" to 25.5" overall length. As they continue to stretch, the foliage is coming in strong and will eventually need a 1/4 defoliation. To do that and make it as simple as being able to count by 2's ------ Every other node gets a single fan leaf chopped. Always chop the ones facing inwards to improve light penetration. On top of this I am seeing the plants begin to look like mature plants more and more each day. The pistils on this plant which have appeared are abnormally thick in contrast to the size of the plant. On top of that I am seeing signs of anthocyanin potential with some shades of purple in the pistils and sugar leaf stems in a scenario where magnesium deficiency may be ruled out with certainty. This tracks with what Zamnesia states on their website in terms of lower temperatures seeing anthocyanin production increases. I have been beginning them at 52 degrees in the morning, and they end up in their mid-day period with an avg temperature of 75.6 degrees according to my master controller. Humidity floats between an avg of 55% and 61% depending on the temperature, but that's me trying to translate my setup into a way people without a VPD controller can understand. I think if you target around 58% on avg, you'll do really well with these Lava Cakes. Also, I cannot stress this enough: Listen to the seed vendor (Zamnesia) if they are offering advice on what a specific strain enjoys most. In this case, I took a leap of faith on temperatures and ran her low. To my amazement, this is where this strain truly began to shine. It's as if she really needs a lower temperature at some point in her daily cycle to enjoy life to the fullest. From all I've learned, plants which can produce purples will produce their best/maxmimum purple coloration (anthocyanin buildup) where a 22-23 degree F difference exists in it's daily temperature swing. Don't forget, this is a mountain plant. Especially so with it's ruderalis genetic crossing in-play here. What I did is simple ----- I want to run them 75'ish average in the day. 75F - 22F = 53F. I went with 52F to be safe. I would normally never go below 62 with plants, but running this one real cold at night does indeed appear to bring out the best in her!!
Make sure you read what your seed vendor says, no need to reinvent the wheel with each strain you run.
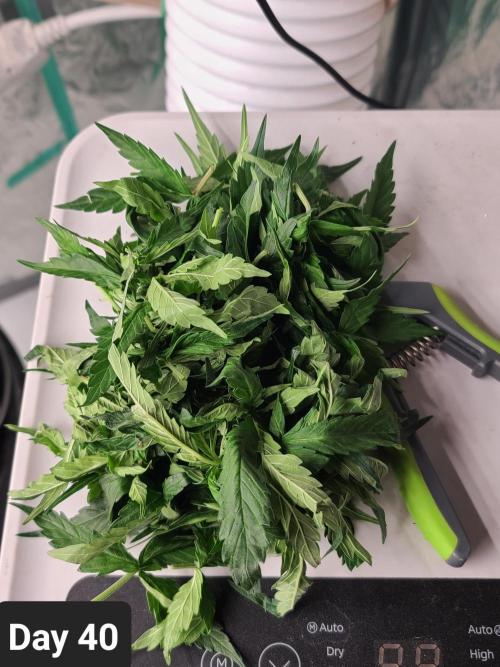
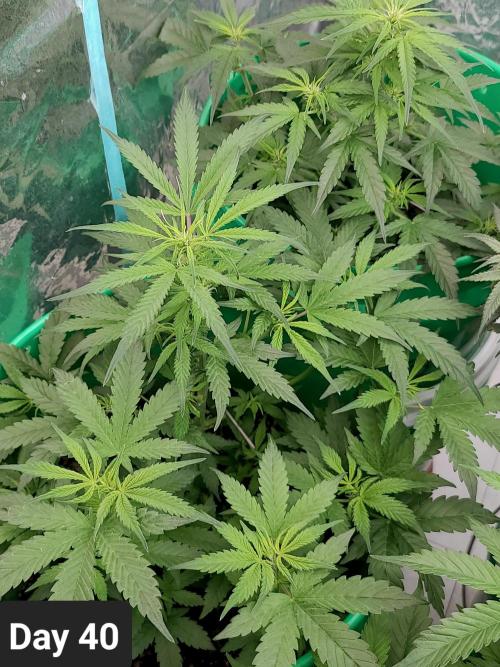
Day 40: A 1/4 defoliation to continue to ensure bud sites are receiving adequate lighting. This also ensures the leaves minimize how many large storage sites they have on board. Ie: Large fan leaves. If the plant can't store... It shunts to building bud sites and sugar leaves - - Which is how you coax out pom-pom's of buds during that critical early flower process. If you want big buds, that's how you get them!!
Here's a great saying to run with - "If the light is dim, give it a trim." Just for fun, here's another like it. "If it wont see light, why does it exist?" Enjoy!! 💡💡
5 likes
comments
Share
Used techniques
12-12
Technique
6
Week 6. Flowering8mo ago


67.31 cm
Height
12 hrs
Light Schedule
25 °C
Day Air Temp
5.8
pH
Normal
Smell
1200 PPM
TDS
59 %
Air Humidity
20 °C
Solution Temp
12 °C
Night Air Temp
11.36 l
Pot Size
1.89 l
Watering Volume
45.72 cm
Lamp Distance
1000 PPM
CO₂ Level
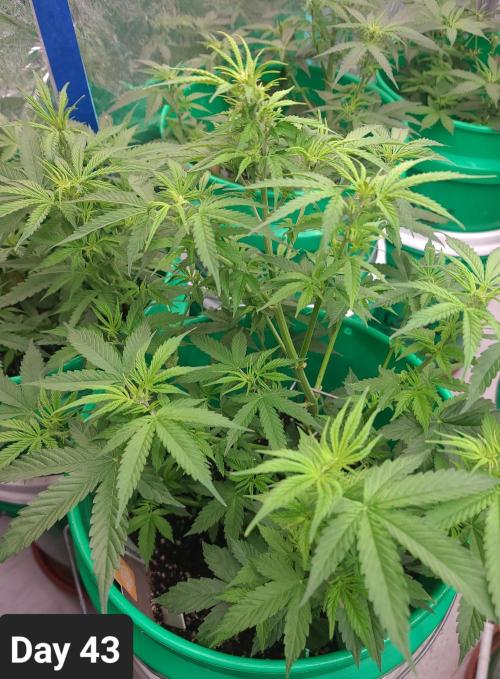
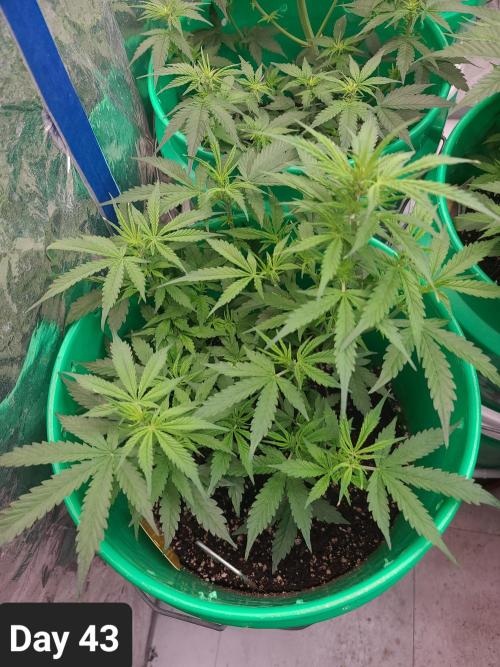
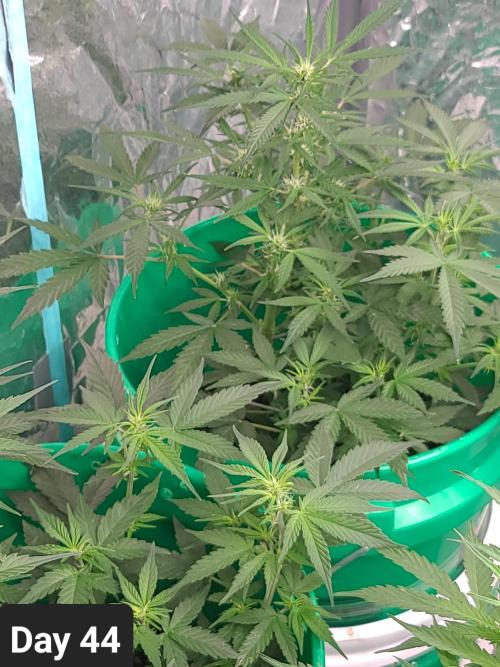
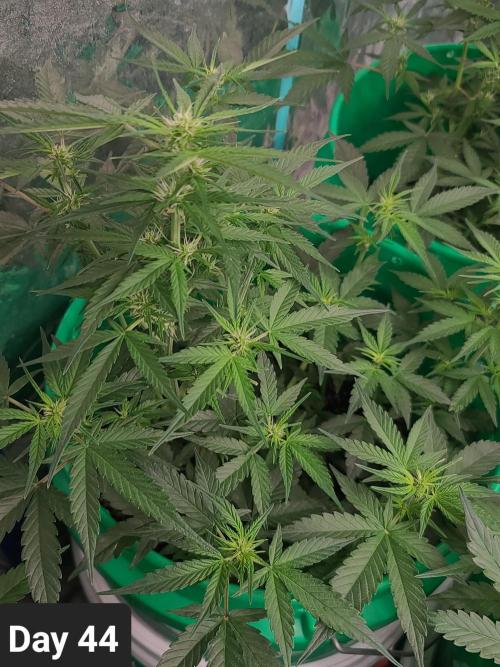
Sapphire9352 Day 42: No photos. Recovering.
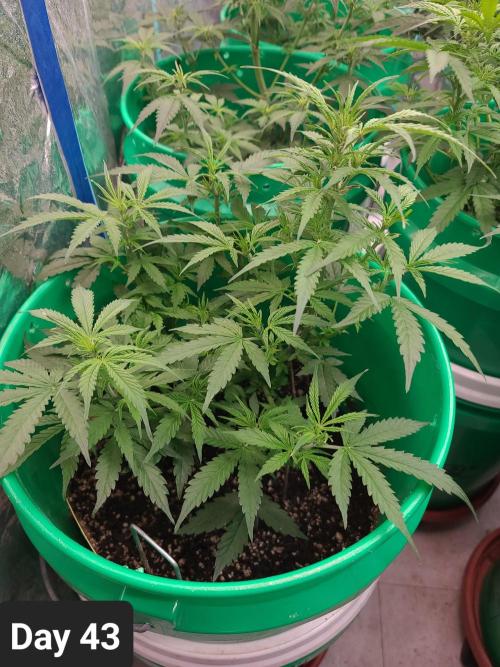
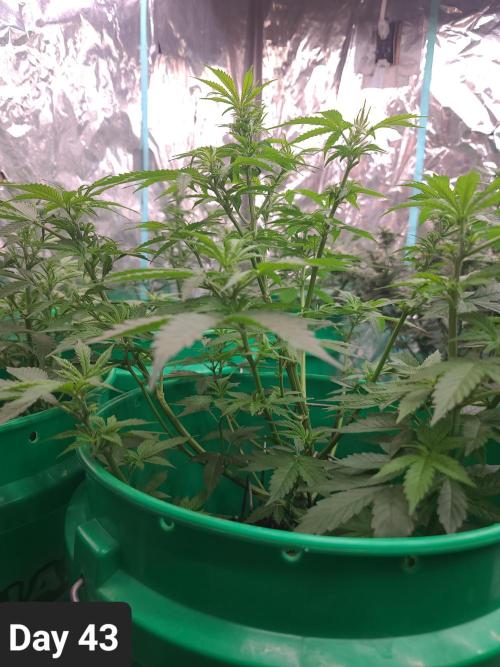
Day 43: The pics say it all on this day. The Lava Cake Automatic plants have ceased to stretch. Their final lengths are between 21.5" and 26. 5" respectively.
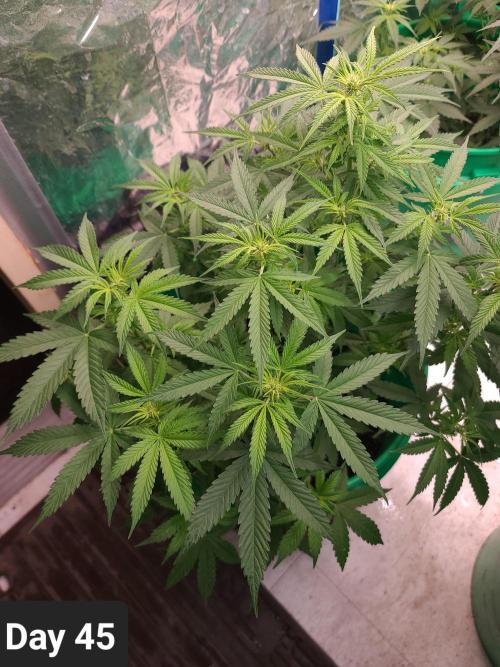
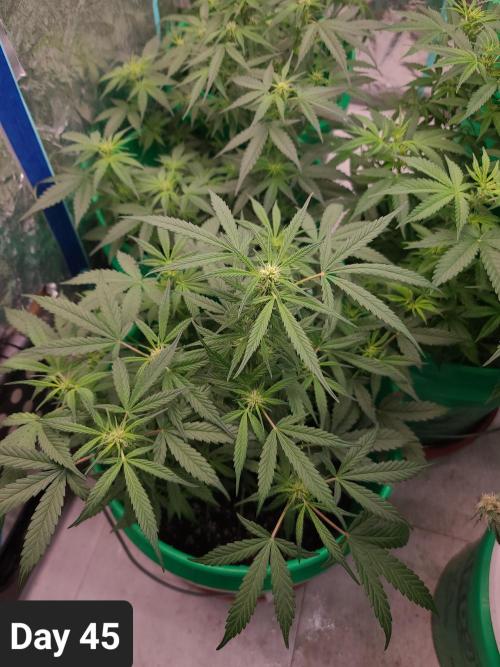
Day 45: Plants are filling out nicely after the 1/4 trim. They're in Early flower stage for sure, preparing to build their pom-poms (buds).
Day 46-47: I ended up getting sick for a couple days. I took great care of the plants, but I didn't take photos as it requires a lot of moving things around. I'll be adding Day 48 pics before it kicks into week 7.
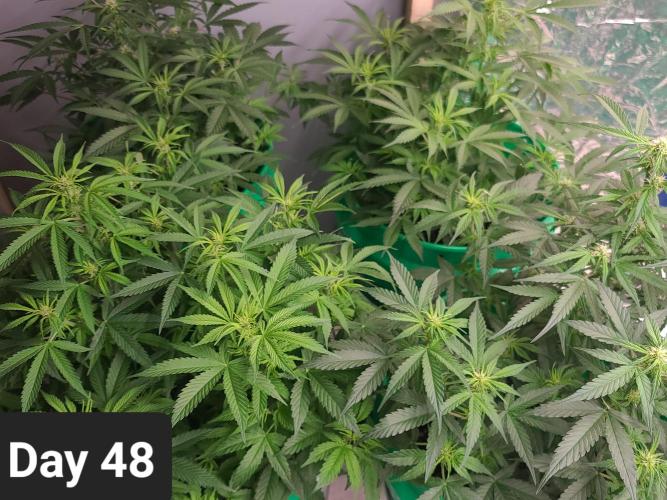
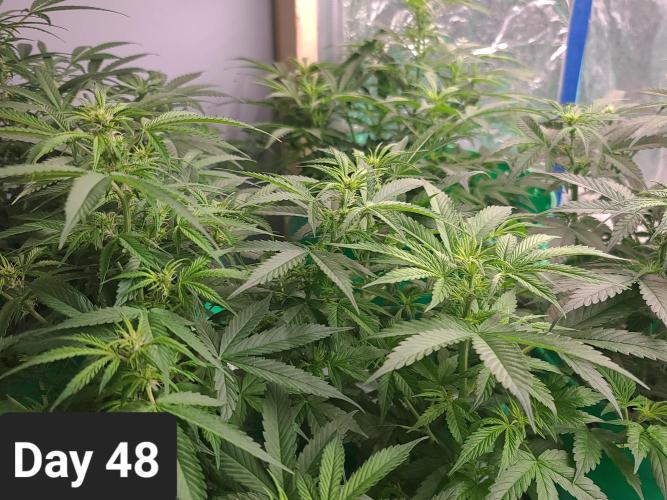
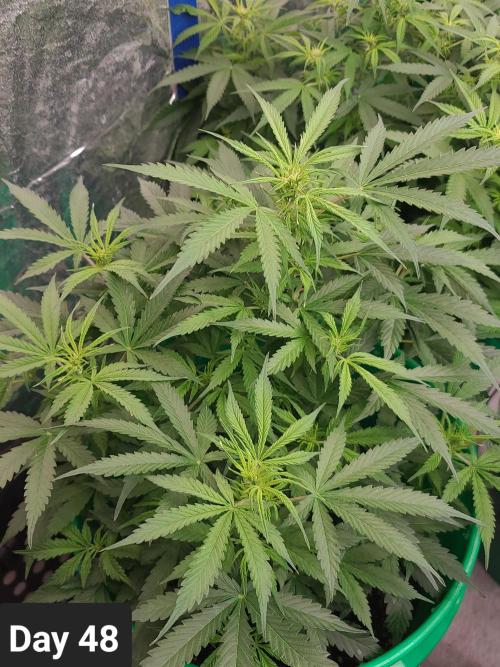
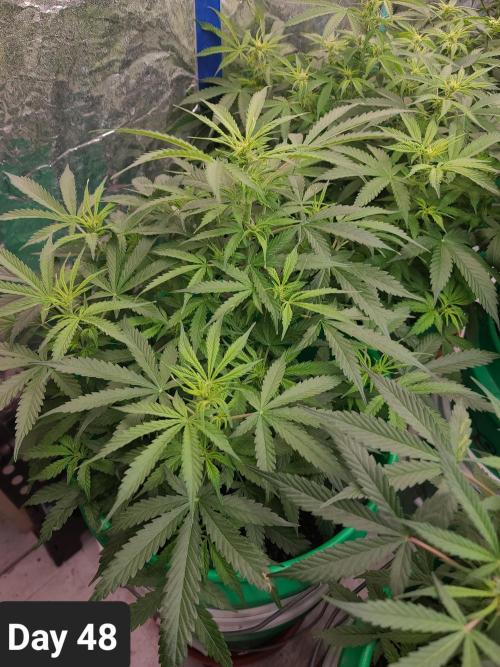
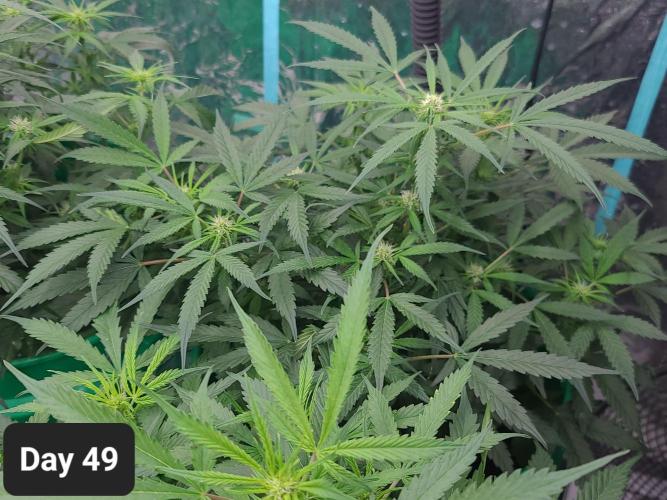
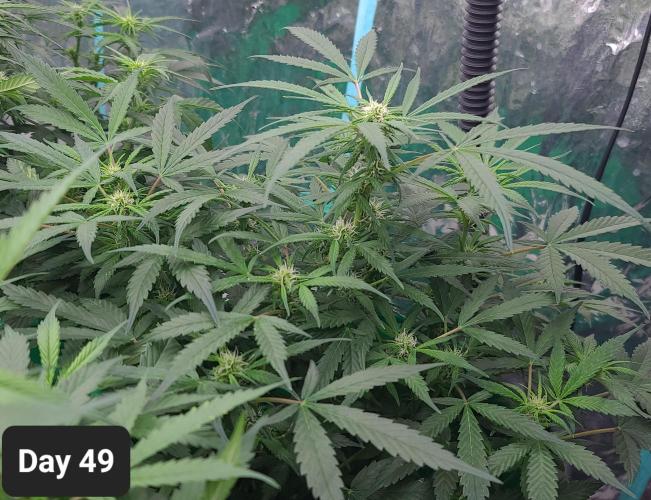
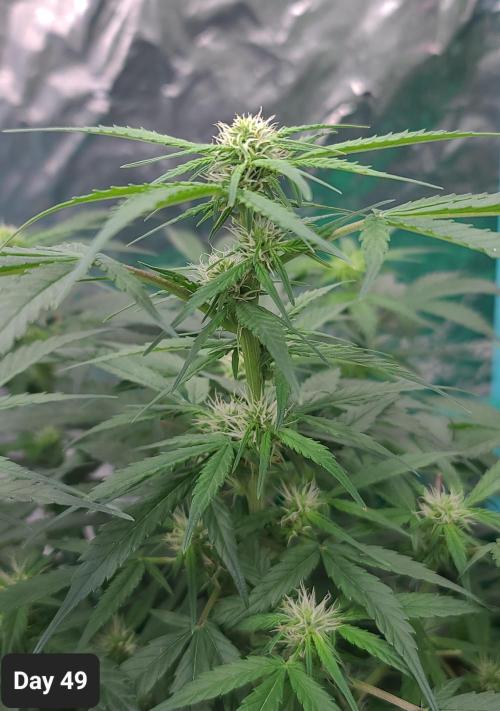
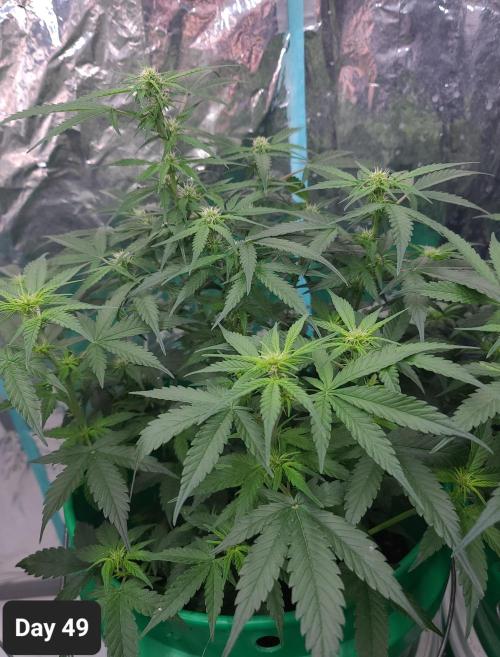
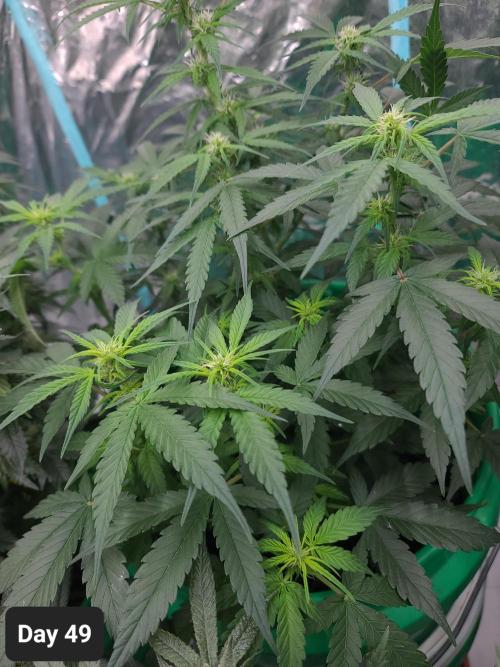
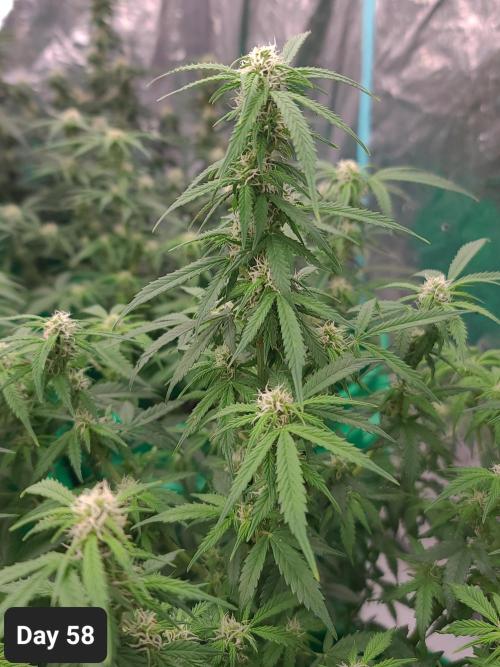
Day 48: Overall I appear to be in a good position for a productive harvest at day 48. There is still time to mess up my grow, but I'll do my best to avoid that scenario along the way. The plants have re-built their foliage and pistils are present on all plants, and all applicable nodes. The big ticket are the tops, of which there are plenty!! The feed schedule I created is running a mix between Early-Flower and my Mid-Flower recipe. In terms of texture, many of the stems are beginning to become rigid, and this is from a combination of the plant entering flower and my humidity being placed lower than when it was in the vegetative state.
4 likes
comments
Share
Used techniques
LST
Technique
Defoliation
Technique
7
Week 7. Flowering8mo ago


81.28 cm
Height
12 hrs
Light Schedule
24 °C
Day Air Temp
5.9
pH
Normal
Smell
1650 PPM
TDS
62 %
Air Humidity
20 °C
Solution Temp
12 °C
Night Air Temp
11.36 l
Pot Size
1.89 l
Watering Volume
30.48 cm
Lamp Distance
1000 PPM
CO₂ Level
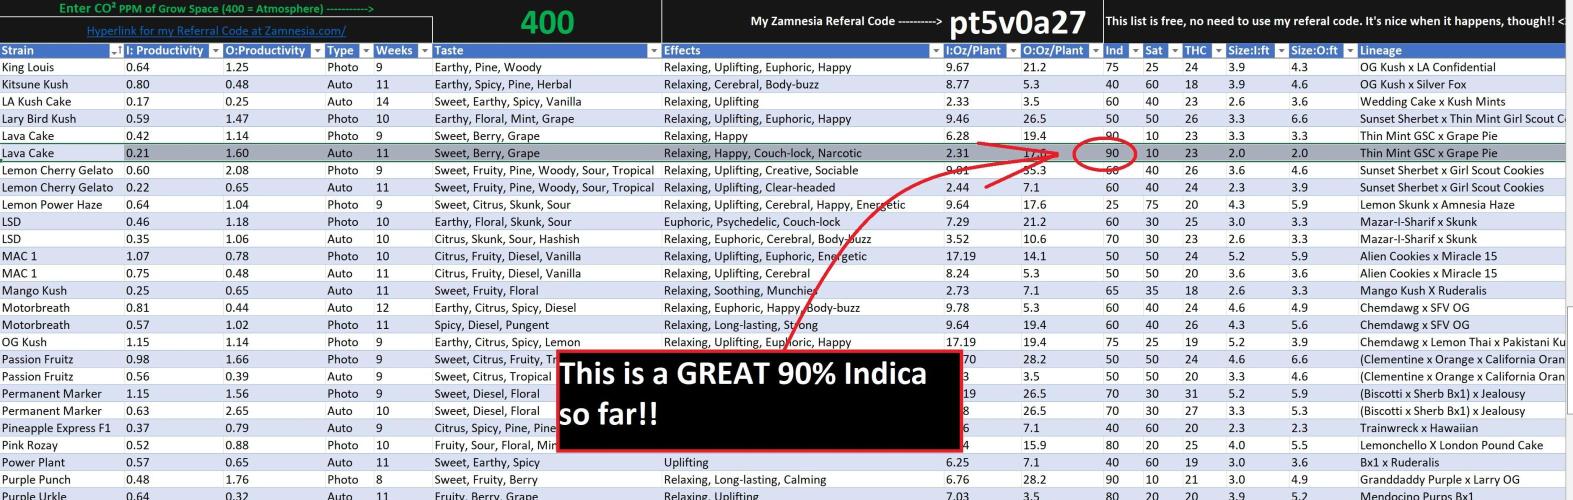
Sapphire9352 UPDATED: 11/13/2025 - A working link to the Calculator = https://drive.google.com/file/d/1Z4nfMMviZxpXFXyv3FY8INgYEjUePSB-/view?usp=sharing
It's an excel sheet within a zip. For some reason when I tried to just do it as a straight google doc converted from excel, it wouldn't work correctly. I have it in the zip file and its up there for whoever wants it. It'll seriously take the guesswork out of which seeds you want to buy if productivity is your goal. I've ran this through my past grows, manufacturer sites, etc and it always comes up accurate for me. One major, MAJOR caveat!! It does not account for your errors. Enjoy!!
I set the efficiency point to 72 for a reason. I'm not here to explain my math or my work on an excel sheet. If you want what the factory says is the output, run it at 72 efficiency and 400 CO2. If you want to see what the community avg yield would look like, set it to 65.
I expect 65 to 93 grams per plant, landing likely closer to 93. This yield calculator has nailed it on my previous grows, I expect no different here as long as I don't ruin things. I've done that, too!!
-------------------------------------------------
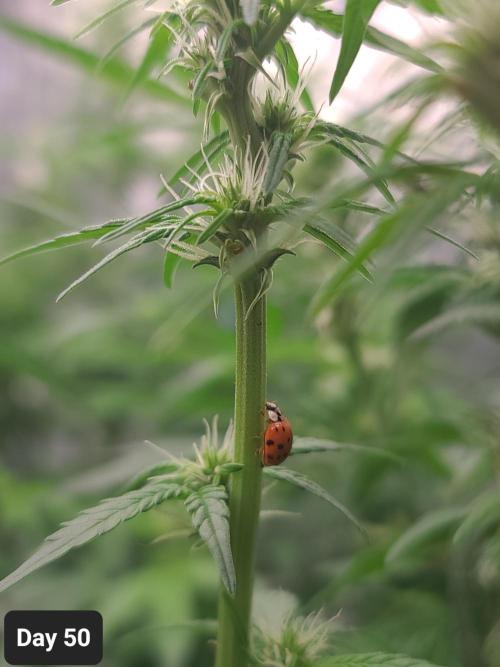
Day 49: I believe I have nailed exact VPD needed for repeated success on this plant during this phase. 62% RH + 75F/24C + 5 degrees leaf offset temp = somewhere in the neighborhood of 0.68-0.72. If you are running without VPD, 62% RH + 75F/24C during the day, and just make sure you have airflow. I promise, I really and truly did the legwork on this one for you all. Time invested to nail it down :)
If you like what you see in the pictures, this is the environmental conditions you need to really shoot for. Also, these plants love a cool down whether in day or at night. In the day, 20-30 minute bursts in the morning and at sunset. Maybe in the day. They are absurd about loving a quick shower with low temps, low low low low light. Then 20 mins later after they absorb the water, get that light back up and heat back up. At night you can and should run them lower than you might ever consider. I've hit 49 with mine and she looked oddly happy. I typically do about 59F-61F at night. I'm careful to get them about 2-3 hours at 51F-53F to draw out the purples (anthocyanins). If you live in the far north or are growing in a cold basement, this is THE indica for you I'm pretty sure.
VPD gear:
Day VPD = 0.70
Night VPD = 0.52
pH = 5.92-5.95
Plant DLI Preferences at 400 PPM CO2 (atmosphere):
Sunrise and rain simulation (Foliar feeding) = 11-14
Daylight = 25-31
Noon Time = 31-32
Dark = 0 if you don't want issues :)
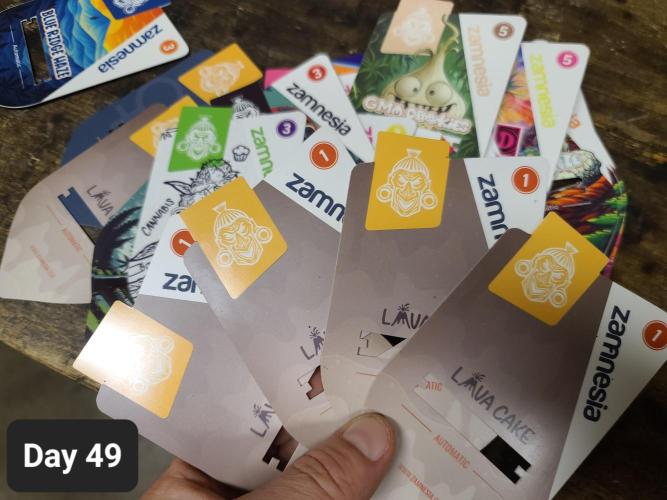
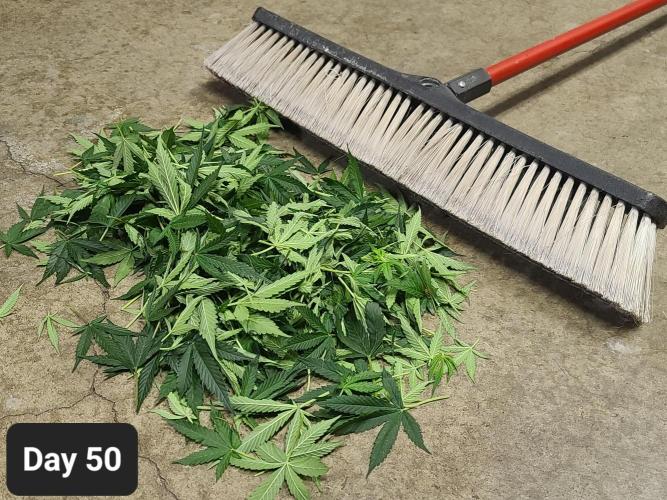
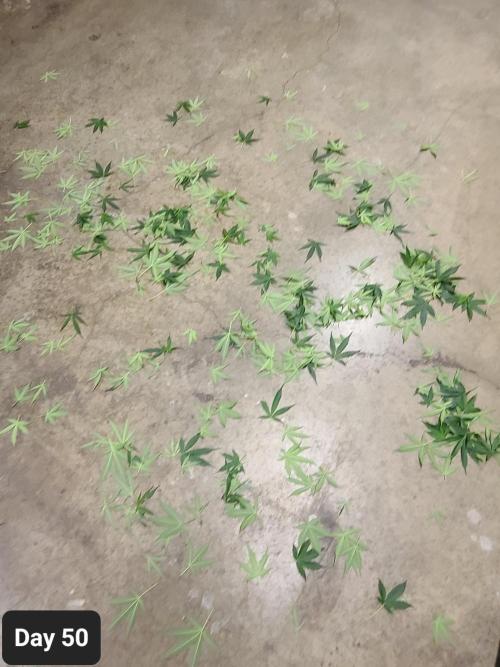
Day 50: Haircut day, but just a light trim!! Clearing out the top colas today and every branch which I look at and can determine it will never see light to be productive. If it wont see light, why does it even exist on your plant? You can only defoliate so far before you're damaging the plant and thus yield. Some branches gotta go or they drain resources hard. The plants have shown me where they will be investing resources, so time to cut the popcorn buds out. While trimming I noticed the plants are showing two distinct phenotype expressions. Photos of me holding some trimmed leaves have been included for context. Two plants have sativa-like fan leaves and bulbous buds. The other two have hybrid-like fan leaves, and the buds are very similar to what OG Kush buds look like at the beginning of flower. The sugar leaves on both plants look like indica dominant leaves and are identical to my eyes.
Recap --- Light defoliation of top cola fan leaves to reveal the lower branches which can be hit by light. AFTER defoliating the colas, determine which branches are junk and/or will never see light. Cut them out. Put the plant back into its grow environment, lower the light to super low. Set the temperature to around 68-71 if you can you. Soak your plants like they got nailed in a rain storm. Really get them wet. Don't put the fan on. Just let them sit in the humidity a bit and soak up that water. That plant needs nutrients, a brief cooldown, etc. This is a scenario where a foliar feed may be applied. The plants just got cut, and they need to recover for a little bit. 30 mins. If you did this correctly, the plants will have softer looking leaves. Let em ride for about 30 minutes longer until they dry. Then go back to normal. The plants are going to begin to crank weed very soon!!
Pro Tip: Do selective defoliation over the course of several days to avoid stressing autoflowers.
Day 51: Selective defoliation continues. Today I am removing EVERY branch from the base to 30% up. I am also removing every single bud I can find which has 1-6 hairs, and/or is in a position where it will never see light. If it wont see light, junk it because it's only a resource thief. Those junk meristem/bud sites will never in a million years be anything and that's what the plant is showing you when it only puts 1-6 pistils on it. Junk them out so the resources will go to your other real buds.
Pro Tip: When it comes to popcorn buds --- Scissors and sheers work very well and are just fine. Sanitize your gear with 91% rubbing alcohol, or something. If you want to take it further --- Ditch the scissors and pinch off the bud sites to seal the wound.
Day 55: After growing and flowering for some time, the differences in the two phenotype expressions is far more pronounced than I had previously observed. Two remained the same, and two continued to stretch. The two which remained the same look similar to every Lava I've seen on Growdiaries. The two plants which continued to stretch look strikingly Sativa-like in features, and are described briefly below.
a. Slender fan leaves.
b. One reached 32" overall length, the other is 26". This in comparison to the other 2/4 seeds which are around 23" or so each.
c. Buds developing much more slowly, at about 1/2 the rate.
d. Buds which develop are similar in detail to the smaller plants, but far more plentiful.
e. All plants have been rotated twice daily, this is not environmental.
3 likes
comments
Share
8
Week 8. Flowering8mo ago


81.28 cm
Height
12 hrs
Light Schedule
22 °C
Day Air Temp
5.9
pH
Normal
Smell
1650 PPM
TDS
58 %
Air Humidity
20 °C
Solution Temp
12 °C
Night Air Temp
11.36 l
Pot Size
1.89 l
Watering Volume
30.48 cm
Lamp Distance
1000 PPM
CO₂ Level
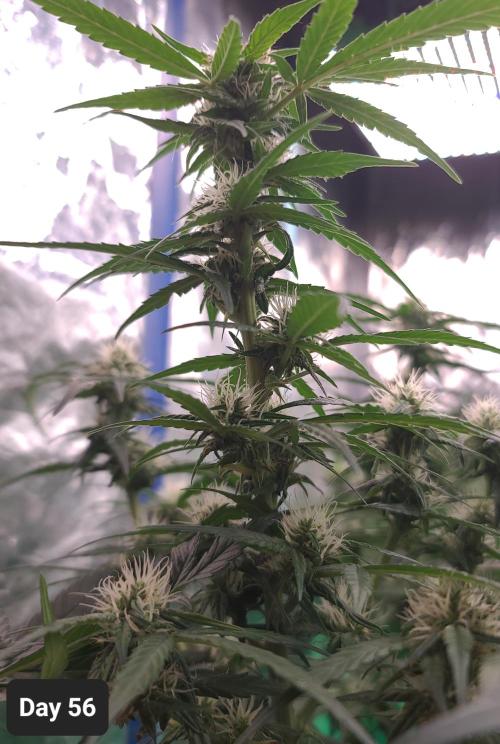
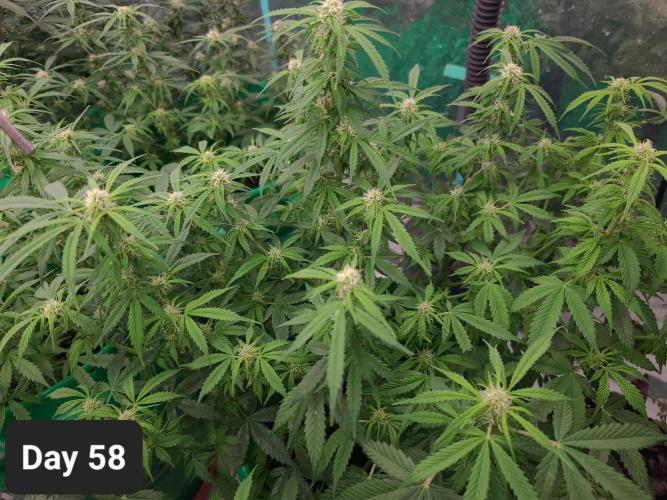
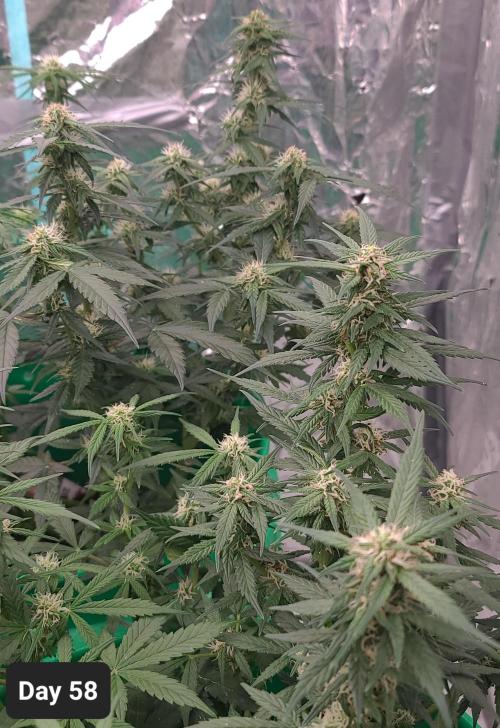
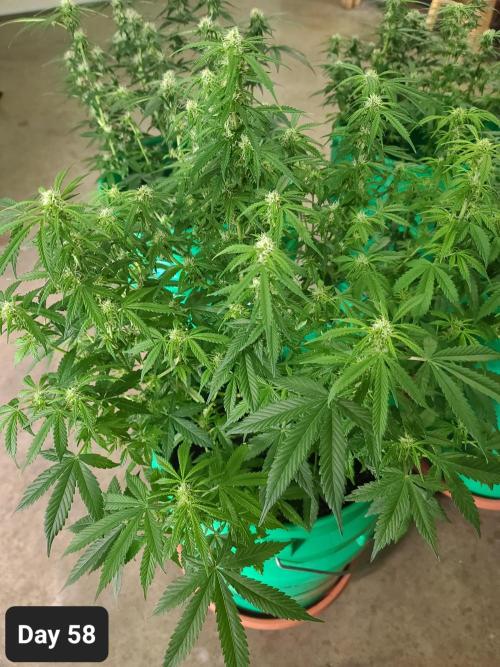
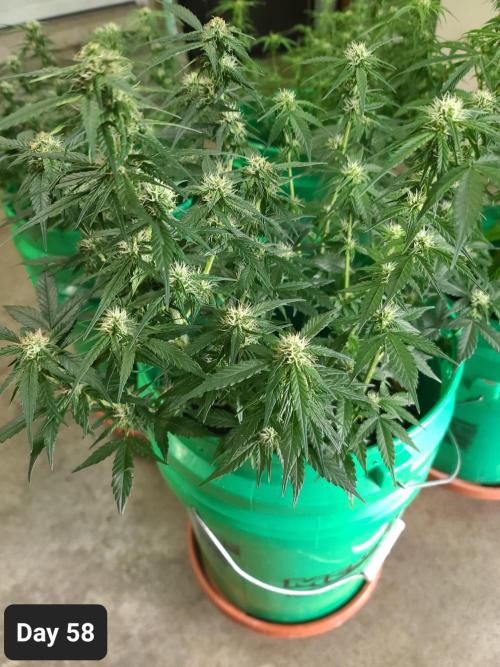
Sapphire9352 Day 56: The plants are forming bud sites rapidly, and it wont be long before Lava Cake Automatic buds are sitting in a curing chamber. I took some time today to clear away some of the foliage which has grown to overshadow the bud sites since my last haircut. From here on, I will likely not touch the foliage any more until I approach the Flush phase of the grow. I say, "Likely," Because the only reason I would ever touch foliage at this point is to ensure bud sites are receiving light.
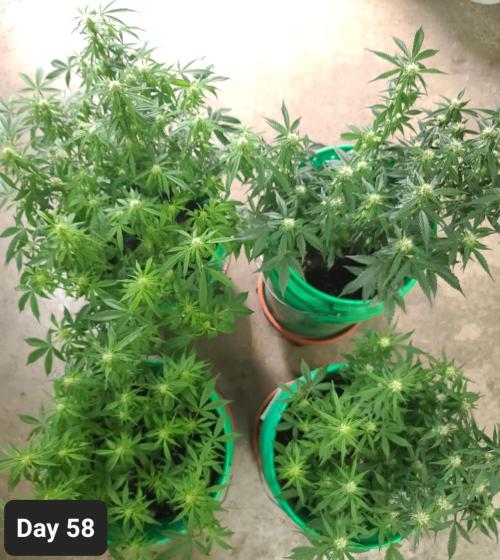
If you are new to this grow diary, I have 4x Lava Cake Autos growing. I'm on day 56 and there are two distinct phenotypes present. I described them initially as one which is Sativa-leaning, and one which is Indica leaning. This still remains true, but it would be much easier to describe them as Big Girl and Normal Girl. Big Girl = Sativa-leaning, Normal Girl = Average Lava Cake.
NOTES about these phenos if you encounter them:
Big Girl - voracious eater, go heavy on cal-mag or you get pale plants, colder weather, not a heavy light requirement plant. Mine are running 14-18 dli at sunrise/sunset, 21-25 dli for most of day, and for at least 4 hours I run them at 31+. These plants running at 1000 CO2 seem to really love toggling back and forth between 21-35dl, with a major preference for 25. I can definitely see the onset of oversaturation of light if this sat at 31-35dli... And keep in mind, this is CO2. So, these plants are PERFECT for someone with a cheap light. I hate to say it like that, but hey!! If you have a 100watt starter light, this is the plant for you. She doesn't need a ton of light for some reason and her buds look productive so far. Feed her heavy. You'll know when you got this one because when you think stretch has ended... Nope!! She wont just continue, all her branches will even out into a canopy. For me, this is the jackpot plant if you are growing Lava. Also, her VPD preference at this stage is dead on 1.0. However you wing it, put her VPD at 0.9-1.1 and she'll be happy. LOTS of fresh air, and make sure you stay on top of defoliation. She wants to canopy over and over and over, dont let her. Keep those bud sites exposed to the light!
Normal Girl - normal eater, normal cal-mag. Colder weather, not a heavy light requirement plant. Same as others from here on, besides their final structure. This plant wants to appear apical and not develop into a canopy. It fits the look of a Hybrid plant which leans heavily indica. Compact, dense, pom pom looking buds in beautiful clusters. Her internode spacing is just right: Not too dense as to cause mold issues, and not so far apart that you lose that giant cola cluster of buds look.
Phenotype Final Notes - Day 56:
When you encounter, "Big Girl," Come back here and look at what I just wrote about how to maintain her. I had to figure her out for a hot minute, and I did. When you are growing Lava, keep an eye out. I don't know what the actual ratio is, but I got a 50% Big Girl ratio with my 4x seeds this grow. This is not a bad thing when you encounter Big Girl even if you are in a constricted space. Because she has sativa leaning traits, just bend and fold the canopy to expose the buds and keep it low. Cut out some of the branches, too!!
Both phenotypes I encountered this run are winners. I cannot stress it enough. I'm a very critical grower and view this as artist work. I grow for my bi-lateral neuropathy, but much of it is just an enjoyment thing. With that being said: At day 56, I'll say it again - Lava Cake Auto is a winner. Zamnesia is being honest in their listed genetics with the Thin Mint GSC background. If you brush your hands against both phenotypes and smell them, they will wreak of mint/camphor/actual girl scout cookie chocolate smell/myrcene(dank earth) with mint being the primary smell. They both smell identical. Big Girl so far has slightly smaller buds, but wow!!!!! They are so much more plentiful, as is her foliage. Normal Girl looks like every low profile ultra indica you ever wished to grow. Again: Winners. Worth every nickle so far, but the proof is in the smoke and we shall see!!
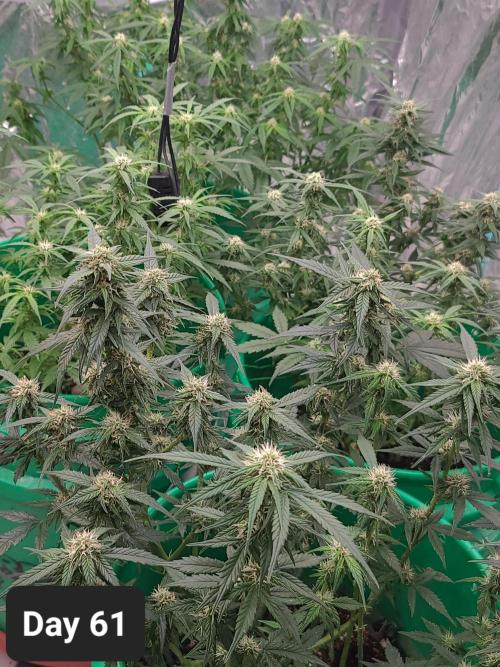
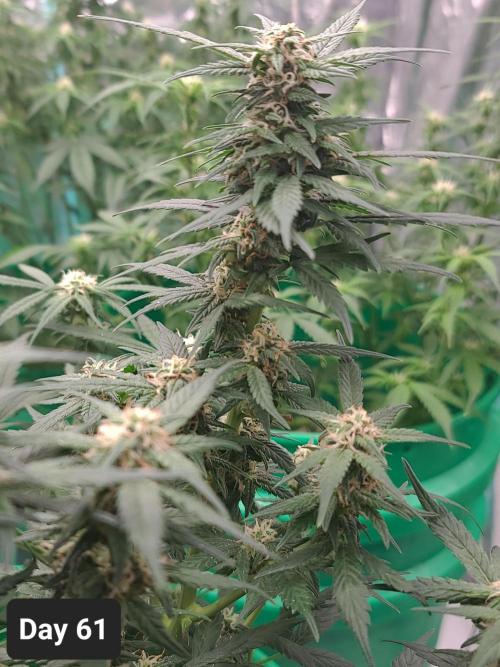
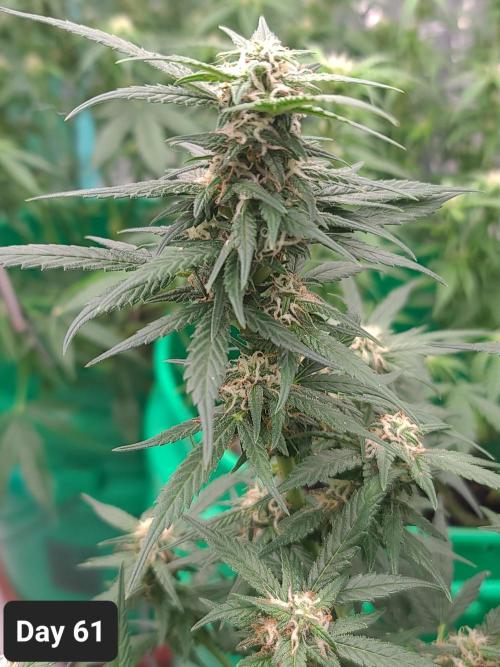
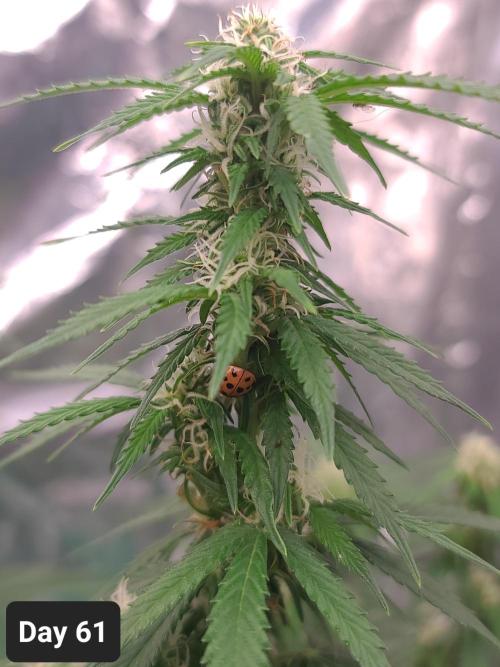
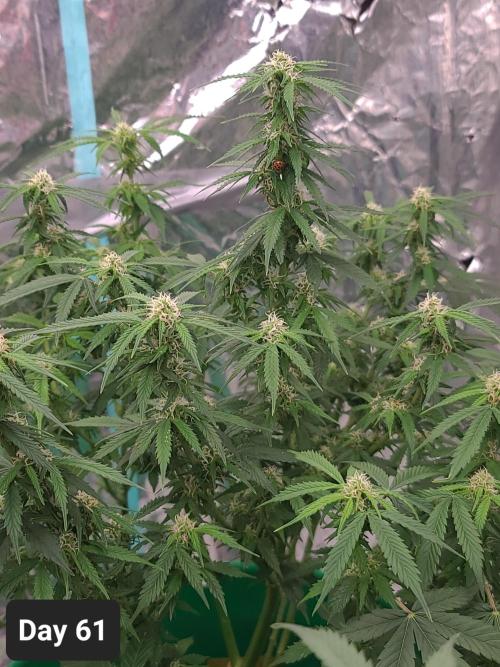
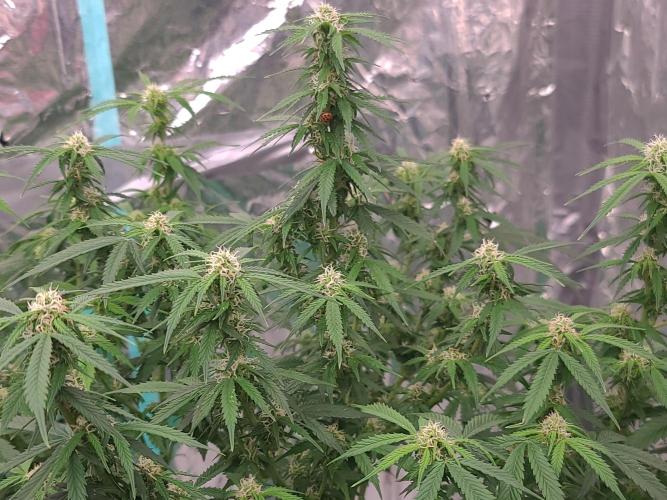
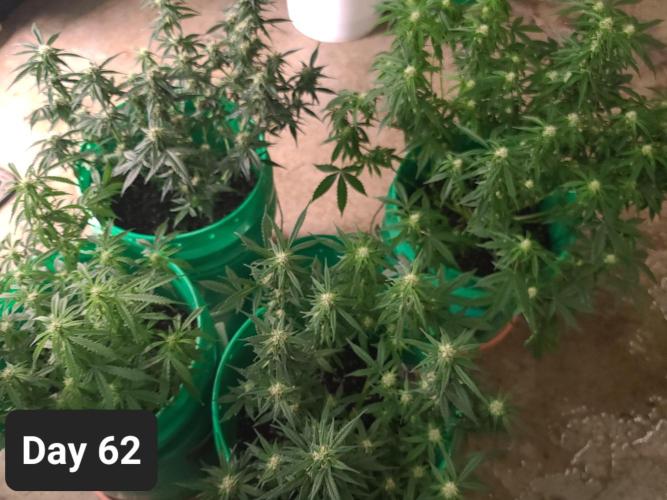
Day 61: They're looking happy, healthy, and productive.
3 likes
comments
Share
9
Week 9. Flowering8mo ago

81.28 cm
Height
12 hrs
Light Schedule
21 °C
Day Air Temp
5.9
pH
Normal
Smell
1650 PPM
TDS
58 %
Air Humidity
20 °C
Solution Temp
12 °C
Night Air Temp
11.36 l
Pot Size
1.89 l
Watering Volume
45.72 cm
Lamp Distance
1000 PPM
CO₂ Level
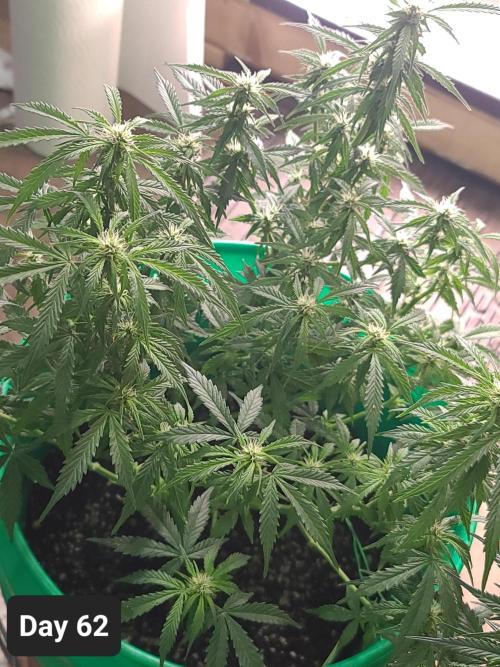
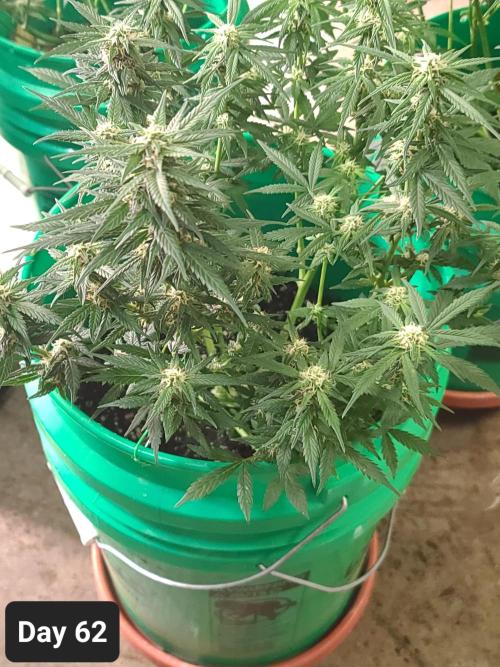
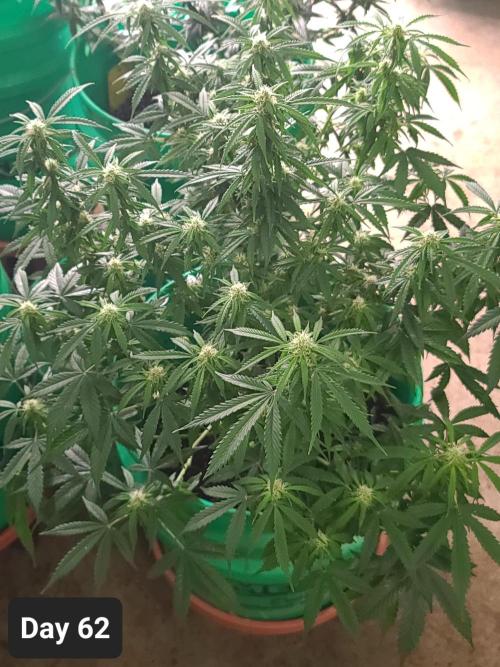
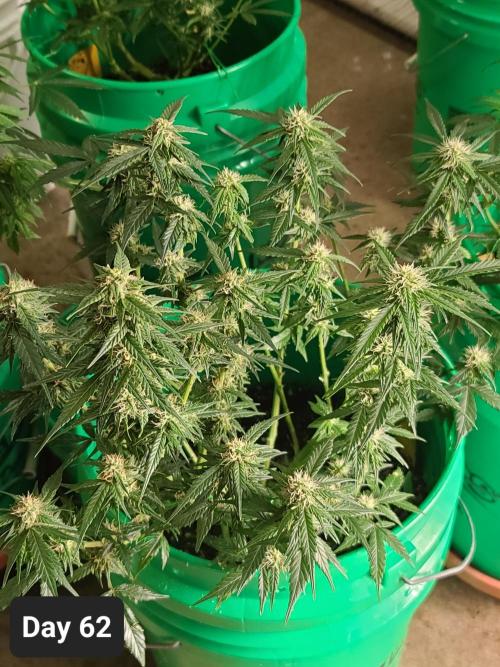
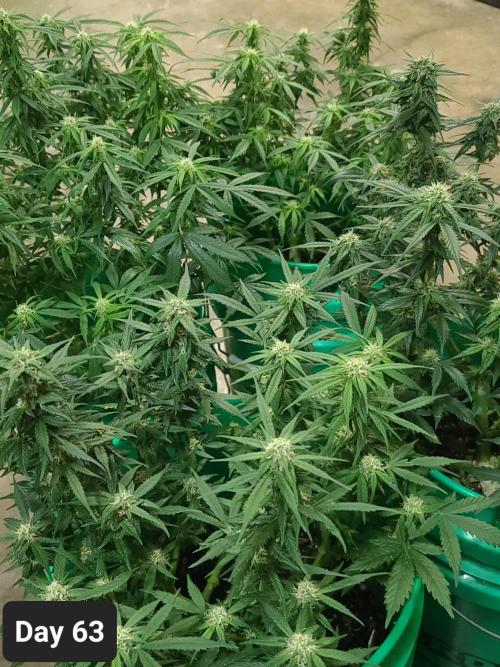
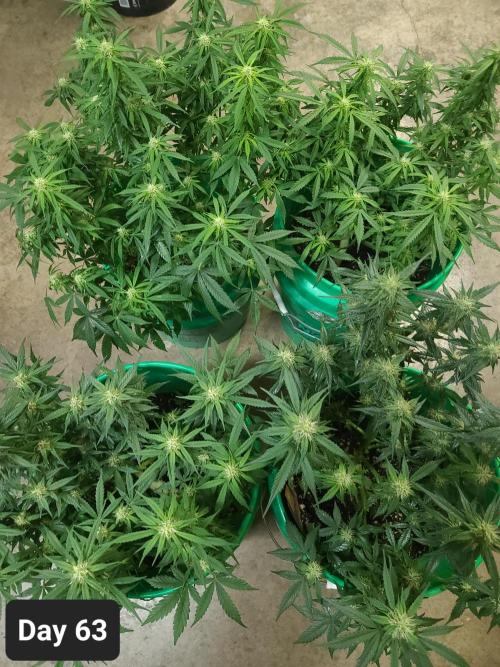
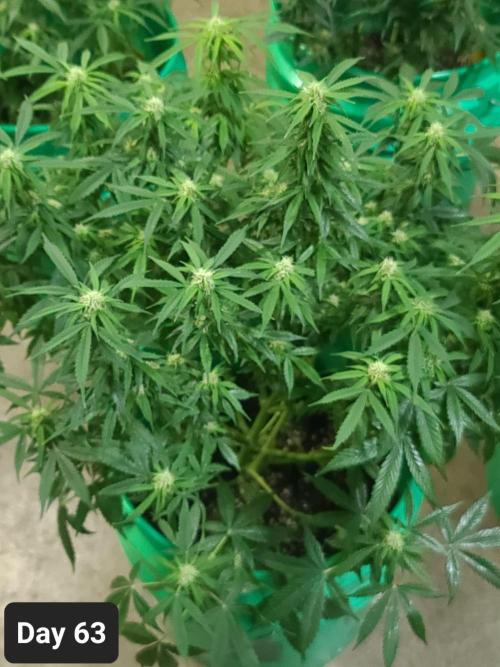
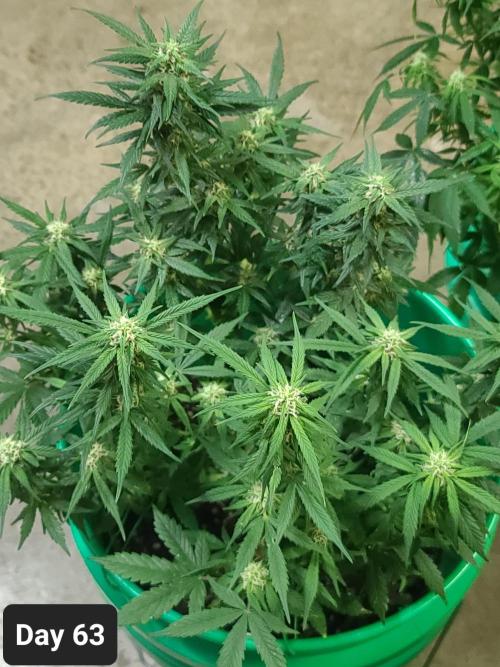
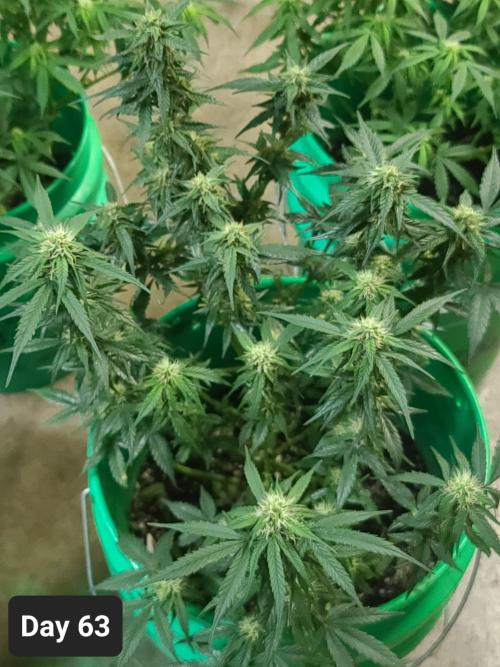
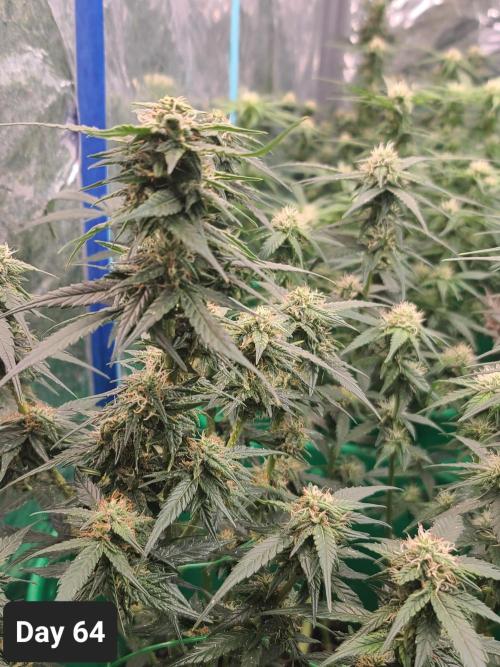
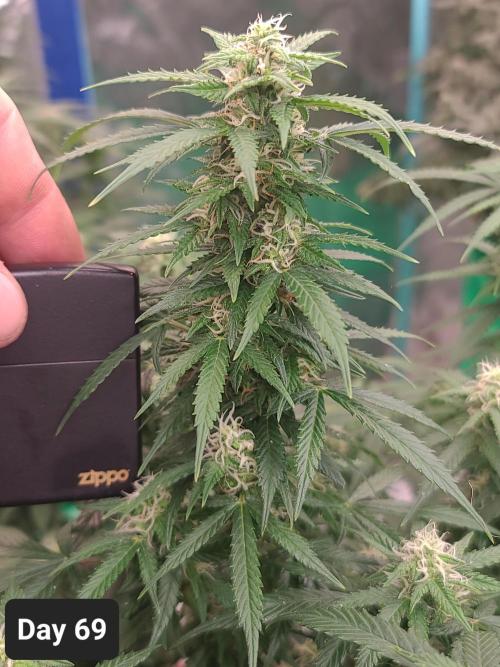
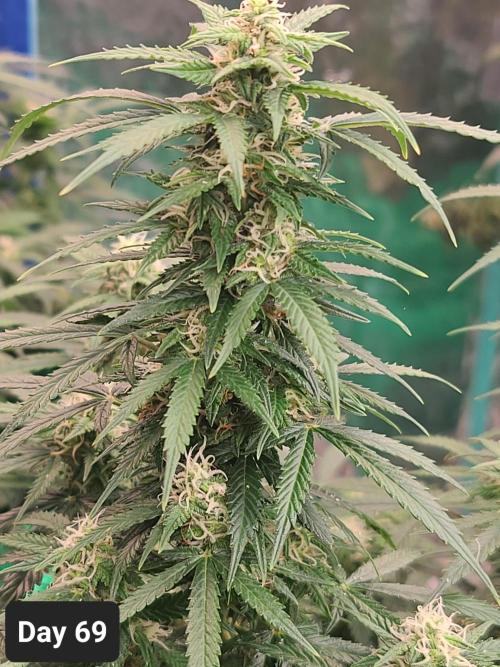
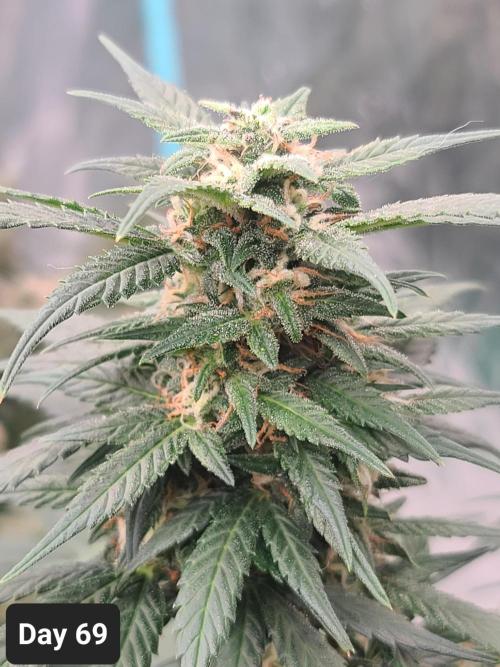
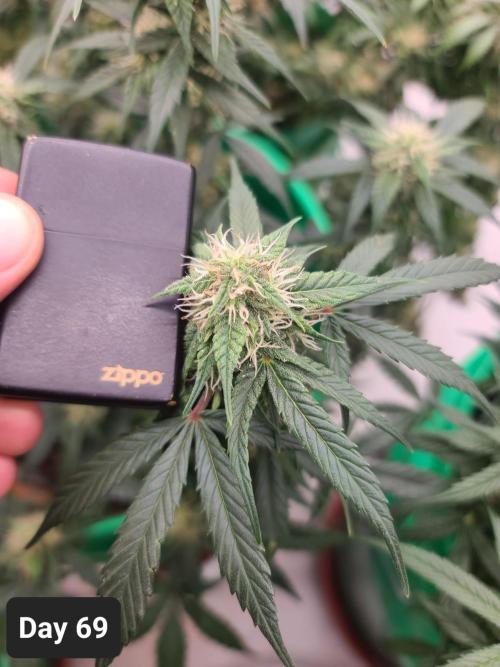
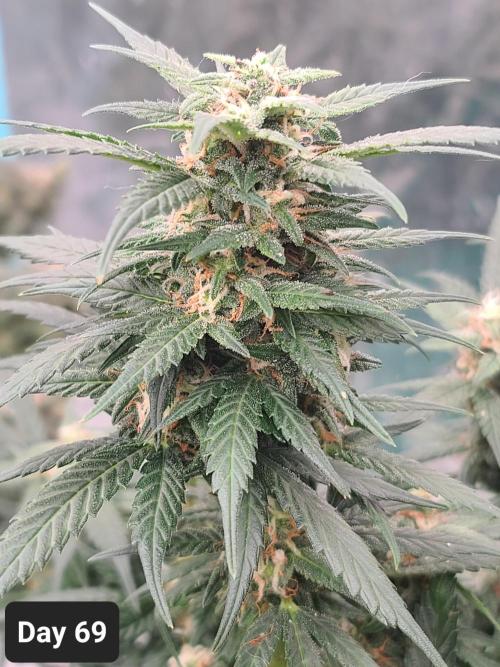
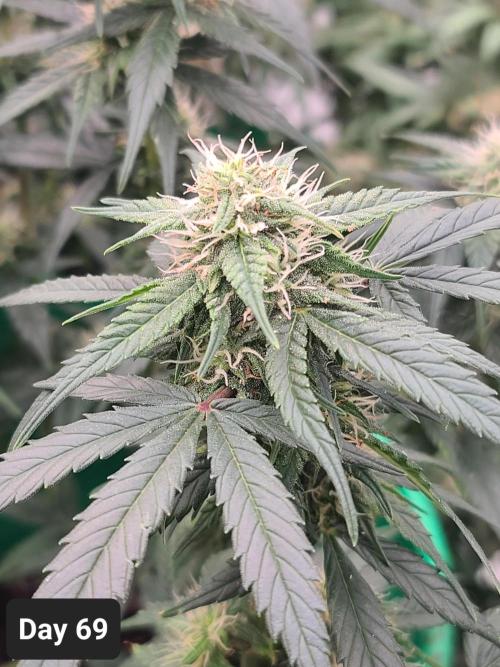
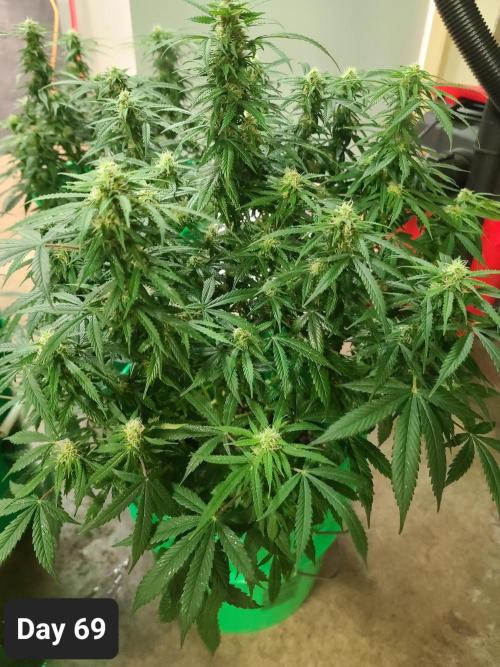
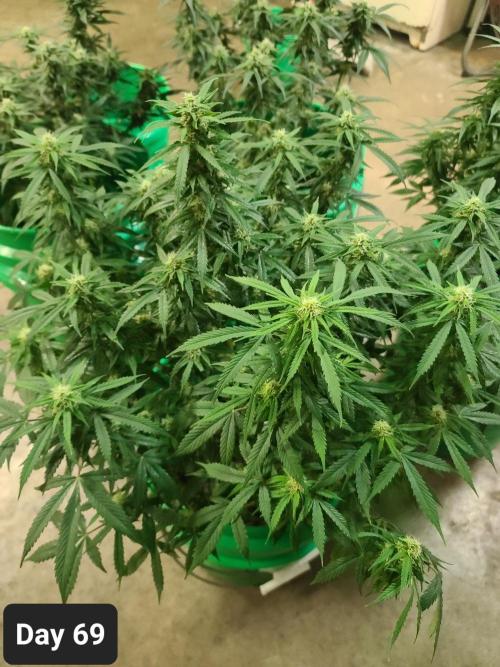
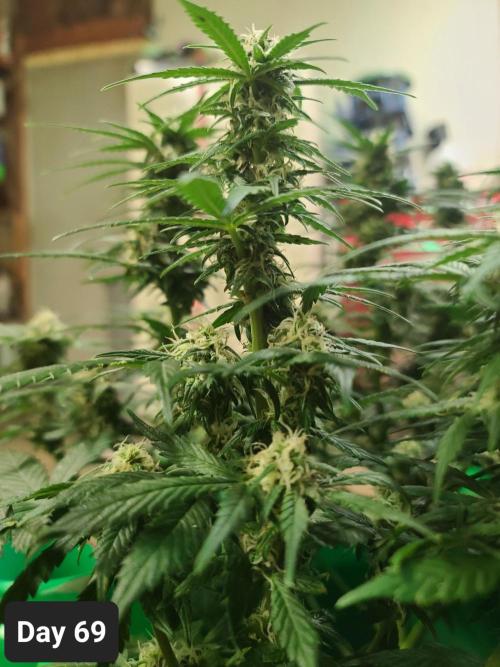
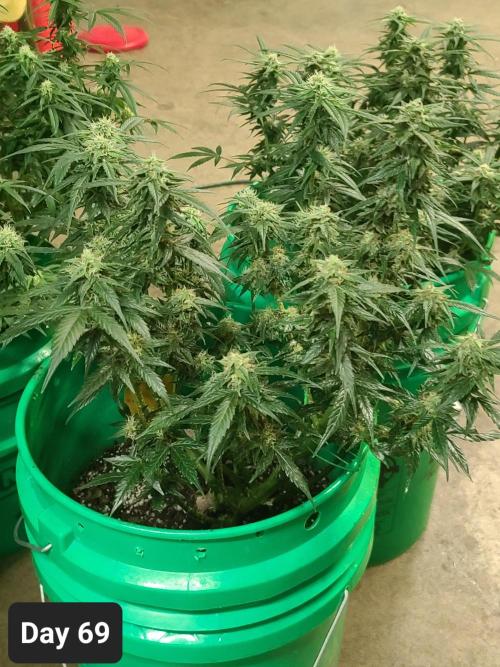
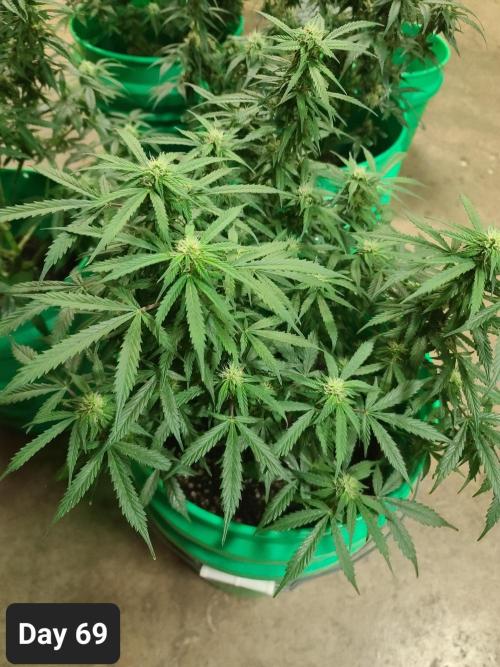
Sapphire9352 Day 63-69: Pics say it all. They are coasting and riding.
6 likes
comments
Share
10
Week 10. Flowering7mo ago
81.28 cm
Height
12 hrs
Light Schedule
20 °C
Day Air Temp
6.0
pH
Strong
Smell
1400 PPM
TDS
55 %
Air Humidity
20 °C
Solution Temp
12 °C
Night Air Temp
11.36 l
Pot Size
1.89 l
Watering Volume
45.72 cm
Lamp Distance
1000 PPM
CO₂ Level
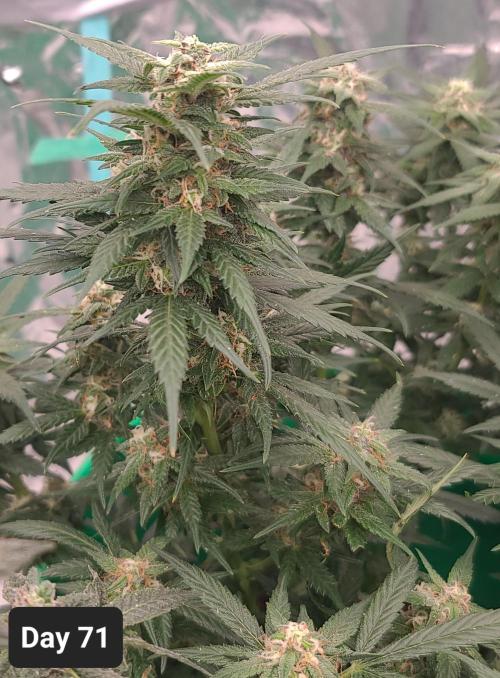
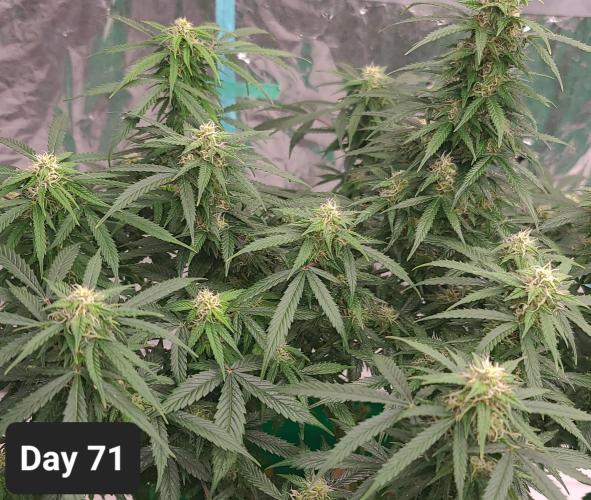
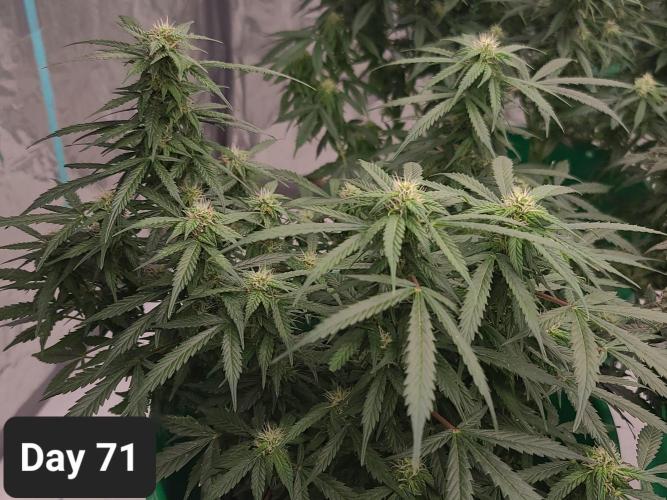
Sapphire9352 Day 71: The plants are looking decent for being in the last 2 weeks of flower. Having grown photos for some time, I forgot how fast autos were!! As can be observed in the photographs, two phenotypes have emerged. One is a week ahead of the other, which is perfectly acceptable and within the time-frame Zamnesia gave for harvest. To me, this appears to all be right on time!! :)
Day 74: No pics. That wouldn't be suspenseful, would it? :) They look great!! I'll share on day 76.
Phenotype expressions are very obvious as two plants. As two plants head into the final bulk phase of the grow, the other remaining two plants are finishing out their bloom phase.
2 likes
comments
Share
11
Week 11. Flowering7mo ago


81.28 cm
Height
12 hrs
Light Schedule
20 °C
Day Air Temp
6.0
pH
Strong
Smell
1300 PPM
TDS
55 %
Air Humidity
20 °C
Solution Temp
12 °C
Night Air Temp
11.36 l
Pot Size
1.89 l
Watering Volume
30.48 cm
Lamp Distance
800 PPM
CO₂ Level
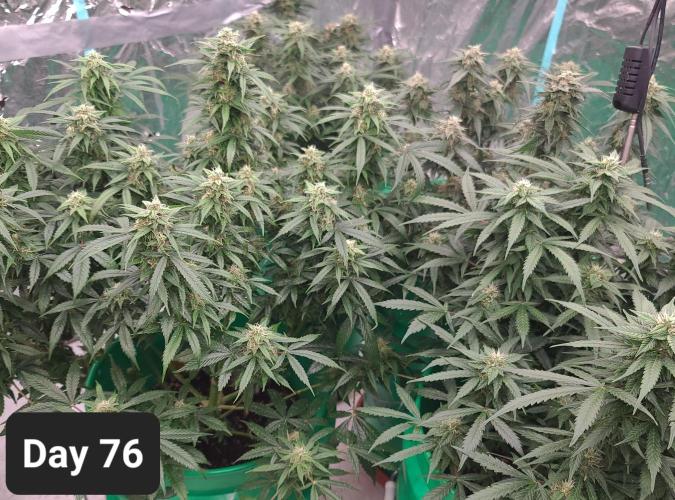
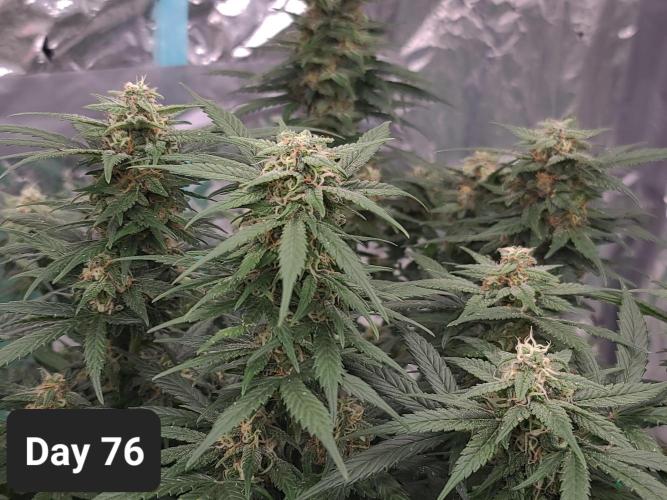
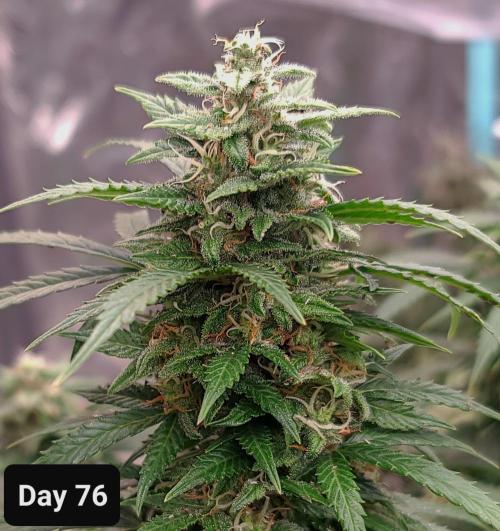
Sapphire9352 Day 77: The plants are all beginning to bulk out nicely. Orange hairs are prevalent on two plants, and the other two plants are close behind!! The smell of mint remains, but is now accompanied by the scent of fresh baked cookies. These truly smell like Thin Mint Girl Scout Cookies. According to Zamnesia they will develop into a grape flavor before this is all said and done.
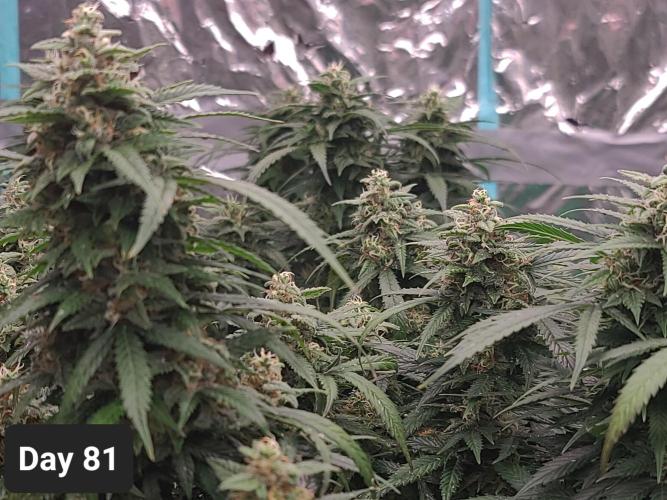
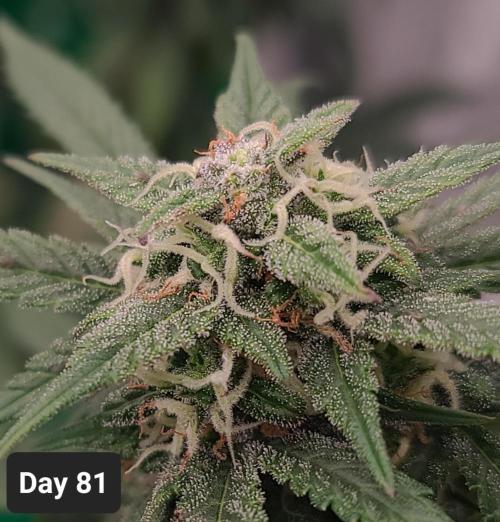
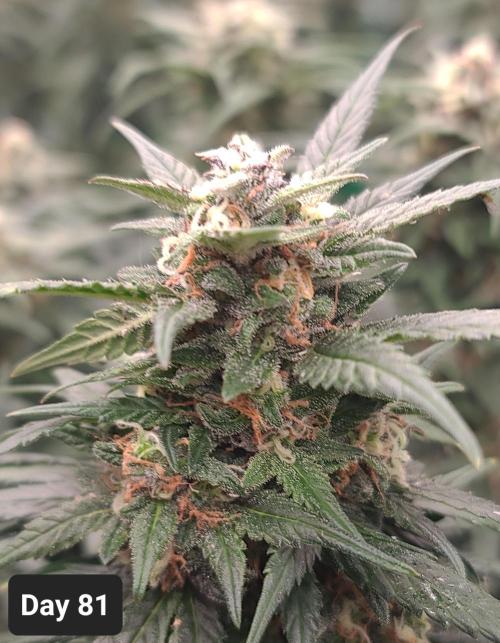
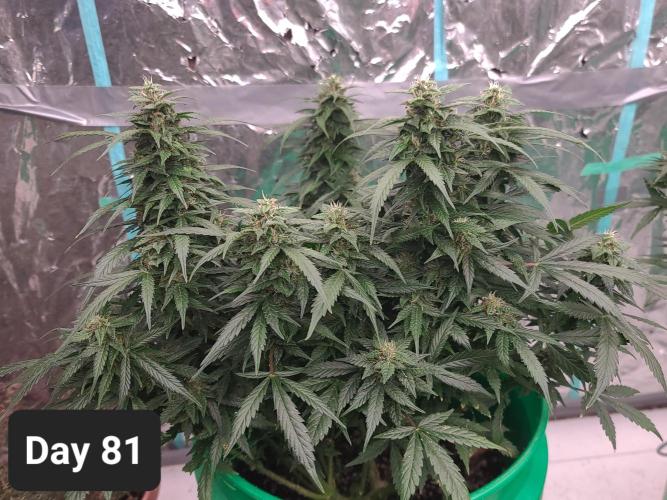
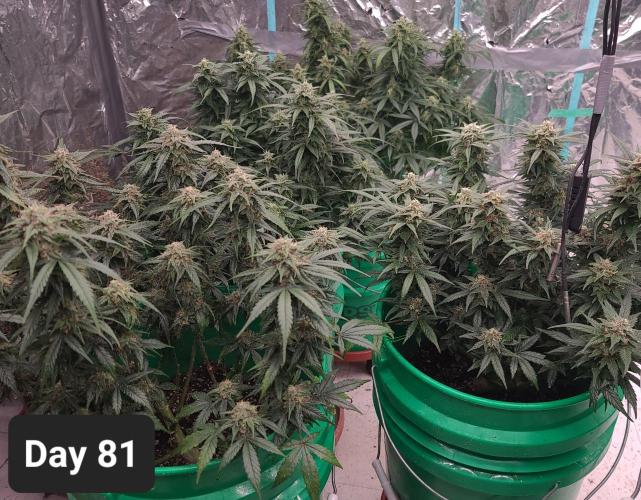
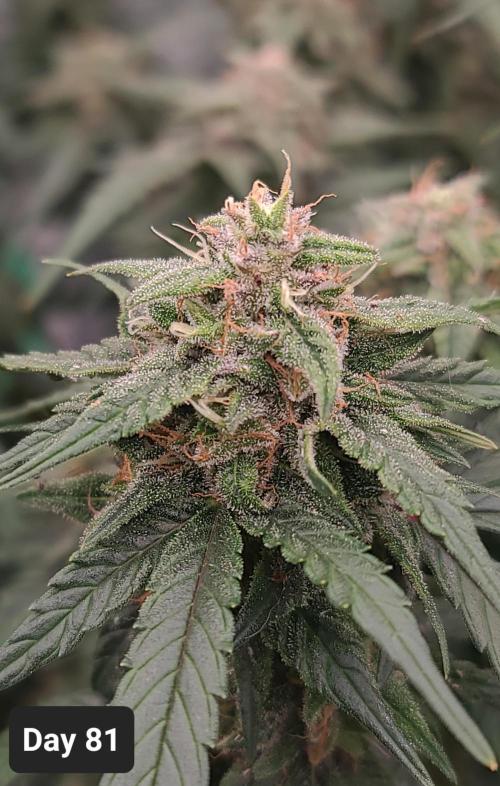
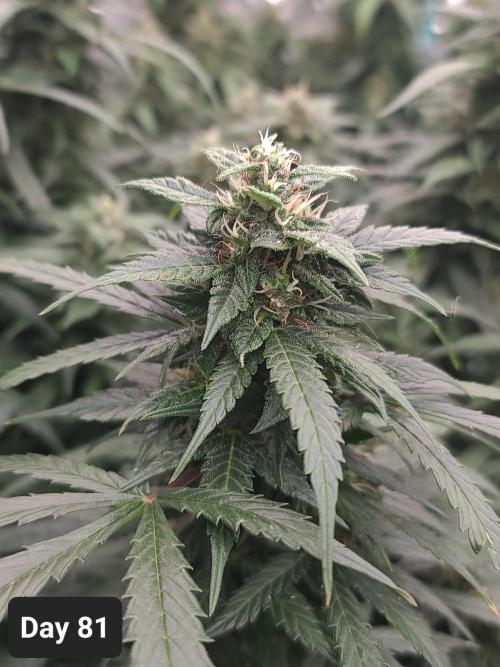
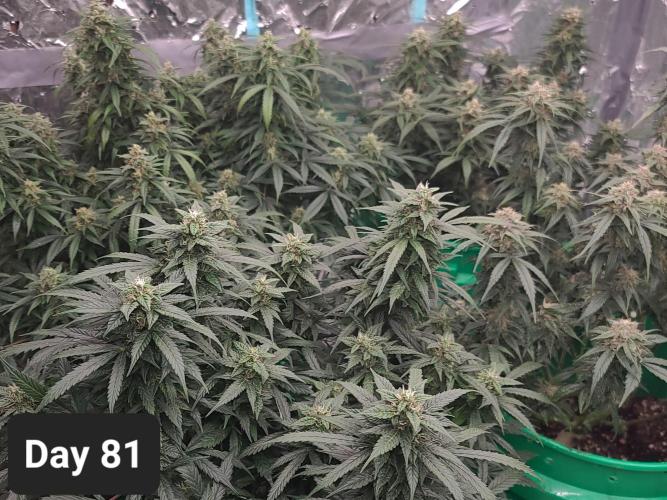
Day 81: I took some picture before I performed a heavy, final fan leaf defoliation leading into late-flower and flush. One plant appears to be fully mature and ripe if 100% milky white tricomes are your goal. Another plant is nearing full maturity to milky white. The other two remaining plants are from the other phenotype group and are virtually identical in appearance. They are still a week behind the early bloomers, but wow are they giants! They are really beginning to fill out nicely, and I wouldn't be surprised to pull 4-6oz per plant on the larger ones at harvest. We'll see. I'm happy regardless.
When it comes to smell, both plants absolutely wreak of mint, fresh baked good, and chemical spill amonia dank goodness. These things are turning out to be DANK!! When you touch them and smell your fingers, the grape smell is definitely arriving. It's very interesting because the fragrance of the plant untouched is nothing like what it smells like after touching it. It smells like grape :) In a very good way!!
Full defoliation pics will come later on. I also did something I always do at the end after defoliation. I bend down the top buds and create a new canopy line. The goal here is to ensure buds which are 2 nodes down from the top will get a chance to be hit hard by light before harvest. This one silly/odd/"DUDE DONT DO THAT!!" trick is possibly one of the greatest tools in the growers arsenal to ensure maximum yields are achieved.
I wont waste your time, I love teaching and helping people:
If you dont do this method -AND- you do not do selective harvesting, short of growing outdoors where the light is constantly changing positions, you will suffer an immediate 30% yield loss indoors. Right out of the gate, you are losing 30% or so of your yield by not bending your branches over so lower branches can get light. SIMPLE fixes for a lot of extra bud
2 likes
comments
Share
Used techniques
Defoliation
Technique
12
Week 12. Flowering7mo ago


81.28 cm
Height
12 hrs
Light Schedule
25 °C
Day Air Temp
6.2
pH
Strong
Smell
1100 PPM
TDS
54 %
Air Humidity
20 °C
Solution Temp
10 °C
Night Air Temp
11.36 l
Pot Size
1.89 l
Watering Volume
30.48 cm
Lamp Distance
800 PPM
CO₂ Level
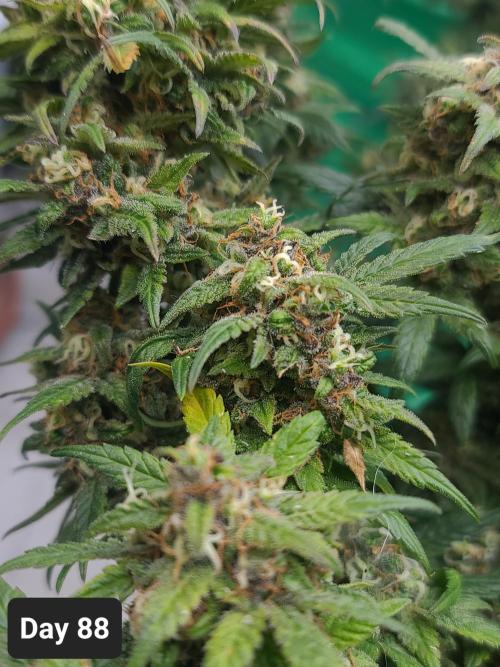
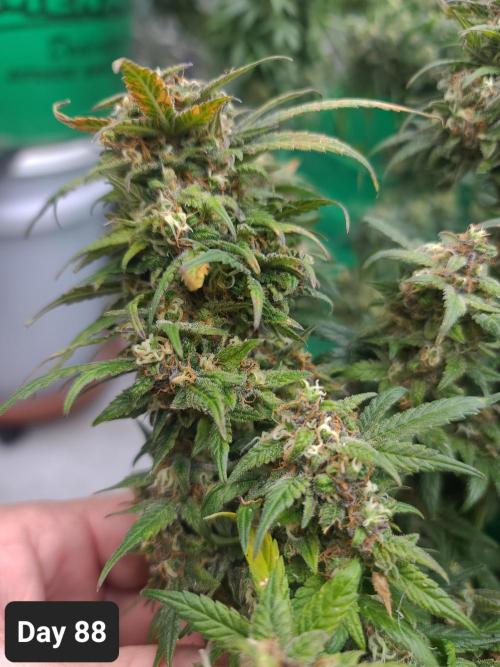
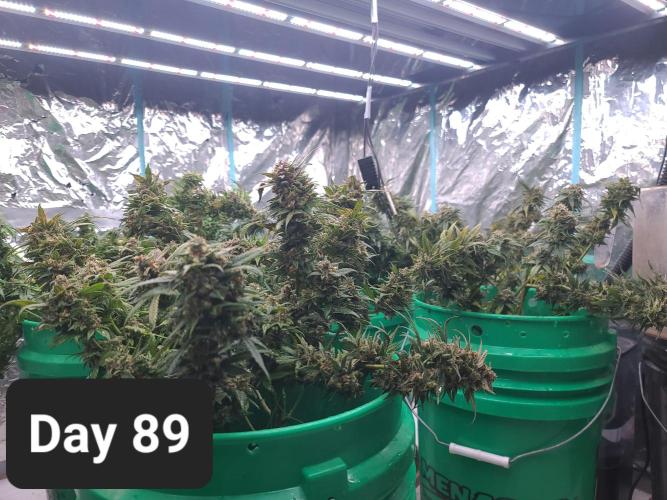
Sapphire9352 Day 88: waiting dor those gainz. Tops are near finished, and have been moved out if the way to make room for the underside buds to also mature. All things good, so far!! For nutrients I am running a custom fade i make here in-site with anhydrous elements. Mainly, nitrogen is the one to cut.
Here is a pro tip, too!! With purple color producing plants, do these things to maximize purple accumulation.
1. 22f temperature differences or more between night and day. Lava Cake Auto likes it very cold if possible for parts of the day.
2. On low end of temp, with low light, soak the plants with ph appropriate water every other day. Let them dry out, and get that humidity back down ASAP. Do not do if lights are off, and only do while it is cold temperatures. Also, the lights should be dimmed to around 200-300 par for this. REALLY soak them well :) You are replicating a mountain sunrise/sunset at harvest. Cold and dew for brief moments every other day, dry/arid at all other times. COLD COLD. I have these between 50-57 at night, and 68-77 in day right now. The trick is that temp swing, and water helps this happen FAST. Otherwise, mold.
3. 0-1-8 to 0--2-10 is ideal for fade, but something along the lines of 0-5-10, would be fine, as well. The higher the P, the less purple you are going to get in the time it takes for your plant to go from milky white to amber. You dont need N at this point, and you need minimum P at the point. Blast the plants with K. The N elimination is to force acceleration of Senescence. The P reduction accelerates Anthocyanin accumulation rates. In other words: If you stack up super high P in fade mode, such as with awesome bloom boosters like 0-50-30, you are setting yourself up to end up in scenarios where purples are elusive, pinks are common in strains where purples should really be popping. If that's you, eliminate N, reduce P, blast with K.
4. Harvest the plant during a cold cycle.
5. pH strictly at 6.2 to 6.4. I find 6.2 to be best from here on out, but on day 1 of the fade you should nail them 6.4 at least once.
6. You must flush your plant before you begin fade. If you don't flush, this is all a waste of your time and energy, and the only purples you will see are the ones which the particular cultivar being grown possesses a genetic disposition to always have purples.
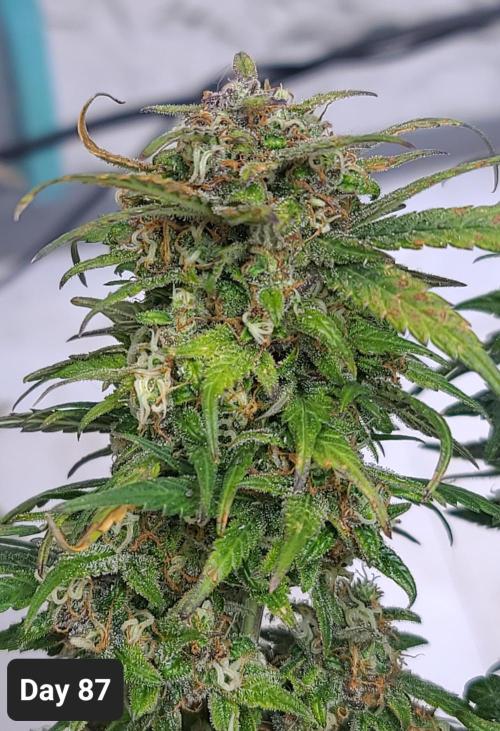
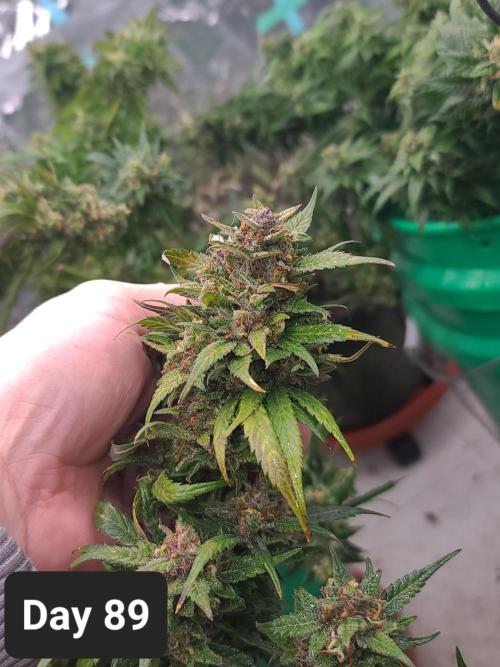
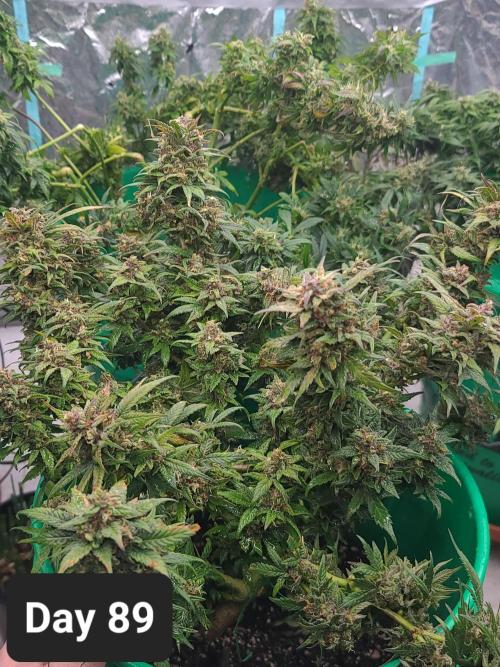
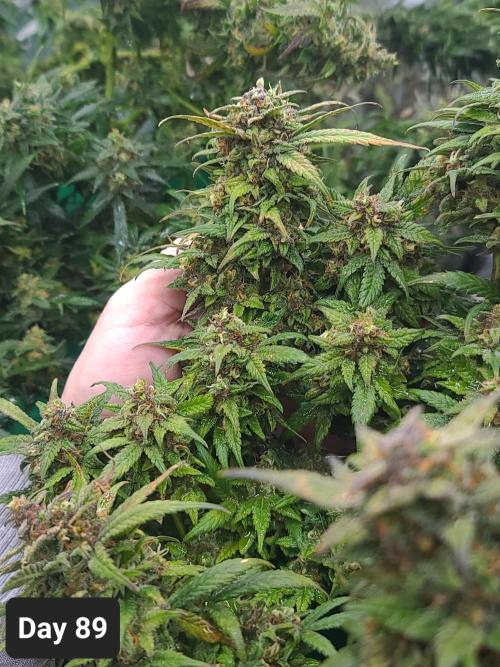
Day 89: Pics from Day 89 are all taken immediately after a temperature tanking from 77f to 53f, satisfying the 22f differential needed to REALLY make those purples pop. Pictures were taken immediately after all of my itemized cycle from day 88 was performed. Ideally, you get that temperature to drop, fast!! It's simulating sunset on a mountain, and the incoming dew. Or sometimes you can and should randomly pop up a simulated incoming cold front storm. You aren't hurting the plant's bulk at this phase, you are developing a rich blend of terps this way. Different terps pop at different temps, and I would recommend going low temp at least once every other day on all plants at this phase. Ideally, at least once a day. Think of being outside during fall time. All of the sudden here comes a cold rain. That's what you are simulating. It makes plants go CRAZY on bulk as soon as you get the heat on.
It's in the previous day's diary notes, but here it is re-worded so the philosophy can be understood a little more in-depth. If you want to skip ALL of this mumble-ramble --- Grow a Basil plant, expose it to frost till the tops just barely wilt. Take it out, get it back into the light. Watch what happens. That's what we are doing. Generating anthocyanins (fancy name for purples).
Anyone can do this. You don't need fancy, but you must have excellent air exchange. Just like outdoors. When it rains outdoors, the air is always fresh around the plant!! Indoors and at this stage of the grow, it is typically not advised to increase the humidity. I agree with this statement 100%. That is not what we are attempting to do here, either. What we are doing is soaking the plants with cold water and tanking the temp instantly from 77f to 53f if possible. As if a wet cold front came in. The liquid here is primarily a thermodynamics thing. Hot moves to cold --- Heat in the buds moves to colder water outside as colder air blows on it, thus evaporating it rapidly and preventing mold. If you do this, you do not need to bud wash, either. Here's what I'm doing when I do Day 88 lab protocol (You must be lollipopped to do this).
1. Tank the temperature as fast as you possibly can.
2. Adjust light to whatever cloudy day means to you. To me it's like 12dli - 14dli ish.
3. Soak the buds (SOAK) with a sprayer. Pure H2O, pH appropriate. PURE H20, can't emphasize that enough. No minerals.
4. RAPIDLY DRY your lollipopped plants (Use a dehumidifier and good air exchange, get it down to 55% rh FAST)
5. Keep that temp low until you start to see the plant look super purple.
6. Raise the light levels as soon as the plant is thoroughly dry. It happens much quicker than you may think.
6. After plants appear purple for a while, usually 2-4 hours, increase the temperature to your target point.
Note #1: All pics taken on day 89 are with plant tops bent over. I did this some time ago to allow light exposure to the lower nodes. Now that the lower nodes are maturing nicely, I'll bamboo stake the plants to support them for the remainder of the grow. Nothing complex needs to be done during Senescence. We are waiting on tricomes to change to an amber we desire, and a final bulk which will come regardless. No amount of deficiency matters now. All the nutrients needed for the remainder of the grow are still in the leaves, and we are draining these nutrients quickly!!
Note #2: I'll take a picture of the plants soon. The next pics will be bamboo staked and organized. I cannot stress it enough!! IF you are neglecting to knock your tops over for a week or two near the end, you really and truly are destroying your yield potential almost entirely. You'll only end up with tops which are developed. That's great for the tops, what about the rest of the plant? Select harvest and waste time with the same plant? Nah!! Bend them over, let those lower nodes get color on them. Then pin them back up if they dont stand on their own. Many times they'll stand on their own :)
Day 90: I took some pictures and began labeling the plants as Plant A through D. I had them bent over to let the lower bud sites get light for a bit. It worked wonders, and now the plants are closing in on harvest. Two of the plants could be harvested today, but I looked under a microscope and they are only 20% amber. I prefer to harvest at 50%. The other two plants are still bulking out, and are about 1.5 weeks behind the other plants. I'll run the two early bloomers for 1 more week, and the other two late bloomers I'll run for two weeks.
Don't expect any pictures until harvest time. They are that close, I may as well save the best for last!! Stay tuned!!
2 likes
2 comments
Share
13
Week 13. Harvest7mo ago
Happy Harvest Day!


10/10
Rated
Stay tuned!! Phenotype 2 plants are taking significantly longer, and in the most spectacular way possible. Zero complaints, you'll see :)
Show more
Translate
Spent 86 days
Ger Veg Flo Har
Easy
Difficulty
Height
Day air temperature
Air humidity
PPM
PH
CO2
Light schedule
Solution temperature
Night air temperature
Pot size
Lamp distance
Sapphire9352 I am currently harvesting the plants. I'll post a giant photo dump once the cure is completed. Stay tuned, it's time to hurry up and wait for us all! :)
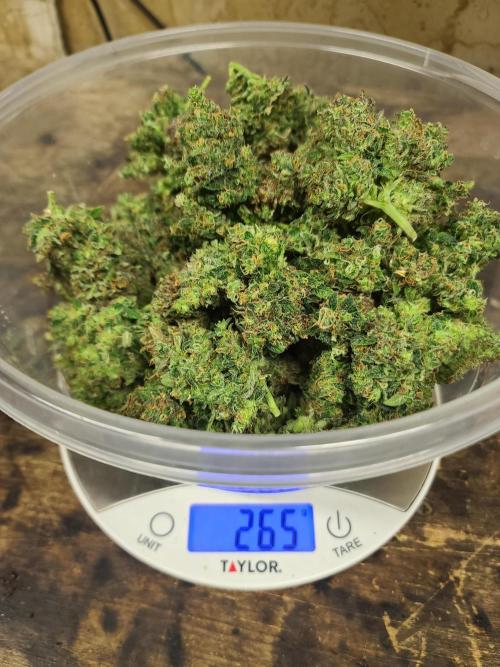
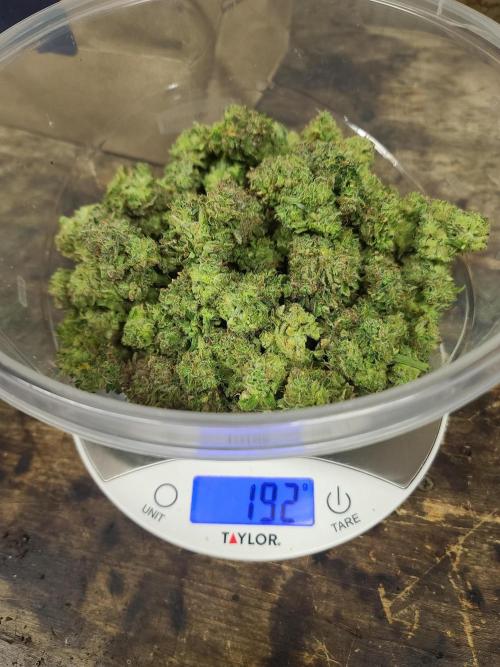
In the mean time I will post the wet weight yields as they come in!!
Note: Plant C had multiple branches sacrificed to force other bud sites to increase in size. I did this for fun, and it worked. I wont get more weight, but I will get very large buds. Currently the buds are the size of a softball, and still bulking. The 2nd pheno is taking significantly longer to mature than pheno 1, and I have zero complaints whatsoever. These things are HUGE, and still increasing!!
Wet Weights
Plant A (Pheno 1): 192g - Avg size = Golf Ball
Plant B (Pheno 1): 265g - Avg size = Racket Ball
Plant C (Pheno 2): ---g - Avg size = Softball at the time of this post, still bulking
Plant D (Pheno 2): ---g - Avg size = Baseball at the time of this post, still bulking
likes
comments
Share
Equipment Reviews


2 comments
Sort by
popularity
popularity
newest
oldest

Sammy420 commentedweek 127mo ago
Joli travail sur cette lava cake 👍👍👍
like 1
Sapphire9352 commented7mo ago
@Sammy420 Merci merci!!
like 1

the end.
Enjoying this diary? Follow for more updates!


Prefer the old Diary view?
Go back to the old Diary view