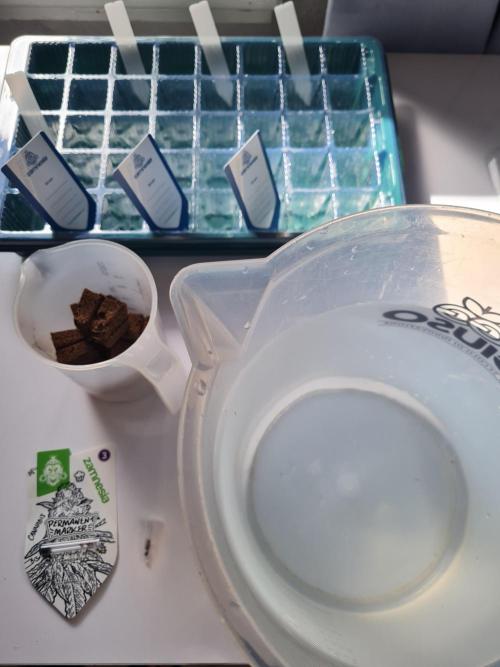
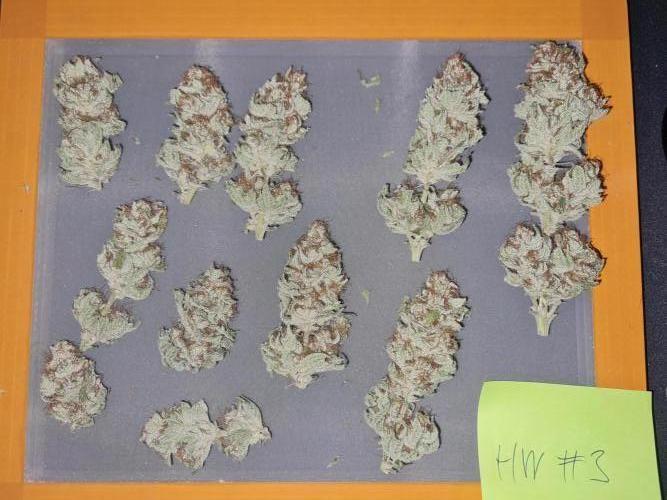
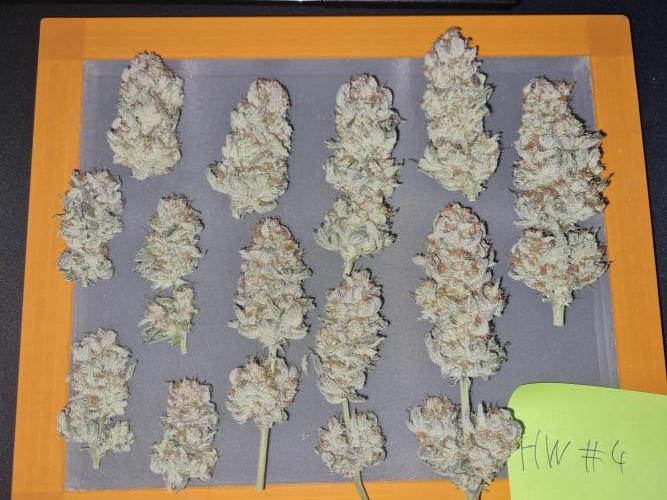
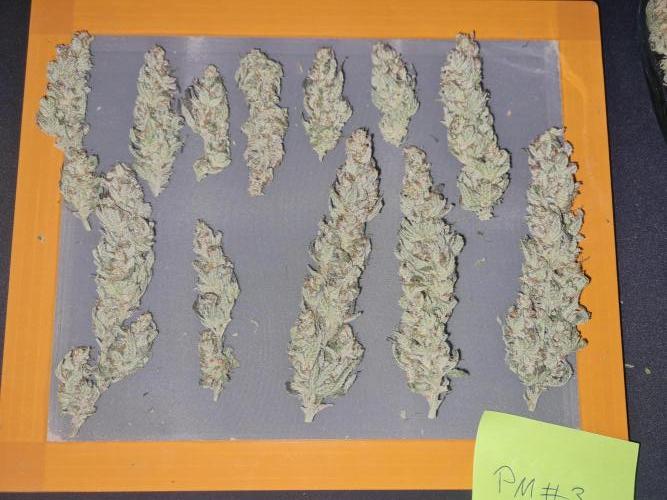
GrowersCorner Seeds: 3× Permanent Marker (Zamnesia), 4× Permanent Marker (HW Seeds)
Grow type: Indoor
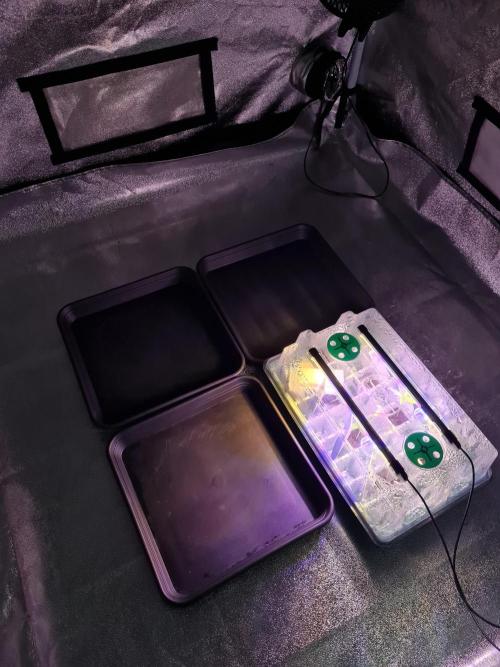
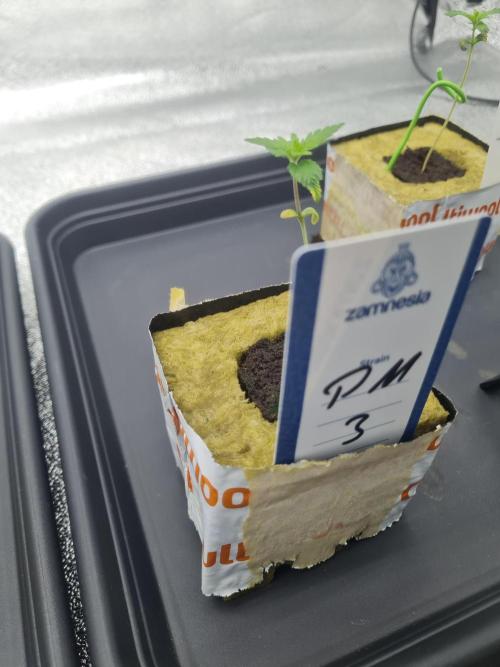
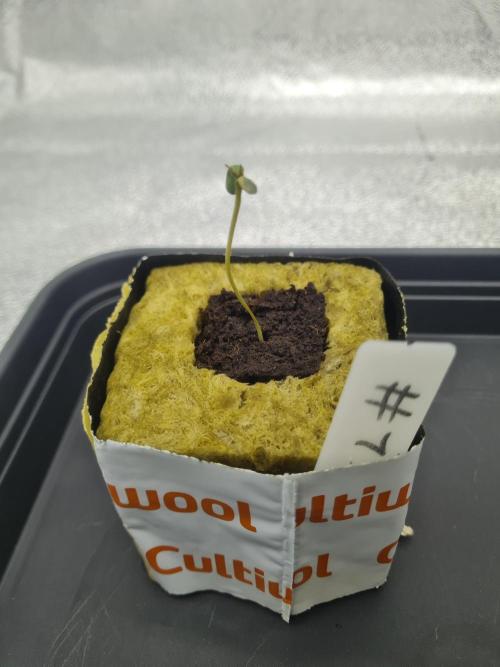
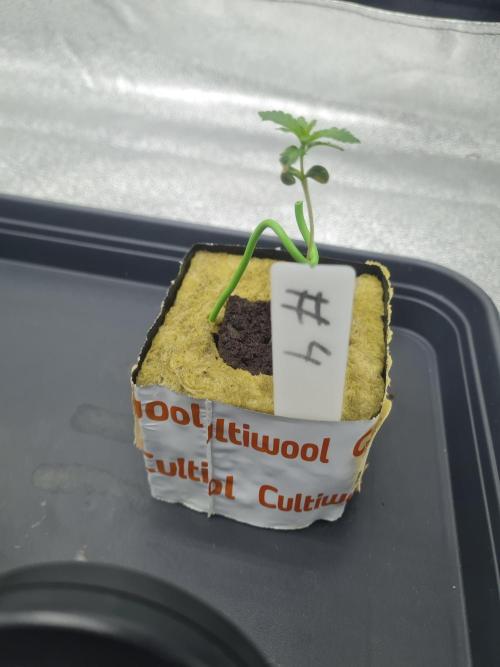
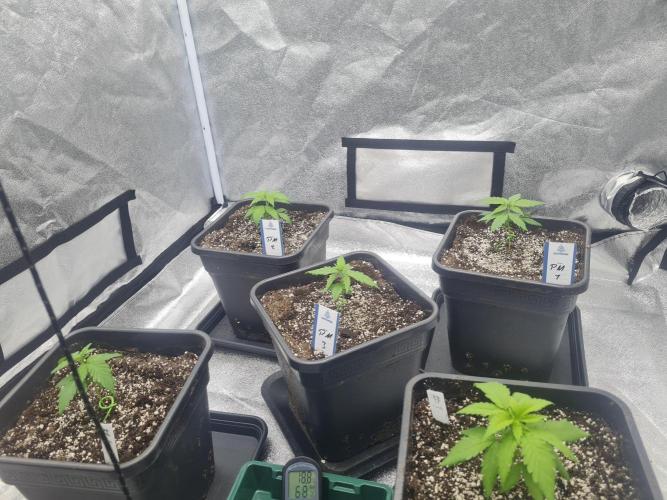
The run started with germination in Easy Plugs, which were soaked in pH-adjusted water before use. All seeds were placed directly into the pre-soaked plugs to ensure even and consistent conditions during the germination phase.
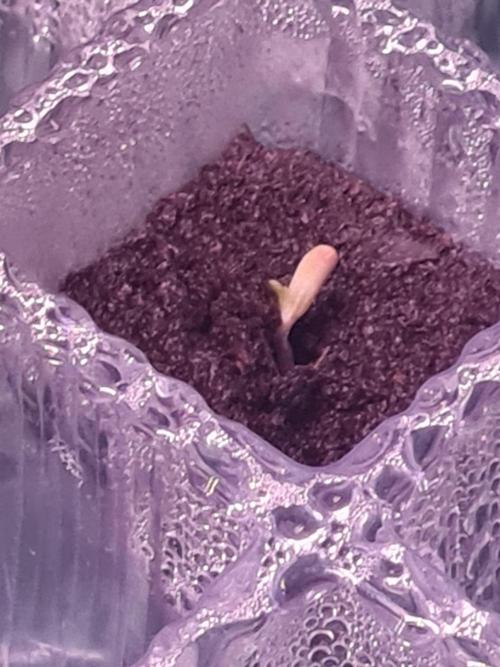
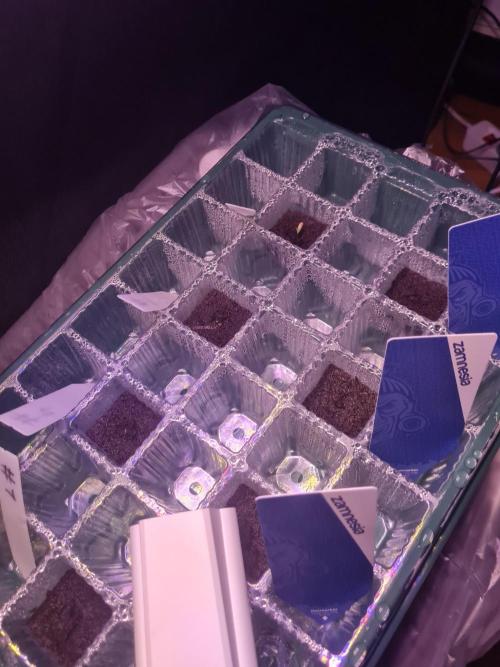
The first seedling emerged on 18.10, showing a healthy and clean start. Over the following days, the remaining seeds followed steadily, and by 23.10 all seeds had successfully germinated.
Moisture levels were kept stable throughout the week, with no nutrients added at this stage. The focus was purely on providing the right environment for root development and early seedling establishment.
Overall, germination was uniform and uncomplicated, creating a solid foundation for the next stages of the grow.
😊
likes
comments
Share
Used method
Peat Pellet
Germination Method
1
Week 1. Vegetation
3d ago
1/3
7 cm
Height
18 hrs
Light Schedule
26 °C
Day Air Temp
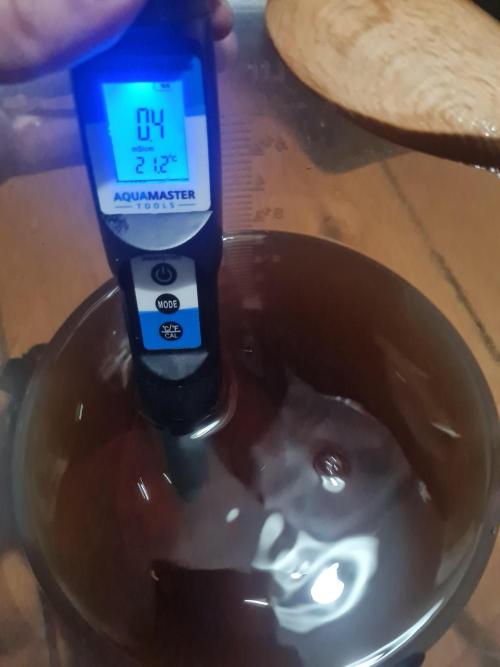
5.8
pH
No Smell
Smell
87 %
Air Humidity
26 °C
Night Air Temp
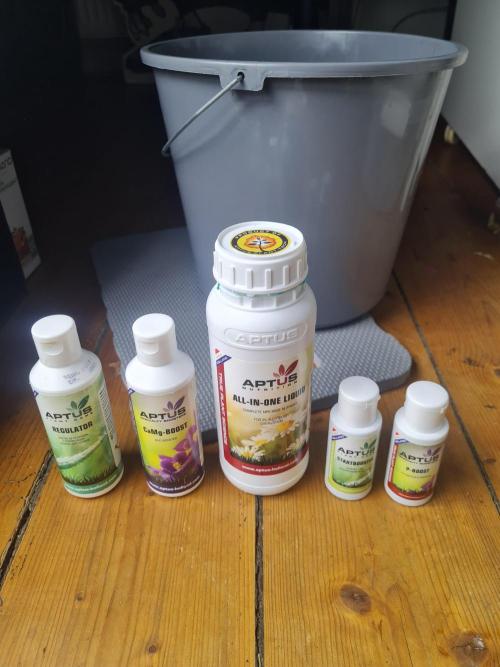
Nutrients 4
All-in-One Liquid
0.8 mll
Startbooster
0.25 mll
Regulator
0.15 mll
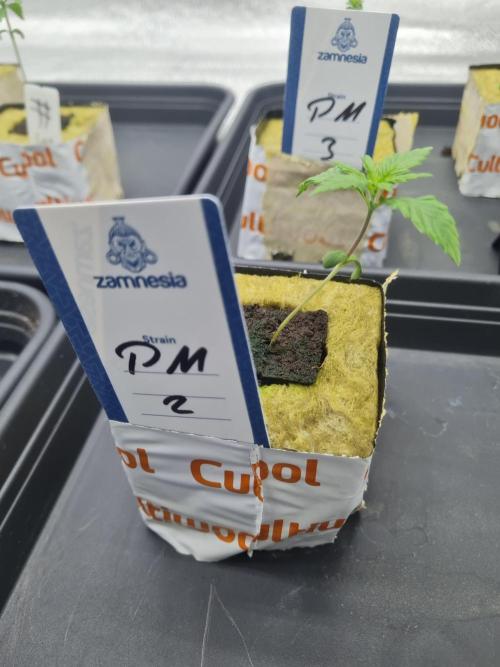
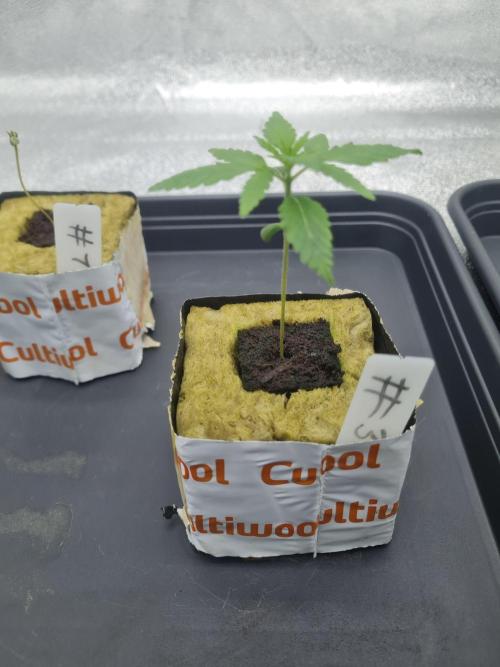
GrowersCorner During week two, all plants were given time to develop a strong and healthy root system. The focus remained on root growth rather than pushing above-ground development.
Throughout the week, conditions were kept stable to encourage the roots to fully establish inside the Easy Plugs. No stress was applied, and growth progressed evenly across all plants.
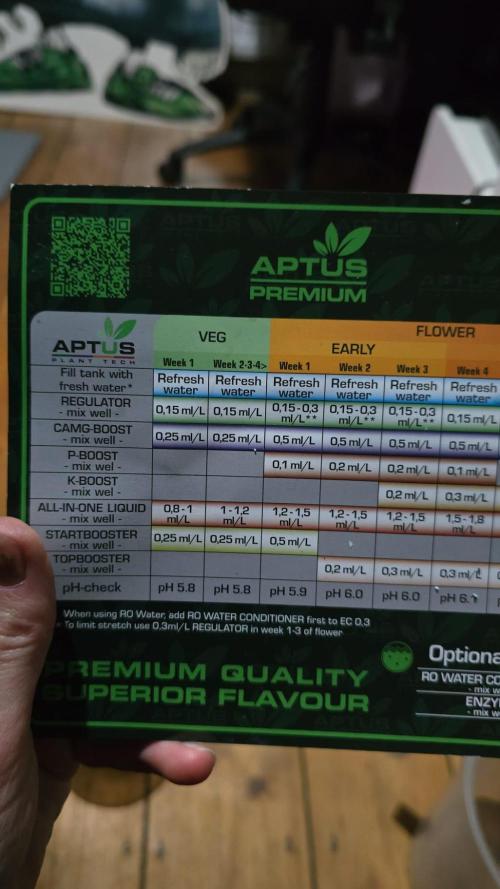
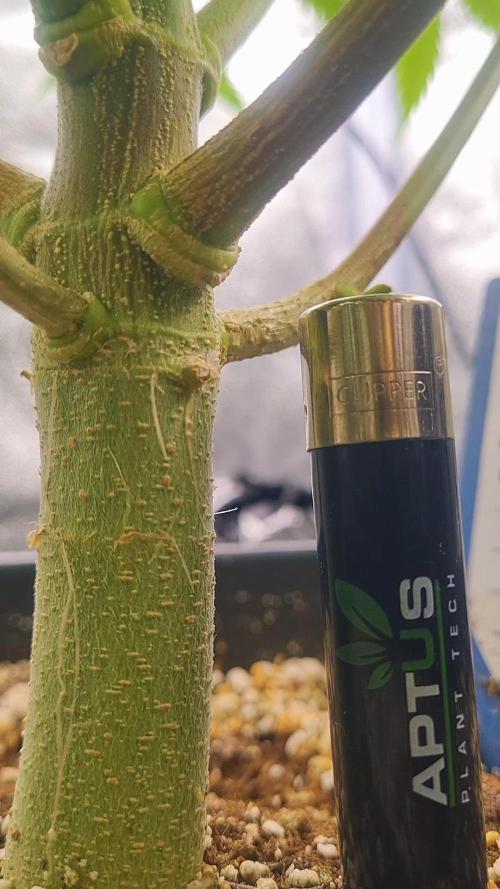
Toward the end of the week, the next step was prepared: rockwool blocks were pre-soaked and conditioned in advance. For this, a light nutrient solution was used, consisting of Aptus Startbooster, Aptus Regulator, and Aptus All-in-One Liquid.
This was done to ensure the blocks were fully buffered and ready for transplant, giving the seedlings an optimal start once moved into the new medium.
By the end of week two, root development looked strong and healthy, setting the stage for transplanting into the prepared rockwool blocks in the following week.
likes
comments
Share
2
Week 2. Vegetation
3d ago
1/13
10 cm
Height
18 hrs
Light Schedule
25 °C
Day Air Temp
5.8
pH
No Smell
Smell
200 PPM
TDS
87 %
Air Humidity
21 °C
Night Air Temp
40 cm
Lamp Distance
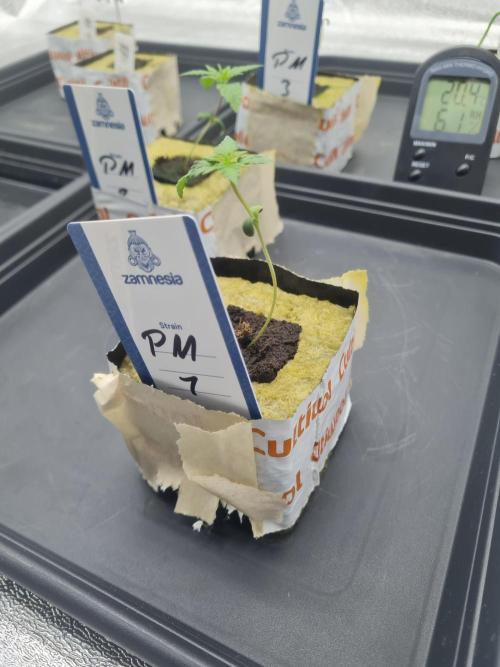
GrowersCorner In week two, all seedlings were transplanted from the Easy Plugs into prepared rockwool blocks. The blocks had been conditioned beforehand to provide a smooth and stress-free transition for the young plants.
After transplanting, the focus was on allowing the plants to root into the new medium. Environmental conditions were kept stable, and irrigation was kept light to encourage the roots to search and expand into the rockwool rather than staying passive.
All plants responded well to the transplant. No signs of stress or transplant shock were observed, and the seedlings started to anchor themselves in the blocks over the following days.
This week was intentionally kept calm and controlled, giving the plants time to establish a solid root base before pushing vegetative growth in the next stage.
1 like
comments
Share
Used techniques
Transplantation
Technique
3
Week 3. Vegetation
3d ago
1/2
15 cm
Height
18 hrs
Light Schedule
24 °C
Day Air Temp
5.8
pH
No Smell
Smell
200 PPM
TDS
65 %
Air Humidity
21 °C
Night Air Temp
40 cm
Lamp Distance
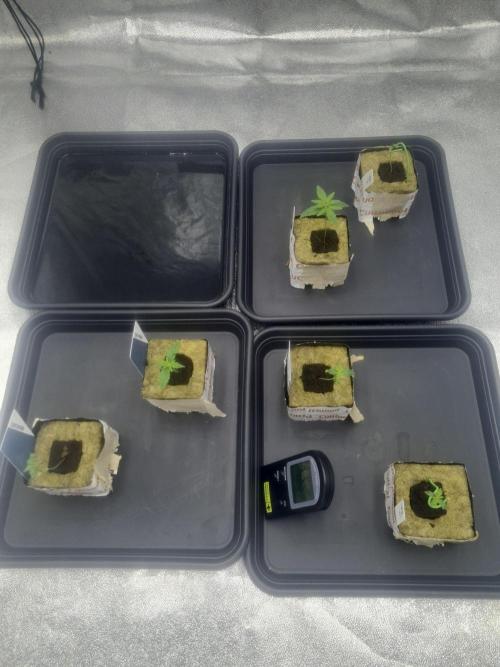
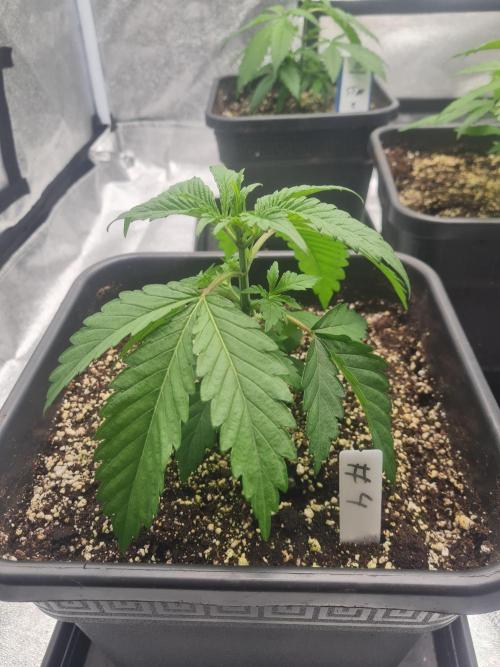
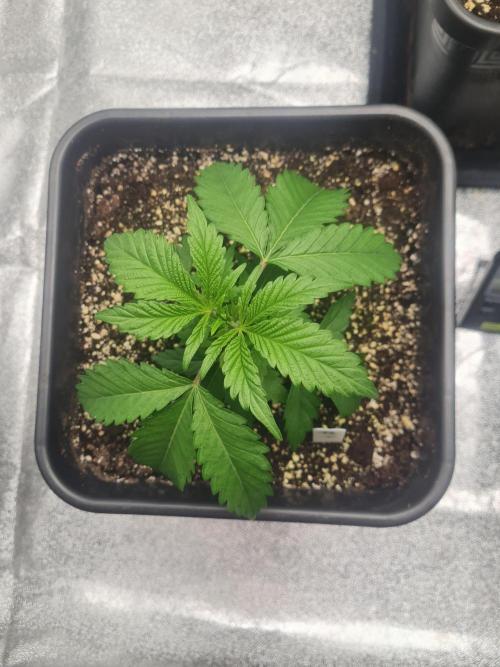
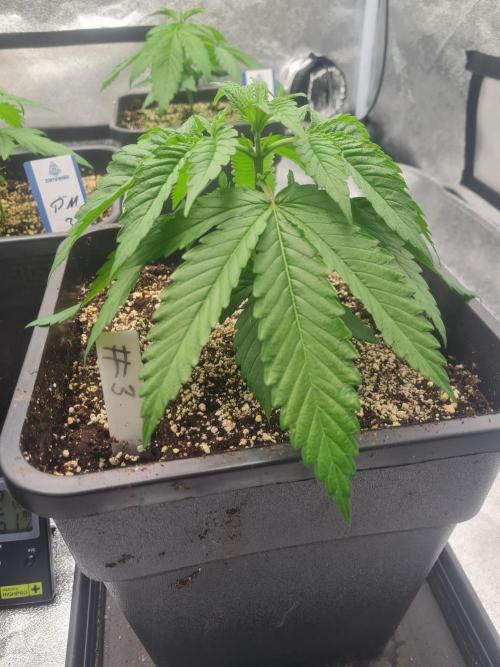
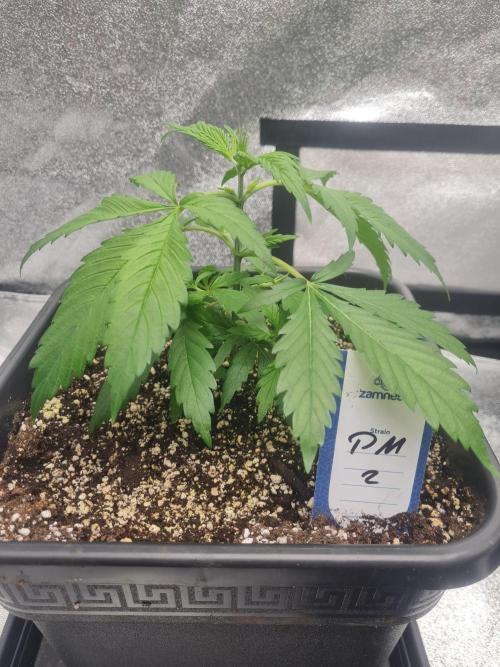
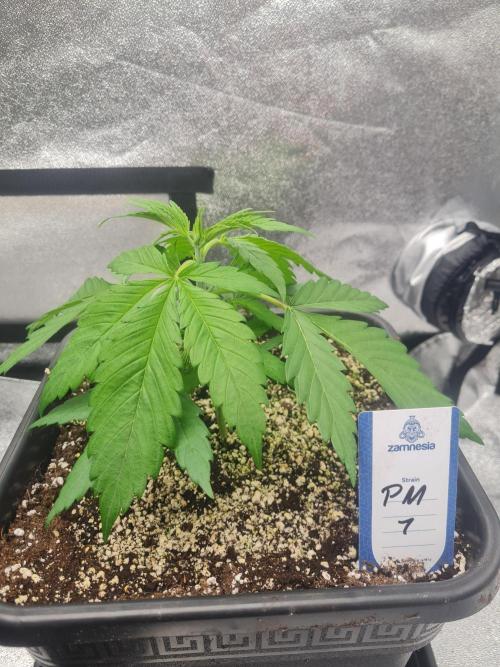
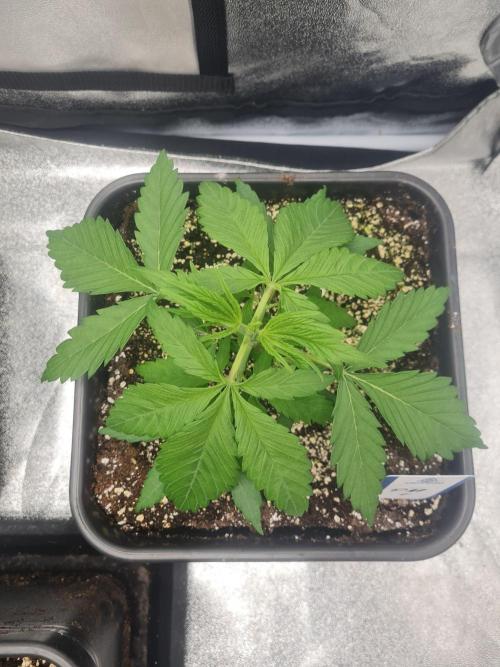
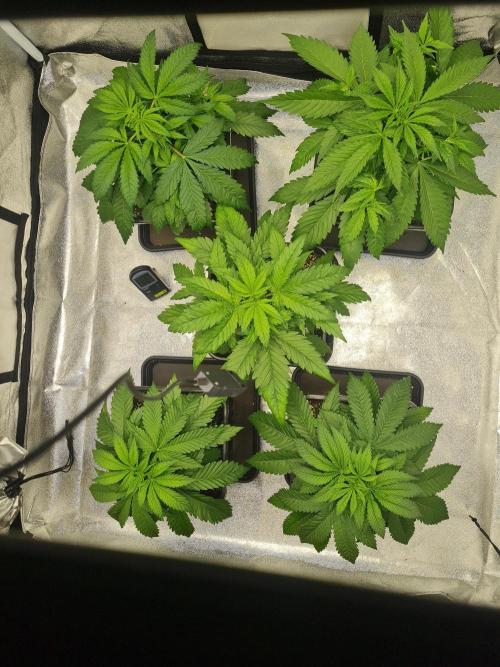
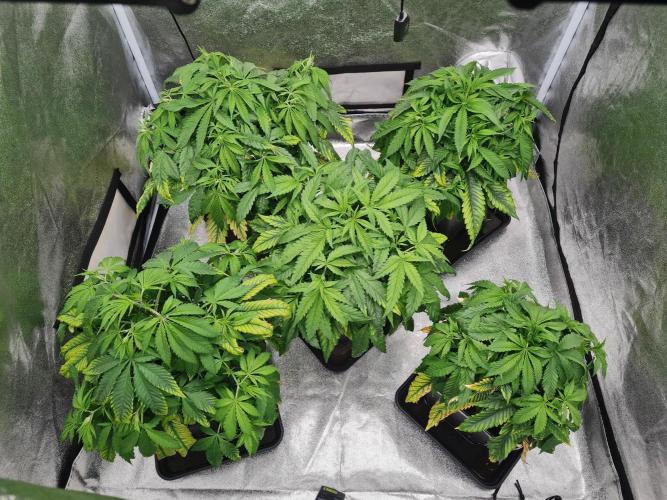
GrowersCorner During week three, the plants continued their early vegetative growth in rockwool. The focus remained on stable conditions and consistent moisture levels, keeping the medium evenly moist to support ongoing root expansion.
Most plants responded very well and showed healthy, vigorous growth above and below the medium. Leaf color, structure, and overall development were on point, indicating that the root systems were establishing properly.
Two plants, labeled HW 1 and HW 2, started to show clear weaknesses compared to the rest of the group. Growth was noticeably slower, and overall vigor was reduced. These plants were closely monitored throughout the week, with the decision made to remove them in the following week to keep the run consistent and focused on the strongest individuals.
Aside from those two plants, the remaining group developed without issues, and the run continued on a very positive trajectory.
1 like
comments
Share
4
Week 4. Vegetation
3d ago
1/2
18 cm
Height
18 hrs
Light Schedule
24 °C
Day Air Temp
5.8
pH
No Smell
Smell
200 PPM
TDS
62 %
Air Humidity
18 °C
Night Air Temp
40 cm
Lamp Distance
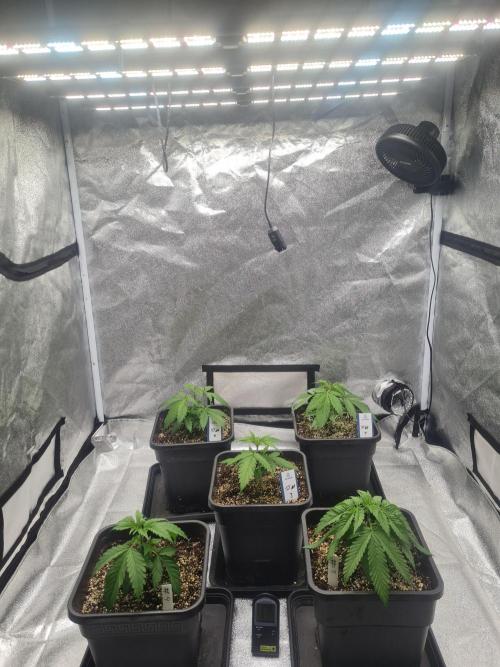
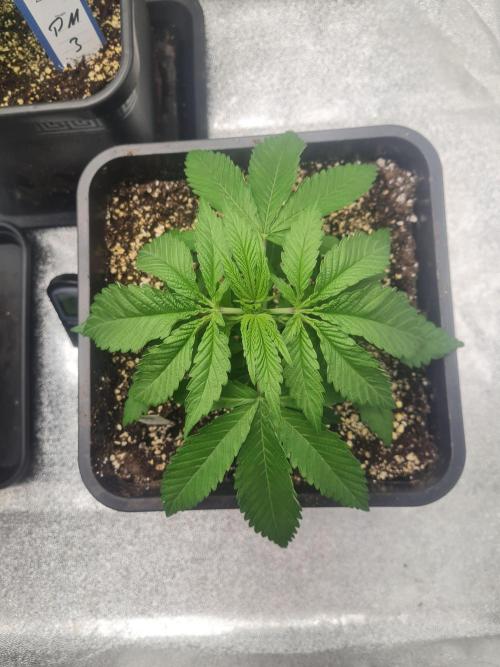
GrowersCorner During week four, the remaining plants were given more time to continue building a strong and healthy root system. The focus stayed on consistent conditions and keeping the substrate evenly moist with the nutrient solution to support steady vegetative growth.
Overall development was very positive. The plants showed good vigor and uniform structure, confirming that the rooting phase in the rockwool was progressing as intended.
During this week, HW 1 and HW 2 were removed from the run. Both plants were clearly lagging behind the rest and showed significantly weaker development. To keep the grow focused on the strongest individuals, they were culled as part of natural selection.
With the weaker plants removed, the remaining ladies continued to thrive, setting a solid foundation for the next stage of the grow.
1 like
comments
Share
5
Week 5. Vegetation
3d ago
1/2
18 cm
Height
18 hrs
Light Schedule
24 °C
Day Air Temp
5.8
pH
No Smell
Smell
200 PPM
TDS
62 %
Air Humidity
18 °C
Night Air Temp
40 cm
Lamp Distance
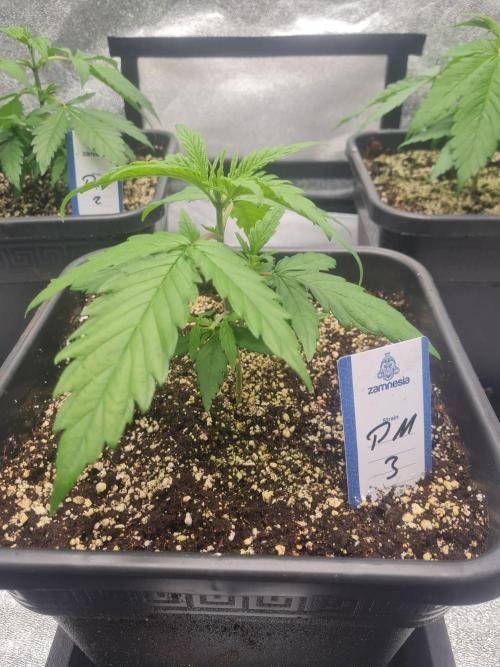
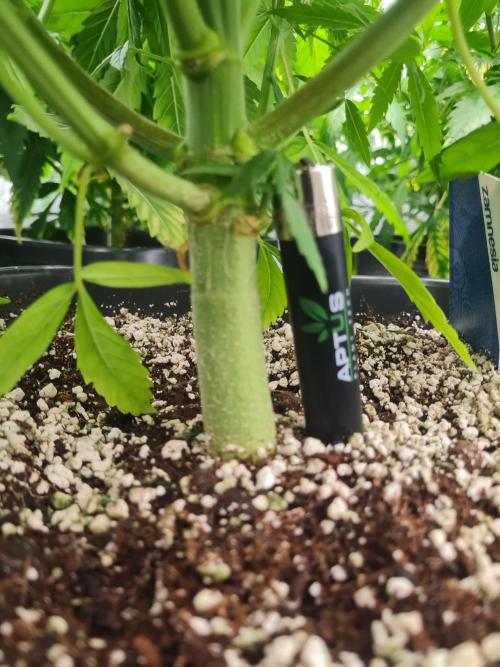
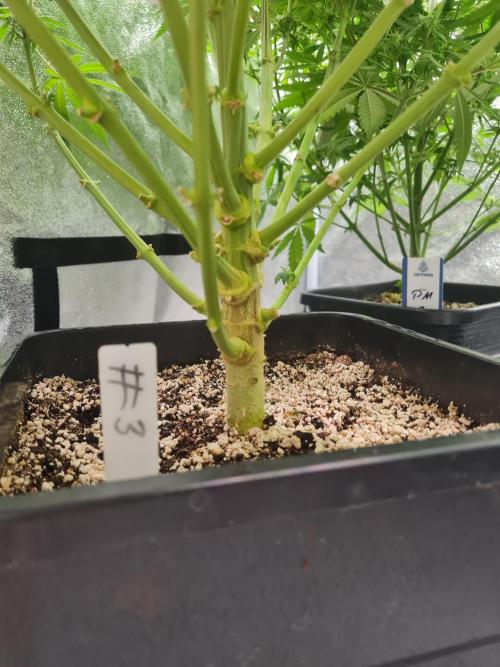
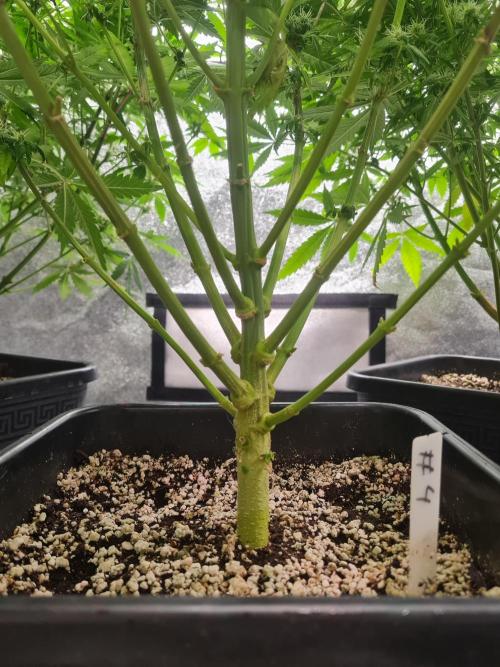
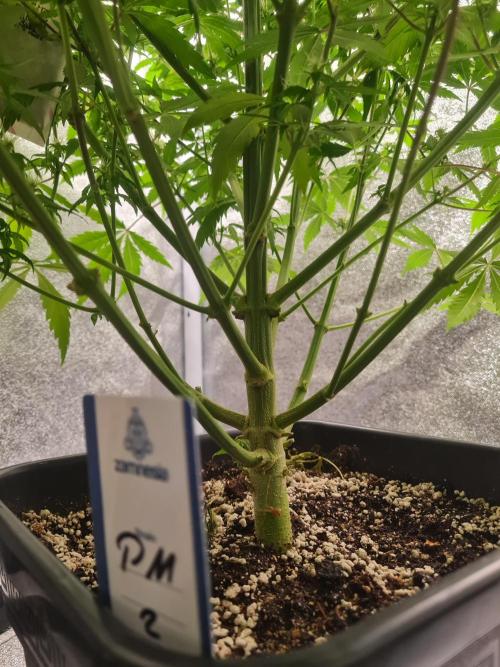
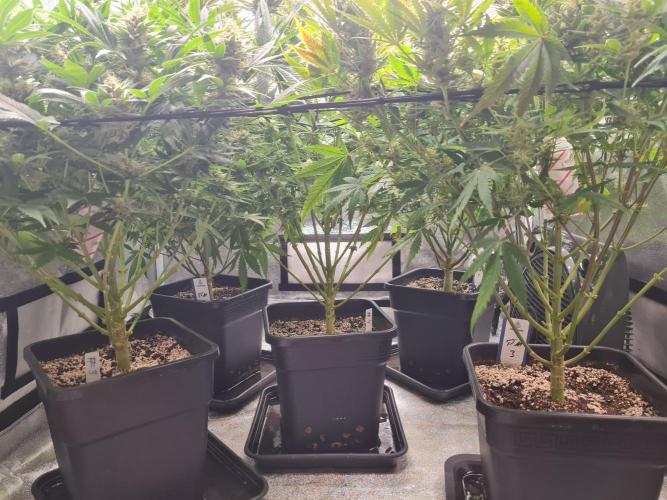
GrowersCorner In week five, all remaining plants were transplanted into their final containers. Each plant was moved into 11-liter pots filled with a mix of Plagron Lightmix and Plagron Perlite in a 5:1 ratio. This setup was chosen to provide good aeration while still retaining enough moisture for steady growth.
After transplanting, the plants were watered according to week 1 of the Aptus feeding schedule, keeping nutrient levels light to support root establishment in the new medium without causing stress.
The plants handled the transplant very well, showing no signs of shock. Growth remained healthy, and the transition into the final medium went smoothly.
This week marked an important step in the run, giving the plants the space and substrate they need to fully develop before the flowering phase.
likes
1 comment
Share
Used techniques
Transplantation
Technique
6
Week 6. Vegetation
3d ago
1/3
18 cm
Height
18 hrs
Light Schedule
24 °C
Day Air Temp
5.8
pH
No Smell
Smell
200 PPM
TDS
62 %
Air Humidity
18 °C
Night Air Temp
40 cm
Lamp Distance
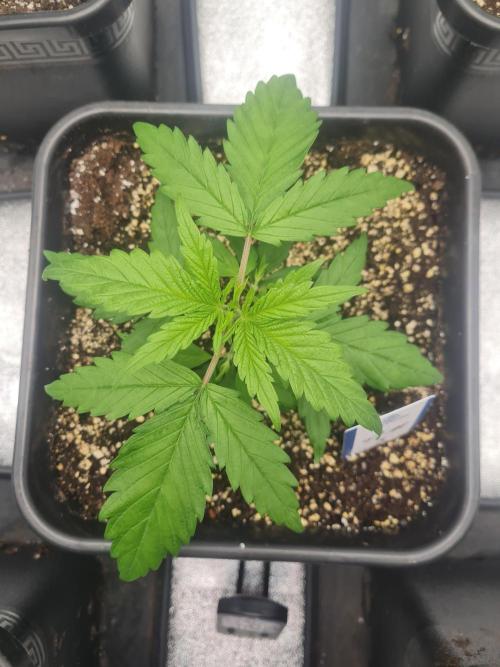
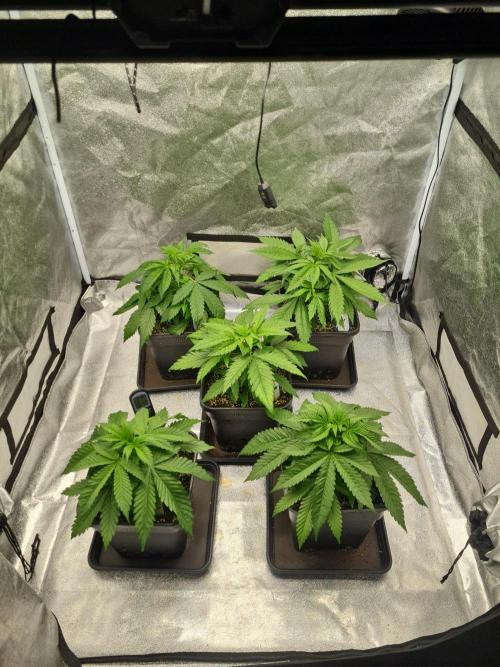
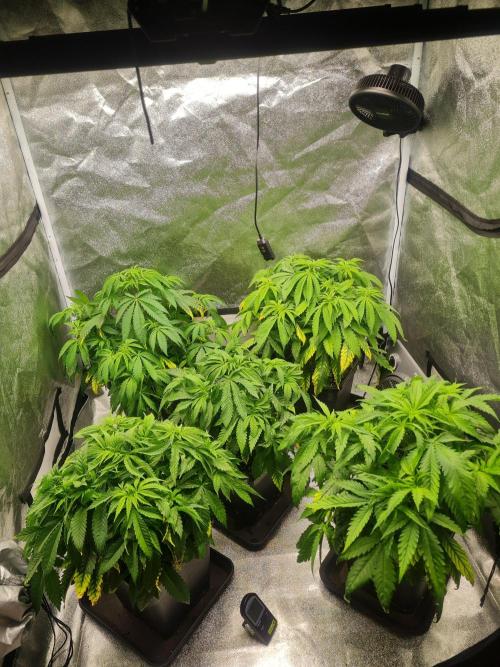
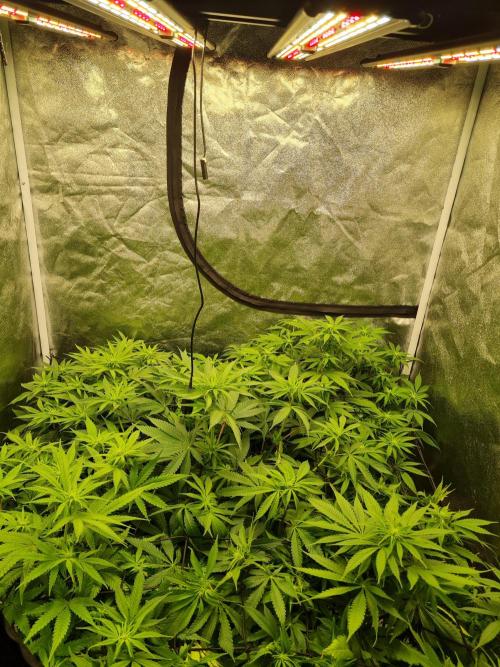
GrowersCorner During week six, the main focus was on fully rooting through the final substrate. After the transplant into the 11-liter pots, irrigation was kept controlled to encourage the roots to expand evenly throughout the Plagron Lightmix and Perlite mix.
The substrate was kept consistently moist without oversaturation, allowing oxygen to reach the root zone while still supporting steady growth. Above-ground development remained healthy and balanced, indicating that the plants were settling well into their final containers.
No major interventions were made during this week, as the goal was to let the plants establish a strong and uniform root system before moving into the flowering phase.
1 like
comments
Share
7
Week 7. Vegetation
3d ago
1/19
20 cm
Height
18 hrs
Light Schedule
24 °C
Day Air Temp
5.8
pH
No Smell
Smell
200 PPM
TDS
62 %
Air Humidity
18 °C
Night Air Temp
40 cm
Lamp Distance
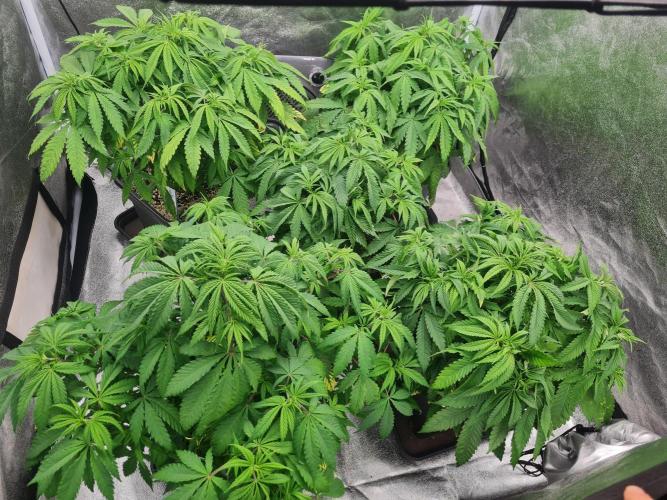
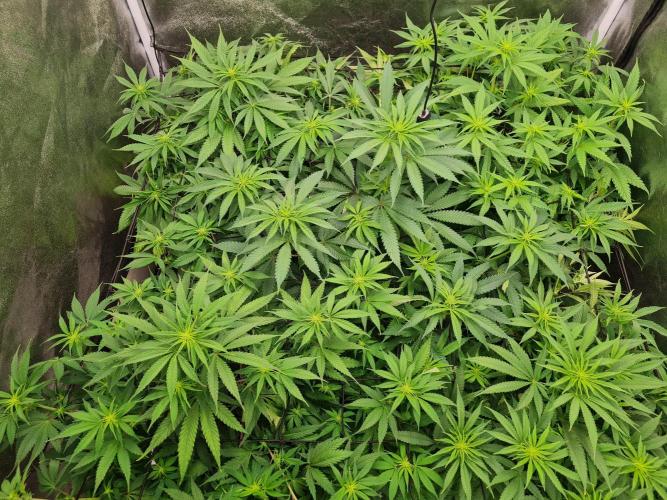
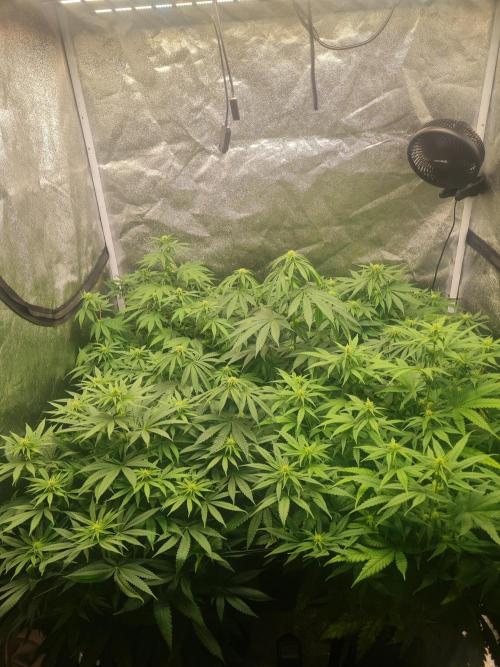
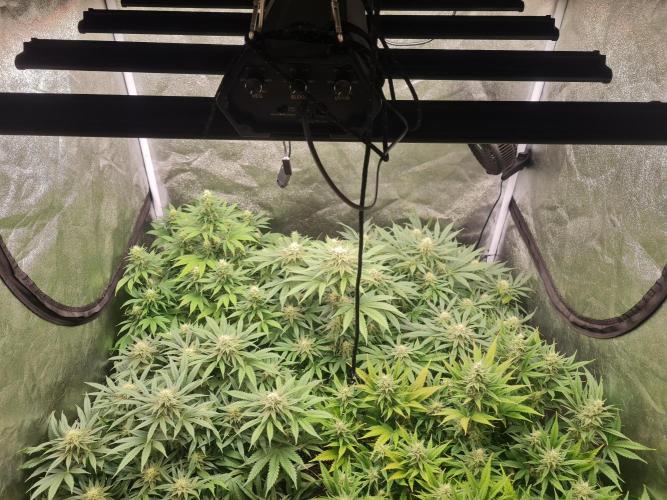
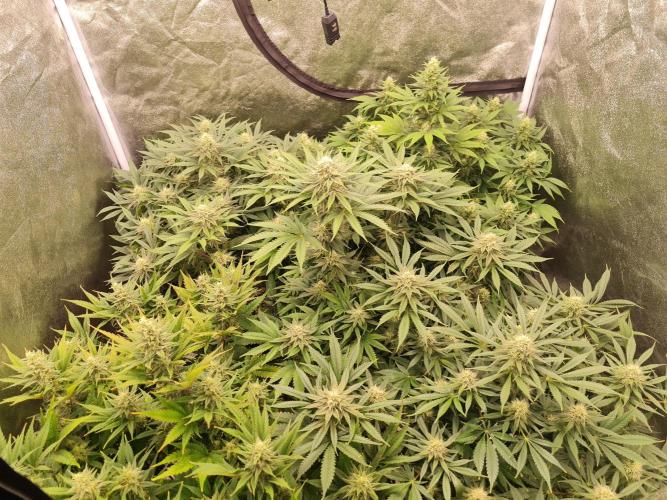
GrowersCorner In week seven, the plants showed a noticeable growth spurt. Vegetative growth accelerated, and by the end of the week the leaf tips had reached the edges of the pots, indicating that the root systems were fully established and actively feeding.
Nutrients continued to be applied according to the Aptus feeding schedule, with no changes made during this phase. The plants responded very well, showing healthy structure and strong leaf development.
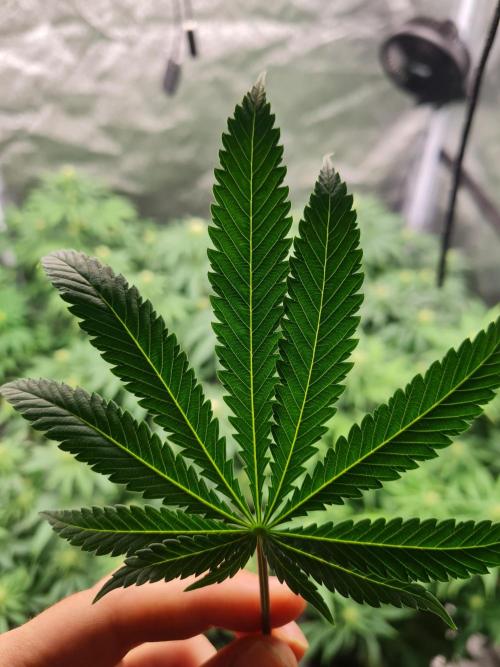
No training or heavy manipulation was applied. The goal during this week was to observe how the plants grow naturally, allowing their structure and growth pattern to develop without interference.
Overall, the plants looked strong and well-balanced, confirming that they were ready for the transition into the flowering phase.
1 like
comments
Share
8
Week 8. Vegetation
3d ago
1/3
25 cm
Height
18 hrs
Light Schedule
24 °C
Day Air Temp
5.8
pH
No Smell
Smell
200 PPM
TDS
62 %
Air Humidity
18 °C
Night Air Temp
40 cm
Lamp Distance
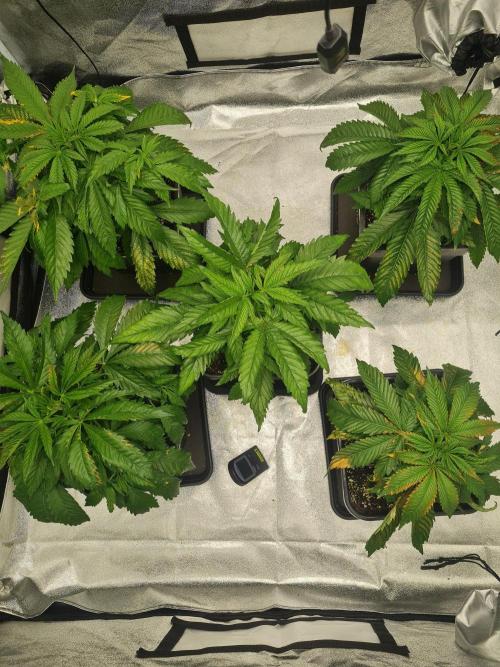
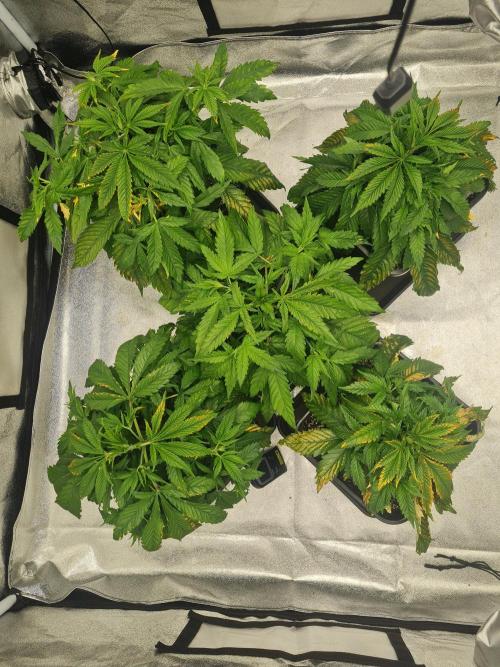
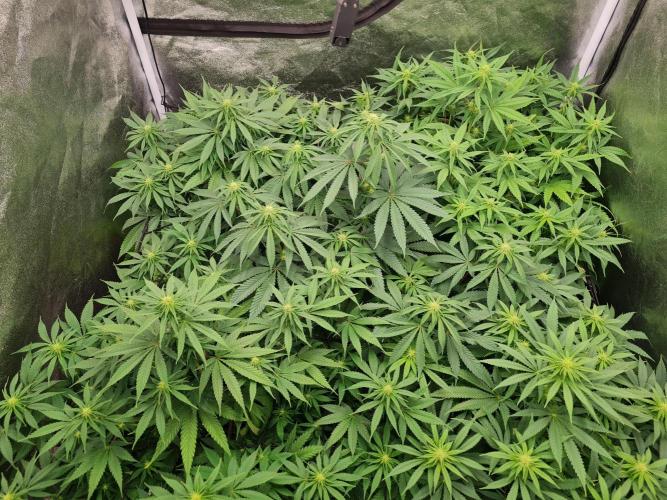
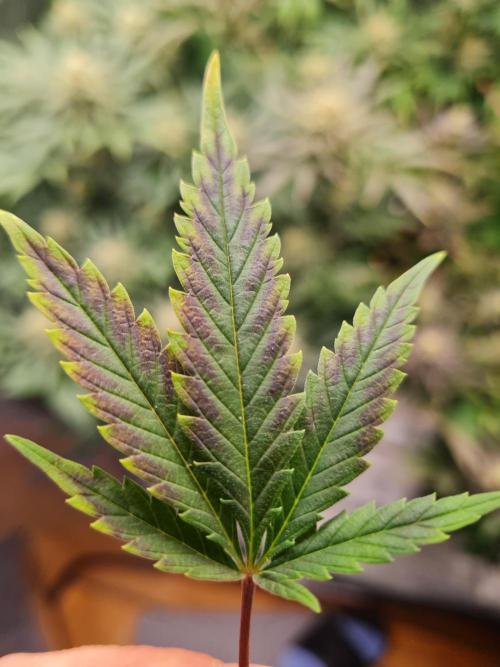
GrowersCorner During week eight, a nutrient deficiency became visible on the plants. To correct this, the Cal-Mag dosage was increased, and the pH value was slightly lowered to improve nutrient availability.
The plants responded well to these adjustments. Symptoms stabilized quickly, and overall plant health improved over the course of the week. Growth continued steadily, with no further signs of stress.
This week was mainly about fine-tuning the feeding and pH management to ensure the plants were fully balanced before moving into the next stage.
2 likes
1 comment
Share
9
Week 9. Vegetation
3d ago
1/8
28 cm
Height
18 hrs
Light Schedule
24 °C
Day Air Temp
5.8
pH
No Smell
Smell
200 PPM
TDS
62 %
Air Humidity
18 °C
Night Air Temp
40 cm
Lamp Distance
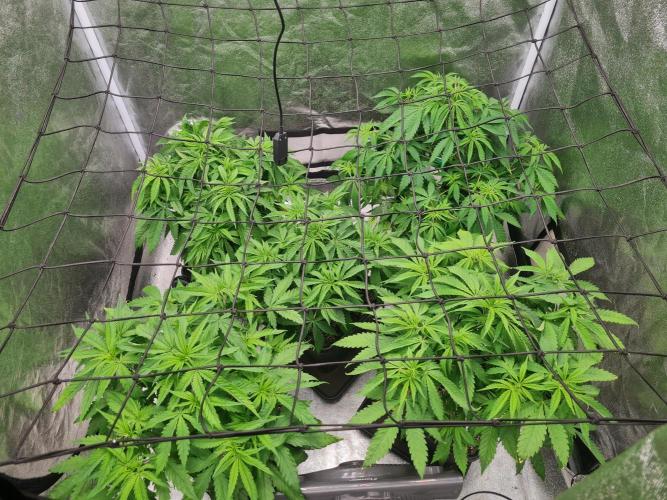
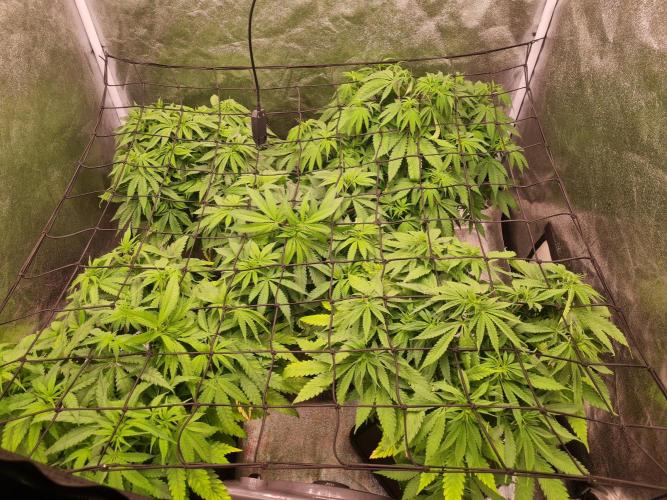
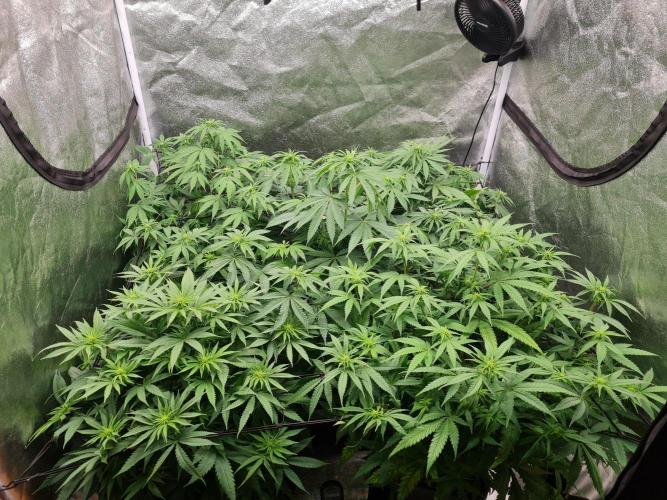
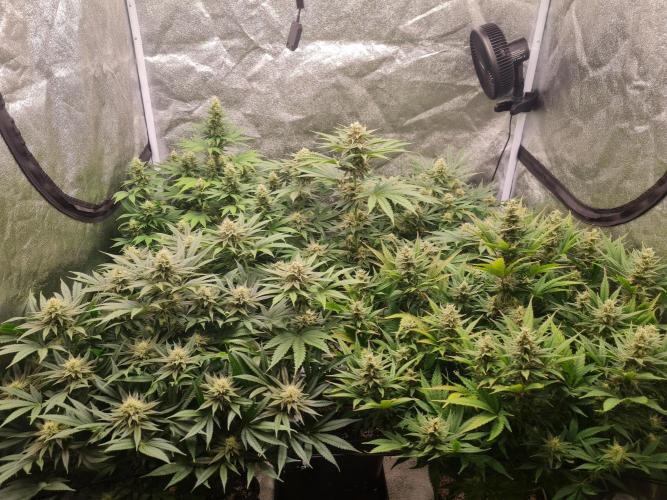
GrowersCorner In week nine, the focus shifted toward preparing the plants for flowering. Everything was set up to start working the plants into the SCROG net, without forcing any aggressive training yet.
The plants looked healthy, vigorous, and structurally ready for the upcoming bloom phase. Canopy development was even, and overall growth was well balanced.
No major changes were made to the feeding schedule, as the plants were clearly in a good place. By the end of the week, everything was prepared for the transition into flowering.
1 like
comments
Share
Used techniques
ScrOG
Technique
10
Week 10. Flowering
3d ago
1/3
32 cm
Height
12 hrs
Light Schedule
24 °C
Day Air Temp
5.8
pH
Weak
Smell
200 PPM
TDS
62 %
Air Humidity
18 °C
Night Air Temp
40 cm
Lamp Distance
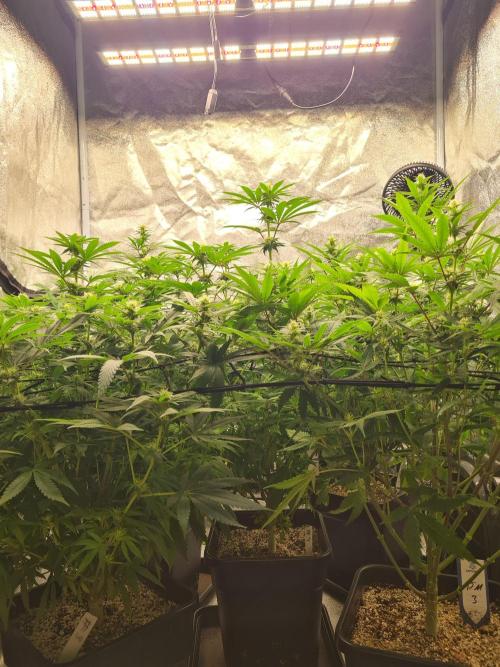
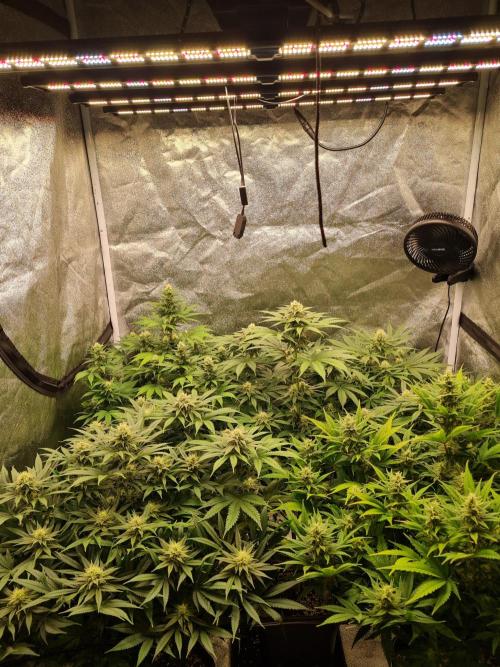
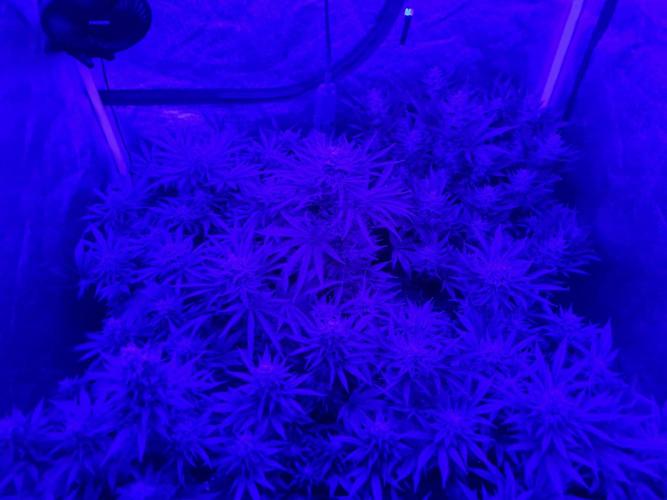
GrowersCorner Week ten marked the beginning of the flowering phase. The plants were flipped to 12/12 light and the stretch began. The main focus was on allowing the main shoots to grow into the SCROG net, without forcing or damaging the branches.
Environmental conditions and nutrient feeding remained stable, following the established Aptus schedule. The plants responded well, showing vigorous stretch and strong internodal growth.
By the end of the week, most of the shoots had reached the net, beginning to form the base for an even canopy.
1 like
comments
Share
Used techniques
ScrOG
Technique
11
Week 11. Flowering
3d ago
1/7
40 cm
Height
12 hrs
Light Schedule
24 °C
Day Air Temp
5.8
pH
No Smell
Smell
200 PPM
TDS
62 %
Air Humidity
18 °C
Night Air Temp
40 cm
Lamp Distance
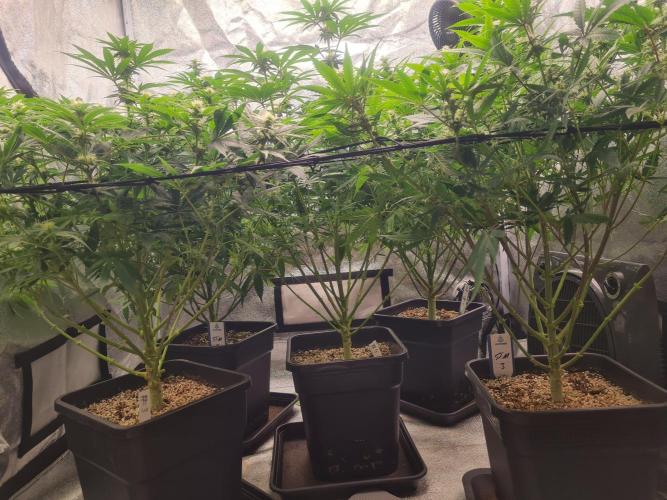
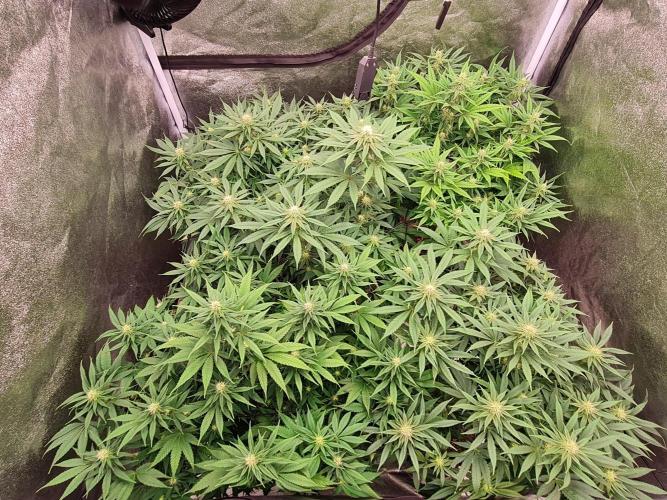
GrowersCorner In week eleven, the focus continued on training the shoots through the SCROG net to create a level canopy. Branches were gently guided, ensuring an even distribution across the entire surface area.
The plants remained healthy, with strong leaf development and no visible stress. Nutrient feeding continued according to the schedule, supporting the rapid growth during the early bloom phase.
By the end of the week, the canopy was becoming more uniform, setting the stage for optimal light penetration and bud formation.
1 like
comments
Share
Used techniques
ScrOG
Technique
12
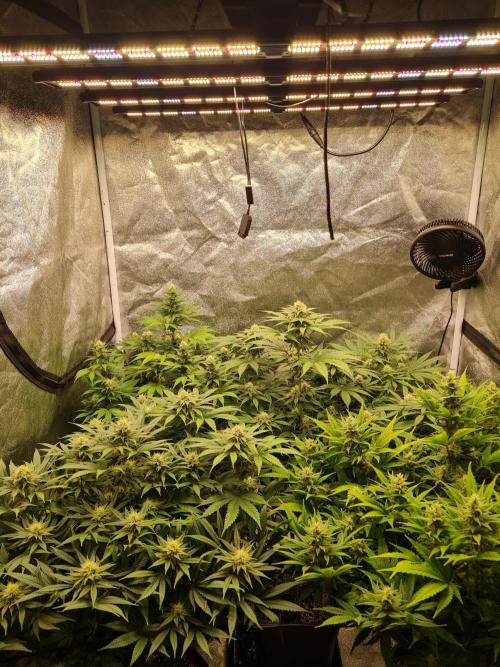
Week 12. Flowering
3d ago
1/10
48 cm
Height
12 hrs
Light Schedule
24 °C
Day Air Temp
5.8
pH
No Smell
Smell
200 PPM
TDS
62 %
Air Humidity
18 °C
Night Air Temp
40 cm
Lamp Distance
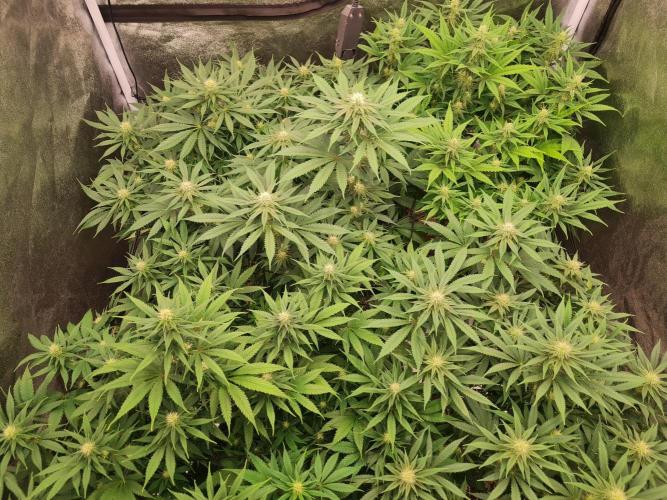
GrowersCorner Week twelve continued the stretch phase, with the plants still actively growing through the SCROG net. Growth was vigorous, with internodes elongating and new shoots filling in gaps in the canopy.
On day 24 of flowering, the plants were lollipopped, removing lower growth that would not receive sufficient light. This allowed the plants to focus energy on the upper, productive bud sites.
Overall, the plants remained healthy and strong, showing clear progress toward a dense, even canopy in preparation for the mid-flowering stage.
1 like
comments
Share
13
Week 13. Flowering
3d ago
1/12
50 cm
Height
12 hrs
Light Schedule
24 °C
Day Air Temp
5.8
pH
No Smell
Smell
200 PPM
TDS
62 %
Air Humidity
18 °C
Night Air Temp
40 cm
Lamp Distance
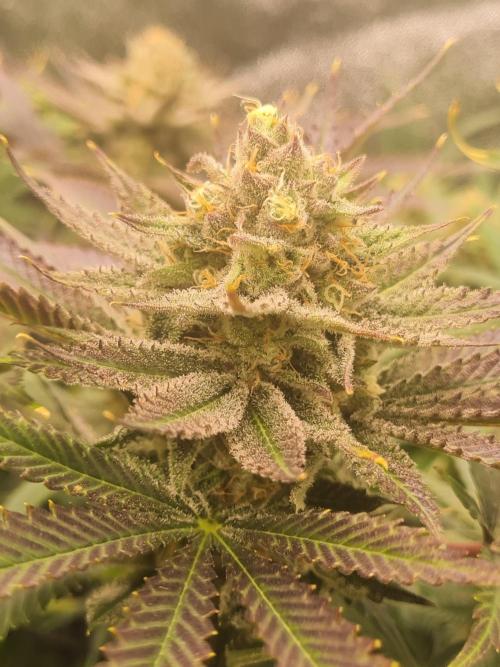
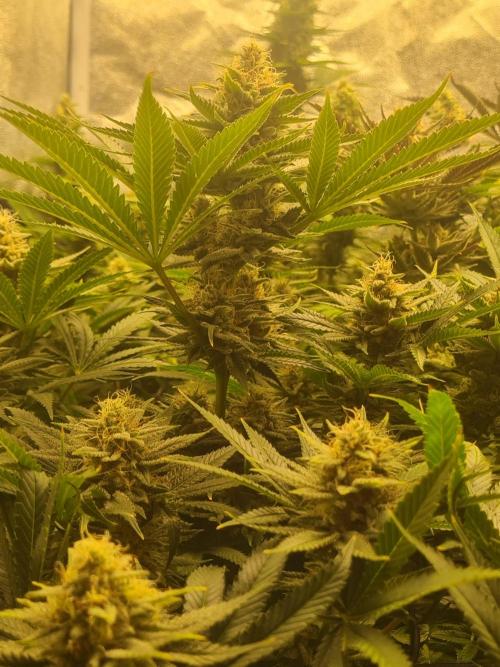
GrowersCorner In week thirteen, the main focus was on canopy maintenance. Large fan leaves that were blocking light to buds were carefully tucked down or removed, ensuring that the upper bud sites received optimal light exposure.
Plants continued to look healthy, and nutrient feeding remained stable according to the established schedule. No major interventions were needed beyond maintaining light penetration and airflow.
1 like
comments
Share
Used techniques
Defoliation
Technique
Lollypopping
Technique
14
Week 14. Flowering
3d ago
1/9
52 cm
Height
12 hrs
Light Schedule
24 °C
Day Air Temp
5.8
pH
No Smell
Smell
200 PPM
TDS
62 %
Air Humidity
18 °C
Night Air Temp
40 cm
Lamp Distance
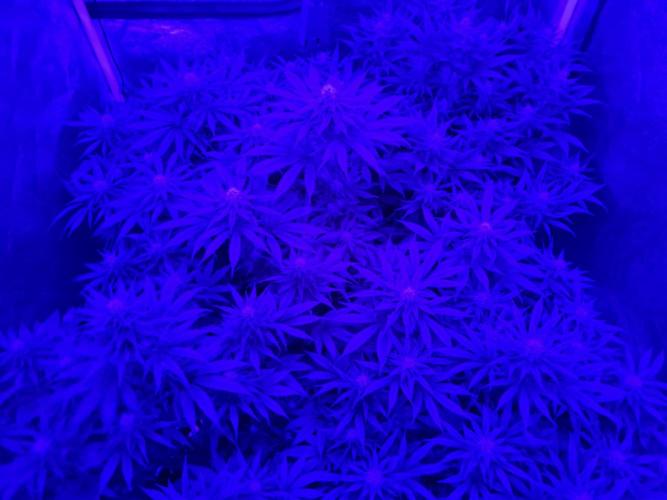
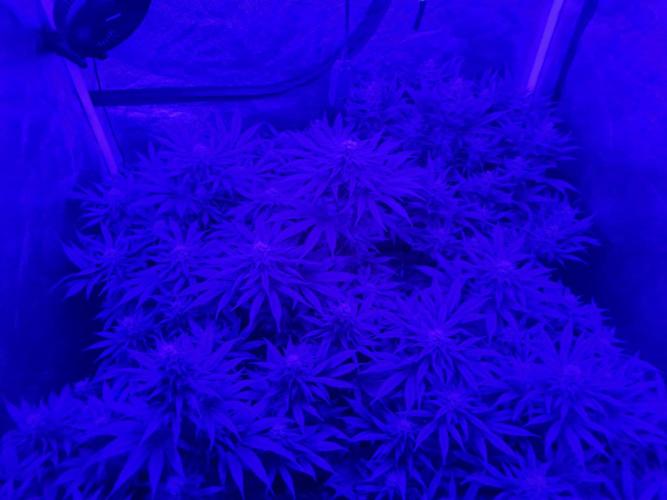
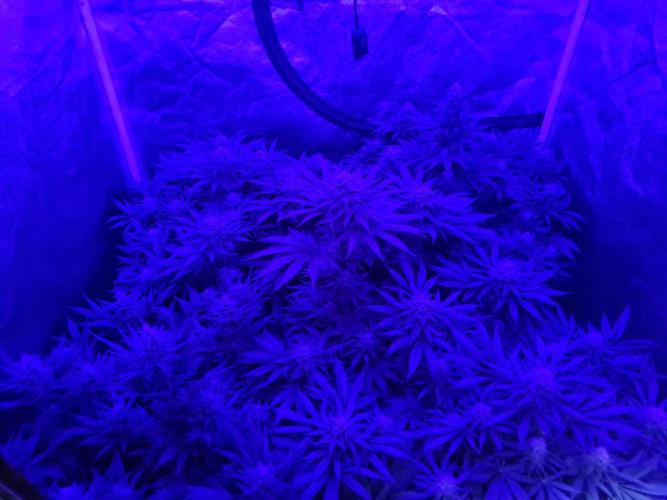
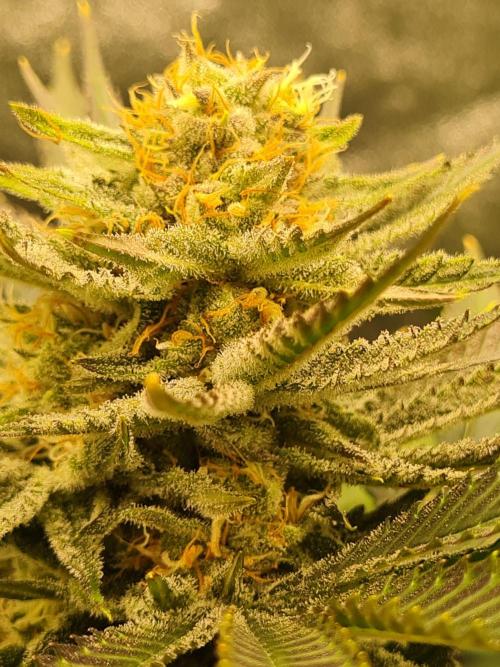
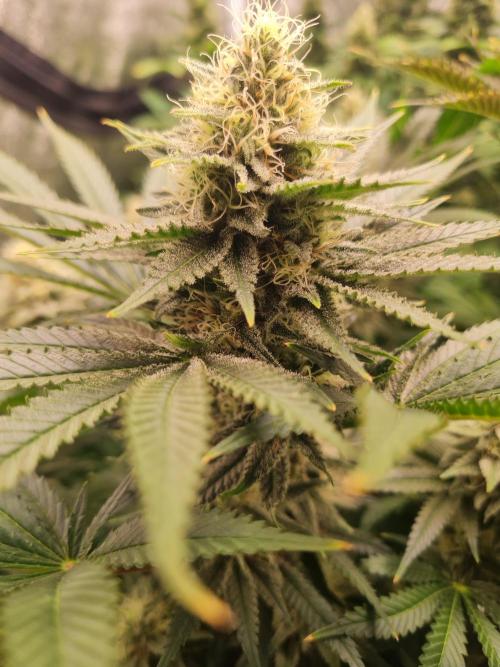
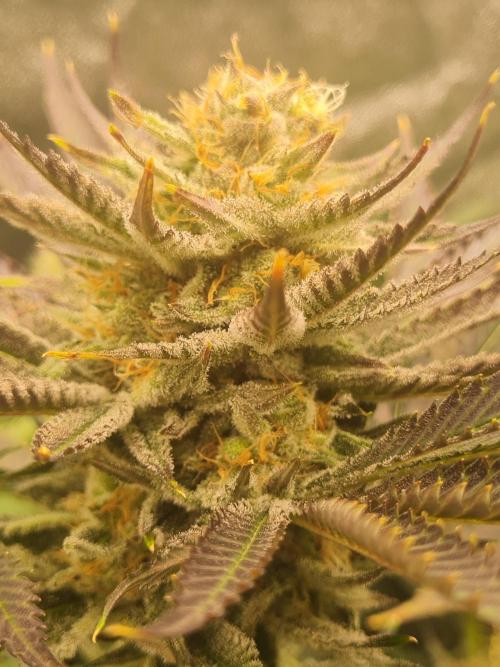
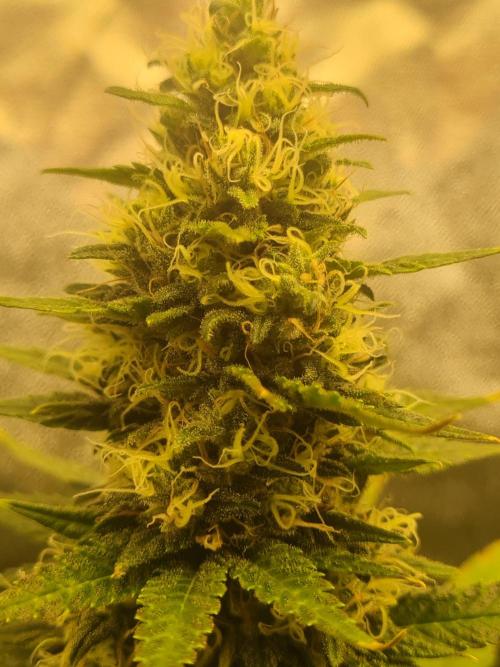
GrowersCorner In week fourteen, the UV light channel was switched on to support resin production and terpene development.
The plants tolerated the new spectrum well, showing no stress. All other environmental and feeding conditions were kept consistent to maintain stable growth.
2 likes
comments
Share
Used techniques
Uv light
Technique
15
Week 15. Flowering
3d ago
1/22
54 cm
Height
12 hrs
Light Schedule
24 °C
Day Air Temp
5.8
pH
Normal
Smell
200 PPM
TDS
62 %
Air Humidity
18 °C
Night Air Temp
40 cm
Lamp Distance
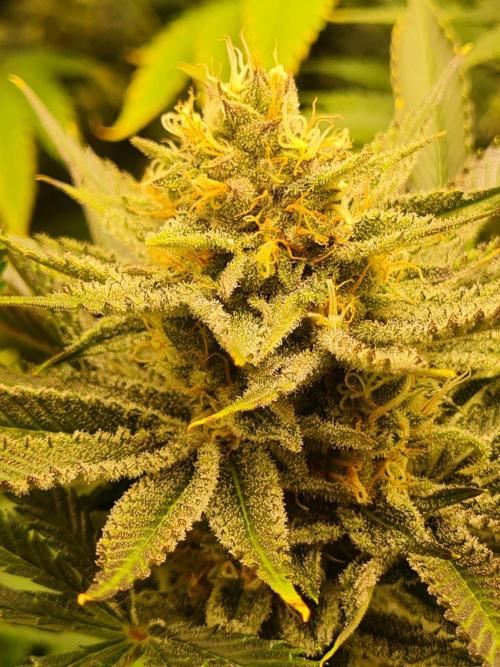
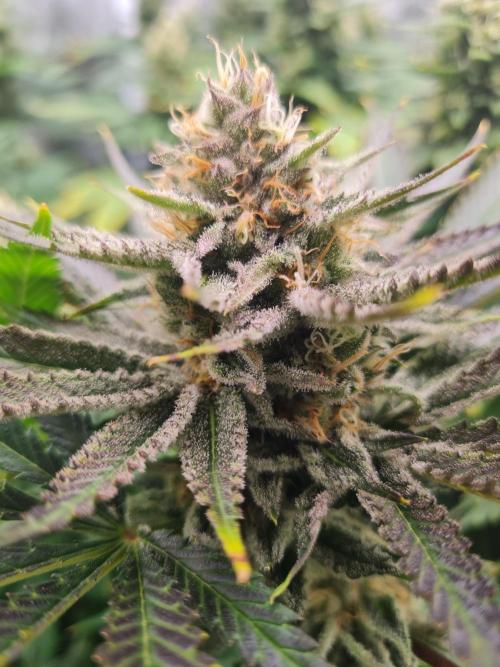
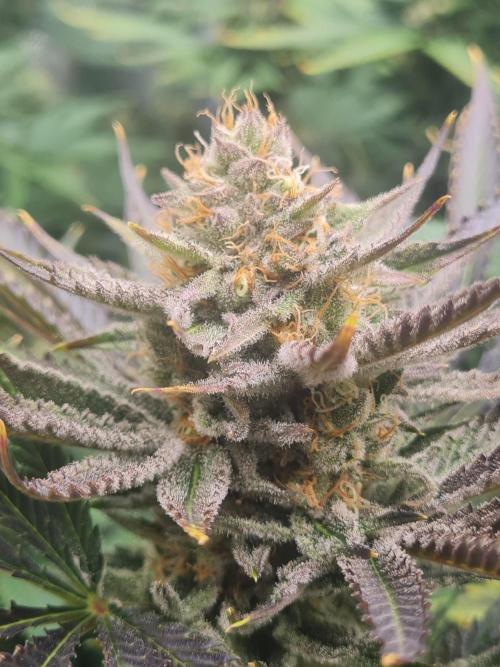
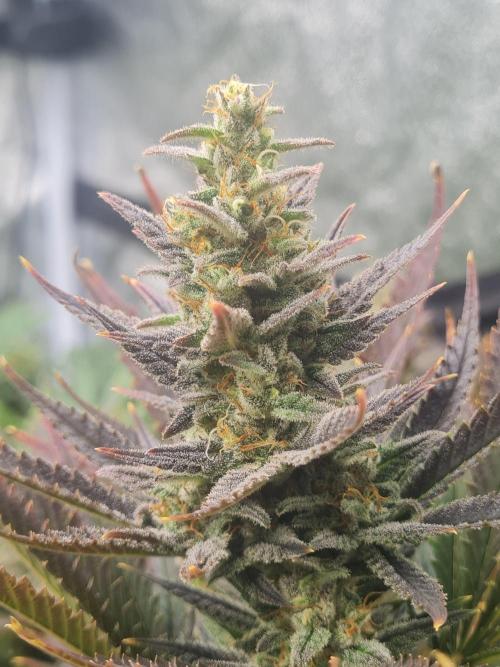
GrowersCorner Week fifteen followed the same approach: the UV channel remained active, feeding and environmental conditions were stable, and the canopy was monitored to ensure even bud development.
Plants continued to develop healthy, dense flowers, with no signs of nutrient stress.
2 likes
comments
Share
Used techniques
Uv light
Technique
16
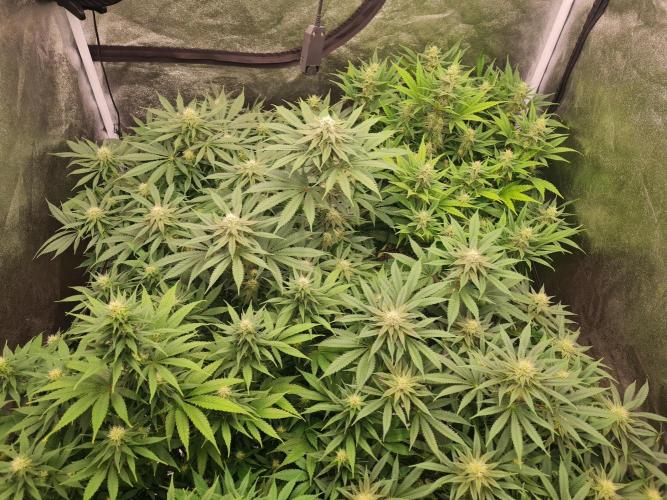
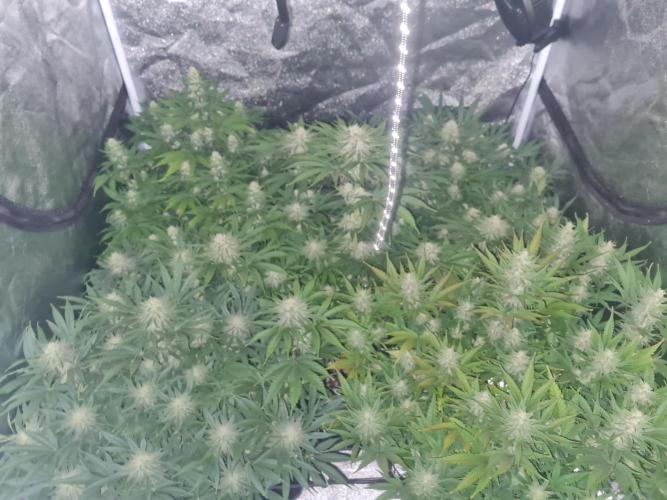
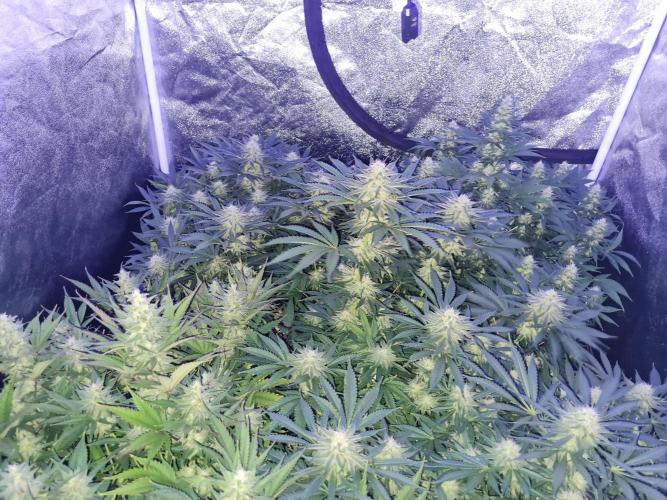
Week 16. Flowering
3d ago
1/30
54 cm
Height
12 hrs
Light Schedule
24 °C
Day Air Temp
5.8
pH
Strong
Smell
200 PPM
TDS
62 %
Air Humidity
18 °C
Night Air Temp
40 cm
Lamp Distance
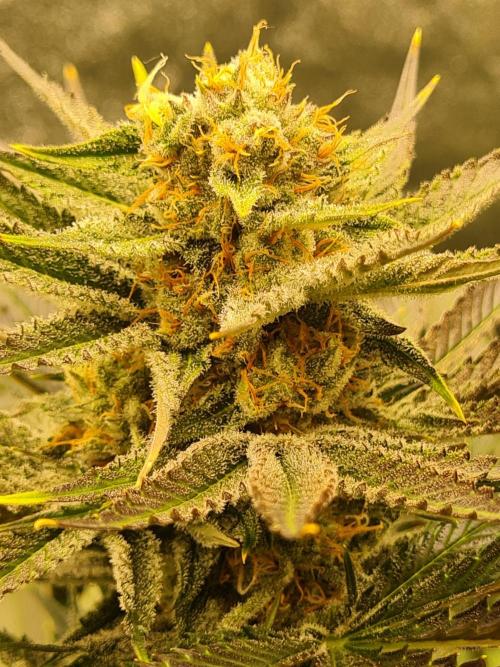
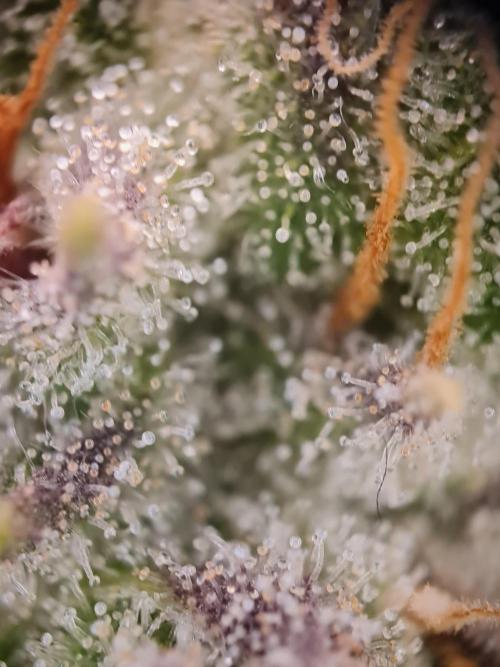
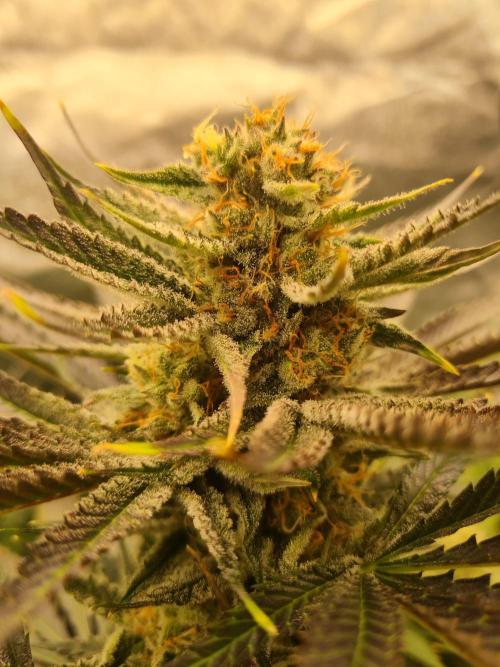
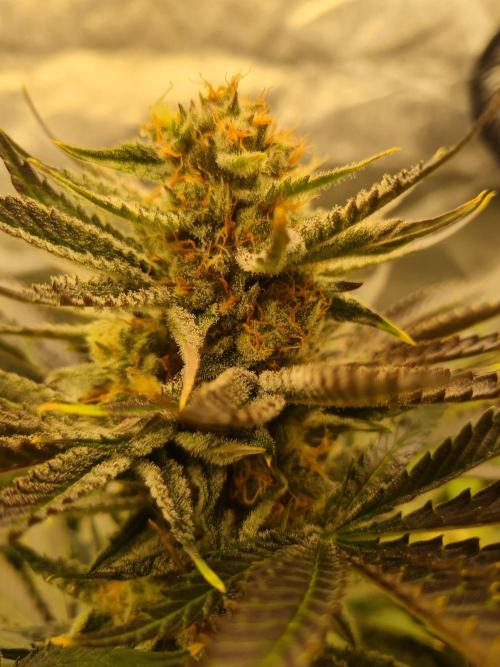
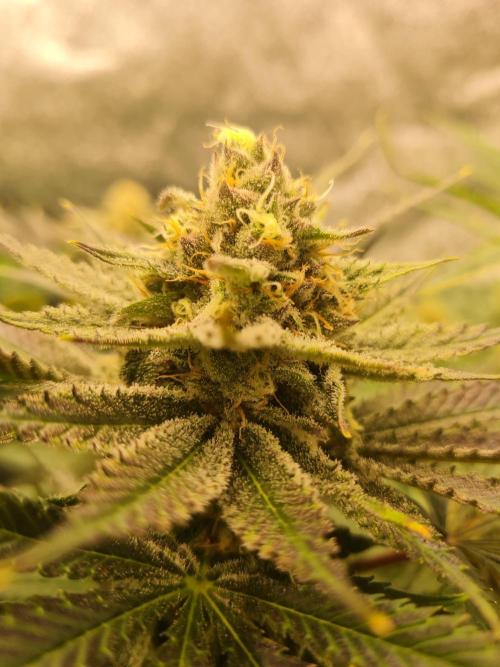
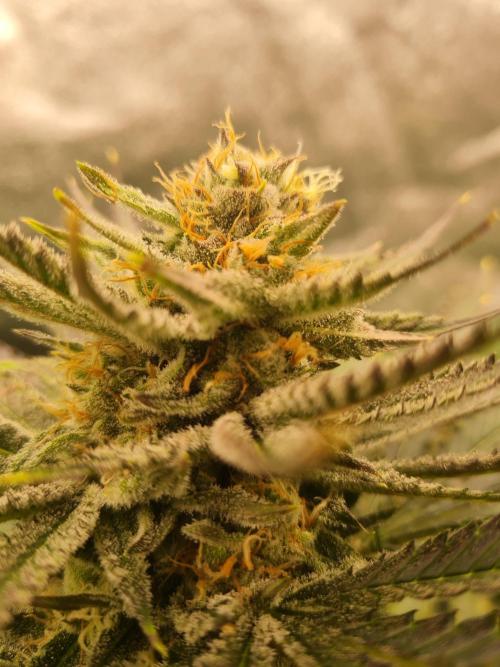
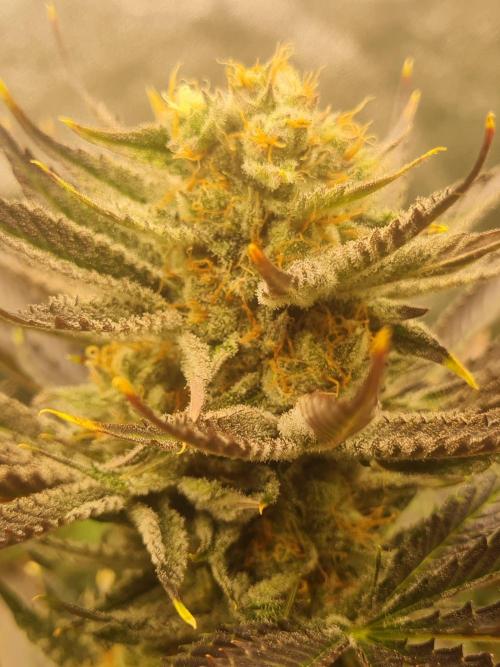
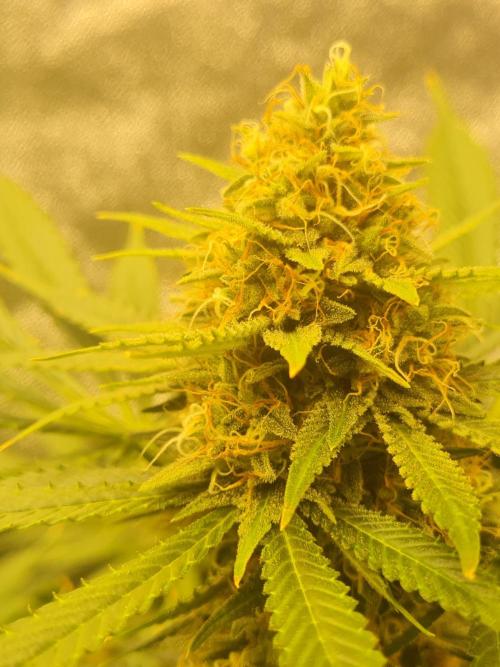
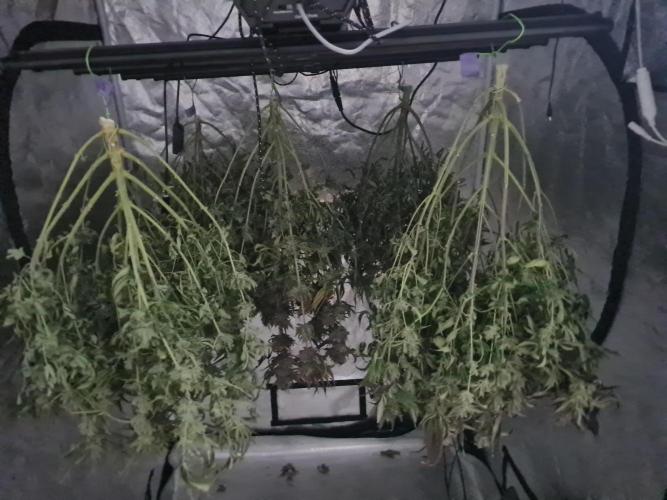
GrowersCorner In week sixteen, the UV channel was turned off. The plants were flushed to remove residual nutrients and prepare for harvest.
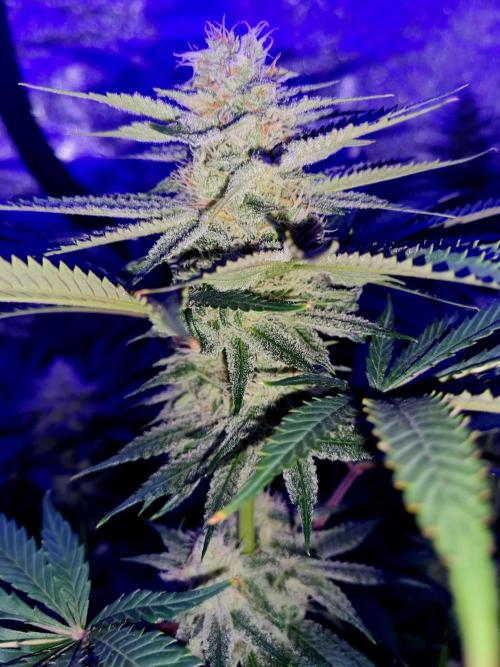
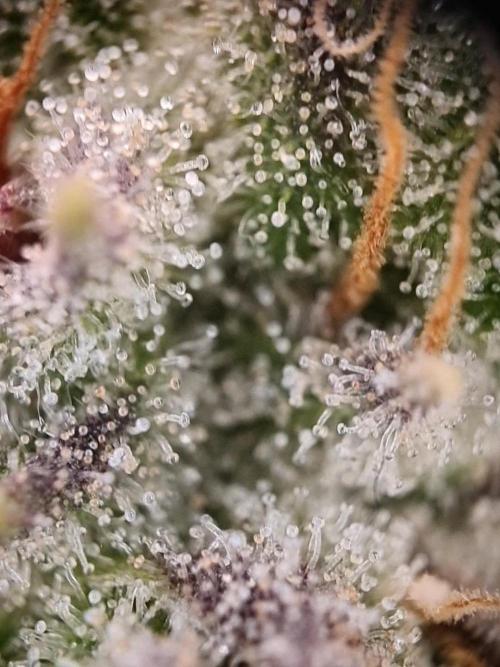
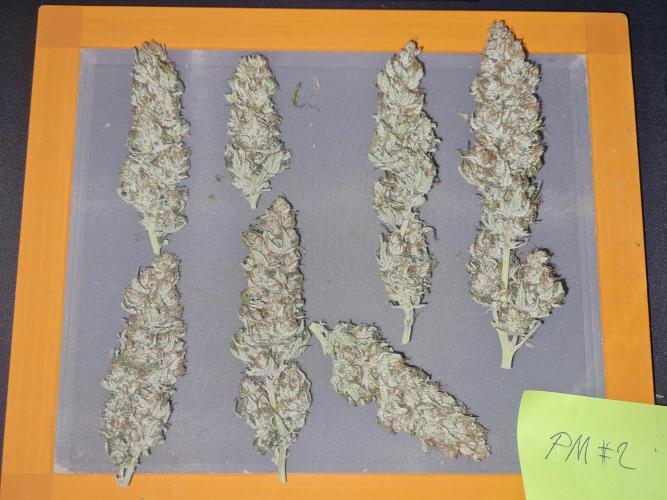
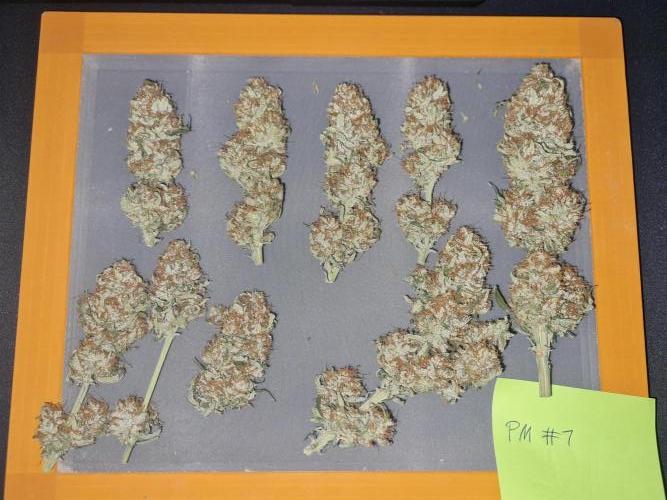
Trichome development was carefully monitored using a handy microscope, checking for milky and some amber-colored trichomes, indicating optimal ripeness.
Environmental conditions remained stable, and the flush ensured the buds would taste clean and smooth after harvest.
Wow, these plants are looking happy and healthy 😍🌱🔥 Great job! Keep growing strong 💪 If you have time, check out my YouTube grow channel and show some love 💚📹✨