The Grow Awards 2026 🏆 


Zkittles Auto (Fastbuds) + Quantum Board

VEG
Fission 300W Light Emitting Diodes/240W
Custom

FLO
Fission 300W Light Emitting Diodes/480W
Custom
Indoor
Room Type
LST
weeks Technique
SoG
weeks Technique
Topping
weeks Technique
Defoliation
weeks Technique
11 liters
Pot Size
Start at Harvest
1
Week 1. Vegetation7y ago
6 cm
Height
18 hrs
Light Schedule
27 °C
Day Air Temp
6.1
pH
400 PPM
TDS
60 %
Air Humidity
23 °C
Substrate Temp
18 °C
Night Air Temp
11.4 liters
Pot Size
60 cm
Lamp Distance
Nutrients 2

GreenDream 1 Grow
1.5 mll

Roots
1 mll
ProfessorSkiSlopes INTRODUCTION
==============
Hi there, this is my second grow - I have no experience with Hybridised feminised seeds, or Autoflowers, or Tents, or Carbon filters, or extraction fans, or LED lights, LST, or humidity control, or Temp control, or coco feeding with a nutrient armoury comprising seven products. This entire endeavor is being done on the back of massive amounts of Internet research, looking at other diaries on here, and the commitment of a large part of my resources in both time and money. It took months of research to come to the choice of Quantum Boards, Fastbuds seeds, Coco, Flairform nutrient range, and a closed tent controlled ducted, humidity/temp controlled environment as being my best arrangement for optimum massive sticky bud production. However, the lack of practical experience is a huge factor, so I expect to see mistakes, possibly catastrophes.
Thank you for coming along for the journey. All comments, questions and suggestions are highly welcome.
AIMS FOR THIS GROW AND THIS DIARY
================================
I will do my best to make this a detailed, complete and informational diary with high quality imagery and video. and I will do my best to make this an attentively monitored grow and give it everything I have to get the best result I can. I would ideally like to get 1.6g-2.6g per watt of light (however unlikely for my second grow) this will be the ongoing goal for my grows using this setup.
GROW SETUP
============
This grow is 9 Zkittles Auto plants from Fastbuds, in a 1.2m by 1.2m by 2.0m grow tent. (My intention is to remove the weakest of the 9 during the first few weeks to leave a final 8 plants to grow to maturity).
They are growing in 11.4 Litres airpots. Each Airpot has 2 Litres of Canna expanded clay balls in the base, followed by a 30/70 mix of Perlite and Canna pro plus coco coir.
The lighting is four quantum q288 boards, each has 288 samsung LM301b diodes for a total of 1156 diodes. I choose the 3500k spectrum (as it was an option from the supplier). This is a relatively rare spectrum for Quantum Boards as HLG (so far) only make them in 3000k and 4000k. My research led me to the conclusion that 3500k is the optimal spectrum for dual Veg/Flower usage. They are running at a combined 480watts for a total PPDF of 1176 umol. This is a DIY clone version of the HLG-550 (purchased from Kingbrite on Alibaba for $400USD including International Express DHL Shipping). The quality of the light and its components are all high quality genuine parts. I have built my own custom frame out of 20mm x 20mm x 3mm angle aluminium to spread the lights to the same dimensions as the original HLG-550 light. This light doesn't necessitate any active cooling even at full wattage, and it ticks along at around 40c at 240w, and gets to around 50c at a full 480w (Heatsink temp tested with infrared gun).
The Coco was given an initial pre-treatment watering with a 35% strength Flairform GreenDream 1 Grow with a 66% Flairform ROOTS additive mixed in tap water to a PH of 6.1. I also added 0.5g/L of Trichoderma powder to the pre-treatment feed. I've found it difficult to get exact quantities for Trichoderma use, so I had to make an educated guess on what amount to put in, I think I likely used too much, but apparently Trichoderma will die back to nominal levels if it doesn't find enough food to consume, so theoretically it shouldnt be possible to overuse it within reasonable limits. The watering was done to an approx 20% run off.
GERMINATION
============
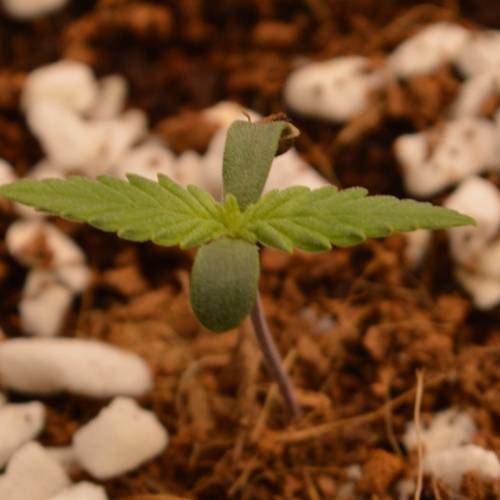
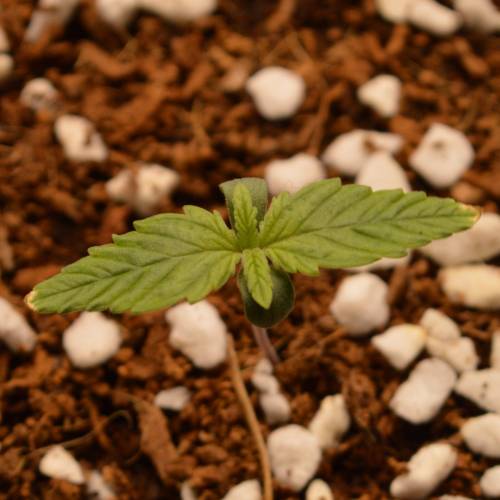
The seeds were germinated using the tissue paper technique. They were left to germinate and then transplanted directly into their final pots. After tap roots were about 1-2cm long, I made narrow holes in the coco and carefully placed the tap root into the hole (gently holding the seed shell with tweezers). I left the unopened cotyledon/seed hull just above the surface of the coco and then sprinkled a little coco over it. This seems to have worked well and as soon as after the first light cycle came on the seedlings had pushed up and were visible. By the second light cycle the cotyledons had opened and tiny first leaves were visible.
The light was set to 60w at 90cm for germination day, and then once the first leaves appeared they were set to 1/2 intensity for this initial seedling stage (240w) at 90cm above the canopy. This is my second grow using Quantum Boards, and I'm still at the stage of refining exactly where to set the intensity/height throughout the grow, but this arrangement feels about right.
ENVIRONMENTAL CONTROLS
=========================
Air circulation is to be provided is via a tent-pole mounted (re-purposed ordinary household stand) fan. I'm using a laboratory lab clamp and drilled a hole in the fan plastic stand housing to mount the fan on one of the tent frame poles, this positions the fan far enough out from the corner of the tent to allow the fan to fully oscillate through 90 degrees and rotate from one side of the tent to the other, and avoids the need for using ground space for the fan stand.
Air Ventilation is being provided via a (max 330m3/h & 160Kpa) 100mm inline mixed flow fan and 300mm Carbon Filter that ducts (via 100mm ducting) out of the grow room and into the roof space. I have two tents ducting to a Y joiner, that then ducts via one duct to the roof space. The Y joiner is mounted on the grow room wall between the tents, and will allow me to easily vent back into the room and setup a recycling air system should I decide (most likely in the coldest part of winter in order to conserve heat) however I imagine this option will necessitate the use of dehumidifier.
Humidity/Temp monitoring is provided by a wireless monitoring station with 3 wireless monitors. I have one in each of my tents and one in the grow room itself, and the monitoring station is in my bedroom, allowing me to keep an eye on the growing environment whenever I like without needing to open up the growroom or the tents. (You can get one of these on eBay for around $30 USD with 3 remote sensors).
Spot temp measuring is being done with an infrared temp gun. This technology is incredibly cheap (around $7 on eBay), and allows for checking leaf temps, coco temp etc from pot to pot. It is a remarkably useful tool.
PH monitoring is done via a bluelabs PH Pen. (Top quality NZ made device).
Heating is provided by a 800w 6-fin oil heater. This is currently using the built in thermostat to keep day temps at around 25c.
NUTRIENTS
==========
My Nutrients are the full Flairform range (Flairform.com) as follows:
GreenDream-1 Grow : ONE-part Vegetative nutrient for hydroponics, coco and soil
GreenDream-1 Bloom : ONE-part Flowering nutrient for hydroponics, coco and soil
Roots : Promotes vigorous root growth
CMX : Calcium, magnesium & iron additive
GroStorm : The All-in-One organic additive
SilikaMajic : Silica additive for enhancing plant weight & strength
BudStorm : The All-in-One flowering additive
BudGenie : For improving resin output
I also have "Plantmate" Trichoderma powder.
WATER TREATMENT
================
For PH Control I have a standard PH-UP and PH-DOWN, as well as PH 7.0 and PH 4.0 Calibration solutions, and KCL probe storage solution. Because the PH control solutions are so concentrated, I dilute 1 part PH-DOWN with 9 parts distilled water, and use this. In general I have found I use around 1ml-1.5ml of this diluted solution to lower 10 litres of nutrient by 0.1 of the PH value. So far, I have not found a need for the PH UP as my municipal tap water is around 7.5-8.0 (and around 180PPM) out of the tap. Since moving from my $10 budget PH pen to the Bluelabs pen, I have found calibration to be needed very infrequently. With the budget meter I was getting so much drift that it necessitated calibrating every other day, and even then the PH readings always felt a bit of a close estimation rather than an accurate measurement.
REMAINING GOALS
================
I currently have on the following items intransit (from Chinese eBay sellers for items 1 thru 8) order:
1) A Xioami 110degrees wifi webcam to allow remote monitoring (And eventually, full grow time-lapse video production)
2) A humidity controller for the extraction fan.
3) A temperature controller for the oil fin heater.
4) Lab clamps for mounting a pedestal fan (minus the pedestal) to a tent pole.
5) An EC meter to use in preference to the TDS PPM meter I already have (EC seems to be what the pro's prefer over PPM).
6) An inline wattage meter to go on the light so I can see easily exactly what intensity the lights are operating at.
7) A 60x illuminated magnifying loupe with phone clip for trichome monitoring to determine optimal harvest time.
8) A green LED 1000lm torch for night viewing the plants. Autoflowers shouldn't mind interruptions to the night cycle, but why not be sefe just in case!
8) FloraKleen - Clearing Solution - after my salt build-up disaster in my other tent, I want to have this on hand for emergencies and possibly for switching from veg to flower nutrients, and for the final flush before harvest.
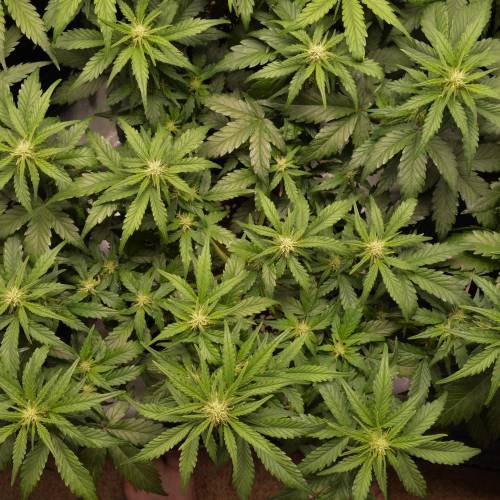
DAY 2 - Good Looking plants so far.
DAY 3 - Installed Carbon filter and extraction fan. Installed small ventilation fan, then after taking Day-3 photos I hung a 40cm fan for proper circulation. Hopefully the tentair quality needs are now well met. The plants continue to grow very well. 240w at 90cm seems to be spot on for now. Zkittles by Fastbuds apparently gets top heavy in the first two weeks, and I can see signs of that already, not that is a concern at this stage.
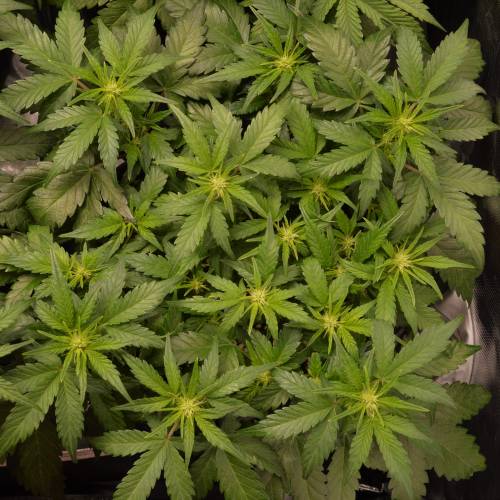
Day 4 - Plants continue to grow well and are now between 4-6cm tall.
Day 5 - So far so good. I've lowered the lights to 60cm and kept them at 240w.
Day 6 - Everything seems to be going well thus far. I think I will give them a small 1/2 strength watering tomorrow.
Day 7 - I feed the plants today with a 50% strength solution of the 1 part vegetative nutrient and the roots enhancer. I also added in a full strength feed of Calcium Magnesium additive (even though my nutrient manufacturer says its a little early for CalMag addition), as fastbuds make a point of mentioning that Zkittles has a love for CalMag. The solution had a PH of 6.3, a PPM of 627 and a temp of 24c. I feed 4 of them 750ml each, and the other 5 got 600ml each. They continue to grow well.
Summary: I'm happy with week 1 and hope to see a great week 2! Also, I've relented and brought two 18cm oscillating pole-grip fans for each tent as my lab clamp hasn't arrived and just hanging the 40cm fan without oscillation isn't making me happy. I tried to use a 40cm household fan and lab clamps to avoid more expensive purpose built smaller fans, but to be honest, it just wasn't working out, and the fan seemed a bit too strong even on its lowest setting, which is a shame because the cost for the intended setup was about 40% of the cost of the two smaller fans, but oh well, such is life! I think the two fans will give a better air circulation dynamic and be less intense in any given spot as well. It should lend itself to easier changing of the circulation arrangement as well as totally free the groundspace the larger fan might have prevented from being utilised.
10 likes
9 comments
Share
2
Week 2. Vegetation7y ago
6 cm
Height
21 hrs
Light Schedule
27 °C
Day Air Temp
6.3
pH
627 PPM
TDS
70 %
Air Humidity
24 °C
Solution Temp
24 °C
Substrate Temp
18 °C
Night Air Temp
11.4 liters
Pot Size
0.3 liters
Watering Volume
60 cm
Lamp Distance
Nutrients 4

GreenDream 1 Grow
2 mll

Roots
0.75 mll

CMX
0.5 mll
ProfessorSkiSlopes WEEK 2
Well so far week 1 seems to have gone as good as could be expected. After their watering yesterday at 50% they seem to have shown renewed vigour in their growth, so I'll probably aim for a moderate watering every three days for the rest of the early vegetative growth stage, I will probably look at 200ml-500ml per plant of 50% strength until the plants are big enough to support a full watering to run-off. At this stage these figures are pure estimates based on research and gut feeling, and the desire to not underfeed, and to not overfeed and potentially have a nutrient salt build-up and lock out.
Day 8 - The plants continue to grow well. They seem a little lite in their green-ness, but I've looked at a few quantum board grows and this seems to be something that happens with coco... I have noticed organic soil grows seem to get much lusher looking dark green seedlings.. but I guess the coco grown plants must overtake later on because I chose coco based on the widespread belief coco ultimately can give a faster grow with a higher yield than soil. I will be installing two 18cm pole grip fans in the next day or two and ditching the 40cm fan as the lab clamps I require to mount the fan properly are around 3 weeks overdue and look to be lost in the post. Also I think two smaller fans will give me better air circulation as the 40cm fan was a bit full-on for this sized environment.
Day 9 - The plants have boomed off today, they must have really enjoyed the feed on Day 7. I have slowed down the extraction fan to keep the humidity high, and the tent is operating at around 27c air temp with a humidity in the light cycle around 75%. I've been told high humidity can dramatically shorten the life of carbon filters, and that during the early veg stages they aren't really required so I will be taking the carbon filter out of the tent today until its required. I've implemented a dehumidifier in the grow room and it is also warming the air, so I haven't had to run my oil fin heater, so I will remove the heater and the large fan (its being replaced by two 18cm pole-grip fans today) which will give me 100% floor space for the plants So I might not have to carry out my initial plan of dropping the weakest plant and only growing 8 in the tent.
Day 10 - The plants continue to grow well and increase in size. At this stage I feel really great about the environment and the performance of the plants and I hope this theme continues unabated! I gave them a small feed of 300ml each using nutrient solution identical to the Day 7 feed (it was the leftover mixed nutrient from Day 7 - I think it should be ok to use this?).
Day 12 - The plants were feed with 650ml each of 50% nutrient (as detailed in the nutrients chart above the text area), with a PPM of 627 and a PH of 6.6 The water temp was about 23c. The plants continue to grow well. After the photos today I replaced the heater/fan with two pole grip 18cm fans, both mounted on the back poles and set to oscillate across the tent in windscreen wiper style waves, which ensures all of the plants get some air circulation and slight leaf movement. I gave them a higher PH than I would usually, in order to ensure they get the magnesium and calcium in the calmag additive. I'll look to vary the ph throughout the feed series in order to make sure the micronutrients that need higher PH to be absorbed are absorbed. I noticed that all of the test growers for Zkittles had their light cycles on 24hrs, so I've increased the light cycle from 18 to 20 hours today.
Day 13 - The plants continue to grow well, and the environment has been fairly consistent at around 70% humidity and temps around 25-27c. I am happy with these. I removed the Carbon filter temporarily to stop it getting damaged by the high humidity. Given there is no smell yet, the carbon filter can be safely taken out of the tent for awhile, until there is some smell or when I start to drop the humidity. My humidistat and thermostats arrived, so I've put the fan on humidity control. Its currently set only to shut-off if the humidity drops below 65%, and to stay on if the humidity is above that. The plants don't seem to have darkened up and still look like they are lacking some micronutrients (even after giving a higher PH feed yesterday), so I might increase the CMX on the next feed as well as include the kelp extract supplement. I increased the light cycle from 20 hours to 21 hours today. I will probably leave it at 21 hours from here on out.
Day 14 - Gave the plants a 75% strength feed (except the CMX which was a 1ml/L (2x Strength). Also started using SilikaMajic additive today.
4 likes
5 comments
Share
3
Week 3. Vegetation7y ago
12 cm
Height
22 hrs
Light Schedule
22 °C
Day Air Temp
6.1
pH
1110 PPM
TDS
65 %
Air Humidity
24 °C
Solution Temp
22 °C
Substrate Temp
18 °C
Night Air Temp
11.4 liters
Pot Size
0.2 liters
Watering Volume
60 cm
Lamp Distance
Nutrients 5

GreenDream 1 Grow
4 mll

Roots
1.5 mll

CMX
1 mll
ProfessorSkiSlopes Day 15 - The plants continue to grow well! I increased the light cycle from 21 to 22 hours. This is where I'm going to leave it.
Day 16 - Wow the plants really are just booming off!
Day 17 - Watered with 75% strength nutrient (Except CMX additive which was at 100%). Solution details: PH 6.1, Temp 24c, Volume given per plant 650ml. Plants are 9-11cm tall with a diameter of 20cm and continue to grow extremely well. Moved lights up a few centimetres to keep distance from canopy at 60cm. Also gave foliar spray of 4g/L Magnesium Sulphate and Water solution during dark cycle. Plants continue to grow well.
Day 18 - The plants really rocketed off after the watering. I think I will increase the frequency of feeds, I am really amazed at the growth rates. The leaves are touching the edges of the pots now. The humidity continues around 60-65% and the temp at around 22. These are a bit lower than I'd like, so I might switch the ventilation to recycling within the grow room.
Day 19 - The plants continue to grow well. I have decided to water tomorrow with 100% and give them their first feed to run-off. I think they are big enough for it, in fact I will probably start gentle LST in the next few days. I switched the room over to recycling ventilation to conserve heat. Hopefully this will see an increase in average tent temp and humidity.
Day 20 - I gave the plants their first full watering to run-off. I gave them a full 100% strength feed. My research says most autoflowers like quite low strength nutrient levels, but these Zkittles seem to be the exception to the rule!Each plant got 3.3 Litres of nutrient, with a 20% run-off (650-750ml). The PPM was 1110. PH was 6.4 and the solution had a temp of 20c. The run-off PPM was around 800-1000. The plants all drooped within a minute of being watered - I think they were a bit surprised by the sudden deluge.
Day 21 - The plants have all perked up from their flood induced droop, and are all looking spectacular. I am incredibly happy at their progress so far. I have gone through many of the other Zkittles diaries on GD and these plants seem to be doing very well relative to most other diaries I've read for this age. The plants have deepened in their colour and seem to have liked the epsom salt foliar spray, and the CalMag additive. I feel very happy with this grow so far and feel like I'm finally starting to get some level of competency, which is a good feeling after all the struggles I had with my first grow.
9 likes
4 comments
Share
4
Week 4. Vegetation7y ago
30 cm
Height
20 hrs
Light Schedule
23 °C
Day Air Temp
6.1
pH
1150 PPM
TDS
63 %
Air Humidity
24 °C
Solution Temp
22 °C
Substrate Temp
18 °C
Night Air Temp
11.4 liters
Pot Size
0.2 liters
Watering Volume
60 cm
Lamp Distance
Nutrients 5

GreenDream 1 Grow
4 mll

Roots
1.5 mll

CMX
1 mll
ProfessorSkiSlopes WEEK 4
Day 22 - Gave the plants a foliar spray of 4g/L of magnesium sulphate solution. Dropped light cycle from 21 hours light back to 20 hours light
Day 23 - Increased light intensity from 240 watts to 300 watts.
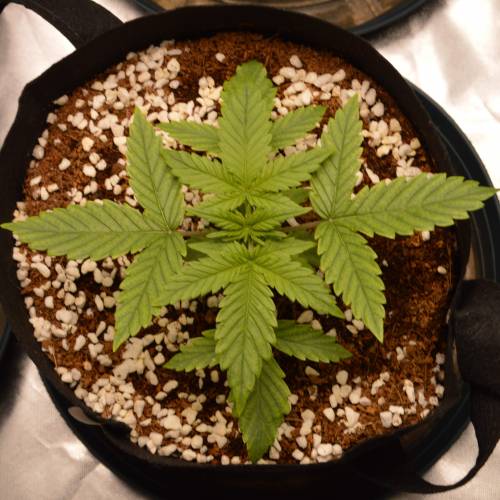
Day 24 - The plants continue to grow very well. The leaves are huge, the largest ones are already about as big as my hand. To be quite frank, I've never seen anything grow this fast in my entire life (not that I've really watched many plants grow LOL). I'm totally stoked with this grow so far.
Day 25 - Noticed the plants drooping a few hours into the day cycle. Checked and the pots were dry so I fed the plants with a 100% strength nutrient solution. Solution Details - PPM: 1150 - PH: 6.2 - Temp: 22c - Volume Given Per Plant: 3300ml - Volume Run-off Per Plant: 1000ml - Run-off PPM: 1050 - Pot weights before watering: 4.0-4.2KG - Pot weights after watering: 6.0-6.2KG
Day 26 - I think I've left it too late to LST the plants. I'm not really sure having never done it. I was planning to do it this week but they grew so fast I think I might have missed my window for training. I am tempted to top them as they seem to be developing a really great structure and the lower laterals are coming up fast. Was sick today and ended up not getting the photos done for today.
Day 27 - Considering doing some LST or topping them. Put it off yet again. I get the feeling I'm going to end up not doing any LST or topping on this grow. I'm such a chicken LOL but the plants are doing so spectacularly well I'm afraid to do anything wrong and fuck it up. The growth over the last 3 days has been amazing they've really started to grow up and out. Suddenly they have laterals shooting up. The plants are between 15 and 30 cm tall.
Day 28 - The pots already feel light. I just weighed them and they're around 4.3-4.6KG so its definitely feeding day today. This puts them on a 3 day feeding cycle already. I decided to tuck the big sugar leaves under. This has exposed the laterals underneath and will hopefully cause them to start strengthening up. I might pluck some of the big leaves off soon I think. I'll update the diary later today with photos and details of the feeding. Fed the plants with a 100% strength nutrient solution. Solution Details - PPM: 1110 - PH: 6.4 - Temp: 22c - Volume Given Per Plant: 3300ml - Volume Run-off Per Plant: 1000ml - Run-off PPM: 1100 - Pot weights before watering: 4.1-4.2KG - Pot weights after watering: 6.4-6.5KG
I plucked the second and third sets of large sugar leaves (from the top of the plant) to let light through to the laterals and encourage them to grow out. I also removed the bottom (spindly) set of laterals from each plant.
I've been having issues with my ventilation. I have two tents venting into a Y joiner and then into the roof space and never having had any experience with ducting or air flow dynamics, I had no idea that when the pressure coming from both tents wasn't balanced that the stronger pressure side was creating back pressure against the weaker side. I currently have my Gorilla Glue tent using a carbon filter, and my Zkittles tent using no carbon filter, so the Zkittles tent has much more air flow venting from it. This was creating a backflow force against the Gorilla Glue vent and pretty much stopping the air-flow out of the Gorilla tent. To resolve this, I mounted backdraft dampners on each duct between the ducting and the Y joiner. I also mounted an inline booster fan on the top of the Y joiner. I tested it by shutting off one of the fans, and the backdraft dampner kicked in and shut the vent to the tent with the switched off fan. I restarted the fan and the backdraft dampener opened up again allowing it to vent to the Y joiner. It looks like the booster fan is now pulling the air-flow from both tents through, and hopefully eliminating any back-pressure forces from imbalanced venting force. I'll do a test later on today once the lights come back on (I did all this while the lights were off) to confirm both tents are venting fully. I will test this by blowing smoke toward the carbon filter.. if it gets rapidly sucked into the carbon filter then I know it is drawing in air properly. I'll do this test with various fan speed settings in one tent, and confirm that the air-flow remains the same in the unchanged tent, and vice-versa.
I have to say, it never occured to me that joining two tent vent ducts into one via a Y joiner would have any issues - but I guess looking at it with hindsight that it makes sense that if one was exhausting air with more force than the other, that it would repress the weaker flow. In hindsight, the more elegant solution probably would have been to have both 100mm ducts from the tents go into a Y joiner with two 100mm holes for the tent ducting, and then a 150mm duct to take the combined airflow into the roof space. Hopefully the booster fan mitigates the issues I've been having. I will update with the results later today.
The leaf tuck, then pluck has really seen a change in the plants. The laterals are all coming up and looking for all the world like I've LSTéd them. I'm so stoked.. they are looking really well setup for their next stage of growth and all I'm going to do from here out is selectively tie the limbs out to keep them equally spread so they don't overlay one another, and that should be it for the training. This week has been stellar and I'm incredibly excited for the rest of the grow.
8 likes
10 comments
Share
5
Week 5. Flowering7y ago
30 cm
Height
20 hrs
Light Schedule
23 °C
Day Air Temp
6.1
pH
1150 PPM
TDS
63 %
Air Humidity
24 °C
Solution Temp
22 °C
Substrate Temp
18 °C
Night Air Temp
11.4 liters
Pot Size
0.2 liters
Watering Volume
60 cm
Lamp Distance
Nutrients 5

GreenDream 1 Grow
4 mll

Roots
1.5 mll

CMX
1 mll
ProfessorSkiSlopes WEEK 5
Day 29 No Feed today.
Day 30 - Started training today. Bent over main stem and tied it down, along with a few of the bigger laterals. Gave 100% Strength nutrient solution. PH=6.1, PPM=3300, Temp=16c, Volume per plant=2L, Runoff PPM=1800, Runoff vol=500ml.
Decided I've been feeding all wrong after seeing the Runoff PPM of 1800 on todays feeding. I have decided watering on a wet/dry cycle is wrong, and I should be watering daily, if not twice per day. I actually thought coco needed a wet/dry cycle and have been watering as such. This has led to all sorts of issues. So in recovery mode I Flushed with FloraKleen at rate of 0.75ml/L. Put through about 3.7L each. Runoff varied between 1200-1400PPM. I then left the plants for the day. I will feed at 25% initially and research what is the best way to determine strength of nutrient to use in coco.
Day 31 Gave 25% feeding. PH=6.1, PPM=461, EC=0.9, Temp=13c, Vol=30L. Runoff PPM=670, Runoff EC=1.6 Runoff Vol=15L, Vol taken up per plant = 1.6L each.
Day 32 -
Day 33 - Wasn't able to water plants for 3 days. They were pretty limp and wilted by day 34 when they got fed.
Day 34 - Fed 25% strength solution, PH=6.3, PPM=466, EC=0.93, Temp=13c, Vol=30L. Runoff PPM=450, Runoff Vol=15L, Vol taken up per plant = 1.6L each.
3 likes
1 comment
Share
6
Week 6. Flowering7y ago
30 cm
Height
20 hrs
Light Schedule
23 °C
Day Air Temp
6.1
pH
1150 PPM
TDS
63 %
Air Humidity
24 °C
Solution Temp
22 °C
Substrate Temp
18 °C
Night Air Temp
11.4 liters
Pot Size
0.2 liters
Watering Volume
60 cm
Lamp Distance
Nutrients 5

GreenDream 1 Grow
4 mll

Roots
1.5 mll

CMX
1 mll
ProfessorSkiSlopes WEEK 6
This week I continued periodic training and defoliation. The plants have continued to droop a few hours before night cycle since the pot dry-out, and it seems like they are slowly recovering from the dry-out. The plants moved into flowering this week, so I will change to bloom nutrients this week.
Day 36 I have found a guide which recommends feeding within certain EC levels during certain growth stages. For late veg he recommended between EC 1.3 and 1.5 and for Week 5 onward to be between EC 1.5 and 2.0 I will aim for these ranges and tweak based on how the plant reacts. I will be aimed to feed every day from here on out. Also PH recommended was 5.9 or less so I will be aiming for 5.8/5.9 PH frpom here out.
Day 37 Feeding today had a goal of 1.5EC and PH of 5.9 I tried 50% strength of my nutrients and it gave an ultimate EC of 1.37. PH=6.1, PPM=634, Temp=17c. Runoff EC=1.1. Volume per plant=3.2L with 1.6L run-off.
Day 38 Feed with 55% strength nutrient. This had an EC of 1.6, PH=5.9, Temp=16c. Volume give per plant=2L, run-off per plant=900ml. Runoff EC=1.0
Day 39 Feed with yesterdays 55% strength diluted from EC 1.6 to an EC of 1.4. The PH=5.9. Each plant was given 1.5L and runoff was 0.8L each. Runoff EC=0.95
Day 40 Feed with EC=1.7, PH=6.0, Temp=18. Volume given per plant was 1500ml, Runoff vol Each plant was 500ml. Runoff EC=1.1 (Made 28L, 14 for today and 14 for tomorrow).
Day 41 Used th 14L of nutrient I made yesterday. Diluted down from EC 1.5 to EC 1.22. PH=5.8. Vol each = 2000ml. Runoff Each=1050ml. Runoff EC=1.0
Day 42 Made 50L of ec 1.3 Nutrient. Gave 1.2L too each plant. Run off was 160ml Each.
7 likes
comments
Share
7
Week 7. Flowering7y ago
76.2 cm
Height
20 hrs
Light Schedule
23 °C
Day Air Temp
6.1
pH
Normal
Smell
1150 PPM
TDS
63 %
Air Humidity
24 °C
Solution Temp
22 °C
Substrate Temp
18 °C
Night Air Temp
11.4 liters
Pot Size
0.2 liters
Watering Volume
152.4 cm
Lamp Distance
Nutrients 5

GreenDream 1 Grow
4 mll

Roots
1.5 mll

CMX
1 mll
ProfessorSkiSlopes WEEK 7
Day 43 Have decided to start watering daily to run-off using nutrient strengths based oin the EC value for the solution. For instance, I have downloaded a coco growing guide which gives recommended EC ranges for the plants based on their stage of growth. So for this stage now, early flowering, I will be aiming for an EC of nutrient solution of between 1.5 and 2.0 (this takes into account my water EC which is 0.4
Day 44 Fed plants with a solution with EC=1.3, PH=5.6,m Temp=20c, Volume given to plants = 15L (1.6L each(, Runoff EC=1.2, Runoff volume = 6.5L = 720ml (approx 50% runoff).
Day 45 -
Day 46 -
Day 47 - Fed plants with an EC aim of 1.7 and a PH aim of 5.9. Mixed in nutrients at a 42% strength and got a solution with EC 1.63, PH=6.0, Temp=14c, Volume given 21L (2,1L each) Run off EC=1.2, Runoff Volume=7.5L (0.83L each = 33%).
Day 48' Fed plants with leftover 9L of nutrient from day 47, diluted with 9L of tap water for a PH of 6.0 and an EC of 1.9
Day 49 Fed plants with an EC aim of 1.4 and a PH aim of 5.,9, Mixed in a 35% nutrient contrentraction, This made 30L of nutrient with an EC of 1.5, PH=6.2, Temp=17c produced. A volume of 15L was given to the 9 plants (1.6L each with nominal runoff that had a EC around 1.0
END OF WEEK 9 - well I have to say I've been seeing droop several hours before and after the light cycle starts even since I allowed the plants to go 3 full days with any water culminating in their first major droop on day 34. That situation effecfed different plants in different ways. It seems like the younger plants got stunted and yellowed off the most, and seemed the most impacted. Those that were closer to flowering stage seemed to take a hit, but overall have taken less of a stunting than the younger plants, and it feels like these younger plants have been taking longer to get back to an optimal growth rate. They are indeed still showing a lighter green coloring in their leaves but given the rapid jump into flowering of the originally more advance plants, these younger ones now that they are returning to their previous vegatative growth rates may well continue to veg up and out, and overtake the originally more advanced plants.
The plants have continued to recover well since the dry out, and several are heavily into flower. Some continue to grow slower than the others and at this stage I really have no idea how these plants will go over their full 12 week growth span. Given the great looking potential yield from my untrained gorilla glue grow, I am wondering what if any advantage my training of these p[ants has had as far as the final yield goes. Maybe I started the LST to late at day 32, but it was my first time ever. I will be interested to see how these Zkittles go, it will definitely influence any future use of training with Autoflower strains of plants. All this aside I think my move to daily waterings was something I should have been doing since the first big watering. I feel like it is definitely a better choice than periodic watering based on how dry the pot is.
8 likes
1 comment
Share
8
Week 8. Flowering7y ago
76.2 cm
Height
20 hrs
Light Schedule
23 °C
Day Air Temp
6.1
pH
Strong
Smell
800 PPM
TDS
63 %
Air Humidity
24 °C
Solution Temp
22 °C
Substrate Temp
18 °C
Night Air Temp
11.4 liters
Pot Size
0.2 liters
Watering Volume
152.4 cm
Lamp Distance
Nutrients 5

GreenDream 1 Grow
4 mll

Roots
1.5 mll

CMX
1 mll
ProfessorSkiSlopes WEEK 8
The plants are going well. I kinda regret the training as I think I left it a bit late, and it ended up compressing the canopy, rather than leaving it to grow more vertically as it would have untraining, but live and learn. I don't think I'll worry about training future grows.. with 9 plants in a 1.2m by 1.2m area I'm not sure it is the best option.. I don't really need a shallow canopy, especially with the penetration of the Quantum Board lights.
I will update this weeks feeding schedule soon. For now, I've upped the plants to a daily watering schedule with an EC of 1.8 and a PH of 6.0
10 likes
15 comments
Share
9
Week 9. Flowering7y ago
50 cm
Height
20 hrs
Light Schedule
23 °C
Day Air Temp
5.9
pH
Strong
Smell
900 PPM
TDS
63 %
Air Humidity
20 °C
Solution Temp
22 °C
Substrate Temp
18 °C
Night Air Temp
11.4 liters
Pot Size
1.6 liters
Watering Volume
60 cm
Lamp Distance
ProfessorSkiSlopes WEEK 9
Daily waterings with nutrients whos strength are EC based is continuing. I have been giving them an increase EC 1.4 to EC 1.9 as several of the plants had developed a less healthy shade (light) in the uppermost leaves. I am not of the exact cause of this, it is not consistent across the plants, but of course, being Autoflower, all of the plants are quite variant in amongst just themselves so it can be hard to draw conclusions about the performance of some plants when others are doing just fine.
DAY 58 - Gave 15L (1600ml per plant) of EC 1.8 / PH 6.0 nutrient solution. There was 6L (600ml per plant) of EC 1.3 run-off.
DAY 59 - Gave 15L (1600ml per plant) of EC 1.96 PH 6.1 nutrient solution. There was 6L (660ml per plant) of EC 1.6 run-off.
DAY 60 - Decided to give all the plants a 3000ml flush with Florakleen solution (3m/L). Some of the plants have developed a pale green weak look to the newer leaves so I am assuming nute buildup or something else in the pot/medium environment that is making life uncomfortable for the plants. Hopefully a flush will sort this. Flushed mix made from Tap Water set to PH 5.5 and added 3ml/L to 27L and gave each plant a 3L drenching to around 50% run-off.
DAY 61 - No changes today. No watering.
DAY 62 - No changes today. No watering.
DAY 63 - No changes today. No watering.
3 likes
comments
Share
10
Week 10. Flowering7y ago
50 cm
Height
20 hrs
Light Schedule
23 °C
Day Air Temp
5.9
pH
Strong
Smell
900 PPM
TDS
63 %
Air Humidity
20 °C
Solution Temp
22 °C
Substrate Temp
18 °C
Night Air Temp
11.4 liters
Pot Size
1.6 liters
Watering Volume
60 cm
Lamp Distance
Nutrients 7

GreenDream 1 Bloom
2.25 mll

BudStorm
0.5 mll

BudGenie
1.25 mll
ProfessorSkiSlopes WEEK 10
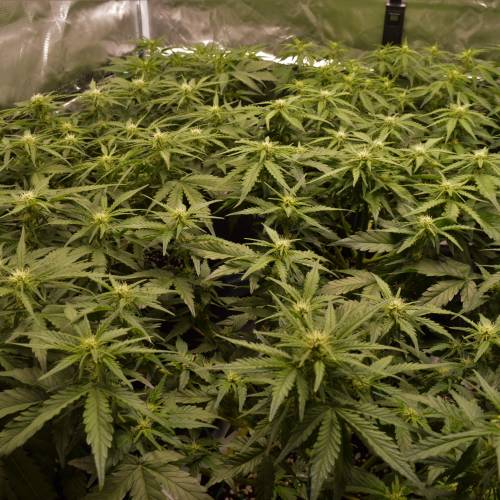
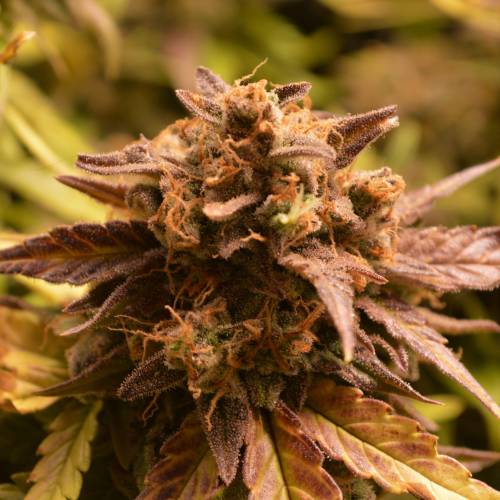
This week saw massive gains in the trichome count and the thickness and size of the buds. One plant has gone into yellow and red coloured fan leaves and purplish extremely frosty crystal covered buds. These are without doubt the most frost laden buds I have ever seen. The buds are also terrifically huge. Really enormous. Not sure if they are american football sized, but they are certainly bigger than anything I saw from my Gorilla Glue grow. Several plants are developing really nice purple/red/yellow tones to the buds as well.
DAY 64 Feed the plants. 1600ml each. EC=1.2 PH=5.9
DAY 65 No changes today
DAY 66 Fed the plants. 3000ml each. EC=2.0 PH=6.0 Runoff Vol Per Plant=1100ml Runoff EC=1.6
DAY 67 No changes today
DAY 68 Fed the plants with standard nutrient range. Dropping the ROOTS from here on out. Vol Per Plants = 3000ml EC=1.7 PH=5.9 Runoff Volume Per Plants = 1100ml, Runoff EC=2.0+ (Not happy with how high the runoff EC is. I will drop the nutrient level to an EC of 1.6 from the next feed then 1.3 for the feed after that. Then I will drop the EC for subsequent feeds to 1.0
DAY 69 Fed the plants. Vol per plant = 1600ml. EC=1.6 PH=6.1
DAY 70 No changes today.
7 likes
2 comments
Share
11
Week 11. Flowering7y ago
50 cm
Height
20 hrs
Light Schedule
23 °C
Day Air Temp
5.9
pH
Strong
Smell
450 PPM
TDS
63 %
Air Humidity
20 °C
Solution Temp
22 °C
Substrate Temp
18 °C
Night Air Temp
11.4 liters
Pot Size
1.6 liters
Watering Volume
60 cm
Lamp Distance
Nutrients 3

GreenDream 1 Bloom
2.25 mll

BudStorm
0.5 mll

BudGenie
1.25 mll
ProfessorSkiSlopes WEEK 11
This week saw the appearance of some bud-rot on the tips of a couple of colas on two of the plants (the two with the largest diameter colas. This week also sees the early harvest of those two plants. This week the feeds have been dropped to an EC of 1.0 - this is in reaction the the runoff EC buildup, and also an attempt to stabilise and balance the root environment, just in case something weird in the coco environment is the cause of the bud-rot in the two plants so far.
DAY 71 - No changes today. Have noticed a couple small spots of bud-rot in some of the larger colas on the two plants with the largest colas. I removed the infected site and surrounding bud. I eventually removed the entire limb of the infected site as it seemed to be reoccuring on those limbs.
DAY 72 - Fed the plants with 3000ml each of EC=0.9, PH=6.2 of solution comprising just Greendream1-Bloom, Budstorm and Budgenie. (So dropped the CMX, ROOTS, Silica and Grostorm).
The bud-rot on the two plants with massive sized buds has me worried. I'm not sure if it can spread to other plants, or if it will keep reoccurring on the plants it has already appeared on, so I've made a decision. Given the two plants with the bud-rot are looking very frosty and not very far from harvest day, I've decided to harvest these two plants today. You can see in todays photos, there are now only 7 plants in the tent. This should remove the risk of more bud-rot, or bud-rot spreading. It will also give the remaining 7 plants more floor space, and more space between them for the fans to circulate air around them. I lowered the fans and turned them to full power. I have also ordered an extra pole-grip fan for each tent, so they will now have 3 pole-grip fans. Hopefully this will aid in the prevention of humidity buildup and more budrot. I am quite astounded at the amount of bud that I harvested from the two plants. I am equally impressed with the level of frostiness and the bud structure. It looks like it will be very attractive sticky bud. I guesstimate from the wetbud quantity that there will be around 2 to 3 ounces of bud from each plant when dry, possibly more depending on how much these dry down.
DAY 73 - Fed the plants with 1600ml each of EC=0.9, PH=6.4 solution as per day 72.
DAY 74 - No Changes Today (NCT)
DAY 75 - Flushed plants with 3000ml each of PHéd water (PH=6.0)
DAY 76 - No Changes Today
DAY 77 - No Changes Today
WEEK 11 SUMMARY: All up the plants have done remarkably well. Apart from the two I removed with bud-rot concerns - I reasoned that removing the plants, and then breaking them down into small bud pieces would be the most assured way of 1) Preventing bud-rot from spreading to other plants. 2) Preventing the bud-rot from spreading within the already infected plants 3) Stopping any further bud loss to rotting, which hopefully mitigated the loss in final yield due to immature harvest (That said, the plants were both quite advanced and I felt no major loss was had by harvesting them at this age). 4) Quickly drying the buds thereby preventing any further mould growth. The buds on the two harvested plants were so massive, they were the most dense and fat multi-hued buds I've ever seen, and their diminutive size had me assuming they were both sub 56g plants. To find them to be actually 88g each (properly dried) was a genuinely pleasant surprise.
BUD-ROT: I am fairly sure this was a result of high humidity (65%+) combined with very large diameter colas, combined with a very compressed canopy (which was due to late LST). The inflection points were few, and limited to 2 plants and apart from one occurrence on one other plant, has not occurred again. This has not prevented regular bud inspection, which has damaged the buds a bit, but it seemed prudent to do it anyway. I have purchased a product called CITROSHIELD SPRAY 750ML. I used it to treat the subsequent occurrence of bud-rot on another plant. I plucked the mould stricken bud off the plant, and then sprayed the affected area. This appeared to work great and the mould did not reoccur in that location (or anywhere else). I assume the greater air flow and less dense canopy, plus the spray, plus the extra fan. plus the fact the rest of the plants don't have quite the same massive diameter buds means the causes of the bud-rot have been eliminated. I have pictures of the bud-rot and will eventually upload them to this week of this diary.
15 likes
7 comments
Share
12
Week 12. Harvest7y ago
Happy Harvest Day!

10/10
Rated
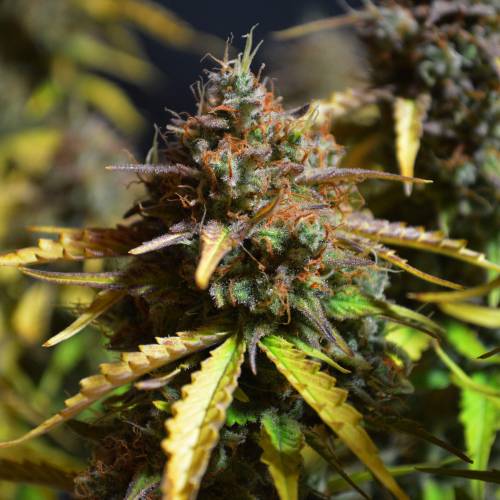
Zkittles is a great smoke, really nice indica buzz that doesn't give me any anxiety. It was a really nice plant to grow and liked lots of nutrient and light. It grew really thick heavy buds, and gave me 932g from 9 plants in 12 weeks. I will definitely be growing this again!
Show more
Translate
Spent 78 days
Ger Veg Flo Har
103.56 g
Bud dry weight per plant
9
Plants
1.44 m²
Grow Room size
Easy
Difficulty

Happy, Relaxed, Uplifted
Positive effects

Dry mouth
Negative effects

Berries, Fruity, Sweet
Taste
Height
Day air temperature
Air humidity
PPM
PH
Light schedule
Solution temperature
Night air temperature
Substrate temperature
Pot size
Lamp distance
ProfessorSkiSlopes FINAL HARVEST YIELD: 938 (33.5oz) grams total. This works out to an average of 104g (3.7oz) per plant. This gives a yield per watt total of 1.96g/w which I am extremely happy with, as I have had a goal of a Kilo harvest and this is pretty much attained that target.
The buds are absolutely terrific, they have a fantastic smell and taste, which is has very noticeable candy/fruit tones. The stone is very nice and relaxing and is one of my favourites from the Fastbuds range so far.
Overall I am extremely happy with this grow, and the results. I finally feel like I am starting to get a handle on how to grow, and I am looking forward to putting this knowledge to good use on the next strain I am growing in this tent, which will be Lemon AK also from Fastbuds.
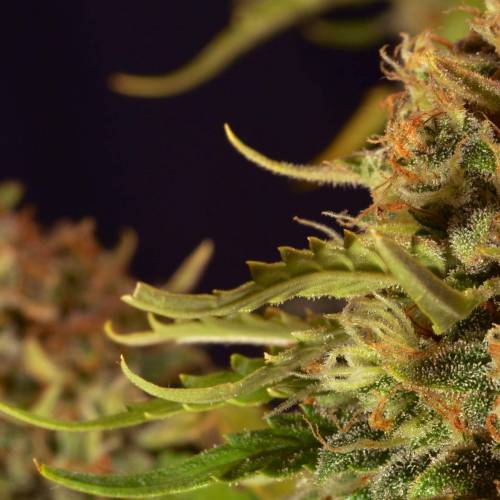
I took these photos with a DSLR using a tripod and multiple lighting sources, and a draped black background. It was a real job and a half, but I think the photos were worth it. I hope you enjoy them!
The photos of the dried, manicured buds shows the harvest from the final 7 plants, and was a total of 27.4 ounces (I harvested two plants early because of budrot concerns and they totalled 6.1 ounces.
Thank you very much for following along on my diary. I hope it was useful and/or entertaining!
Cheers
ProfessorSkiSlopes
24 likes
11 comments
Share
Equipment Reviews

the end.
Enjoying this diary? Follow for more updates!
Prefer the old Diary view?
Go back to the old Diary view


